Configuring Antivirus on the RV34x Series Router
Available Languages
Objective
The objective of this document is to show you how to configure Antivirus on RV34x series routers.
Introduction
The Antivirus protects network users from infections and malware content received in emails or data. The Antivirus feature supports Simple Mail Transfer Protocol (SMTP), Hypertext Transfer Protocol (HTTP), File Transfer Protocol (FTP), Post Office Protocol version 3 (POP3) and Internet Message Access Protocol (IMAP) protocols.
The Antivirus engine uses two important components: a classifier that knows where to look, and the virus database that knows what to look for. The engine classifies the file by type rather than by relying on the extension. The virus engine looks for viruses in the bodies and attachments of messages received by the system; an attachment’s file type helps determine its scanning.
To learn what malware is, check out this link: What Is Malware?.
To learn how to configure Umbrella, click the link: Configuring Cisco Umbrella RV34x.
Important Note: If the router is currently under a heavy workload, this may exacerbate the issue.
The table below gives expected statistics for performance under various configurations. These values should be used as a guide, as real world performance may differ due to a number of factors.
|
|
Concurrent Connections | Connection Rate | HTTP throughput | FTP throughput |
| Default Settings | 40000 | 3000 | 982MB/sec | 981MB/sec |
| Enable APP control | 15000-16000 | 1300 | 982MB/sec | 981MB/sec |
| Enable Antivirus | 16000 | 1500 | 982MB/sec | 981MB/sec |
| Enable IPS | 17000 | 1300 | 982MB/sec | 981MB/sec |
| Enable App Control Antivirus & IPS | 15000-16000 | 1000 | 982MB/sec | 981MB/sec |
The following fields are defined as:
Concurrent Connections – The total number of concurrent connections For example, if you are downloading a file from one site, that’s one connection, streaming audio from Spotify that will be another connection, making it two concurrent connections.
Connection Rate – The number of connection requests per second it can process.
HTTP/FTP Throughput – The HTTP and FTP throughput are the download rates in MB/sec.
Security licenses have been updated to include Antivirus in addition to existing application and web filtering. A smart account is required in order to have a security license. If you do not already have an active smart account, section 1 of this document will be required.
To learn how to configure Intrusion Prevention System on RV34x, click here.
Applicable Devices
· RV34x
Software Version
· 1.0.03.5
Table of Contents
4. Updating Antivirus Definitions
5. Conclusion
Licensing Structure - Firmware versions 1.0.3.15 and later
Moving forward, AnyConnect will incur a charge for client licenses only.
For additional information on AnyConnect licensing on the RV340 series routers, please see the article on: AnyConnect Licensing for the RV340 Series Routers.
Configuring Antivirus
Step 1. If you haven’t logged into the router, log in to the web configuration page.
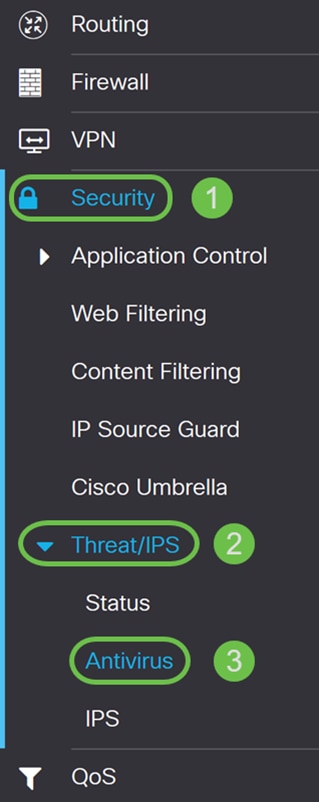
Step 2. Navigate to Security > Threat/IPS > Antivirus.
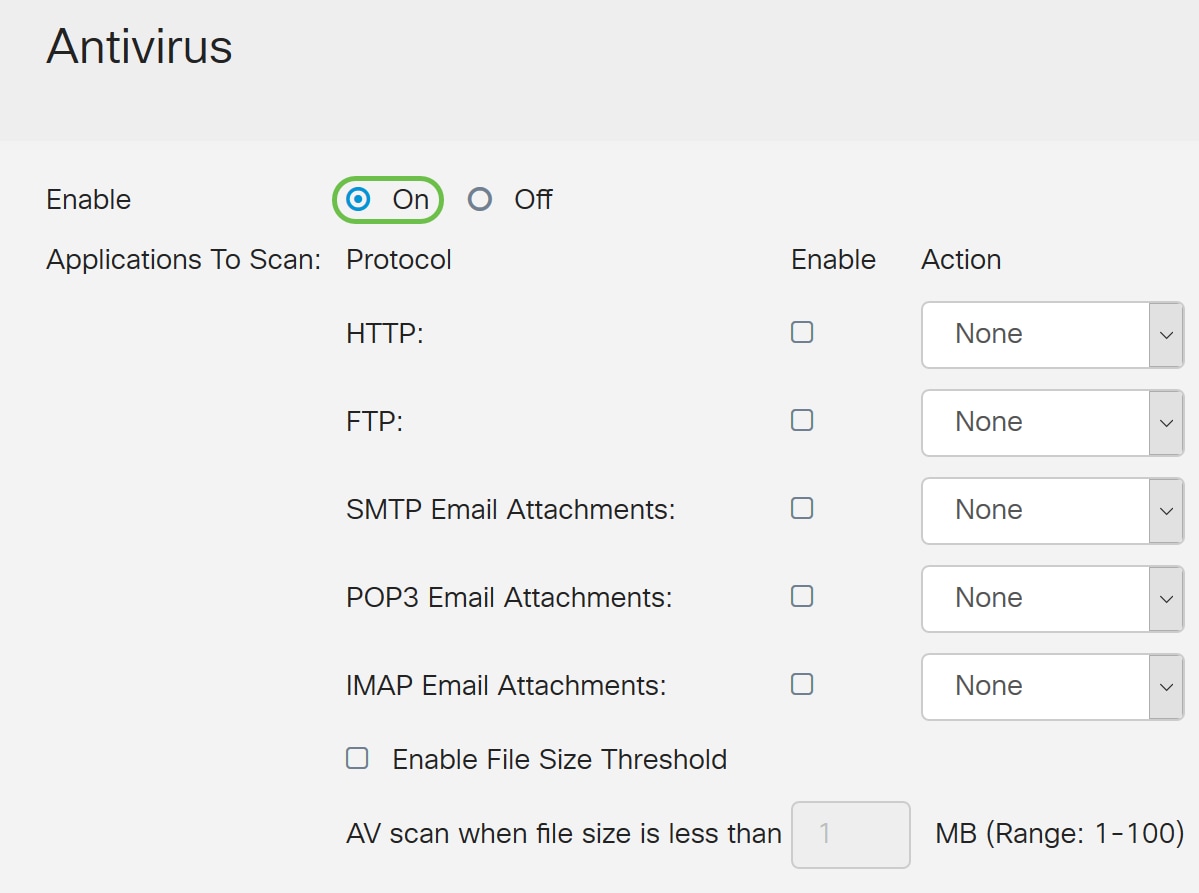
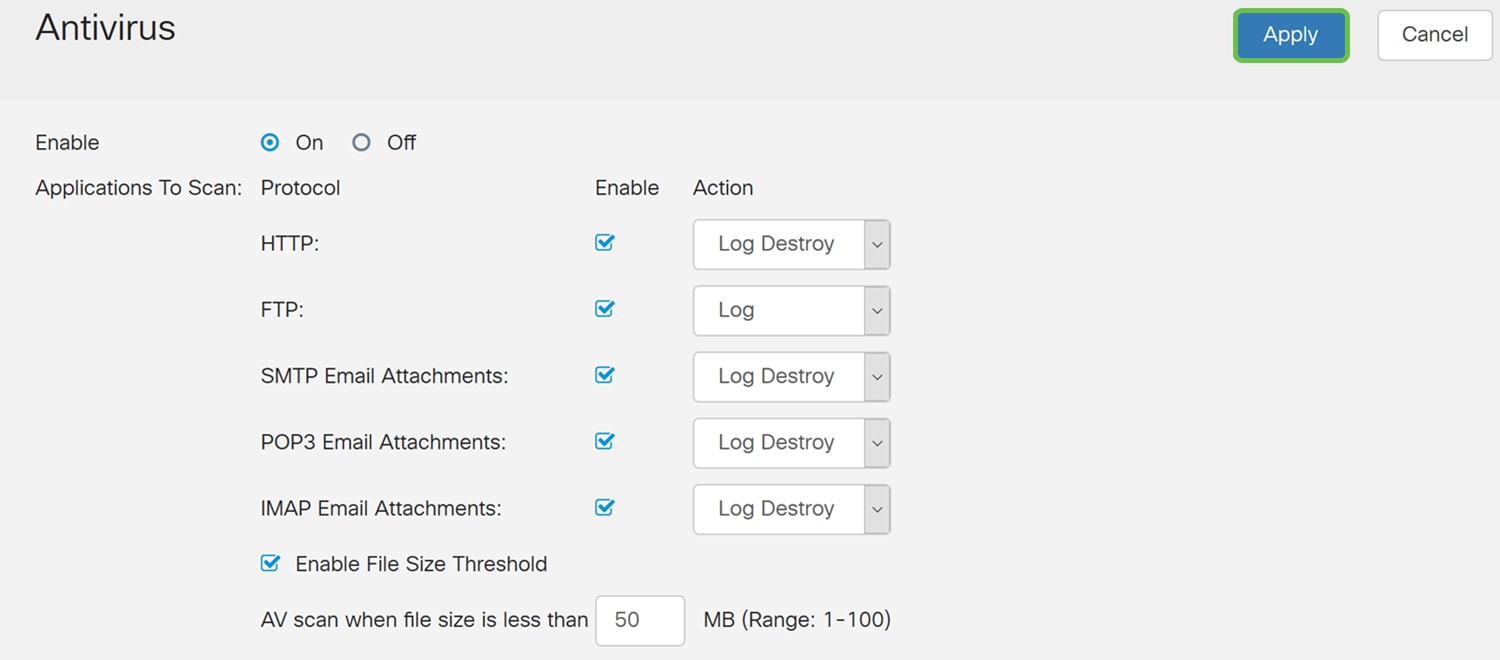
Step 3. Click the On radio button to enable the antivirus feature.
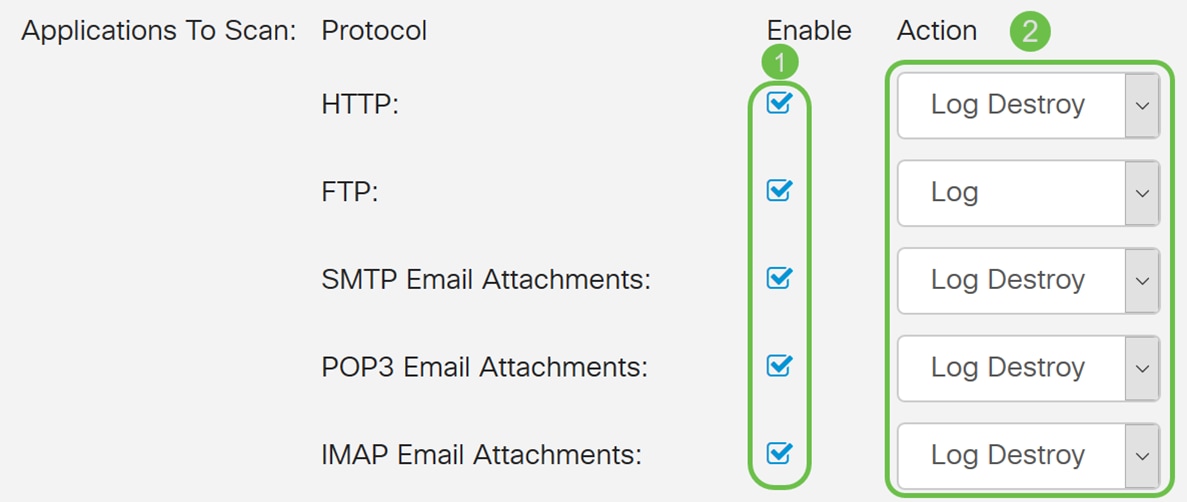
Step 4. Check the Enable checkbox(es) to enable Applications to Scan on the protocols. In this example, we have enabled all the protocols (HTTP, FTP, SMTP, POP3, and IMAP). Then select the appropriate action for it. The following options are defined as:
· Log – Select this option to generate the log only (with client information, signature ID, etc.) when the threats are identified. It does not impact the connection.
· Log Destroy – Select this option to drop the connection when threats are identified and logs the message for deletion.
Note: In the case of an identified threat in an attachment, it will truncate the file during the download process.
Step 5. If you want the antivirus to have a required file size to scan, check the Enable File Size Threshold. Then enter the file size that the antivirus can scan. The range is from 1-100 MB.
In this example, 50 MB was entered.

Step 6. In the Virus Database section, the Last update shows the date and time of the last updated signature. File version shows the signature version which is being used.

Step 7. Click the Apply button to save your changes.
Pressing Apply only saves your configuration to the running configuration. You will need to copy your running configuration to the startup configuration if you want to keep your configuration between reboots.
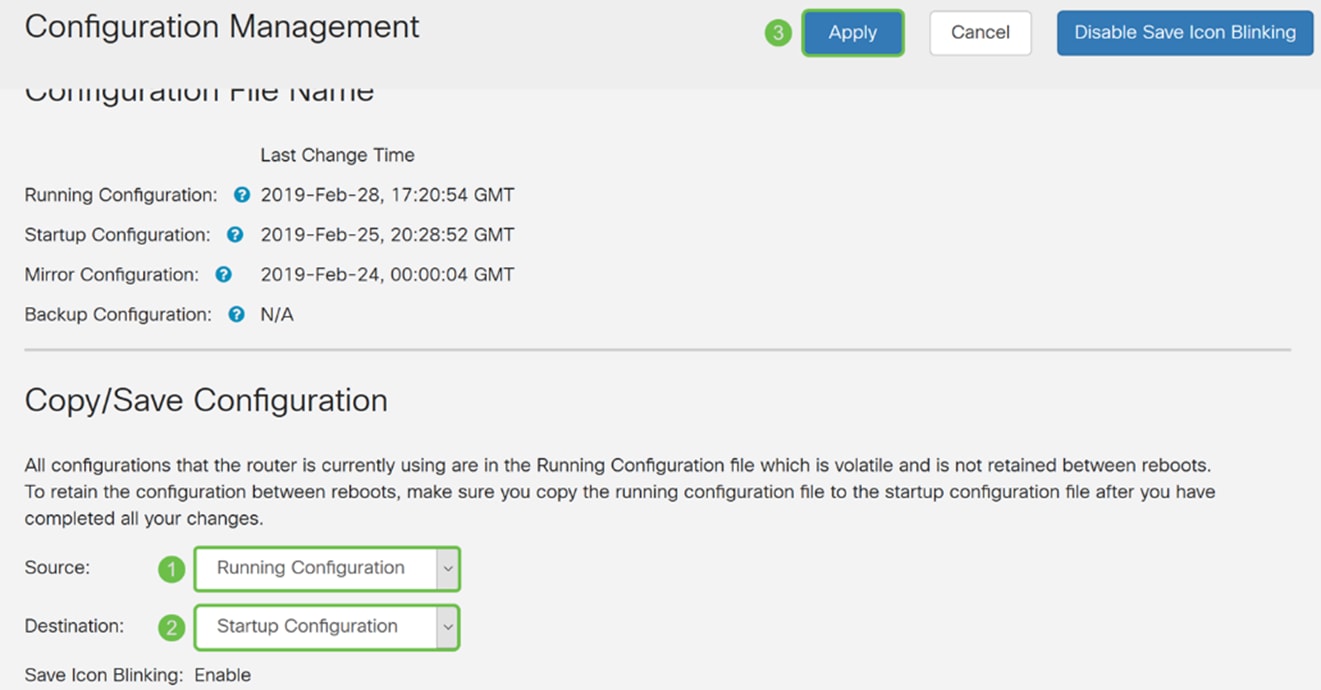
Step 8. Click the Floppy Disk (Save) icon at the top of the page. This will redirect you to the Configuration Management to copy your running configuration to the startup configuration.

Step 9. In the Configuration Management, scroll down to the Copy/Save Configuration section. Ensure that the Source is Running Configuration and the Destination is Startup Configuration. Click Apply. This will copy the running configuration file to the startup configuration file to retain the configuration between reboots.
Threat/IPS Status
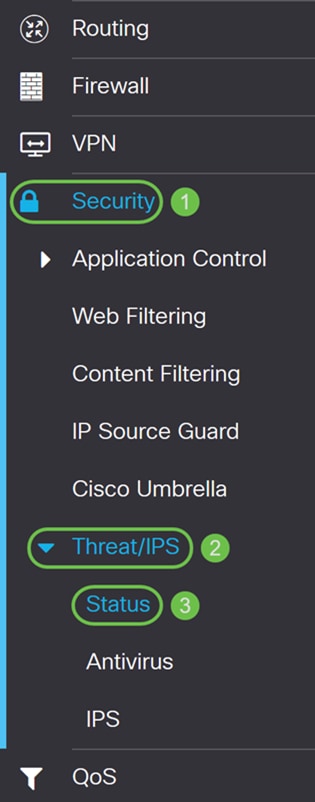
Step 1. Navigate to Security > Threat/IPS > Status.
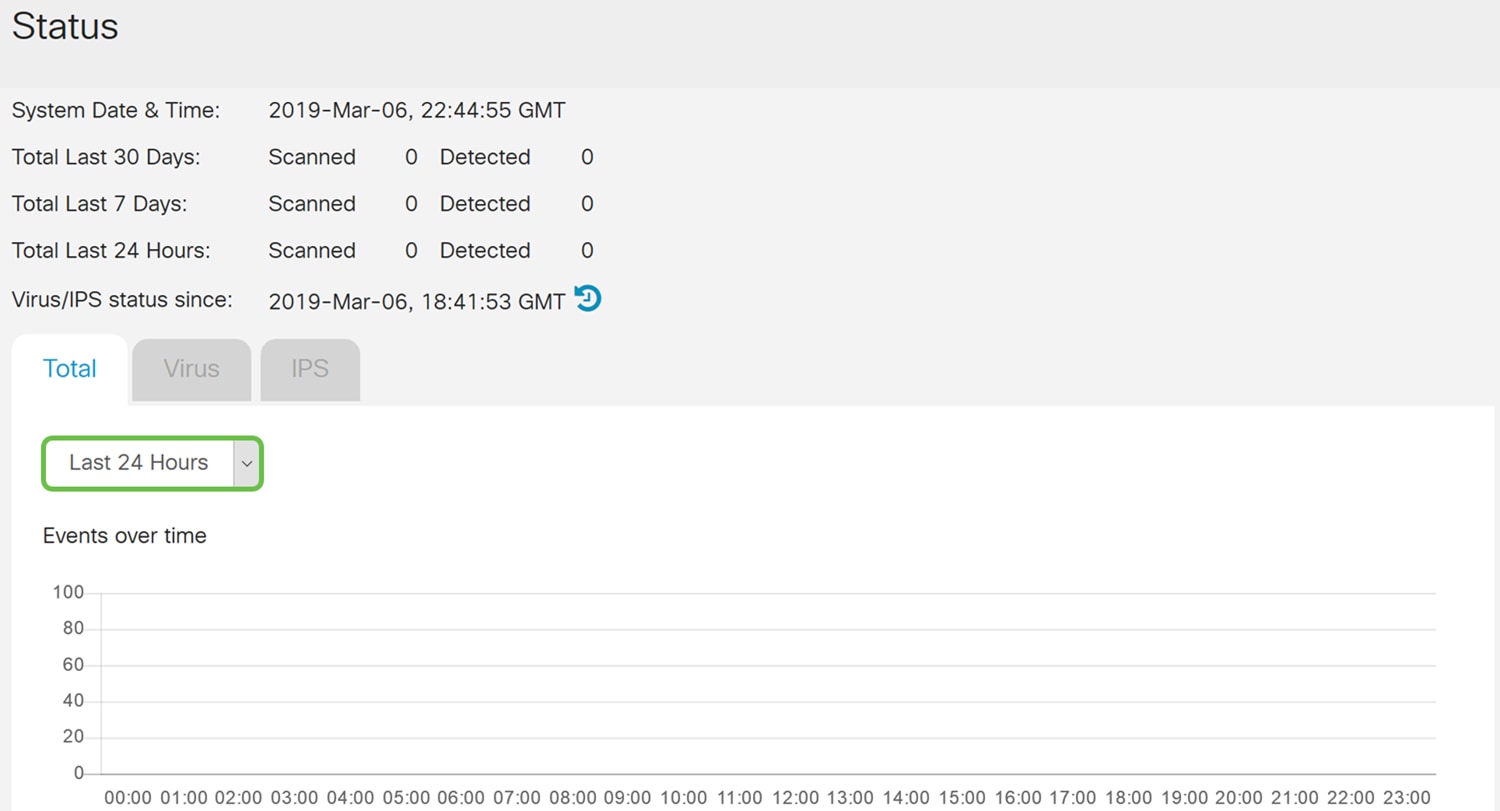
Step 2. In the Status page, you can see the system date and time, scanned and detected threats, and attacks of the selected tab. By default, you can see the Total tab’s status.
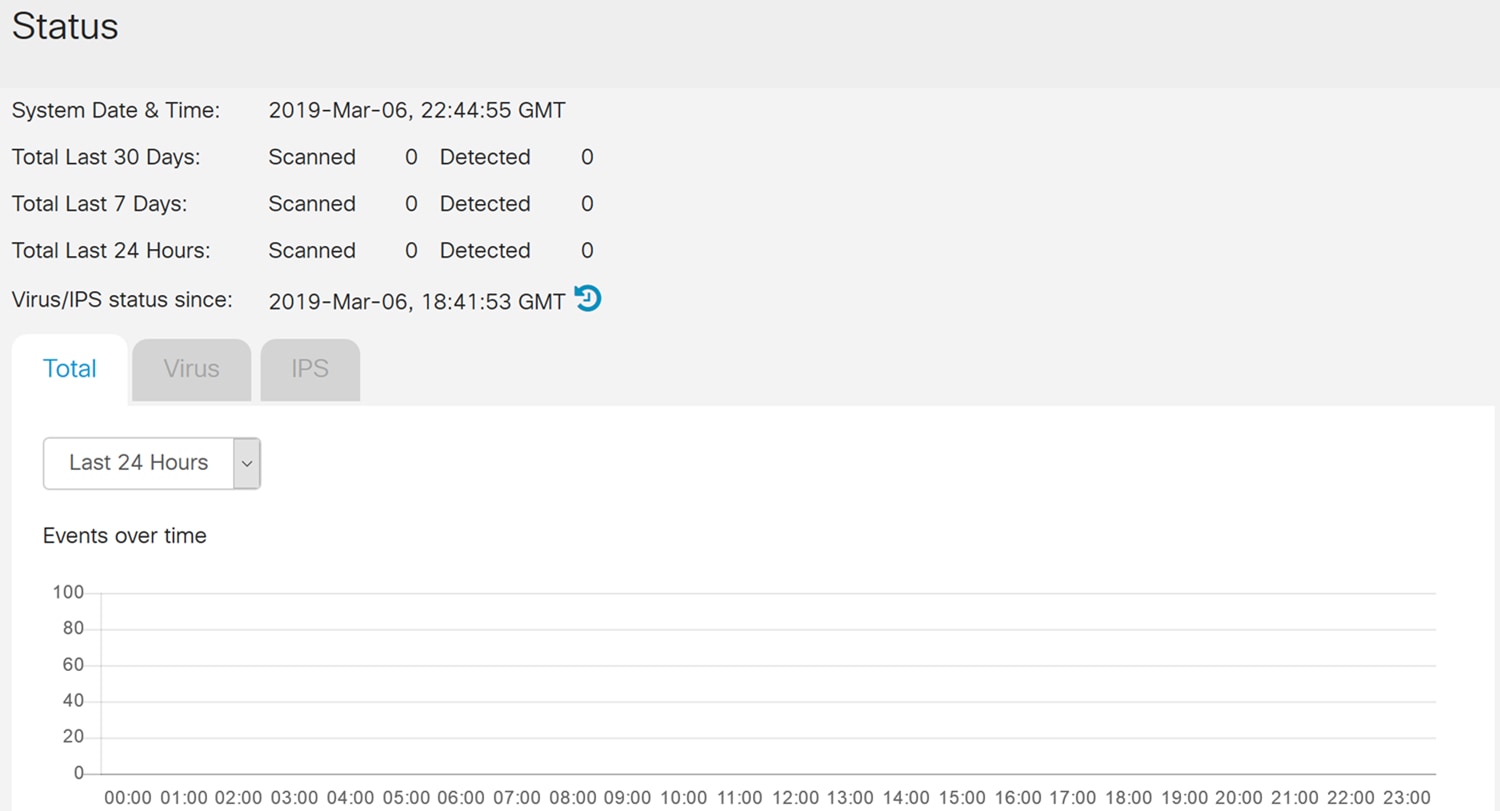
Step 3. In the drop-down list under Total tab, you can select Last 24 hours, Week, or Month to display the events.
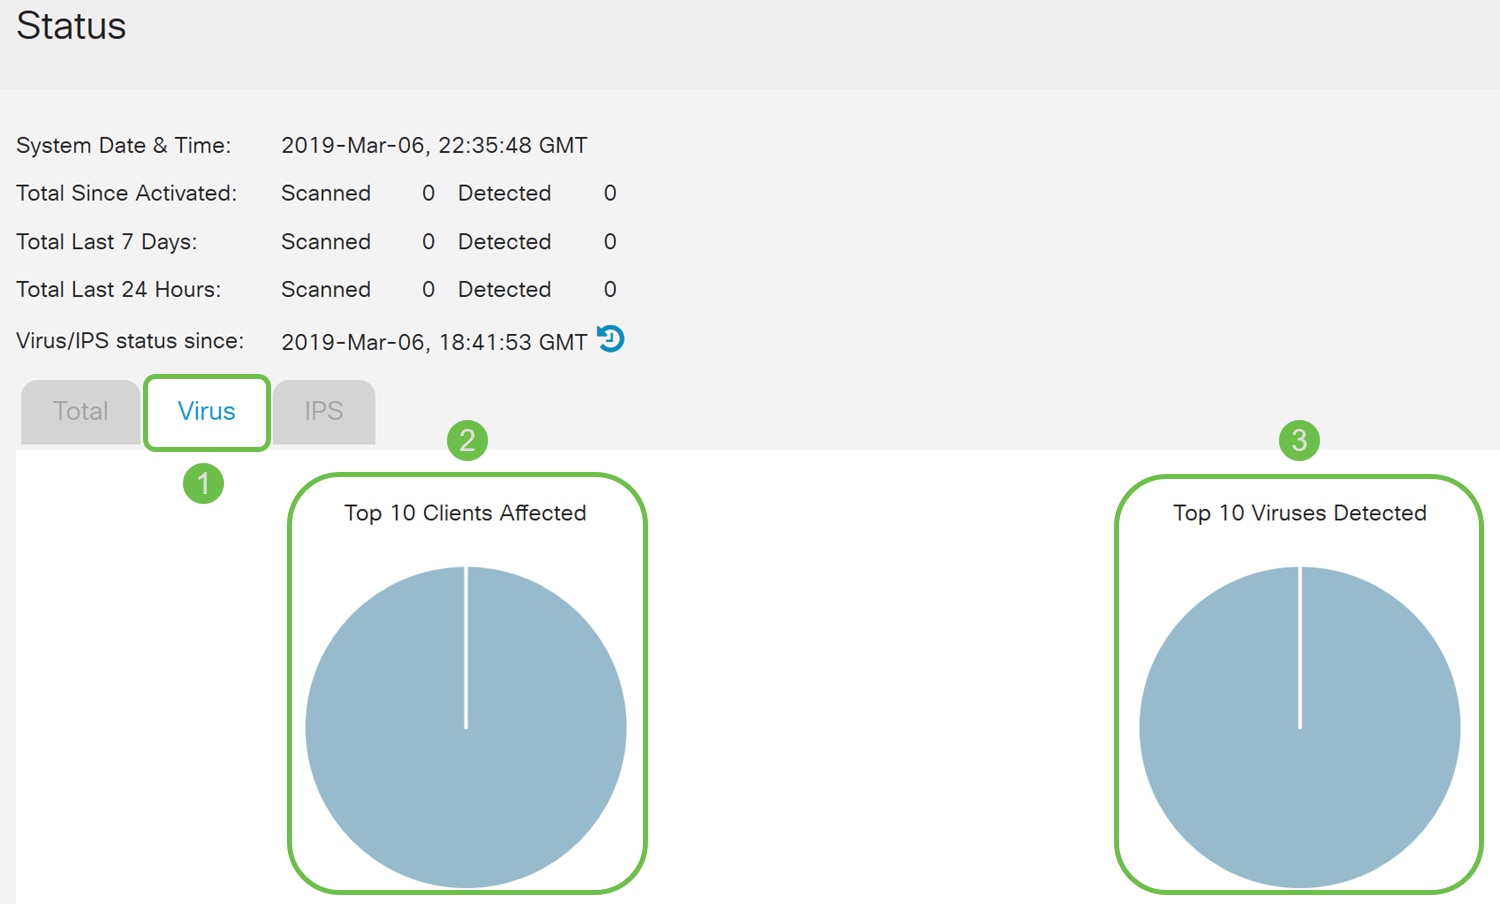
Step 4. Click the Virus tab. In the Virus tab, it will display the following:
· Top 10 Clients Affected – the list of mac addresses who are affected.
· Top 10 Viruses Detected – the list of threats detected.
Note: You can hover your mouse over the pie chart for more details.
Updating Antivirus Definitions
You can update the Antivirus database either manually or automatically. Steps 1-2 will show you how to update the Antivirus database manually while Steps 3-6 will show you how to update the Antivirus database automatically.
Best Practice: It is recommended to update the security signatures automatically on a weekly basis.
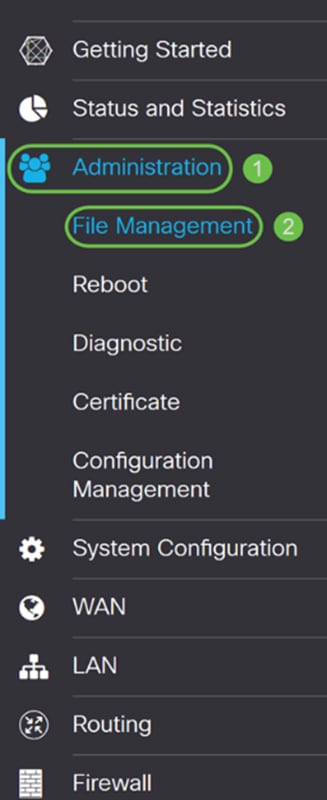
Step 1. To manually update Antivirus database, navigate to Administration > File Management.
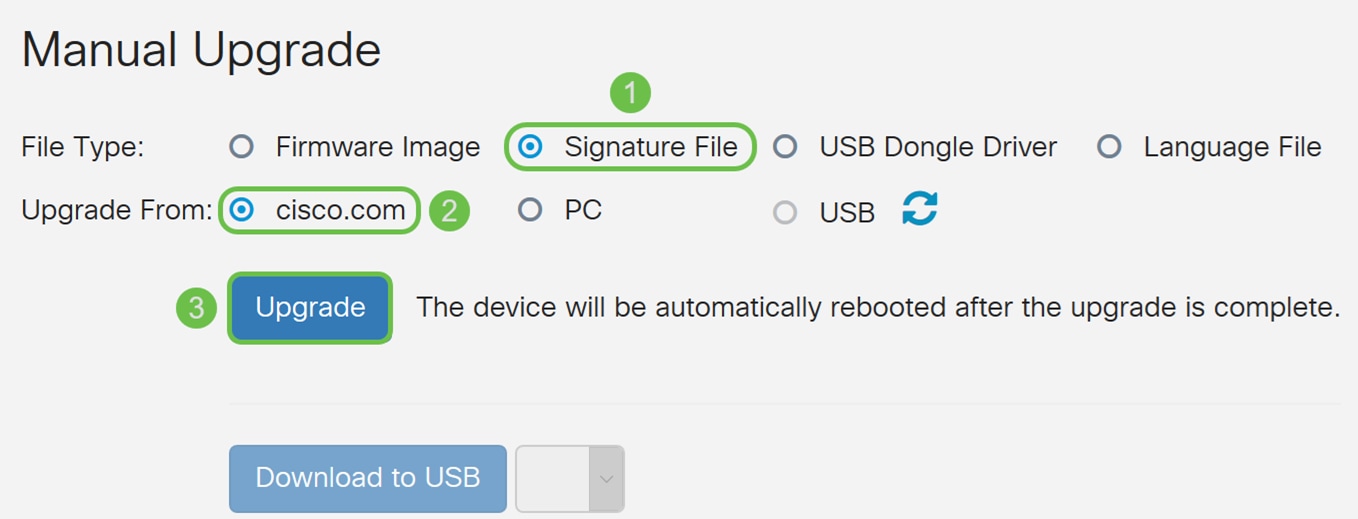
Step 2. Scroll down to the Manual Upgrade section in the File Management page. Choose Signature File for File Type and cisco.com for Upgrade From. Then press Upgrade. This will download the latest security signature and install it.
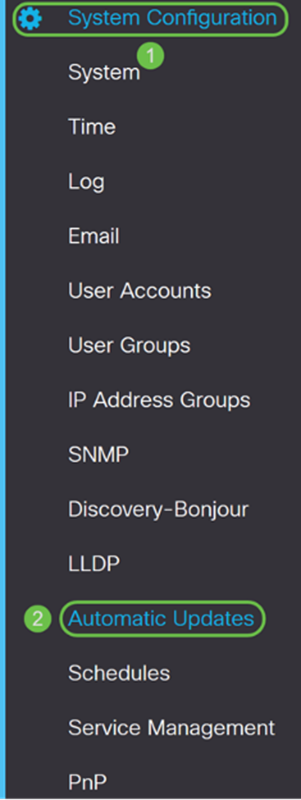
Step 3. To automatically update the Antivirus database, navigate to System Configuration > Automatic Updates.
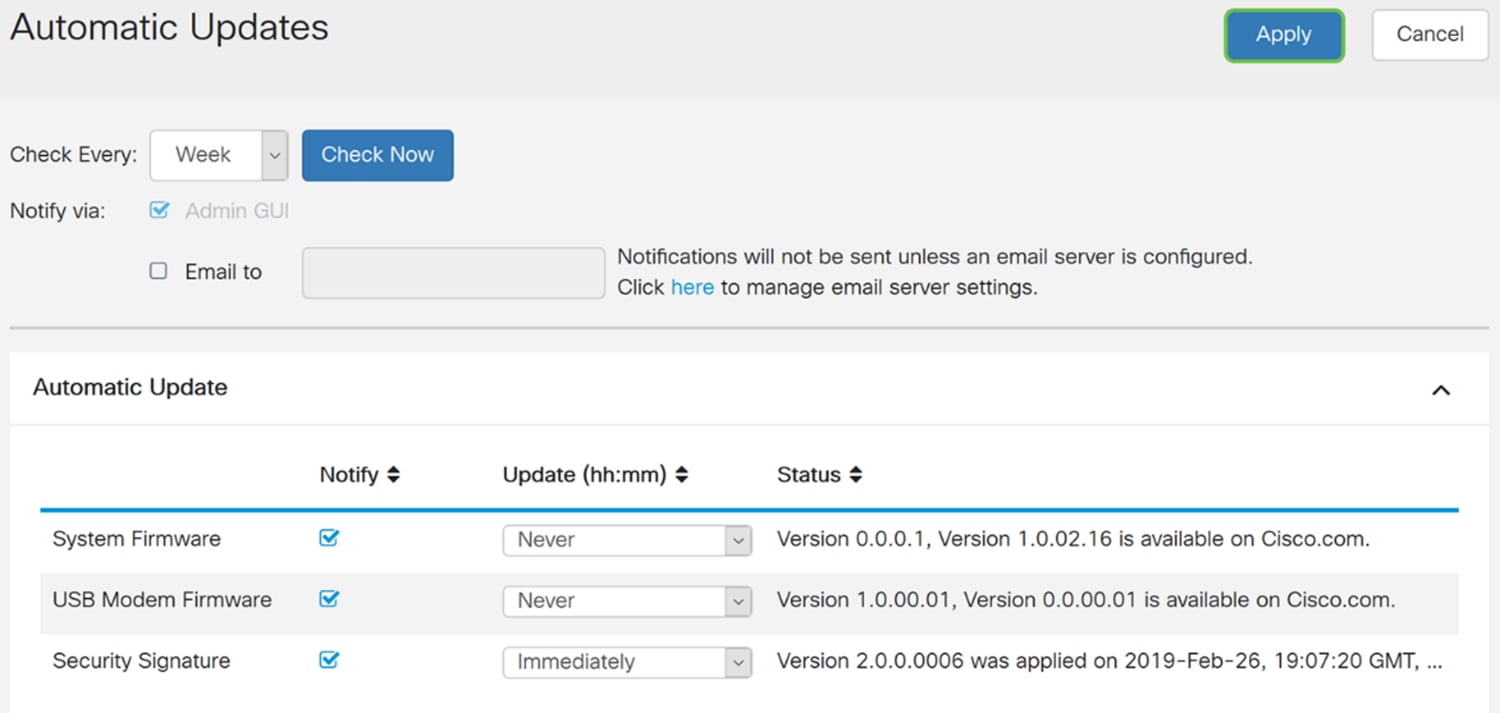
Step 4. The Automatic Updates page opens. You have the option of checking for updates either on a weekly or monthly basis. You can have the router notify via email or the Web UI. In this example, we will be selecting to check every week.
Note: It is recommended to update security signatures automatically on a weekly basis.

Step 5. Scroll down to the Automatic Update section and look for the Security Signature field. In the Security Signature Update drop-down list, select the time that you want to automatically update. In this example, we will be selecting Immediately.

Step 6. Click Apply to save the changes to the running configuration file.
Note: Remember to click the Floppy Disk icon on the top to navigate to the Configuration Management page to copy your running configuration file to the startup configuration file. This will help retain your configurations between reboots.
Conclusion
You should now have configured Antivirus on your RV34x Series Router.
For additional information, check out the following resources.
· Router Community: Cisco Small Business Support Community
· FAQ about RV34x Series: RV34x Series Router FAQs
 Feedback