Install and Configure the PingFederate Identity Provider for Cisco Identity Service to enable SSO
Available Languages
Download Options
Bias-Free Language
The documentation set for this product strives to use bias-free language. For the purposes of this documentation set, bias-free is defined as language that does not imply discrimination based on age, disability, gender, racial identity, ethnic identity, sexual orientation, socioeconomic status, and intersectionality. Exceptions may be present in the documentation due to language that is hardcoded in the user interfaces of the product software, language used based on RFP documentation, or language that is used by a referenced third-party product. Learn more about how Cisco is using Inclusive Language.
Contents
Introduction
This document describes the configuration on the PingFederate Identity Provider (IdP) to enable Single Sign On (SSO).
Cisco IdS Deployment Models
| Product | Deployment |
| UCCX | Co-resident |
| PCCE | Co-resident with CUIC (Cisco Unified Intelligence Center) and LD (Live Data) |
| UCCE |
Co-resident with CUIC and LD for 2k deployments. Standalone for 4k and 12k deployments. |
Prerequisites
Requirements
Cisco recommends that you have knowledge of these topics:
- Cisco Unified Contact Center Express (UCCX) Release 11.6 or Cisco Unified Contact Center Enterprise Release 11.6 or Packaged Contact Center Enterprise (PCCE) Release 11.6 as applicable.
- PingFederate installed on Windows Server
Note: This document references the configuration with respect to the Cisco Identitify Service (IdS) and the Identity Provider (IdP). The document references UCCX in the screenshots and examples, however the configuration is similar with respect to the Cisco Identitify Service (UCCX/UCCE/PCCE) and the IdP.
Components Used
This document is not restricted to specific software and hardware versions.
The information in this document was created from the devices in a specific lab environment. All of the devices used in this document started with a cleared (default) configuration. If your network is live, ensure that you understand the potential impact of any command.
Install
System Requirements
Install
Extract the distribution ZIP file or use a platform-specific installer to install PingFederate.
- Request a license key via the Ping Identity license Web page (www.pingidentity.com/support-and-downloads/licensing.cfm)
- Ensure you are logged on to your system with appropriate privileges to install and run an application
- Verify that the Server Java Runtime Environment (JRE) is installed and that environment and PATH variables are set correctly
Install PingFederate with distribution ZIP file
Extract the distribution ZIP file into an installation directory.
Warning: To avoid future problems with automated upgrades, do not rename the installed pingfederate folder. If you are install multiple instances of PingFederate on the same machine (for example, in certain server-clustering scenarios), either install each instance in a different location or rename the parent folder to install a parallel file structure in the same location.
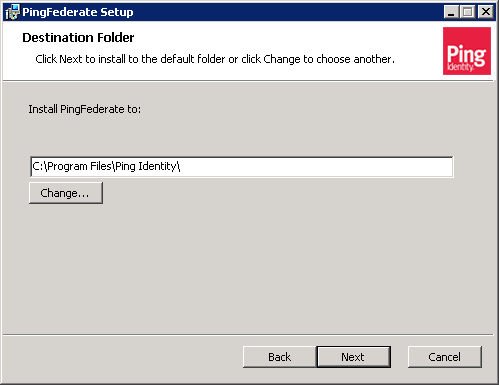
Install PingFederate with distribution EXE file
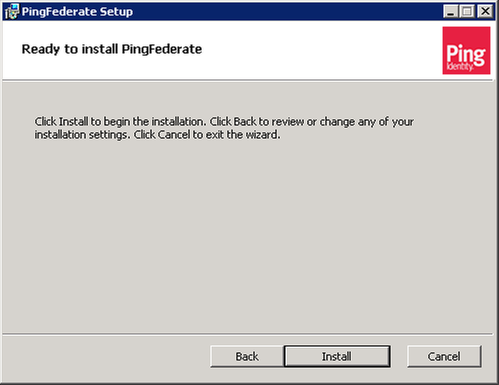
Double click the exe file and follow the installation steps

Start PingFederate for the first time
If you install PingFederate with one of the platform-specific installers, PingFederate is configured to run as a service and started automatically at the end of the installation process.
If you install PingFederate with a distribution ZIP file, run the script to start PingFederate manually,
(Windows) <pf_install>/pingfederate/bin/run.bat
(Unix/Linux) <pf_install>/pingfederate/bin/run.sh
Wait for the script to finish—the startup process completes when this message appears near the end of the sequence:
PingFederate started in <X>s:<Y>ms
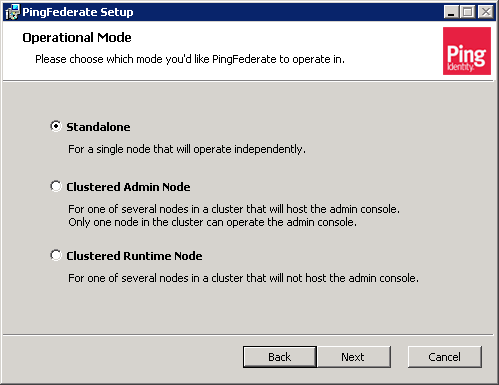
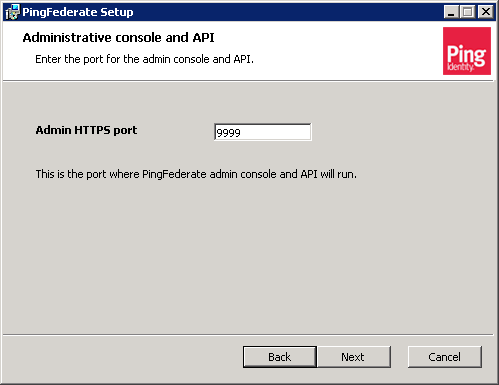
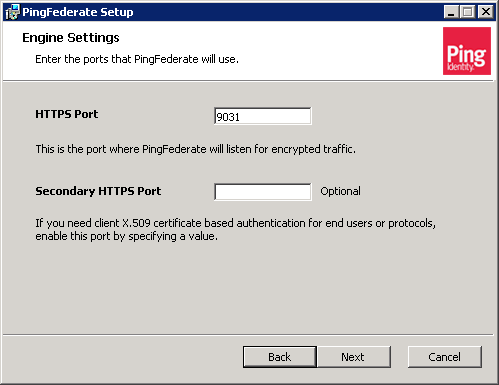
Initial Setup Wizard
The PingFederate administrator’s user interface, the administrative console, is built around a system of wizard-like control screens. Launch the PingFederate administrative console and use the initial setup wizard to complete the configuration of your identity federation settings. You can also connect PingFederate to PingOne to deploy a powerful on-premise and cloud-based hybrid solution.
In order to access the administrative console:
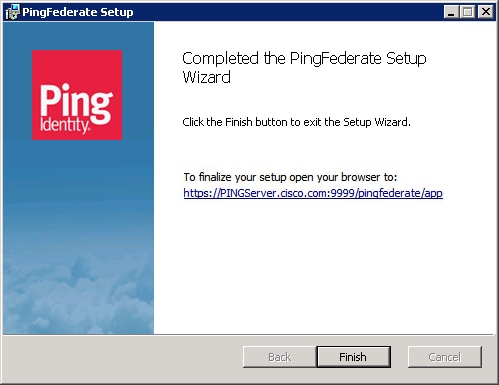
Launch your browser and navigate to https://<FQHN>:9999/pingfederate/app (where <FQHN> is the fully qualified hostname of the server where the PingFederate is installed).
Note: The port number 9999 is set by default. This can be changed through the PingFederate properties.
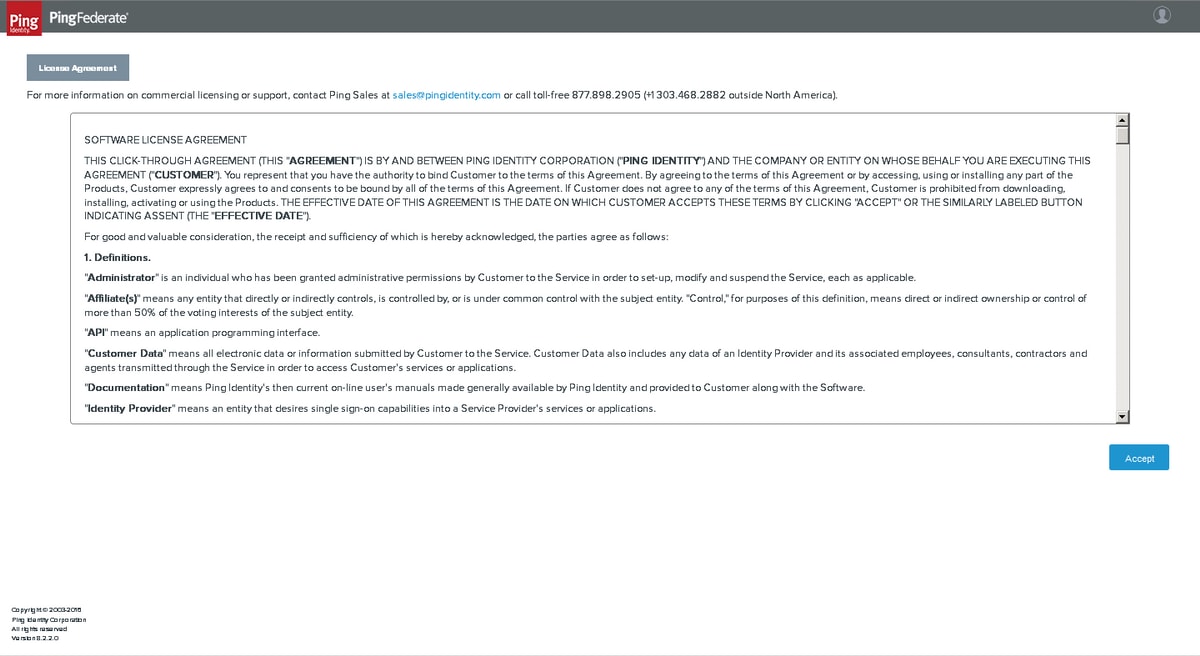
Accept License Agreement
PingOne Account
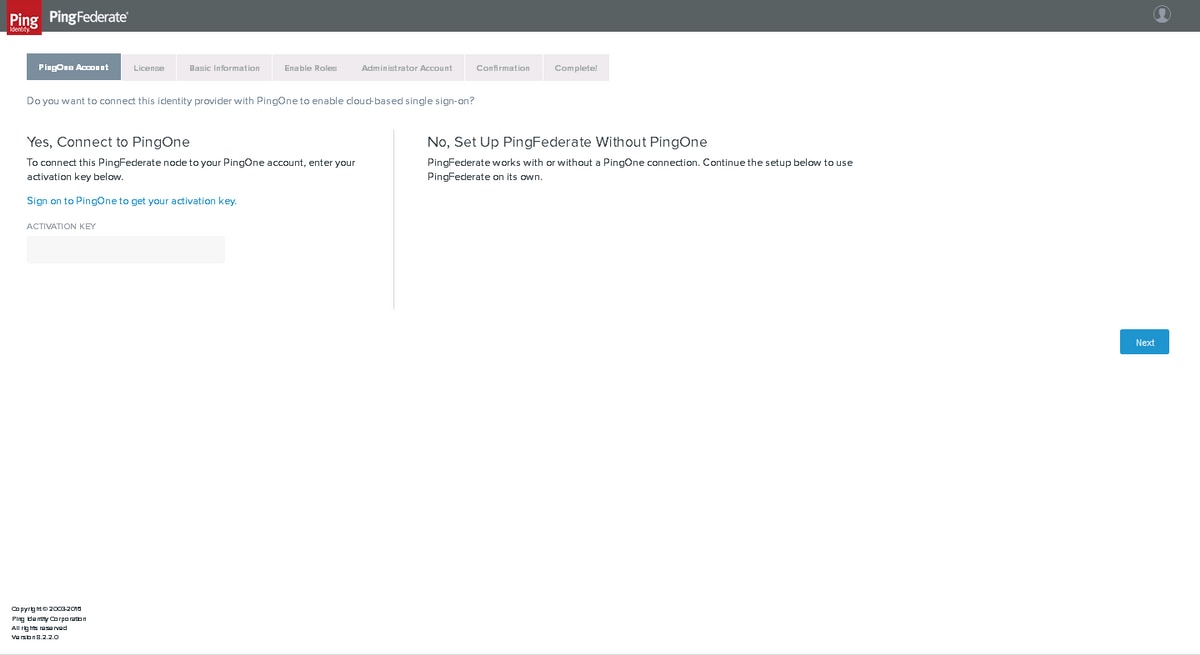
Click Next
License
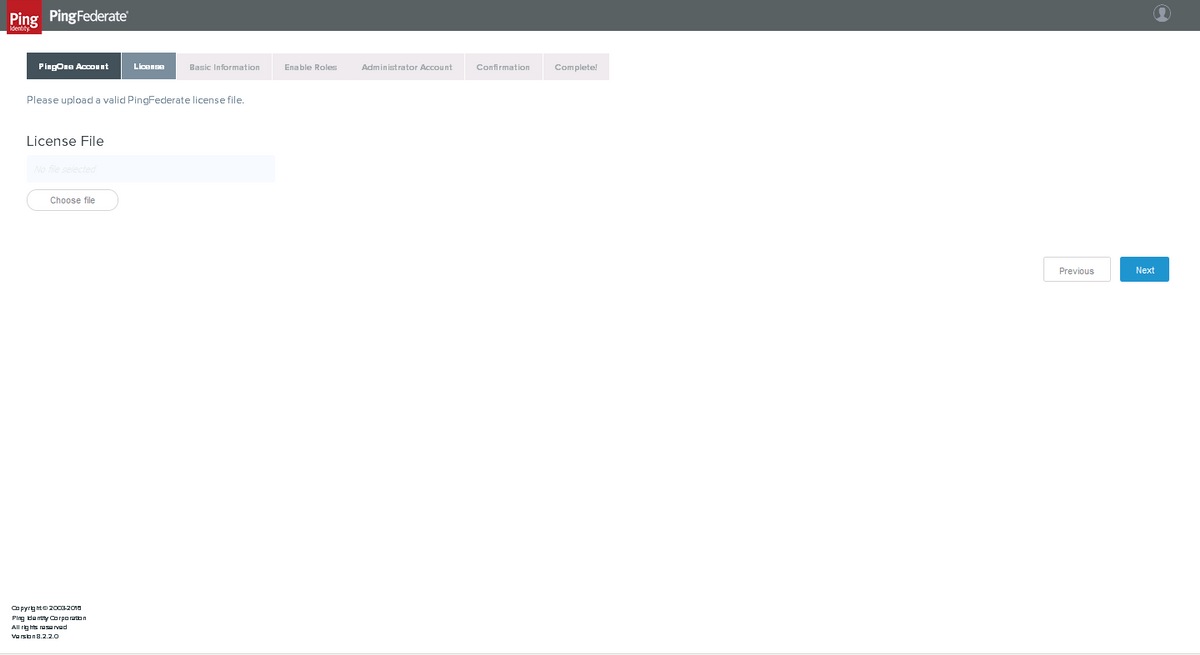
You must purchase or request a development license from pingidentity.com, upload the license file and click Next
Basic Information
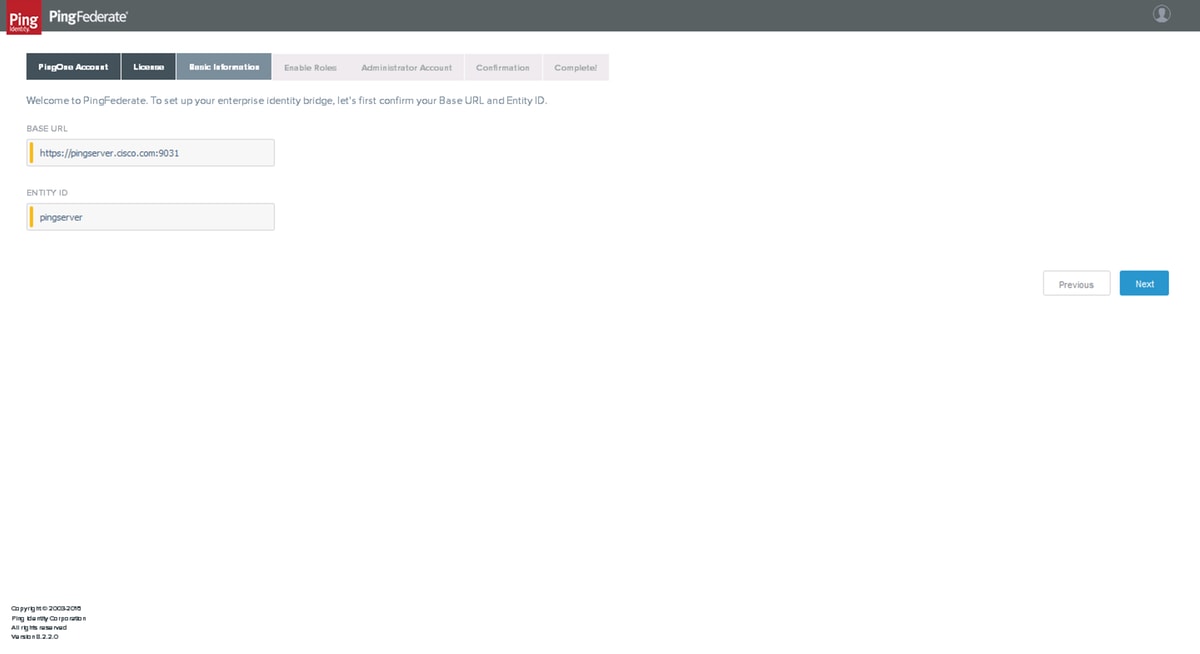
Set BASE URL and ENTITY ID and click Next
Enable Roles
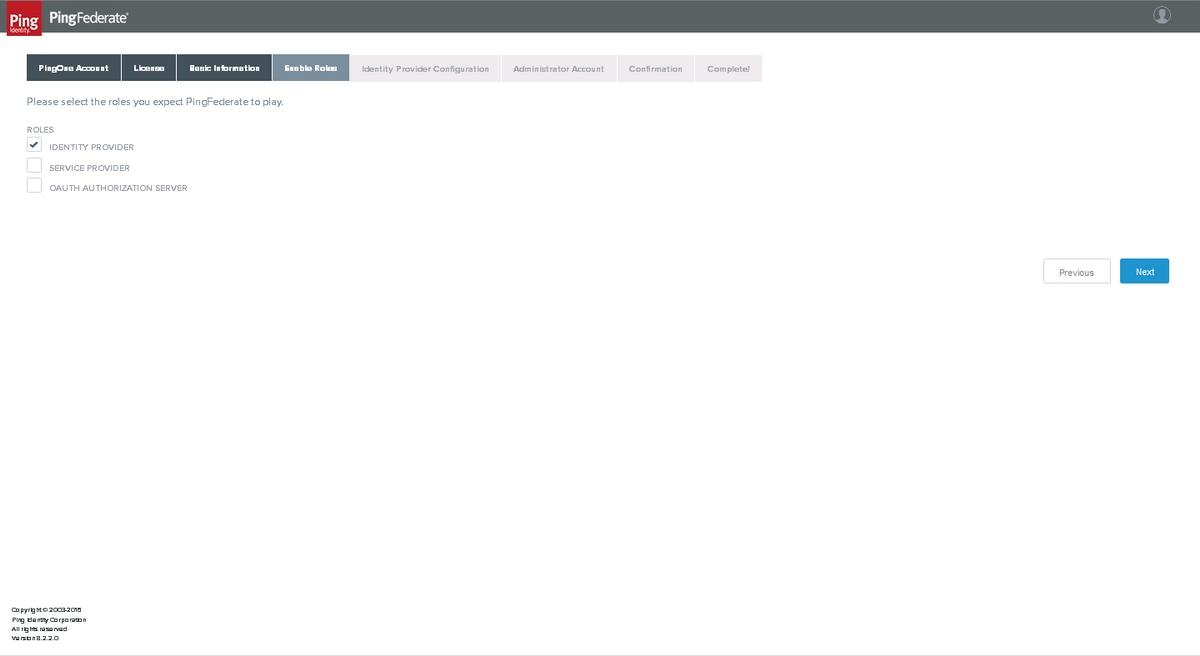
Select IDENTITY PROVIDER and click Next
Identity Provider Configuration
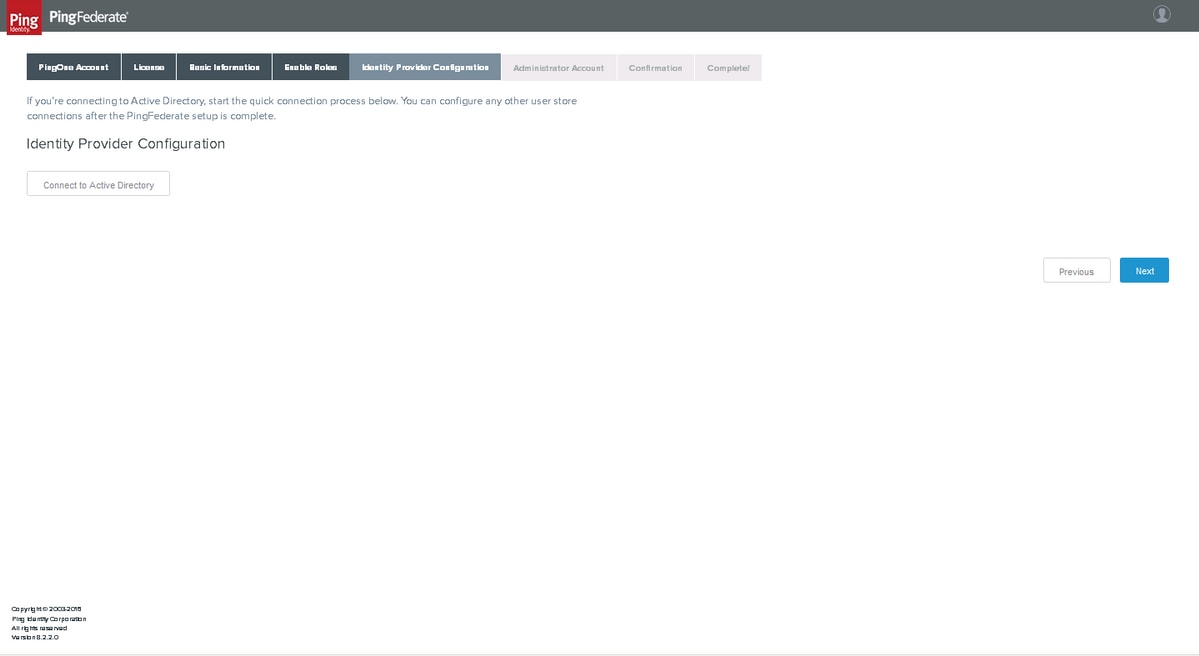
The connection to Active Directory can be performed later, click Next
Administrator Account
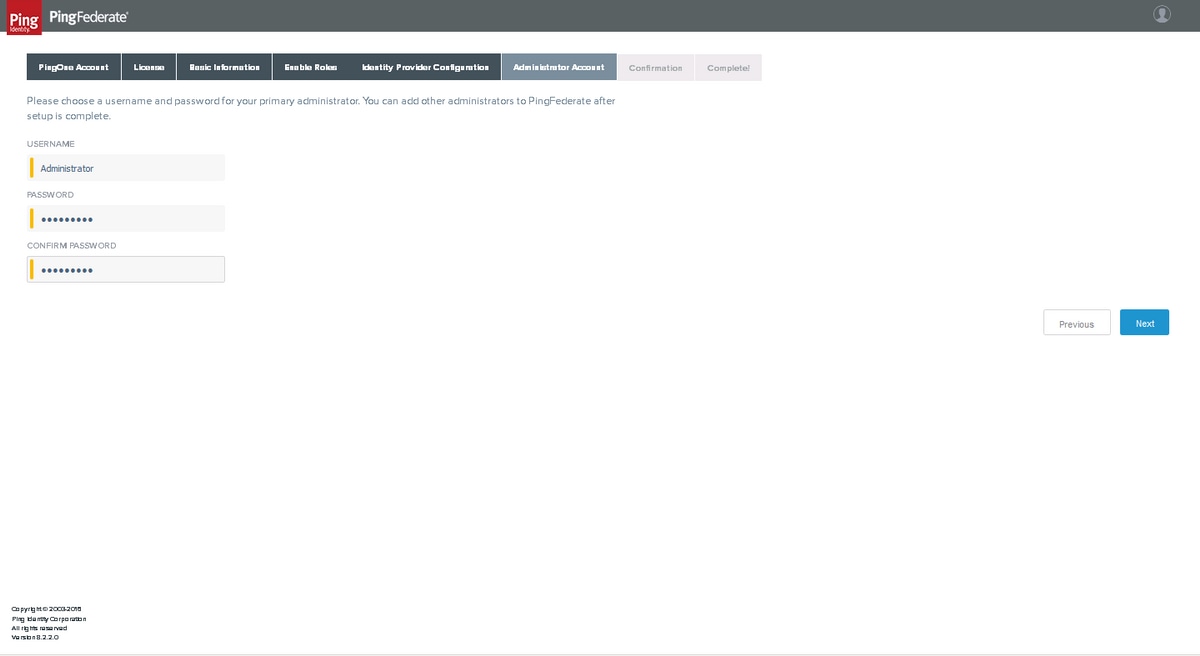
Set Administrator's password and click Next
Confirmation
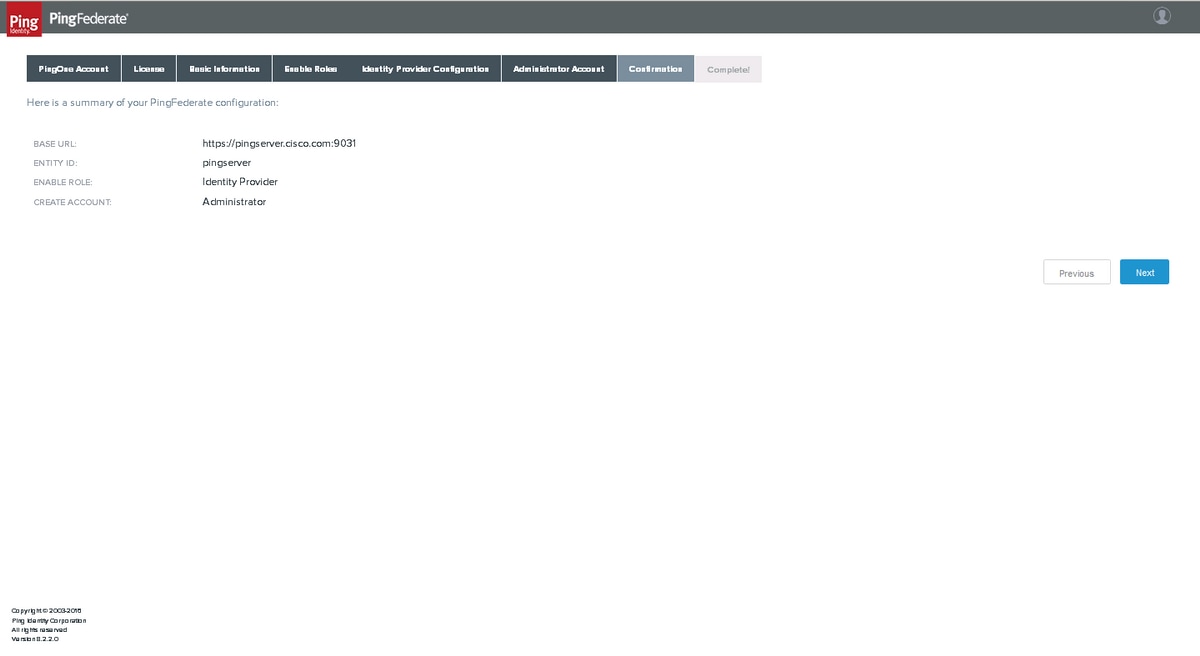
Confirm and click Next
Complete
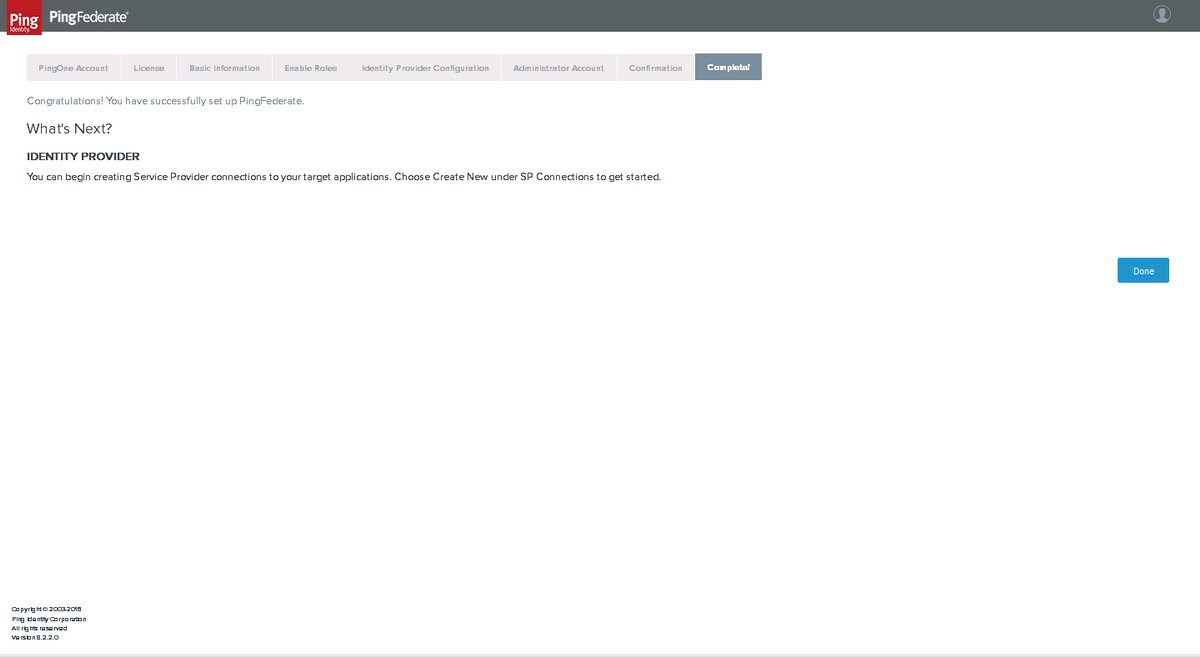
Click Done
Configure PingFederate
Server Configuration

Digital Signing and Extensible Markup Language (XML) Decryption Keys and Certificates
Click Server Configuration > Certificate Management >Signing & XML Decryption Keys & Certificates
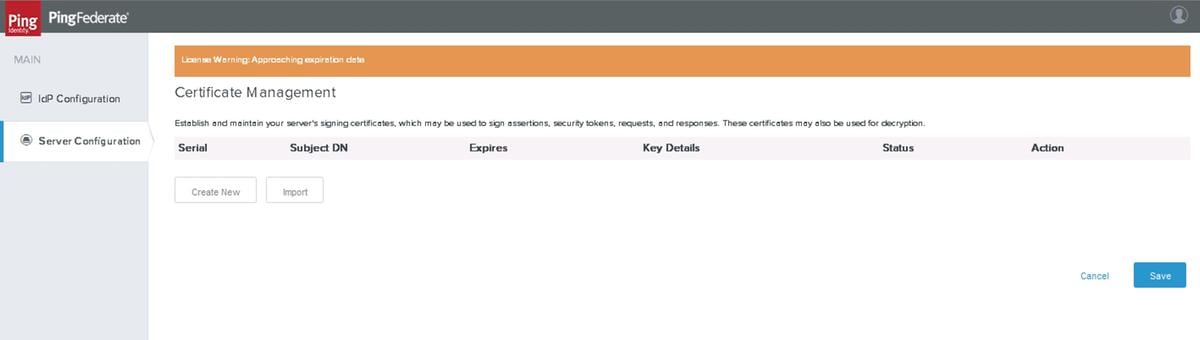
Click Create New
Create Certificate
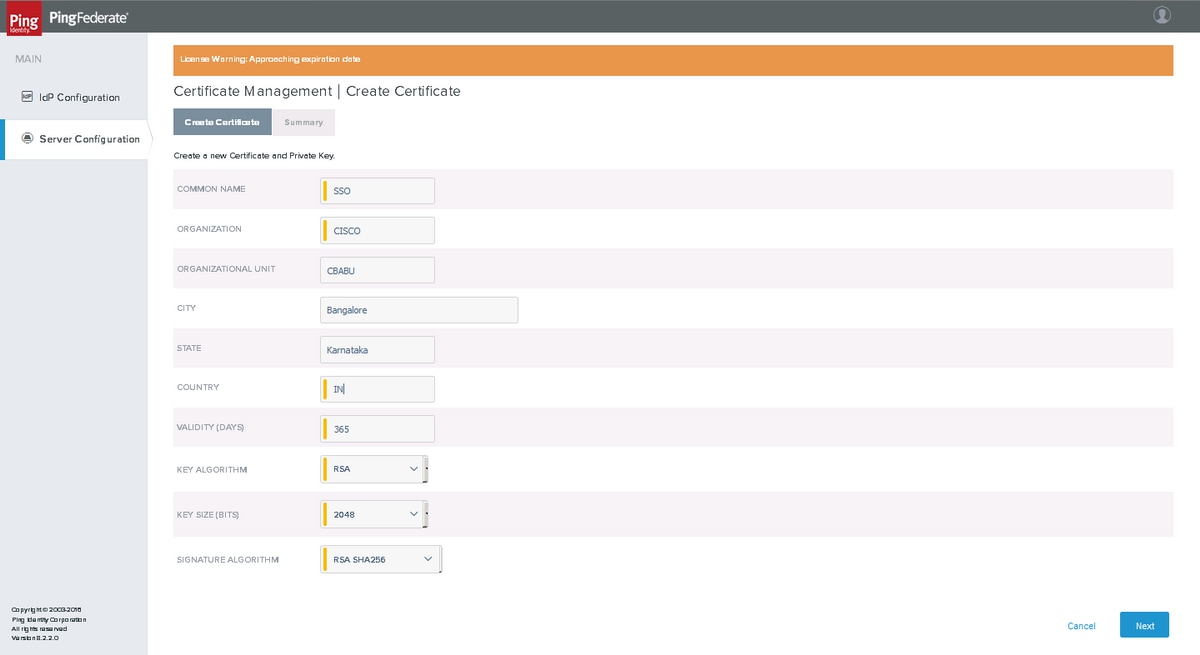
Click Next
Export Certificate
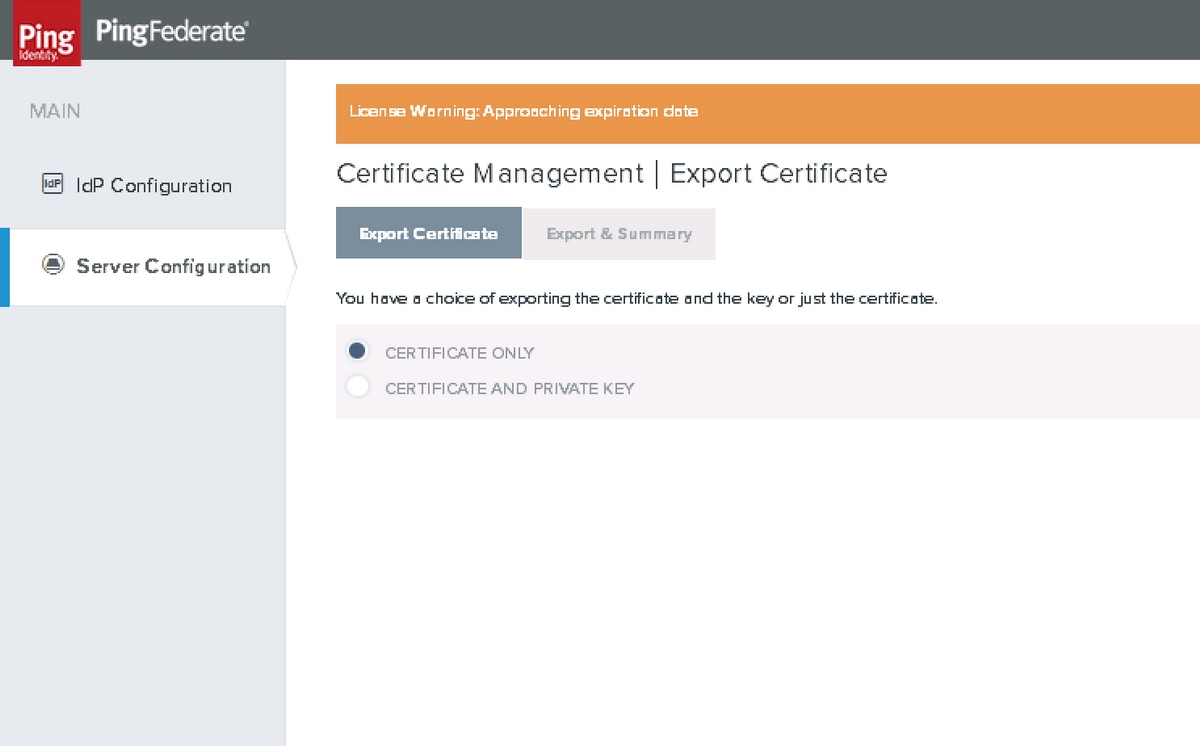
Export & Summary
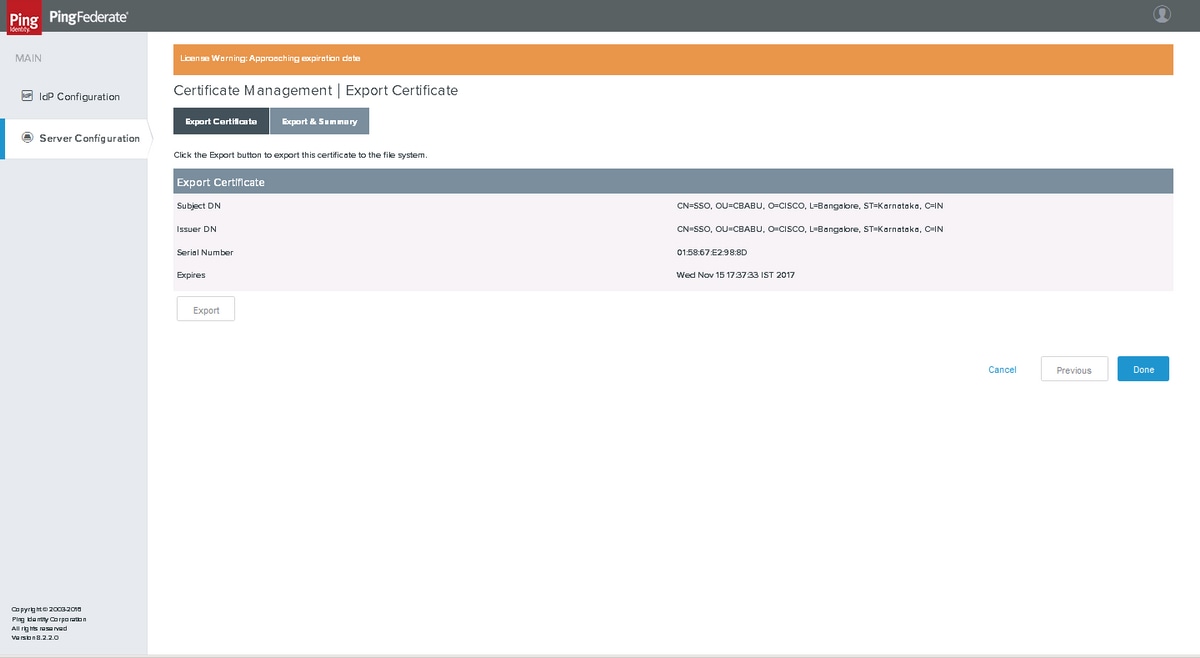
Click Export
Data Stores
Click Server Configuration > SYSTEM SETTINGS > Data Stores
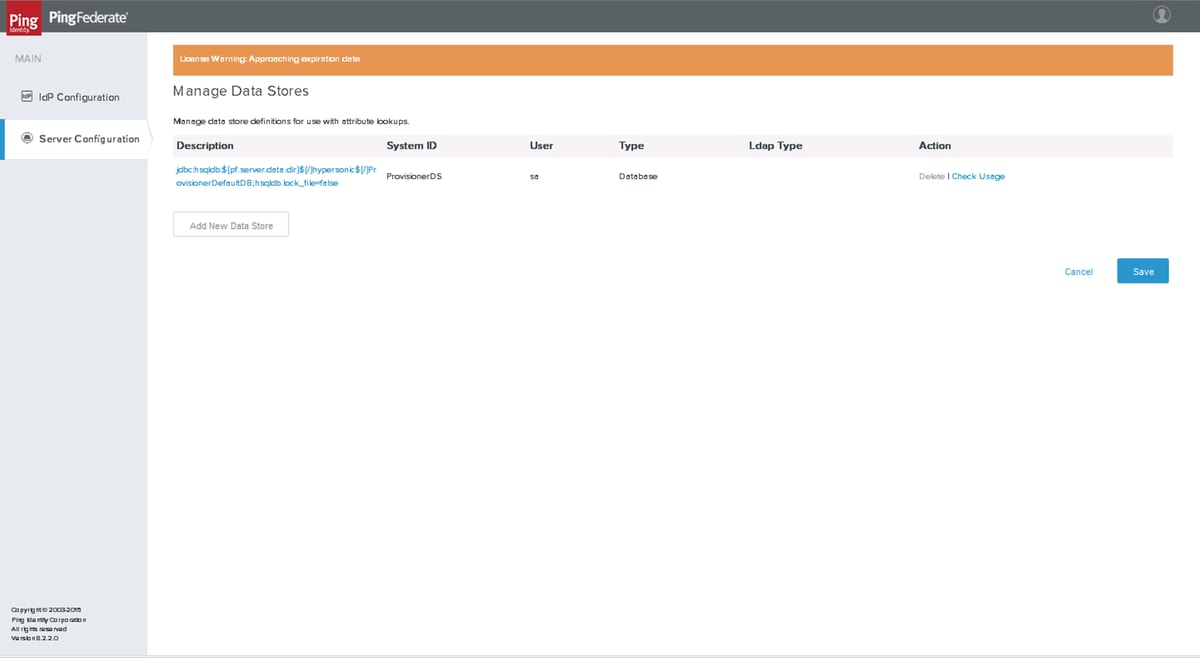
Click Add New Data Store
LDAP Configuration
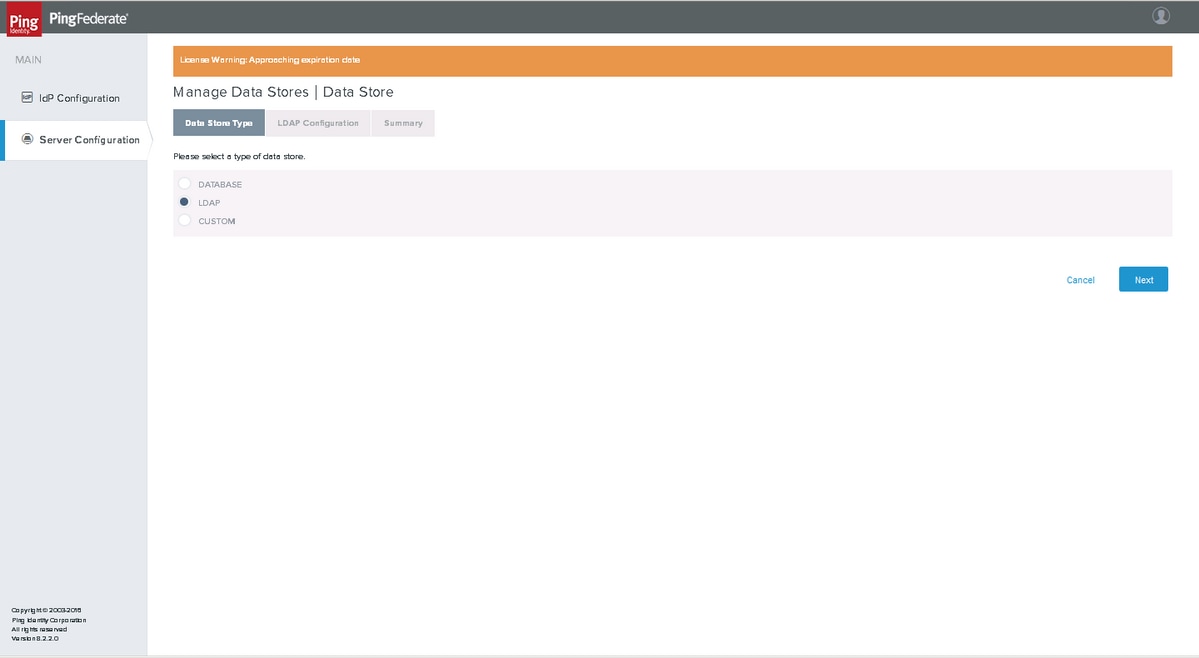
Choose LDAP and click Next
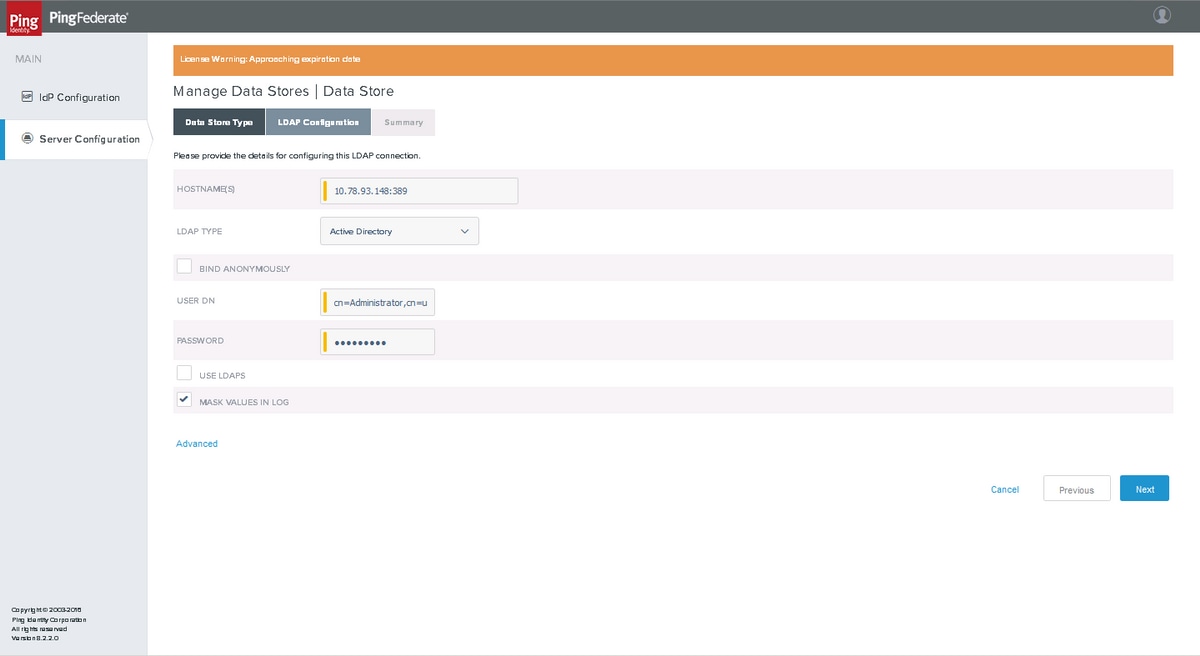
Enter the values and click Next
Summary
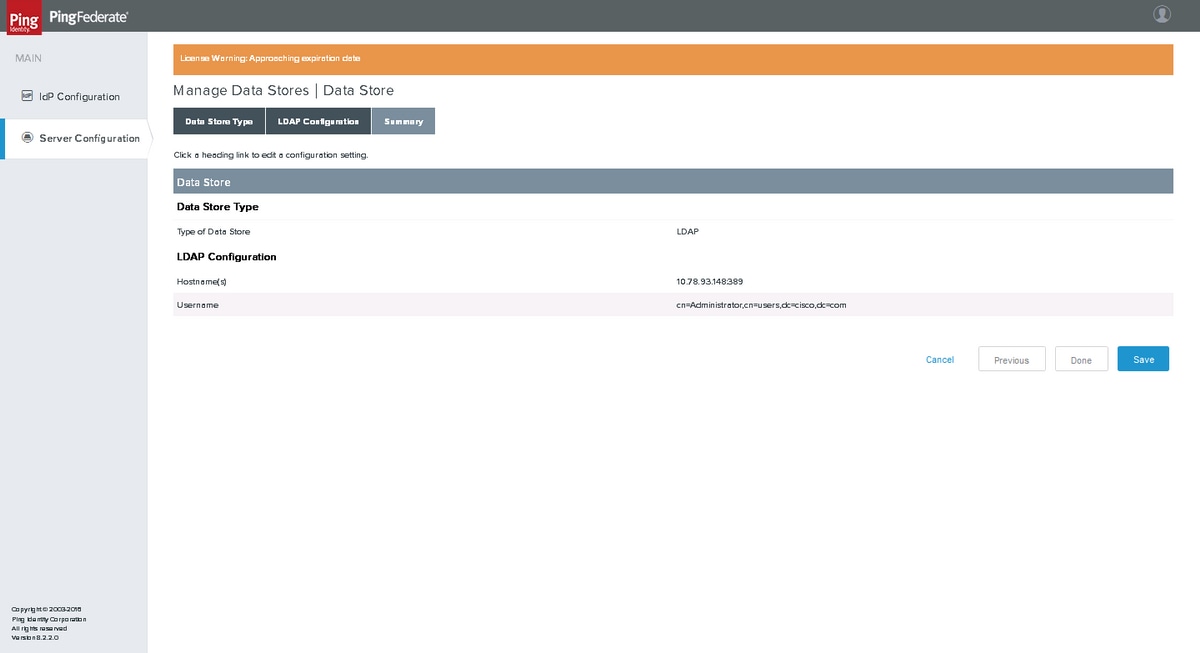
Click Save after verification.
Password Credential Validators
Click Server Configuration > AUTHENTICATION > Password Credential Validators
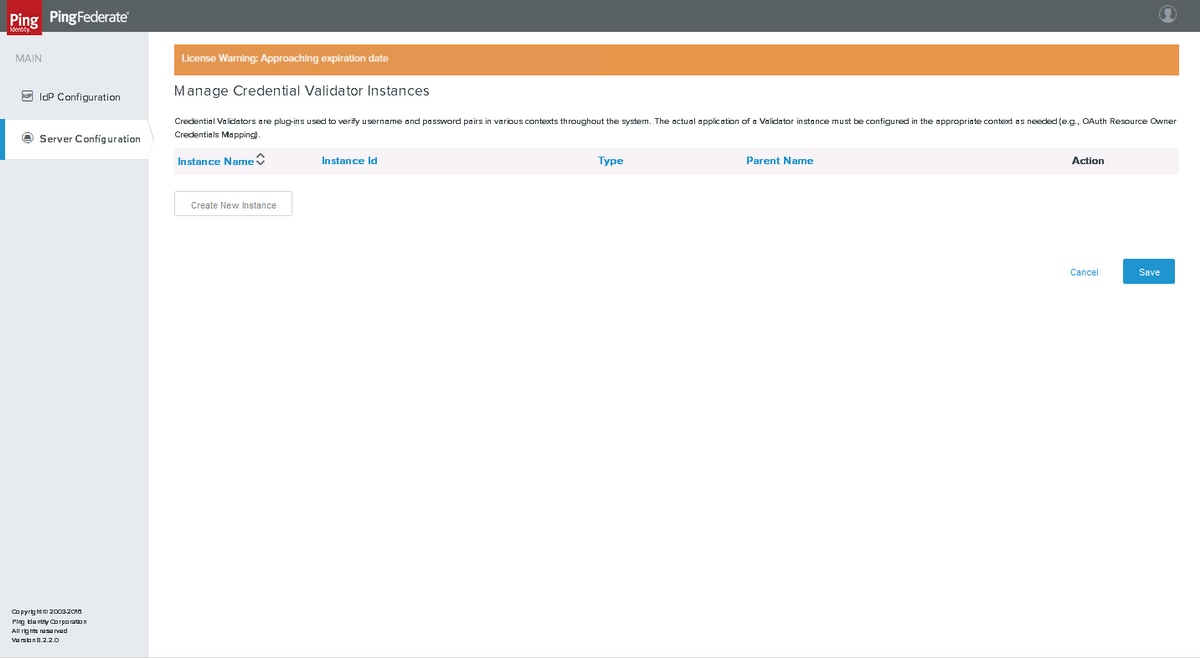
Click Create New Instance.
Type
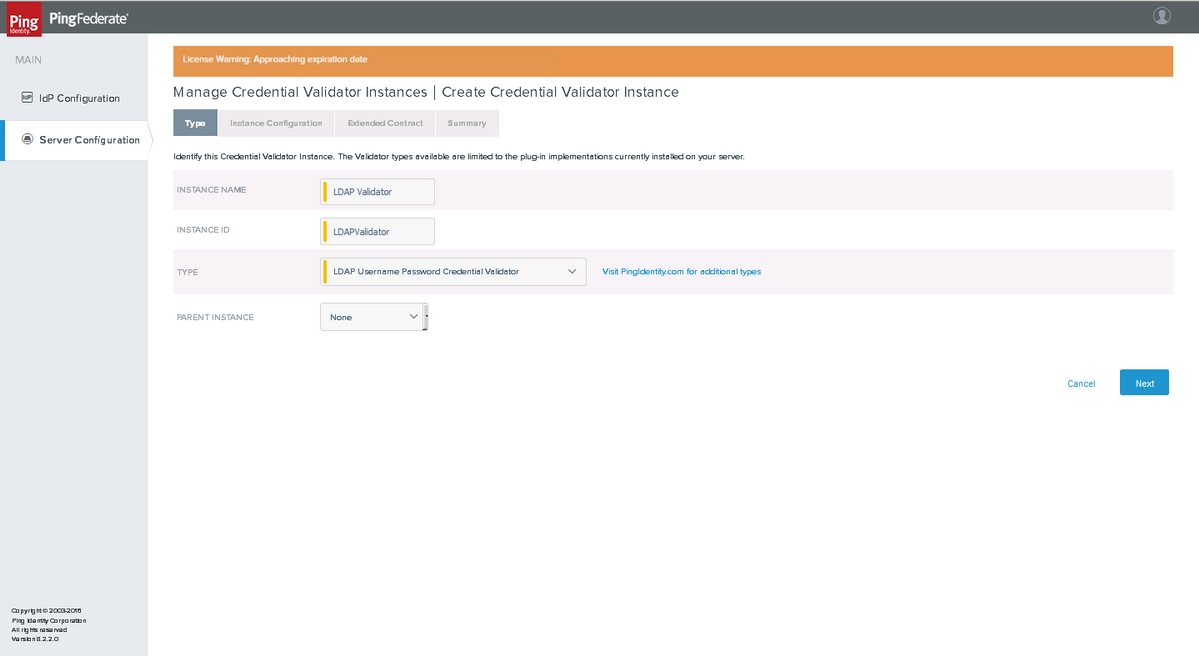
Select the LDAP Username Password Credential Validator as the TYPE. Click Next.
Instance Configuration
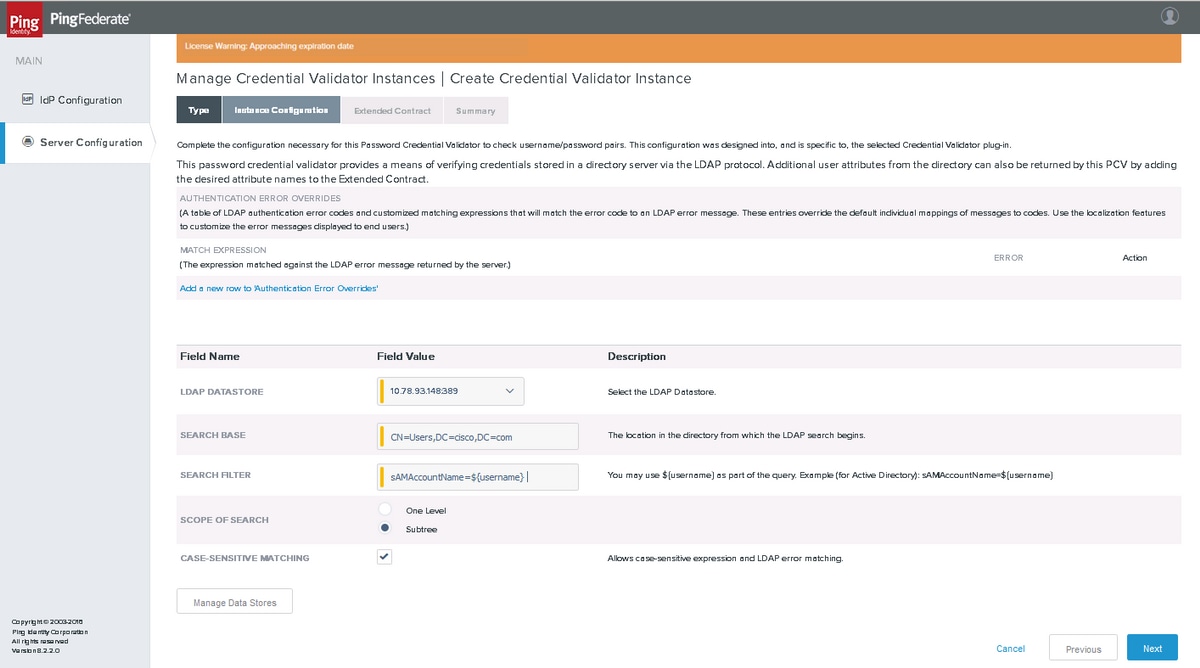
Select the LDAP Datastore and enter the Search Base, Search Filter and the Scope of Search. Click Next.
Extended Contract
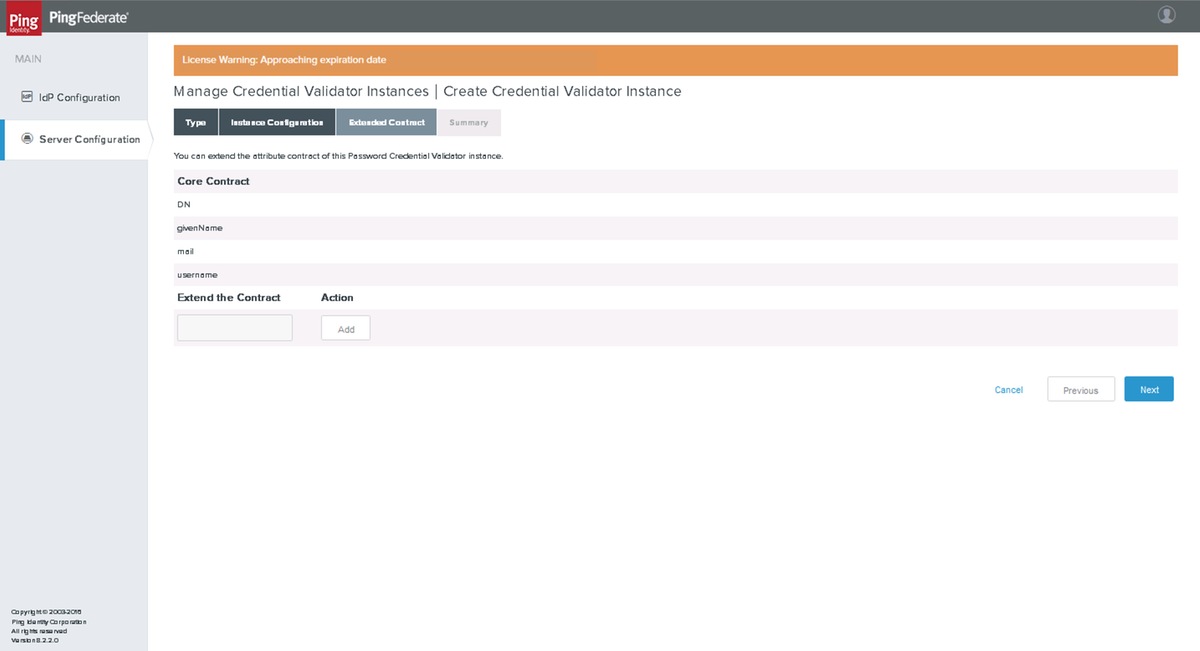
Click Next
Summary
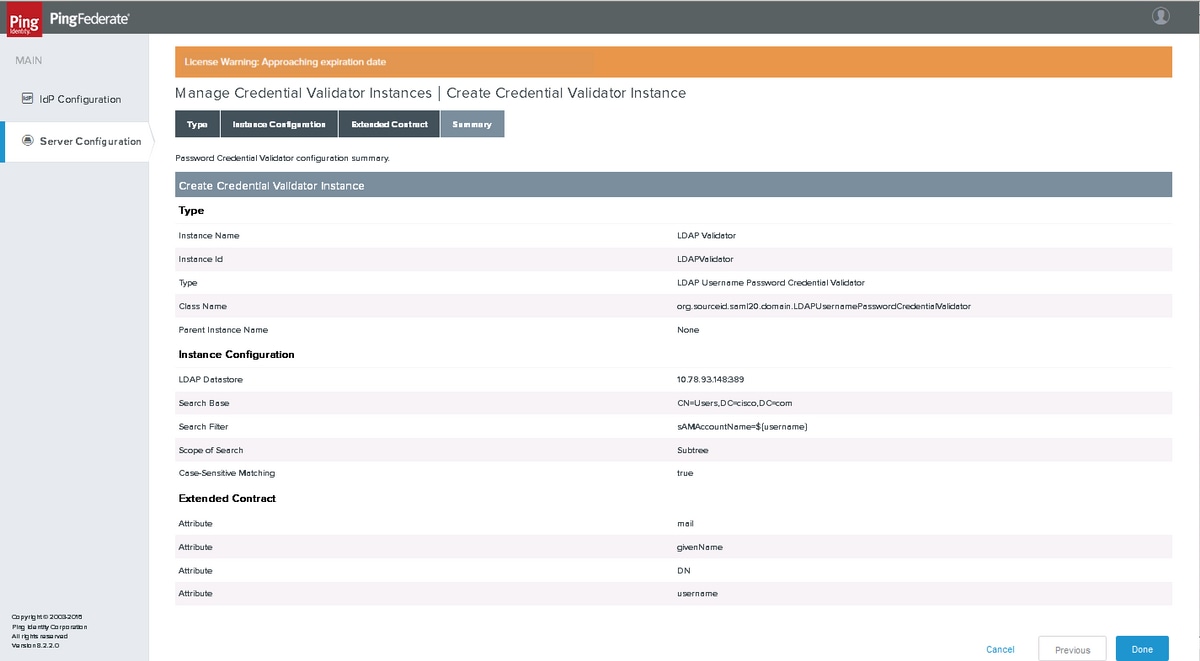
Verify the settings and click Done.
Server Settings
System Administration
Click Server Configuration > SYSTEM SETTINGS > Server Settings
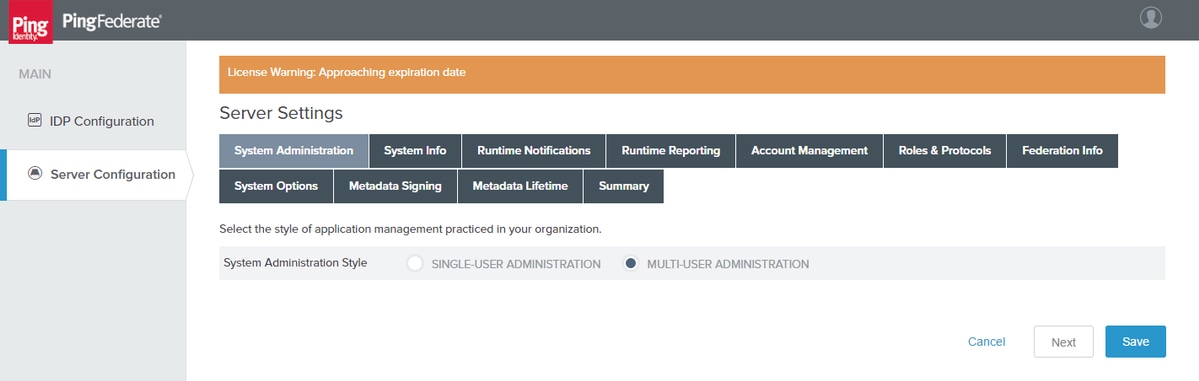
Click Next.
System Info
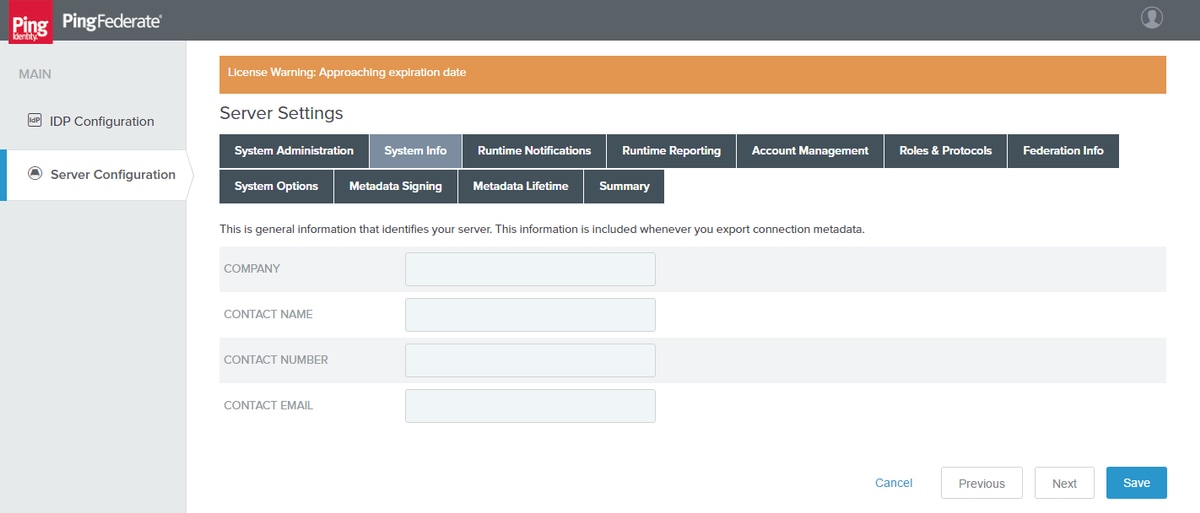
Click Next.
Runtime Notifications

Click Next.
Runtime Reporting
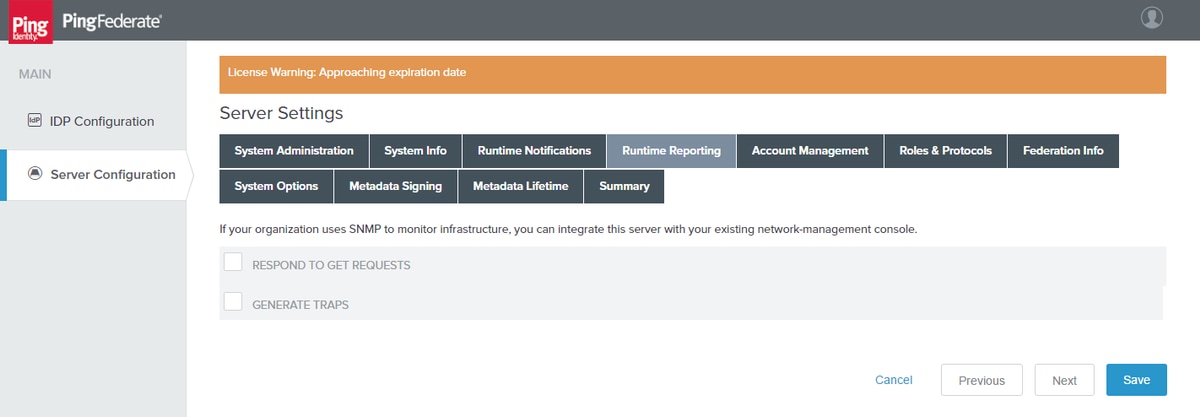
Click Next.
Account Management
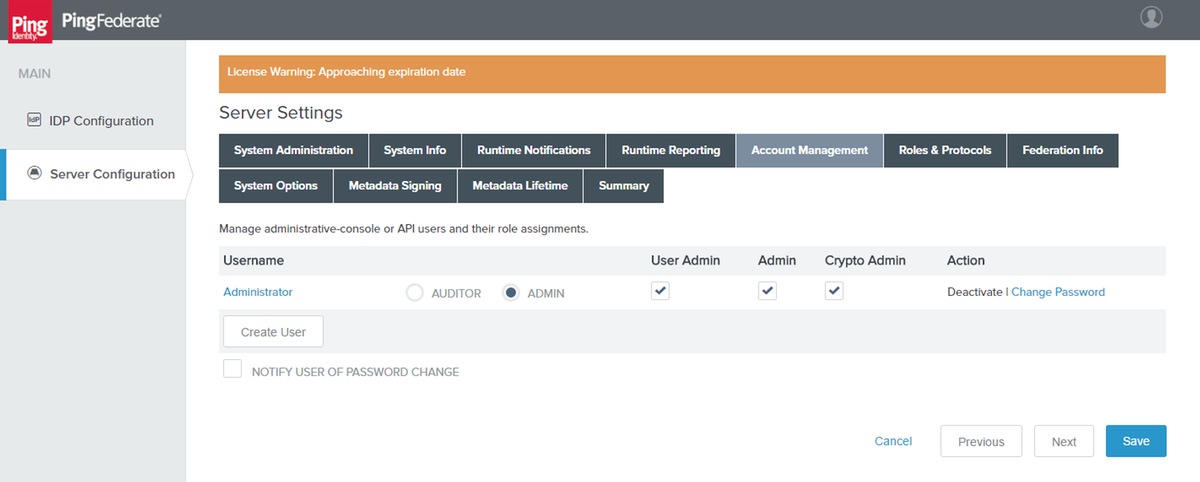
Click Next.
Note: You can add user or change the user's password in this section.
Roles & Protocols
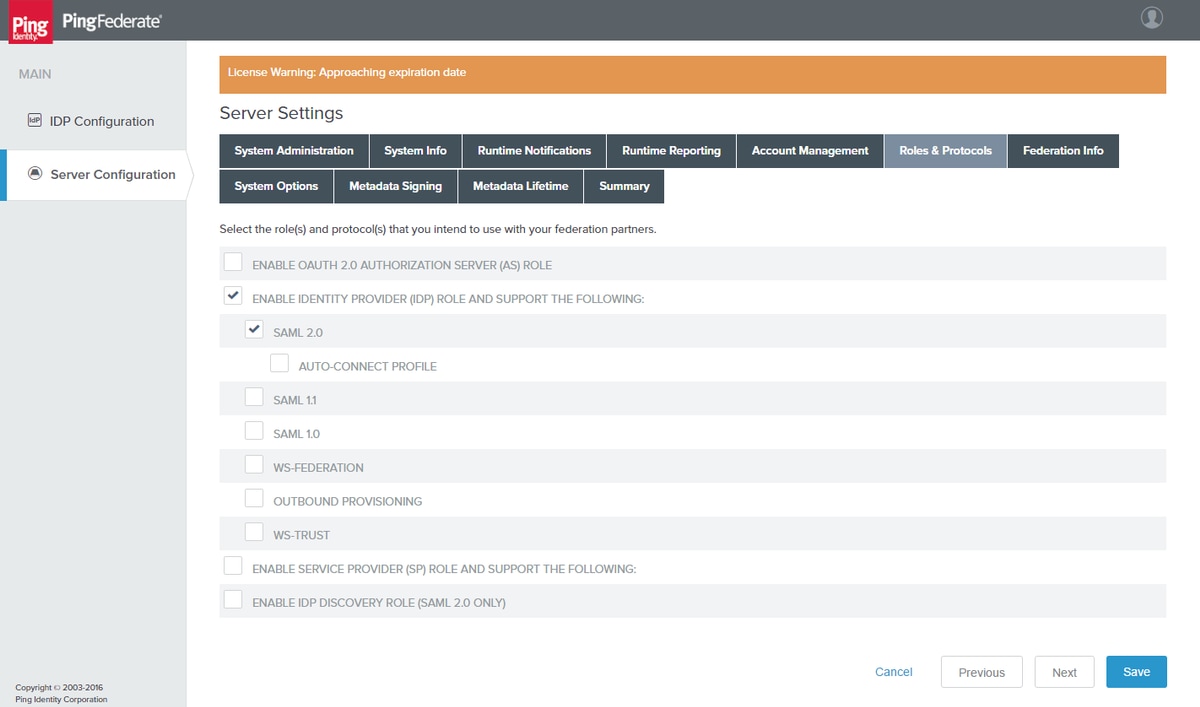
Select the appropriate Role/s and Protocol/s. Click Next.
Federation Info
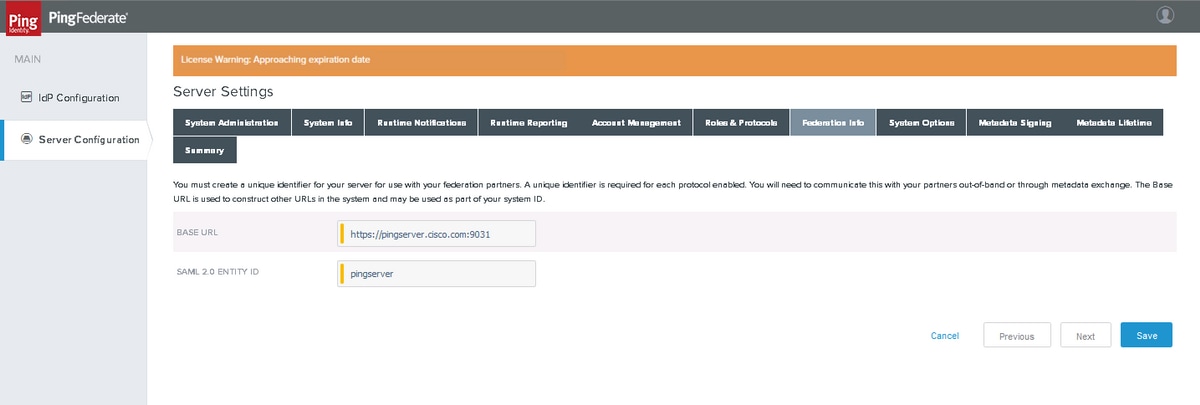
Click Next.
System Options
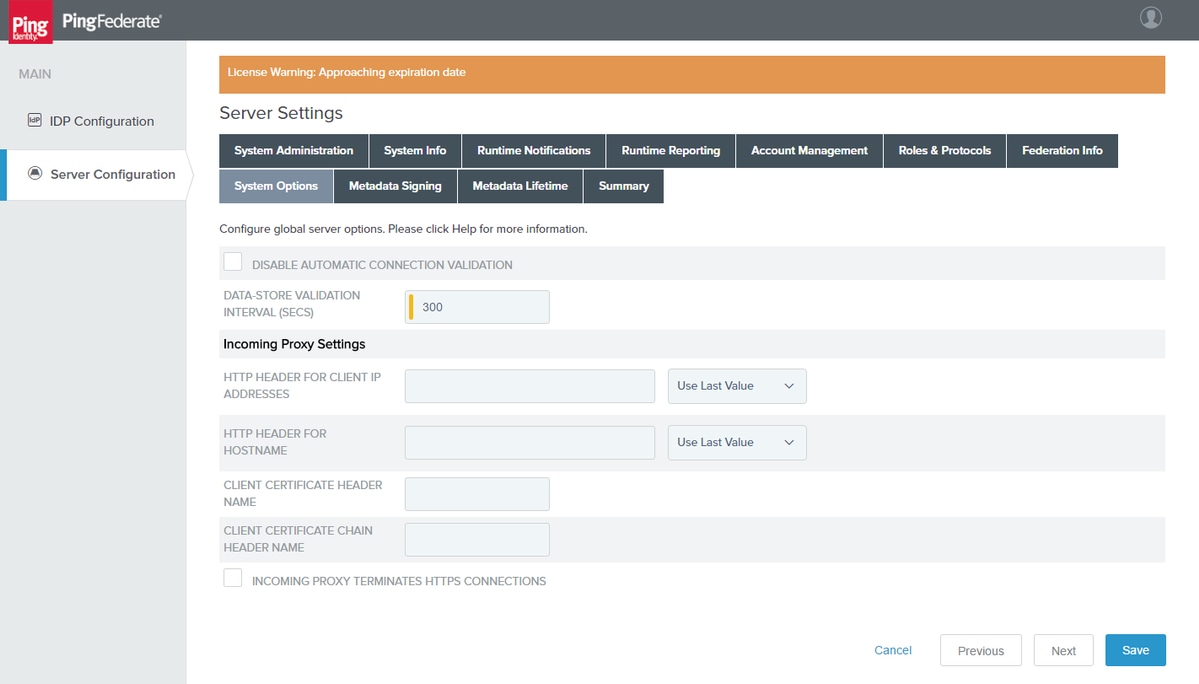
Click Next.
Metadata Signing
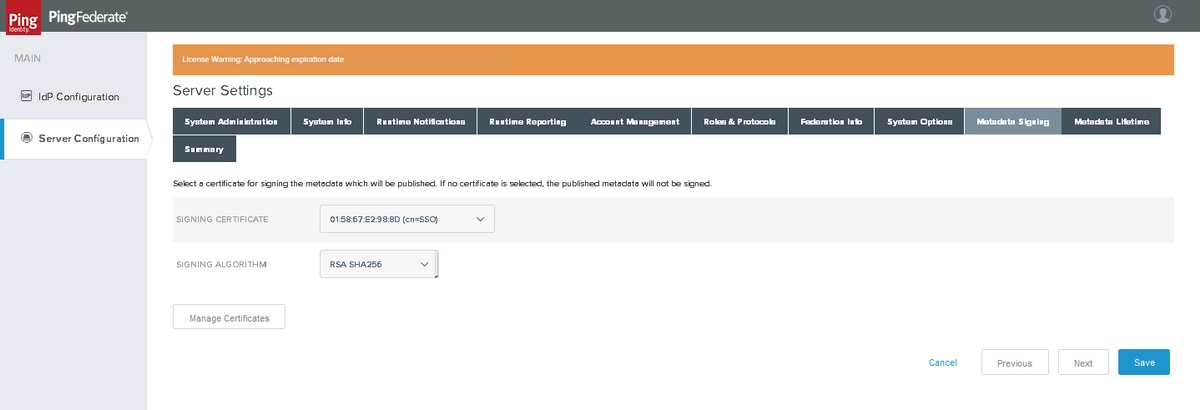
Select the Signing Certificate and the Signing algorithm created earlier as a part of the Certificate configuration. Click Next.
Metadata Lifetime
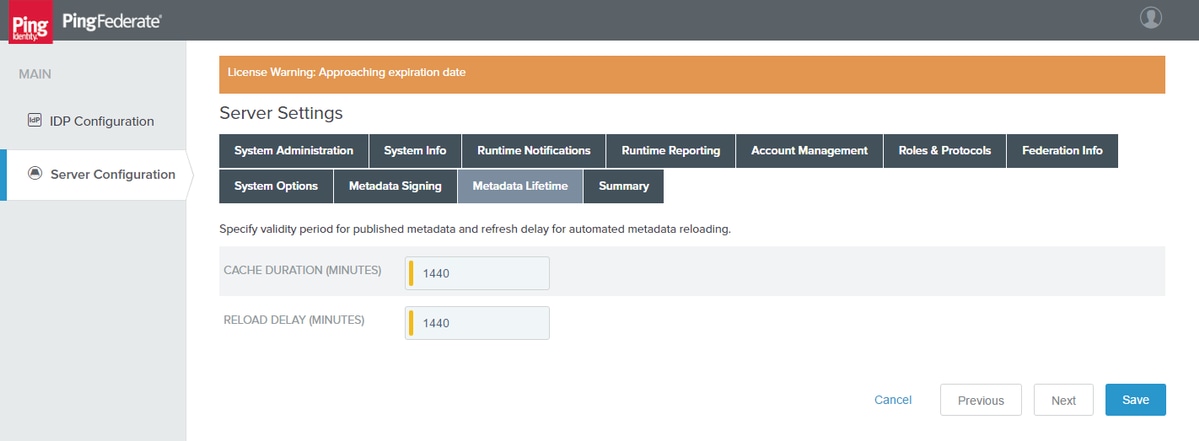
Click Next.
Summary
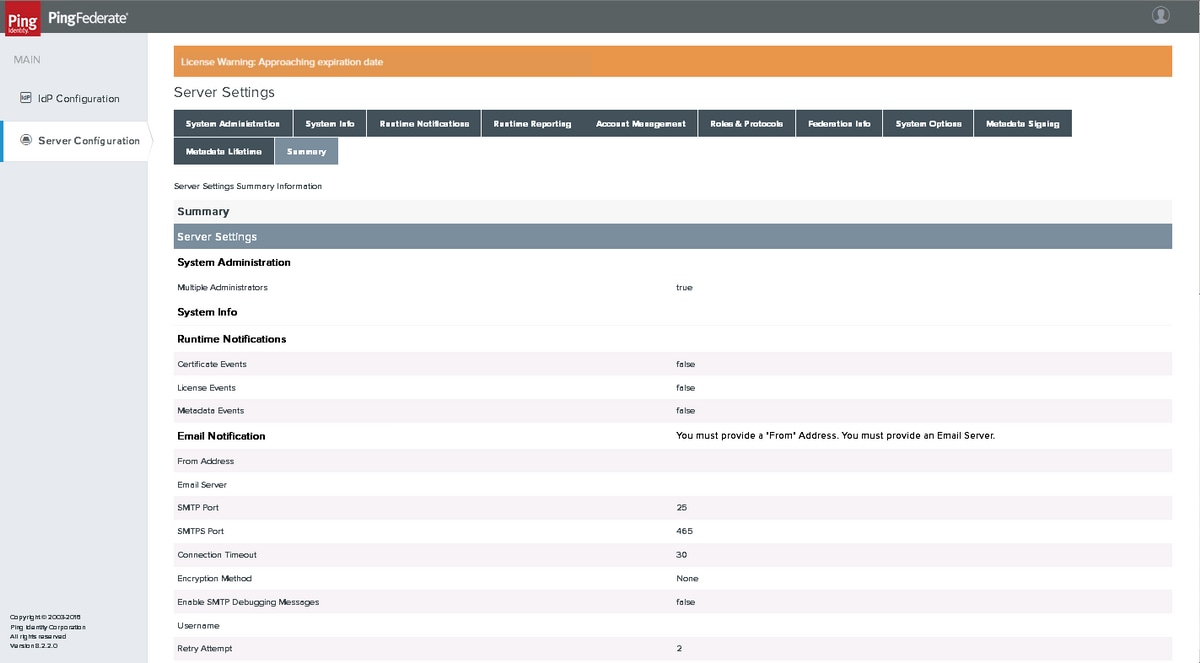
Verify the settings and click Save.
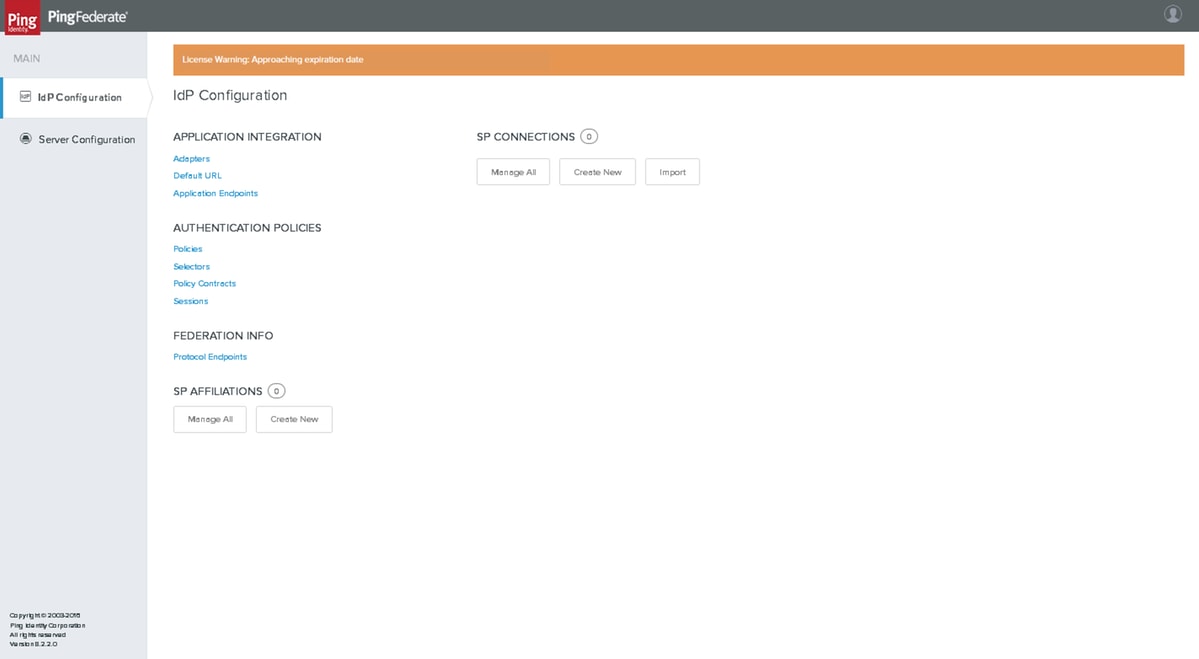
Identity Provider (IdP) Configuration
Adapters
Click IdP Configuration > APPLICATION INTEGRATION > Adapters
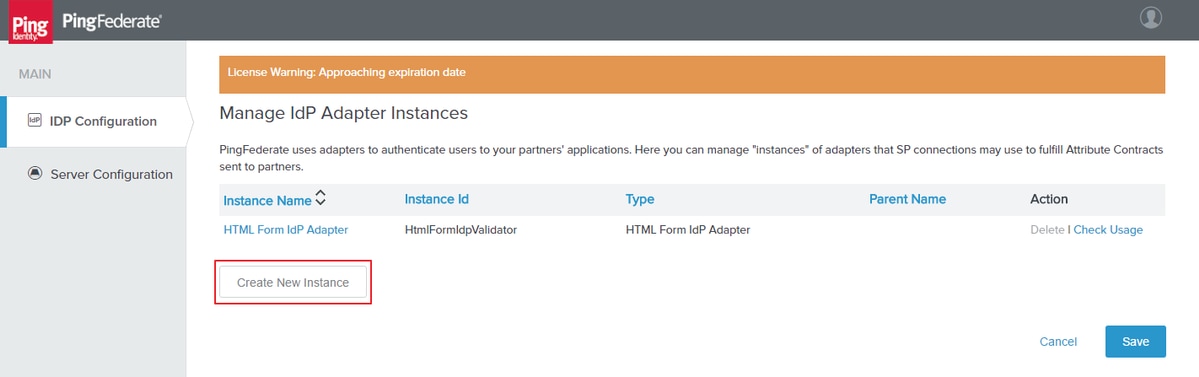
Click Create New Instance.
Type
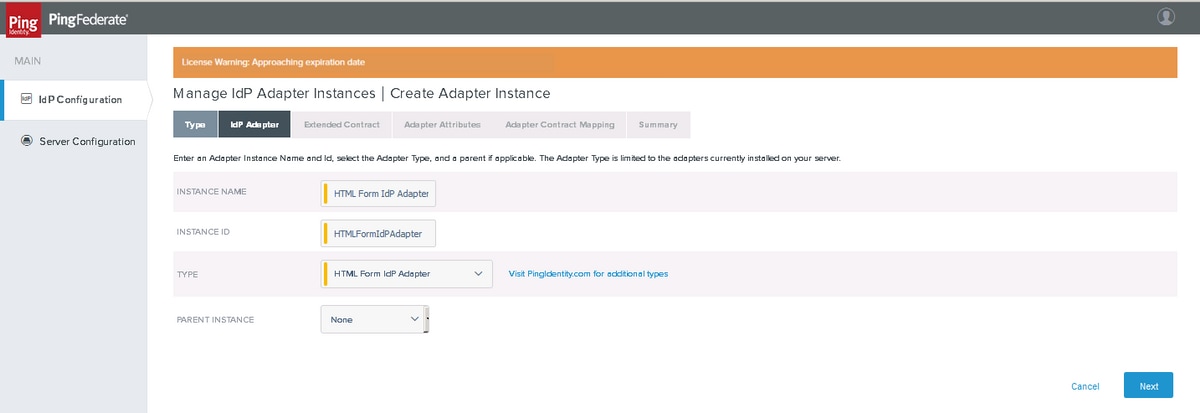
Choose HTML Form IDP Adapter. Click Next.
IdP Adapter
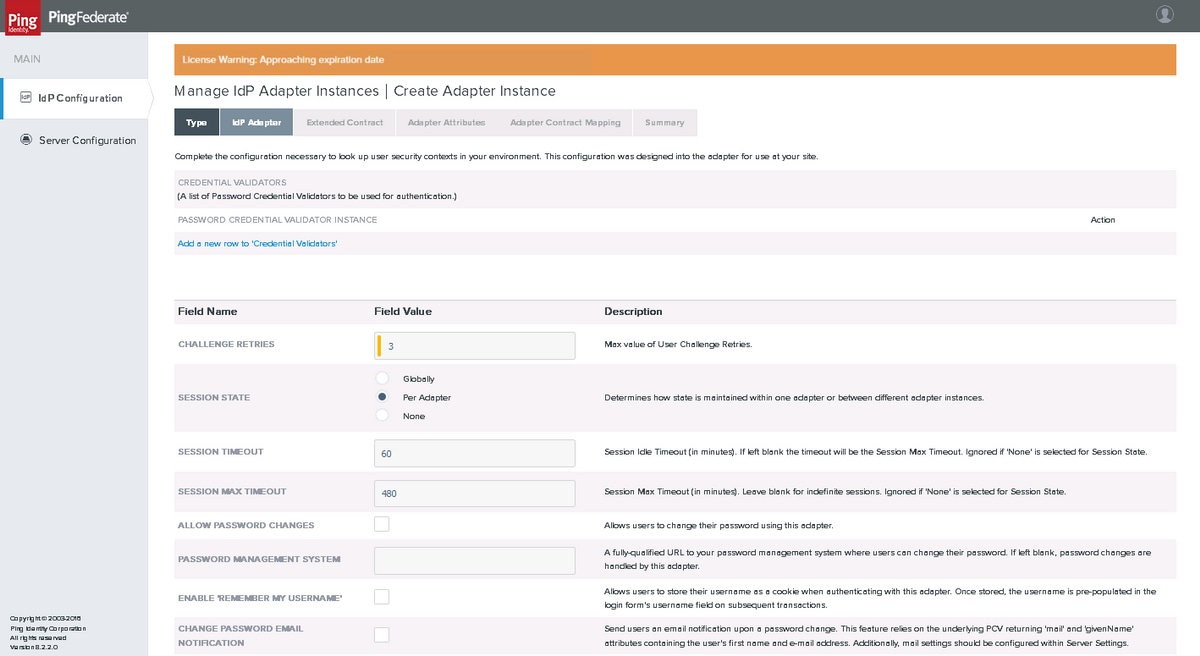
Click Add a new row to 'Credential Validators' and select the LDAP Validator that was created earlier as PASSWORD CREDENTIAL VALIDATOR INSTANCE and click Update. Click Next.
Extended Contract
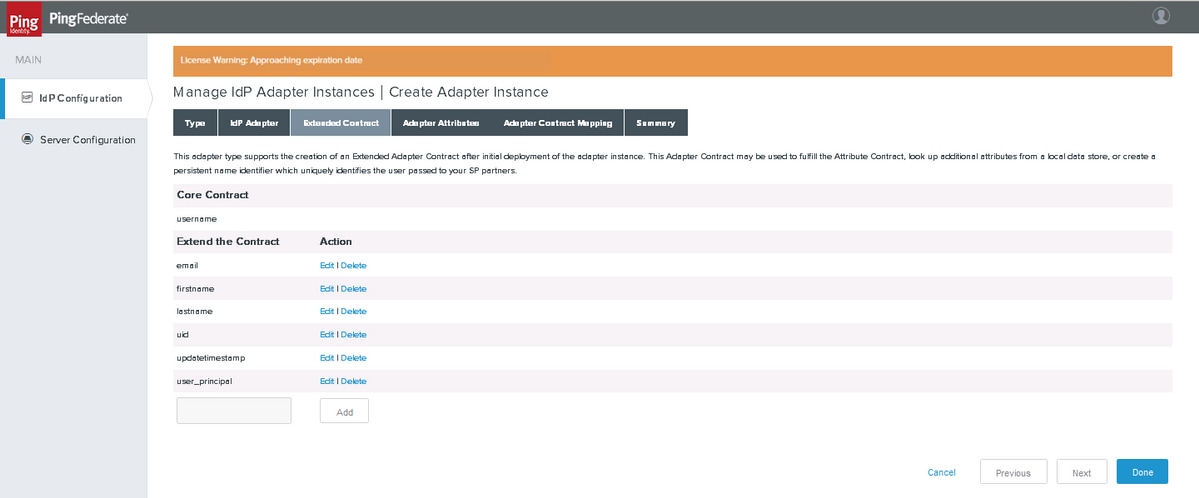
Add the contracts as shown. Click Next.
Adapter Attributes
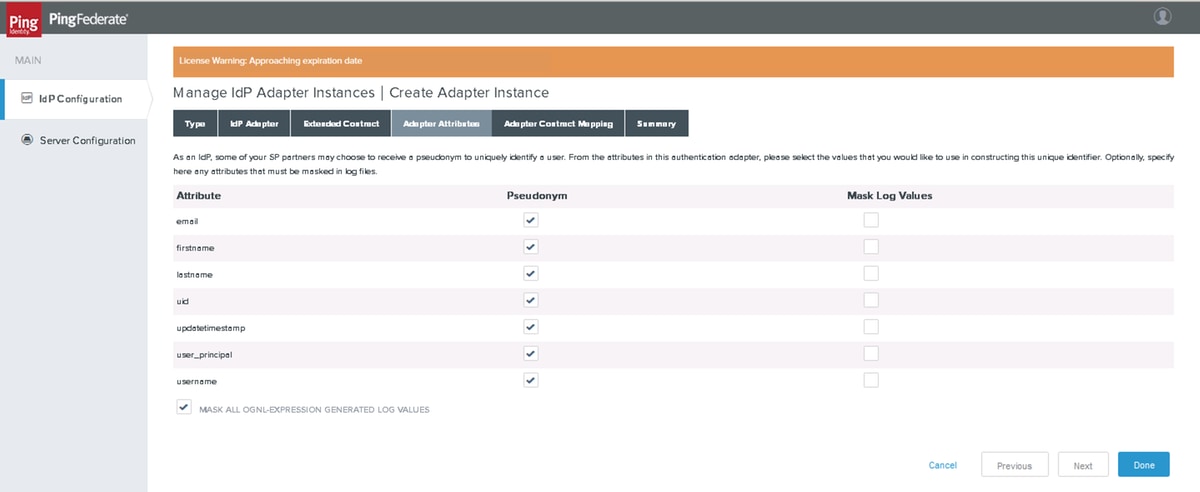
Click Next.
Adapter Contract Mapping
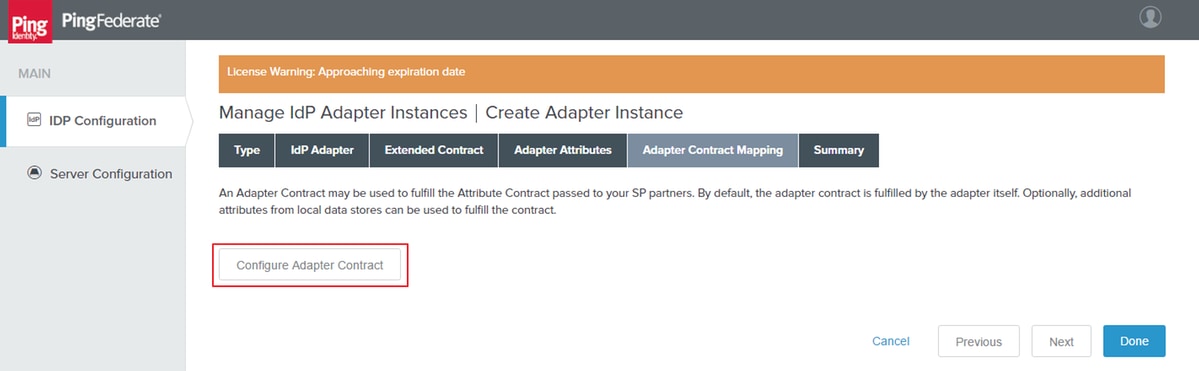
Click Configure Adapter Contract.
Attribute Sources & User Lookup

Add an attribute source and select the LDAP Store created earlier. Click Next.
Adapter Contract Fulfillment
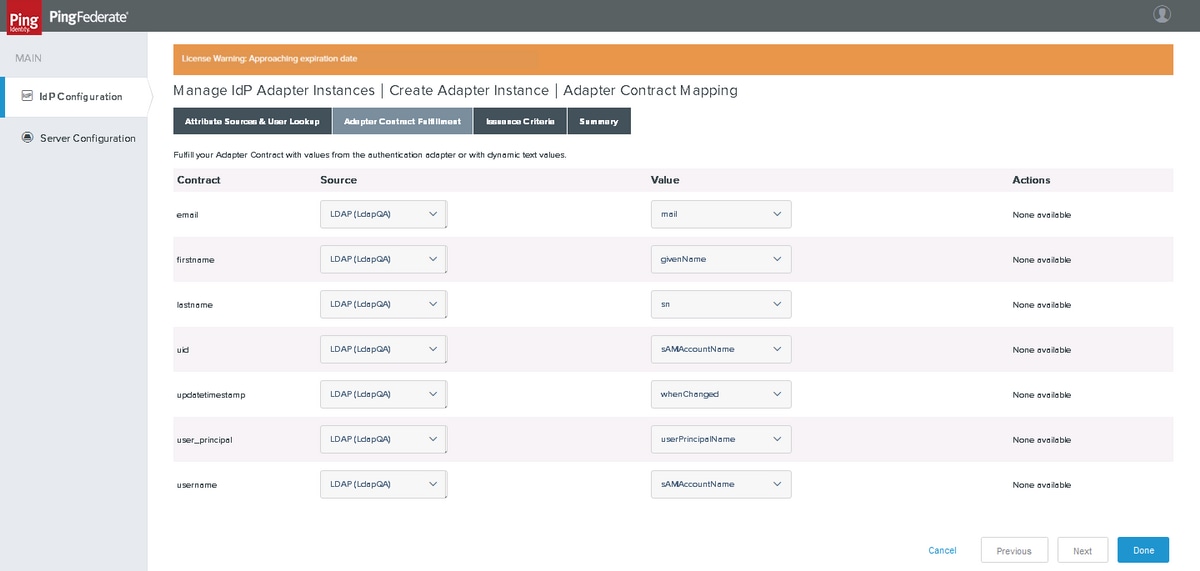
Map the attributes. Click Next.
Issuance Criteria
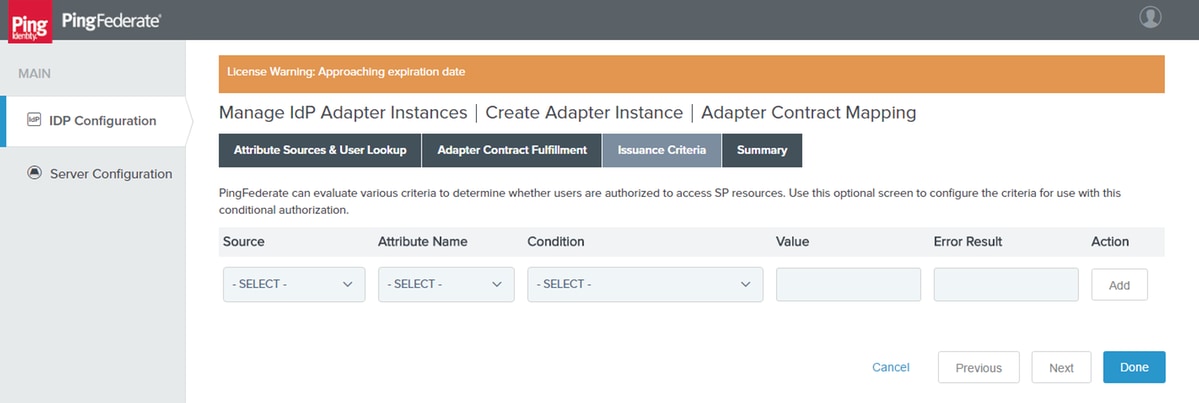
Click Next.
Summary
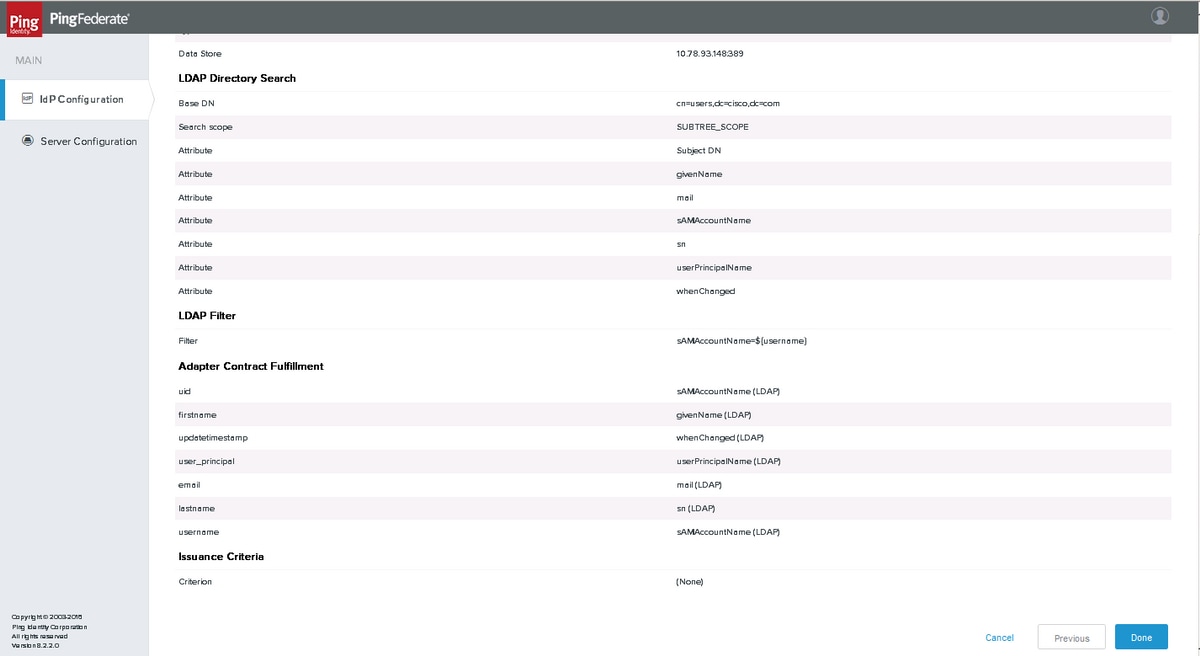
Verify the settings and click Done.
SP Connections
Create new SP connections
Connection Type
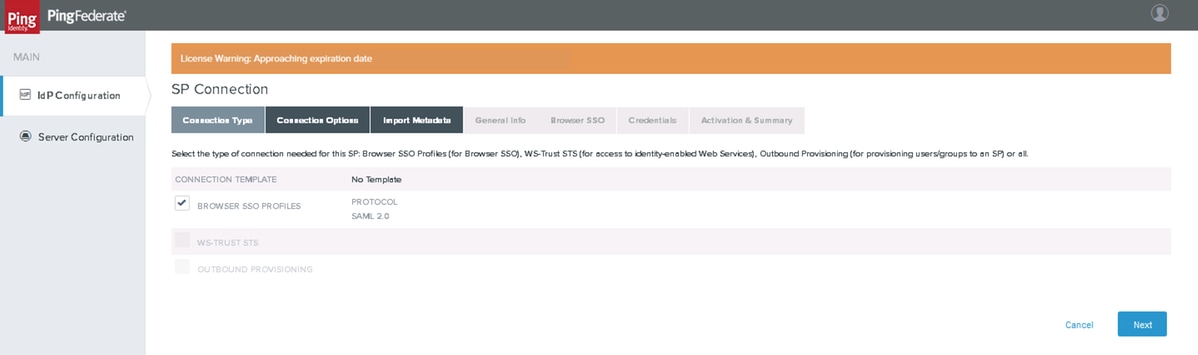
Click Next.
Connection Options

Click Next
Import Metadata
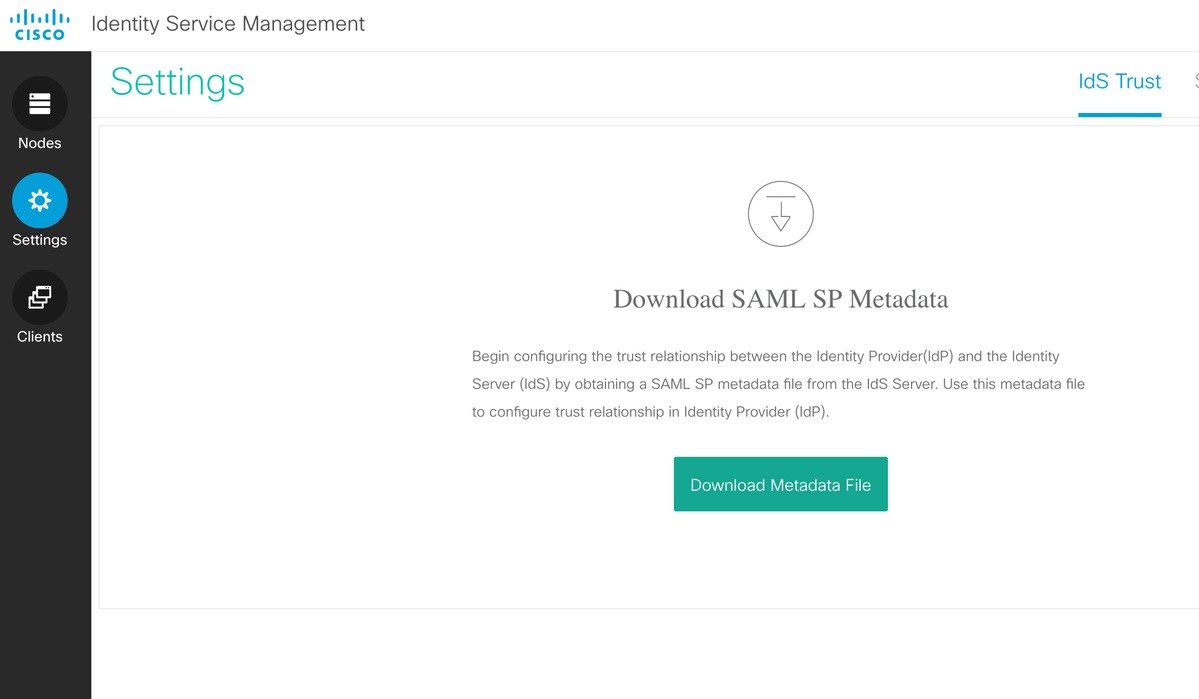
Download Service Provider's metadata xml file from Cisco Identity Service Admin > Settings > IdS Trust > Download Metadata
Upload the Service Provider's metadata xml file to PingFederate.
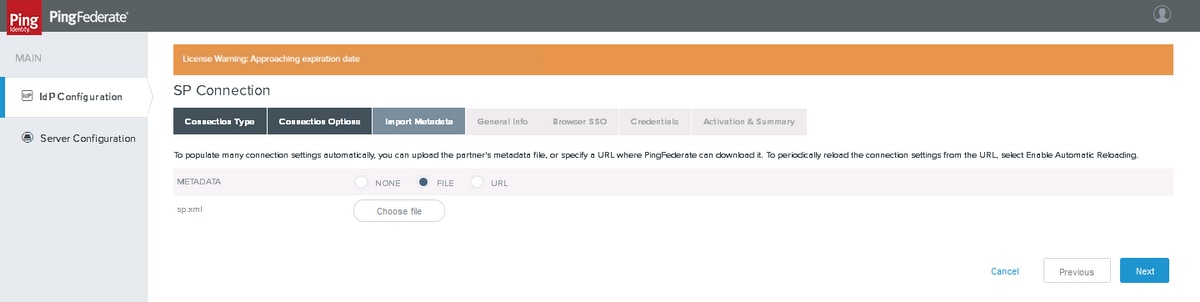
Choose the downloaded xml file and Click Next
Metadata Summary

Click Next
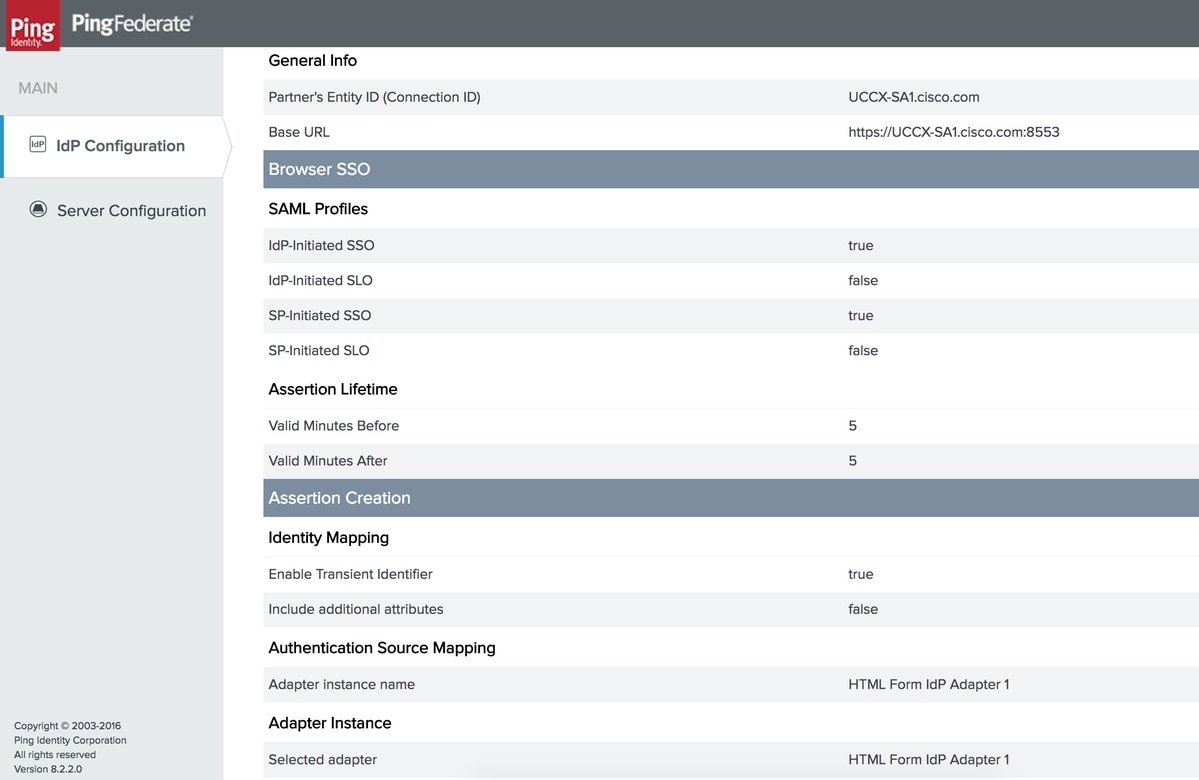
General Info

Click Next
Browser SSO
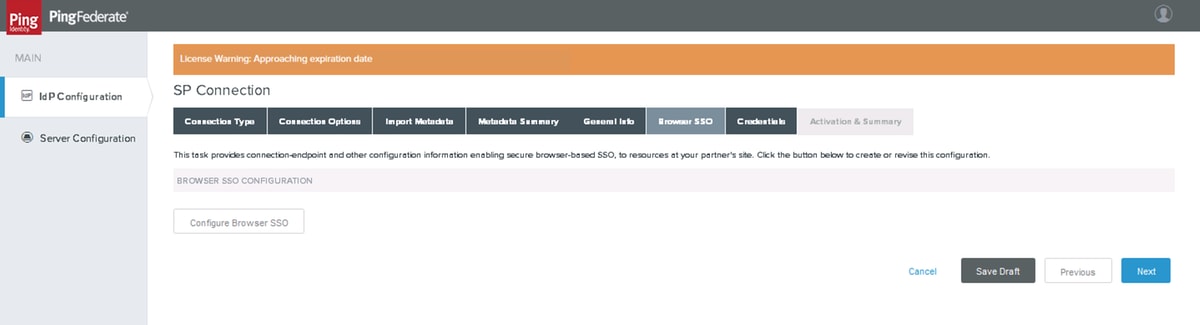
Click Configure Browser SSO
Security Assertion Markup Language (SAML) Profiles
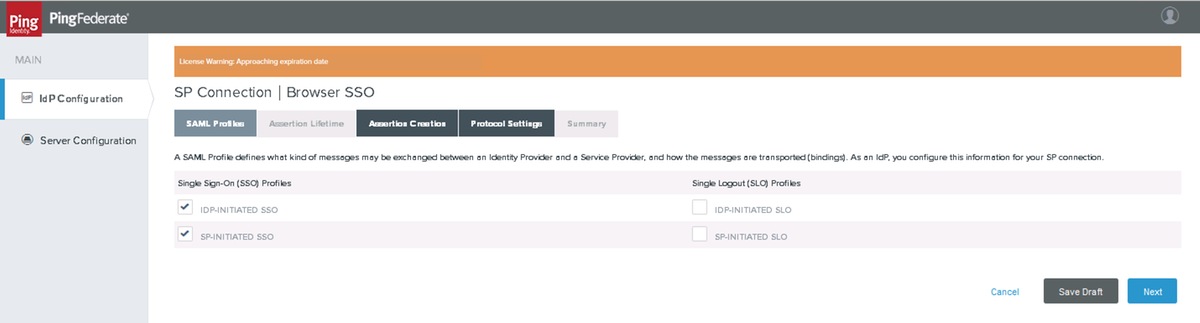
Click Next
Note: Single Logout (SLO) is not supported by Cisco Identity Service (IdS) in 11.6 and are not selected.
Assertion Lifetime
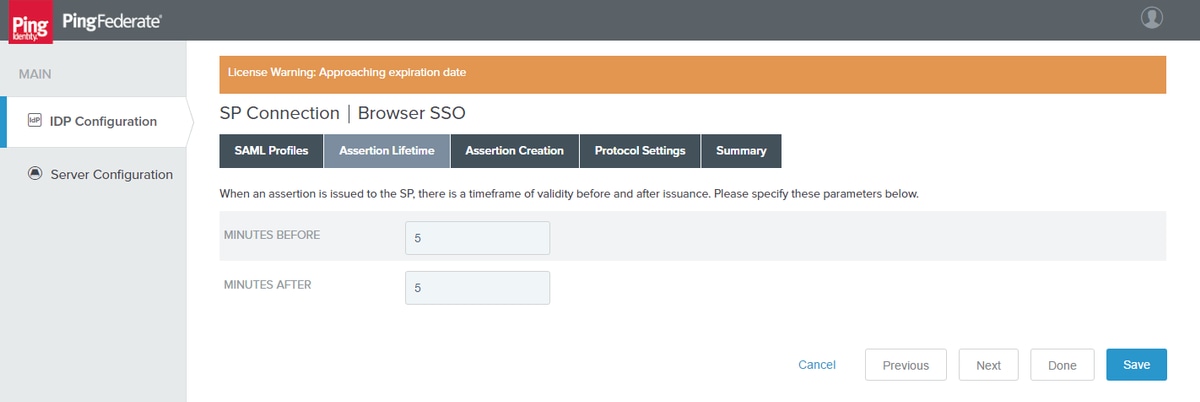
Click Next
Assertion Creation
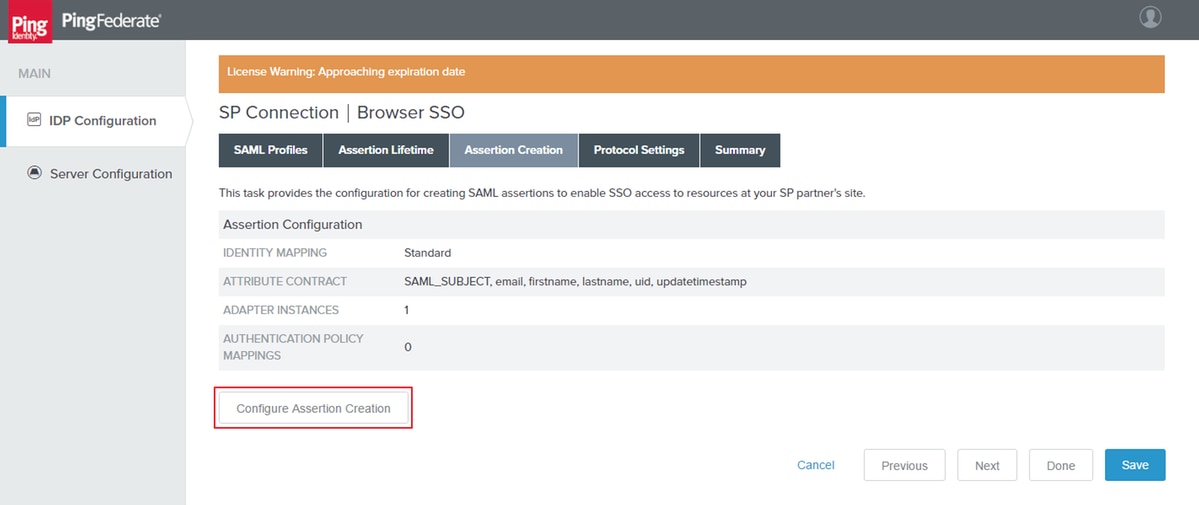
Click Configure Assertion Creation
Identity Mapping

Click Next
Attribute Contract
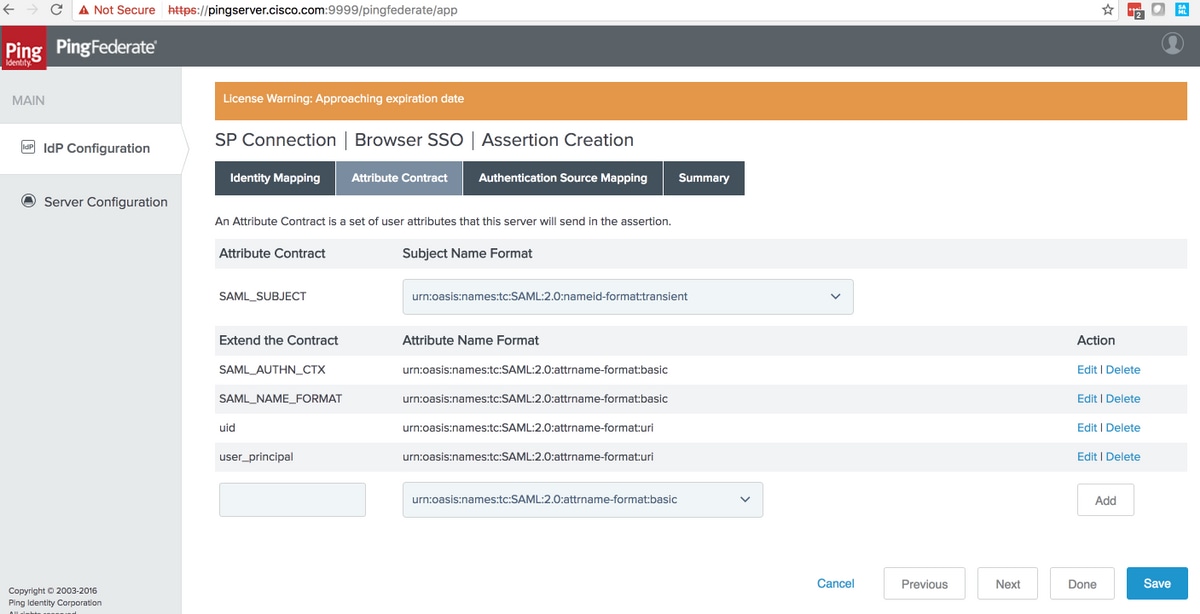
Warning: These attributes are mandatory for Cisco Identity Service (IdS) interoperability with PingFederate.
|
Attribute Contract
|
Purpose
|
|---|---|
|
SAML_SUBJECT |
Used by the PingFederate search filter to check if the mapped value is met |
| SAML_AUTHN_CTX | Used in the SAML response to indicate 'PasswordProtectedTransport' authentication contet |
| SAML_NAME_FORMAT | Used in the SAML response to indicate SAML 2.0 transient name-id format |
| uid | Used by Cisco IdS to identify the authenticated user |
| user_principal | Used by Cisco IdS to identify the complete name (i.e. id + domain) of the authenticated user |
Administrator can customize name-format alternatives via the custom-name-formats.xml configuration file located in this directory:
<pf_install>/pingfederate/server/default/data/config-store.
In order to operate SSO with transient as the name identifier, add the xml item under the saml2-subject-name-formats section: <con:item name="urn:oasis:names:tc:SAML:2.0:nameid-format:transient">urn:oasis:names:tc:SAML:2.0:nameid-format:transient</con:item>
Click Next
Authentication Source Mapping
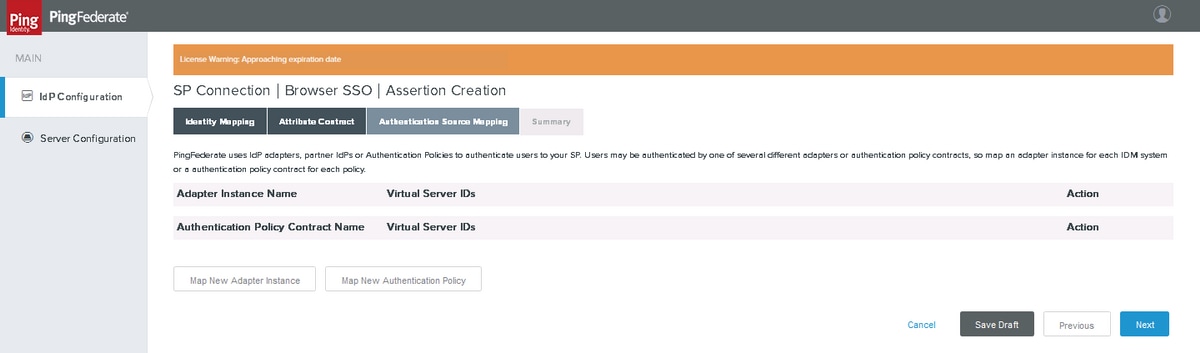
Click Map New Adapter Instance
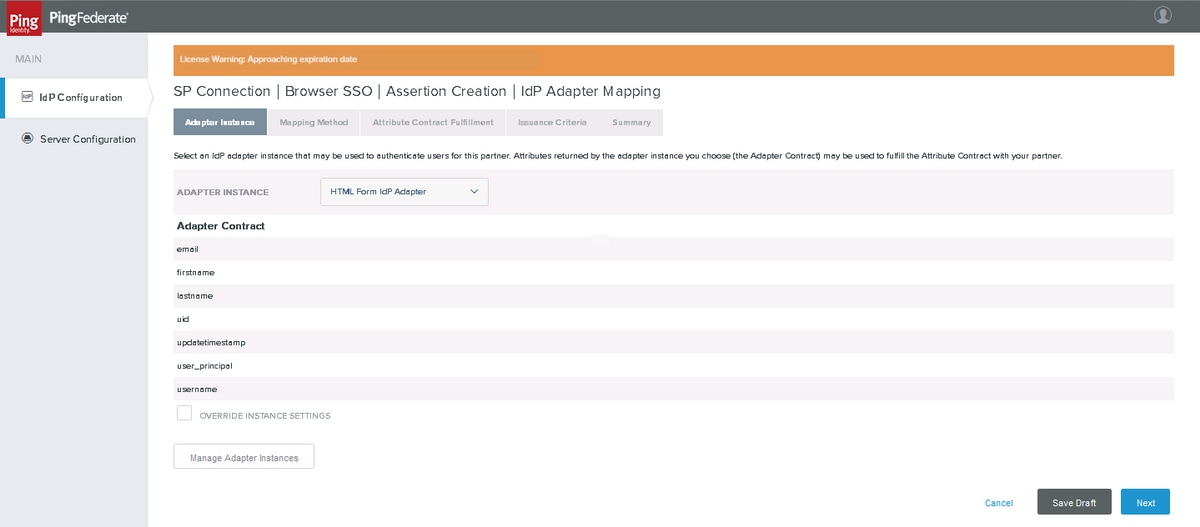
Map the HTML Form IdP Adapter created earlier. Click Next
Mapping Method
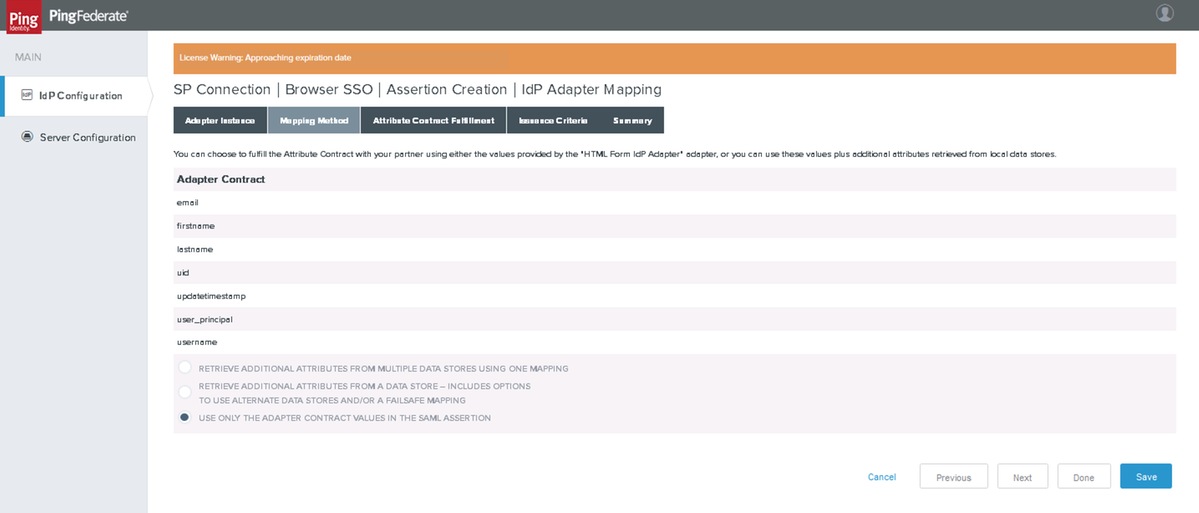
Click Next
Attribute Contract Fulfillment
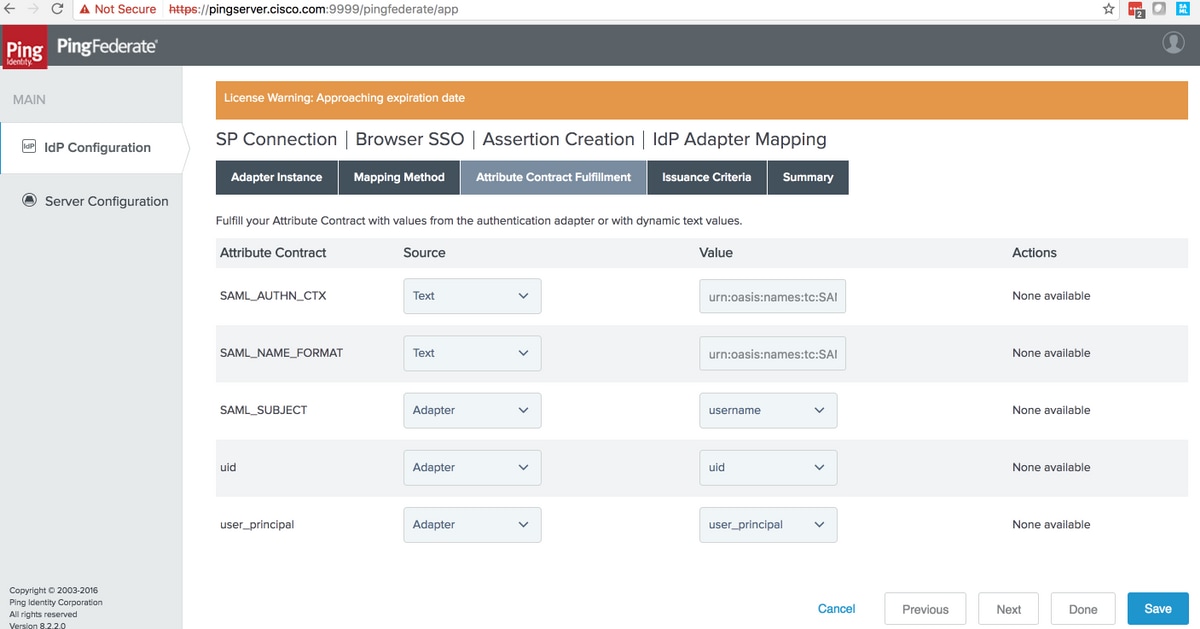
Ensure that the values are set to
|
Attribute Contract
|
Source
|
Value
|
|---|---|---|
|
SAML_SUBJECT |
Adapter |
username Very Important Note: value used for this setting must match with the one used in the LDAP filter setting (section#3.1.3.2. Instance Configuration) Note: 'username' is used here since the filter used there was sAMAccountName=${username} |
| SAML_AUTHN_CTX | text |
urn:oasis:names:tc:SAML:2.0:ac:classes:PasswordProtectedTransport |
| SAML_NAME_FORMAT | text | urn:oasis:names:tc:SAML:2.0:nameid-format:transient |
| uid | Adapter | uid |
| user_principal | Adapter | user_principal |
Click Next
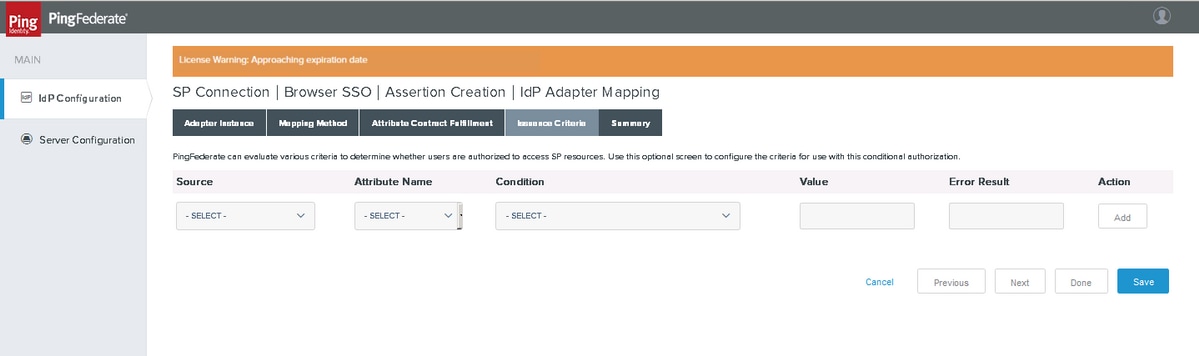
Issuance Criteria
Summary

Verify the settings and click Done
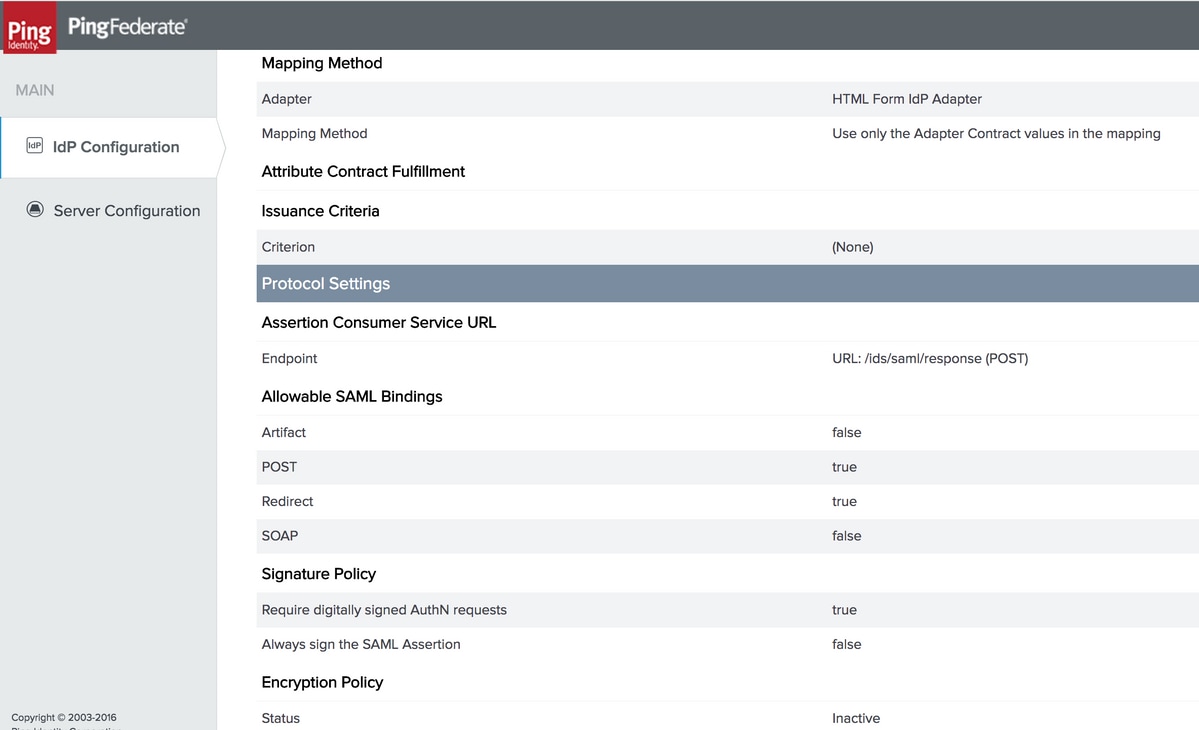
Protocol Settings

Click Configure Protocol Settings
Assertion Consumer Service URL
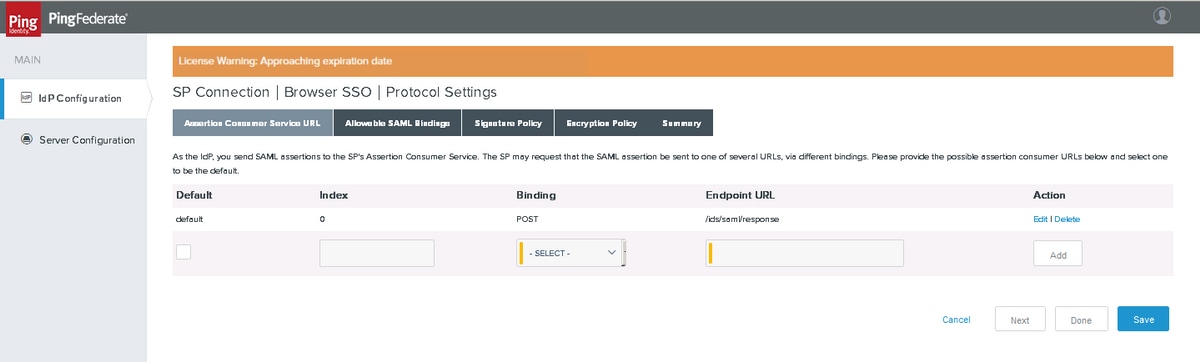
Add POST Binding SSO Endpoint. Click Next
Allowable SAML Bindings
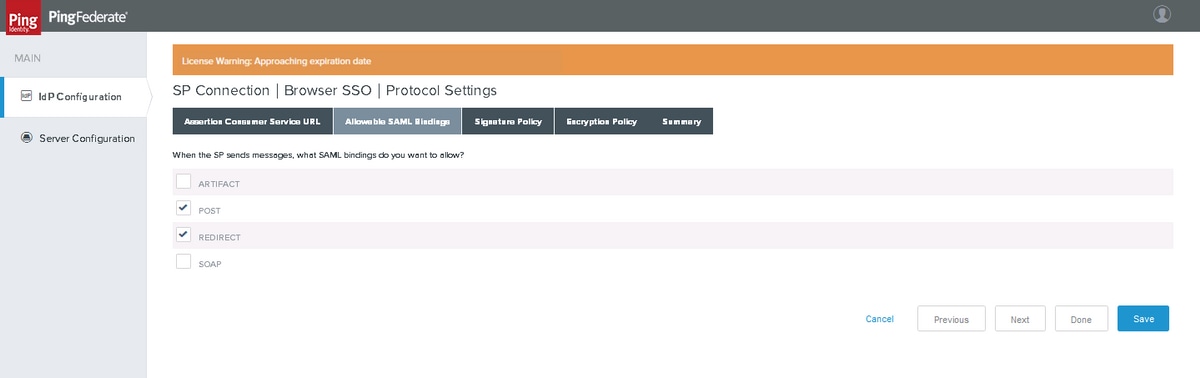
Click Next
Signature Policy
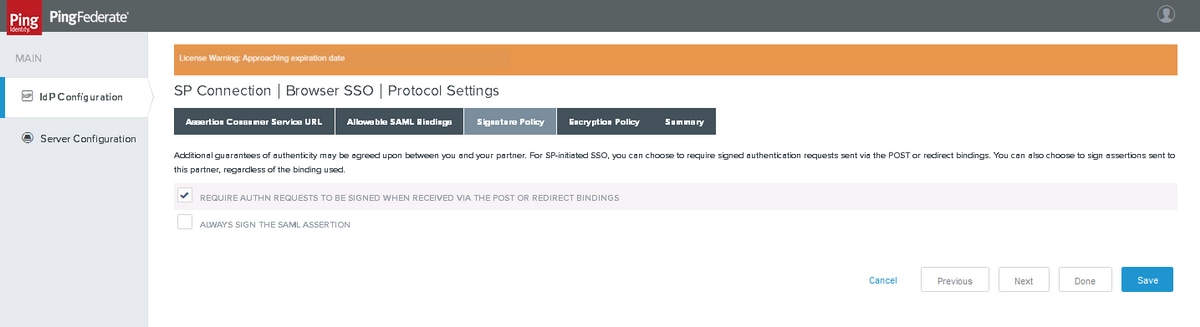
Note: Cisco IdS warrants the SAML message to be 'signed' and hence do not select 'ALWAYS SIGN THE SAML ASSERTION'. This is because PingFederate would sign either 'SAML assertion' or 'SAML response' but not both.
Click Next
Encryption Policy

Note: Cisco IdS does not support encrypted SAML flow and hence choose 'NONE' for the 'Encryption Policy' setting.
Click Next
Summary
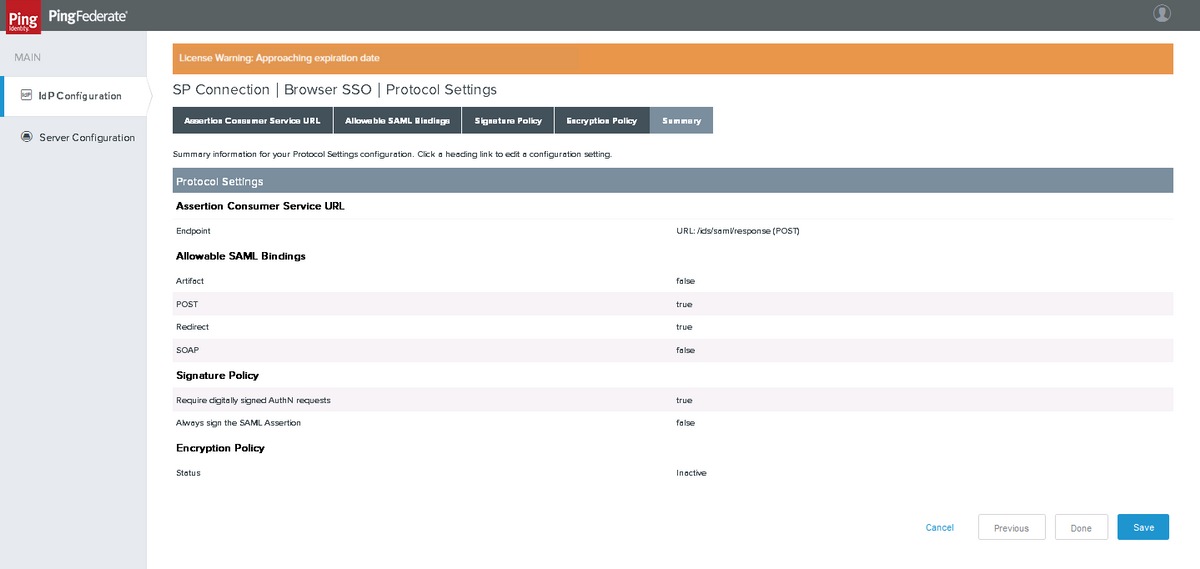
Verify the settings and click Done
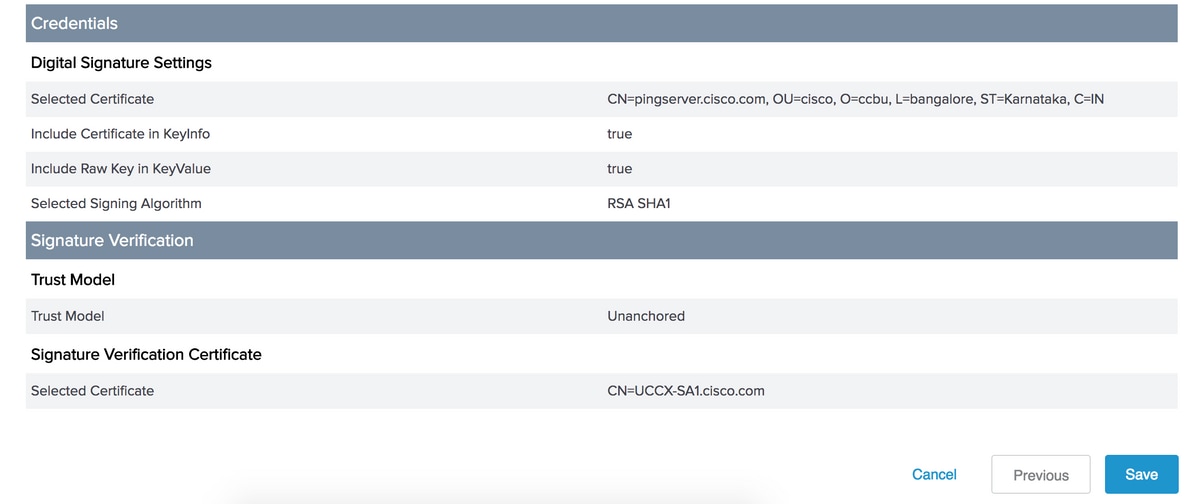
Credentials
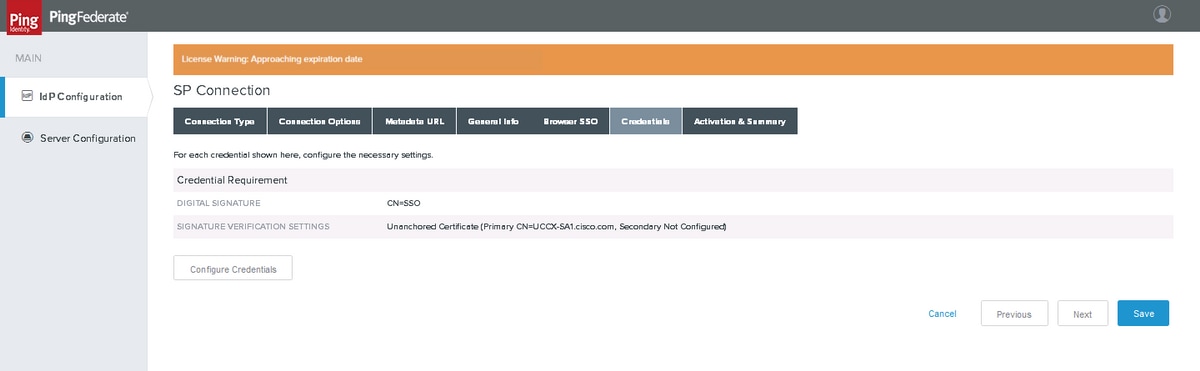
Click Configure Credentials
Digital Signature Settings
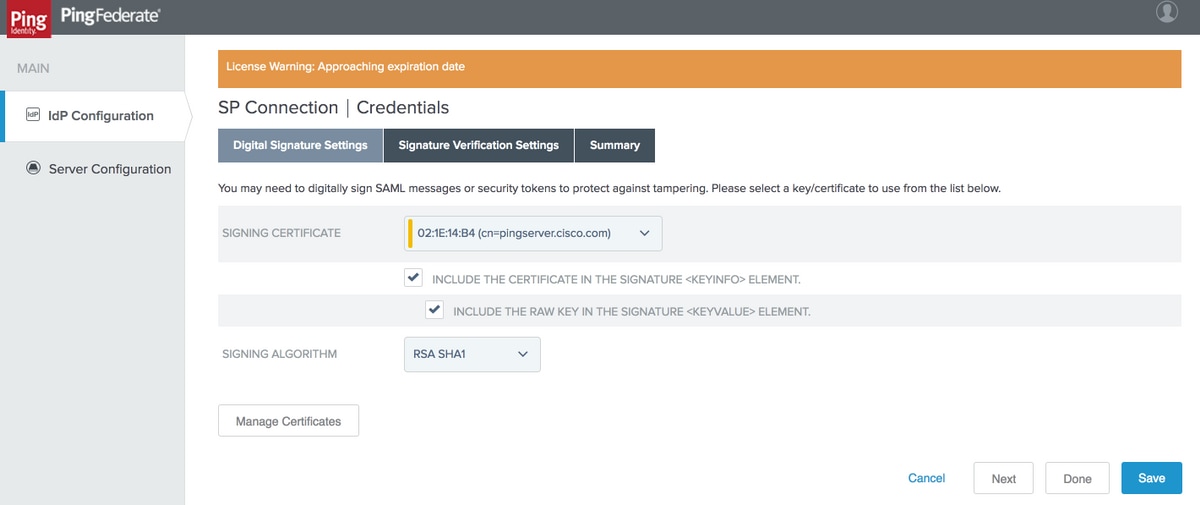
Select SIGNING CERTIFICATE created earlier. If not, you can click Manage Certificates to create a certificate.
Note:Cisco IdS does not support RSA SHA256 for SAML response signature and hence 'RSA SHA1' is used.
Click Next
Signature Verification Settings
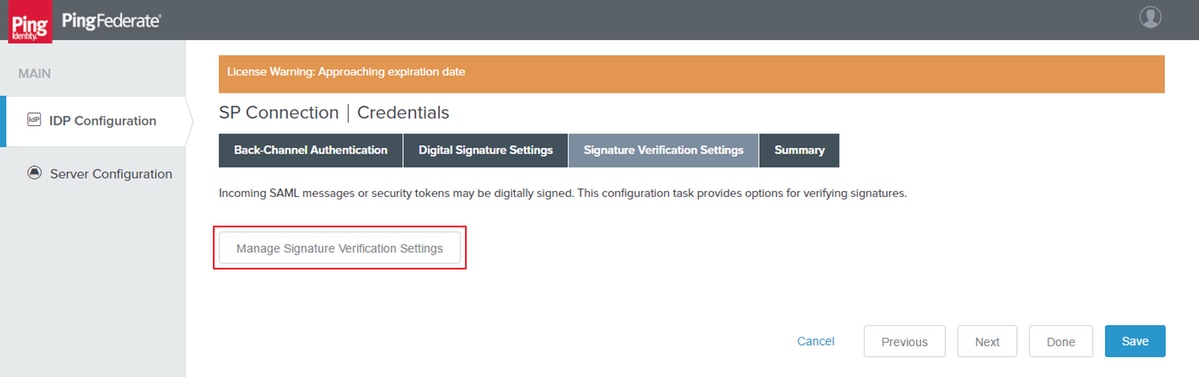
Click Manage Signature Verification Settings
Trust Model
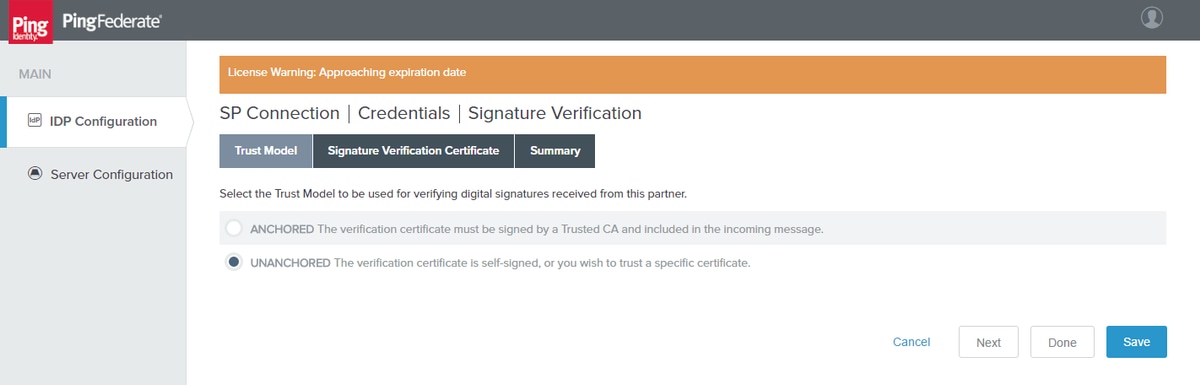
Click Next
Signature Verification Certificate
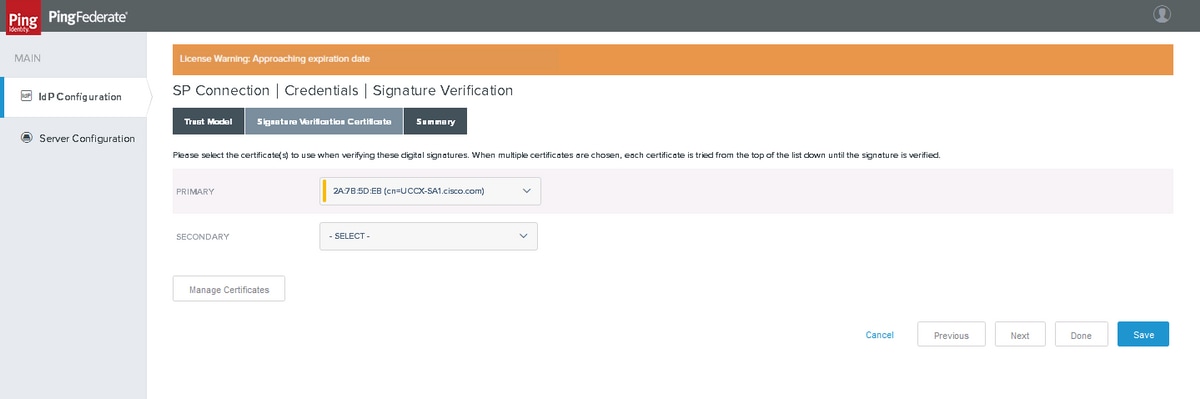
Click Manage Certificates to import certificates from SP.
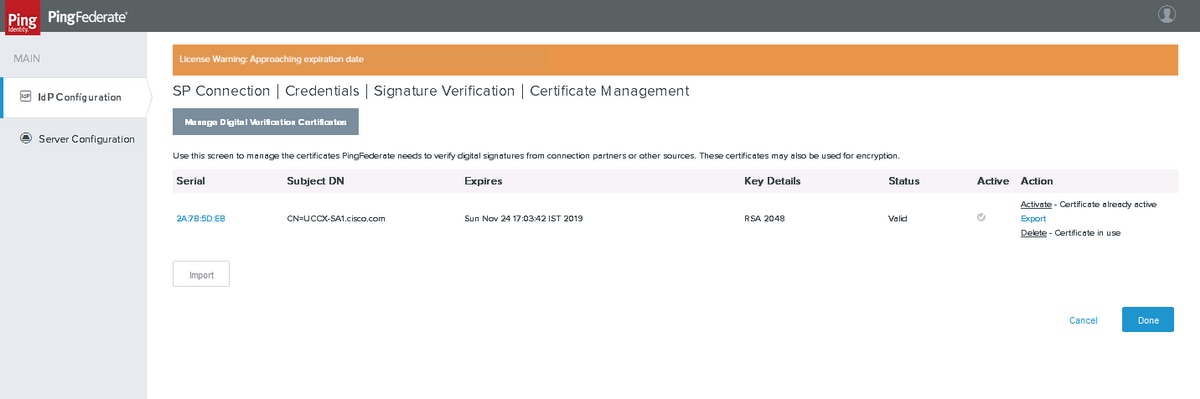
Click Import to import a certificate.
Summary
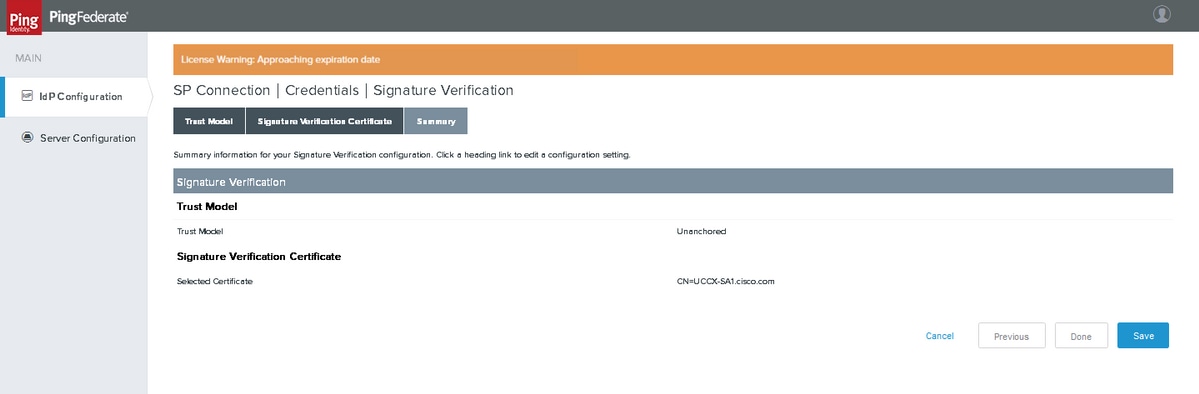
Click Done
Summary
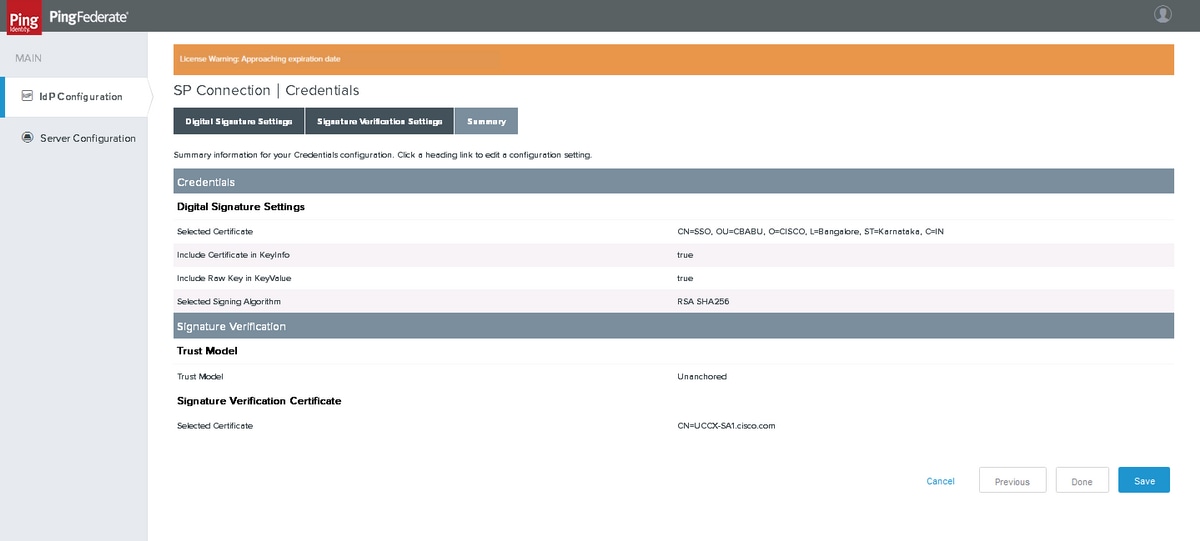
Verify the summary and click Done
Activation & Summary
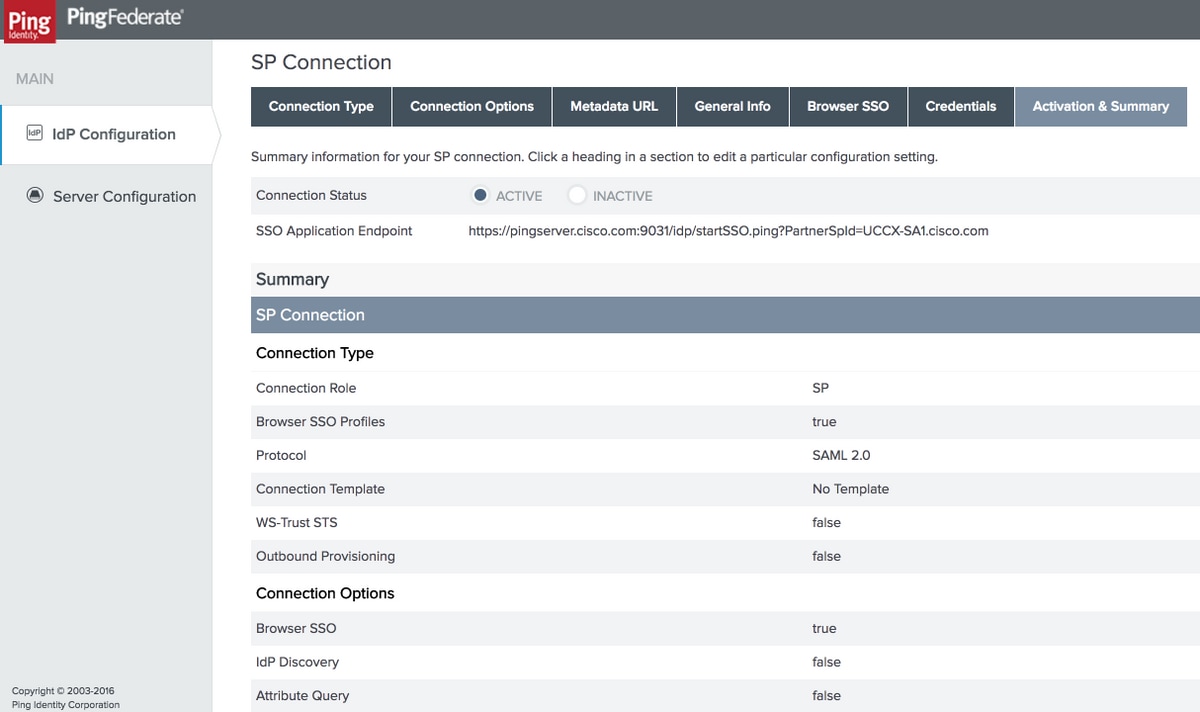
Verify the summary and click Save.
Export PingFederate Metadata
Metadata Export
Metadata Mode
Click Server Configuration > ADMINISTRATIVE FUNCTIONS > Metadata Export

Click Next
Connection Metadata
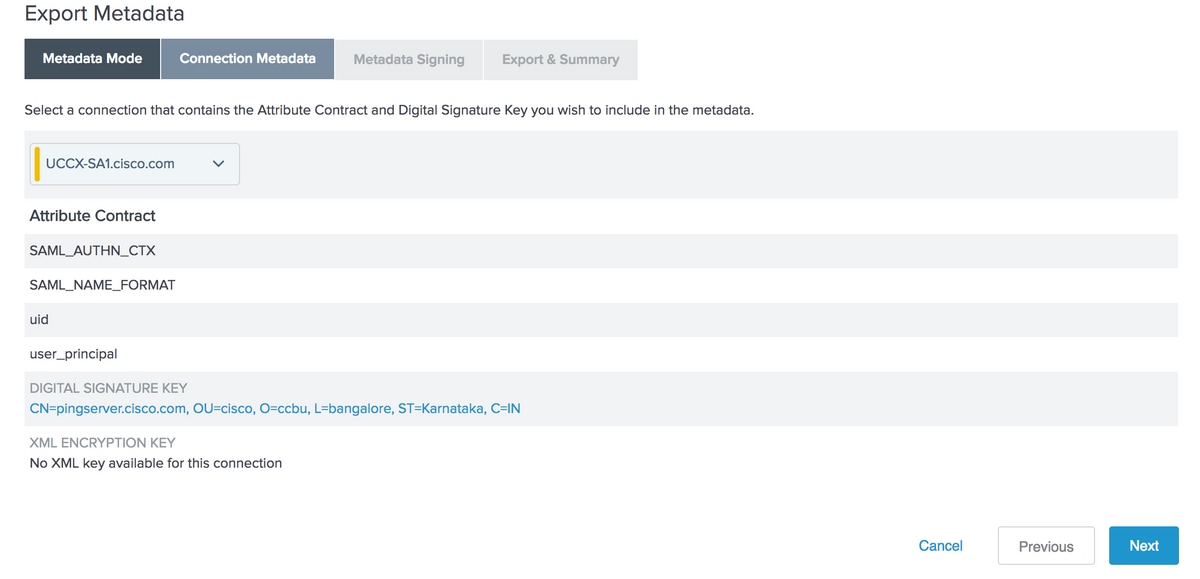
Select the SP Connection that you have created and click Next
Metadata Signing
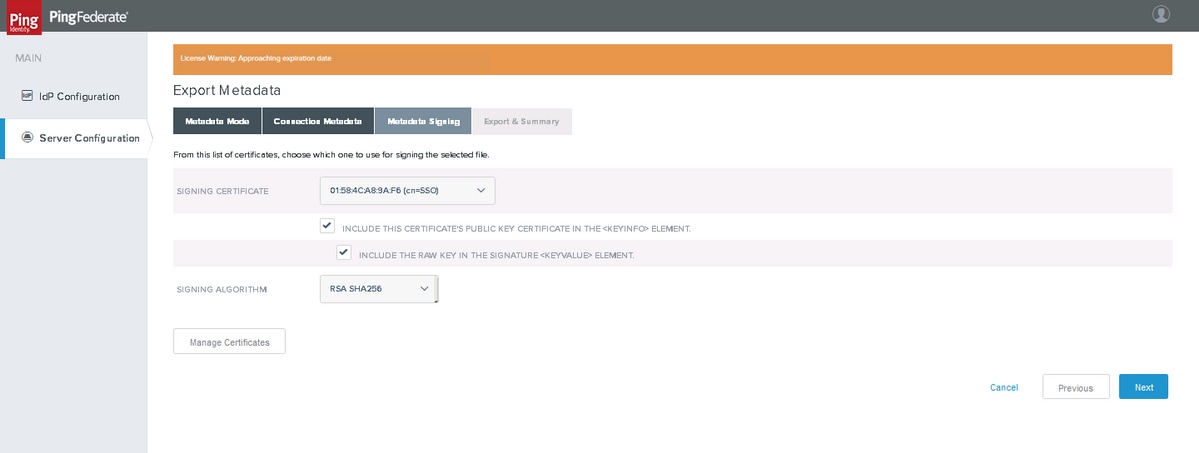
Select the Metadata certificate that you have created and SIGNING ALGORITHM as RSA SHA256. Click Next
Export & Summary
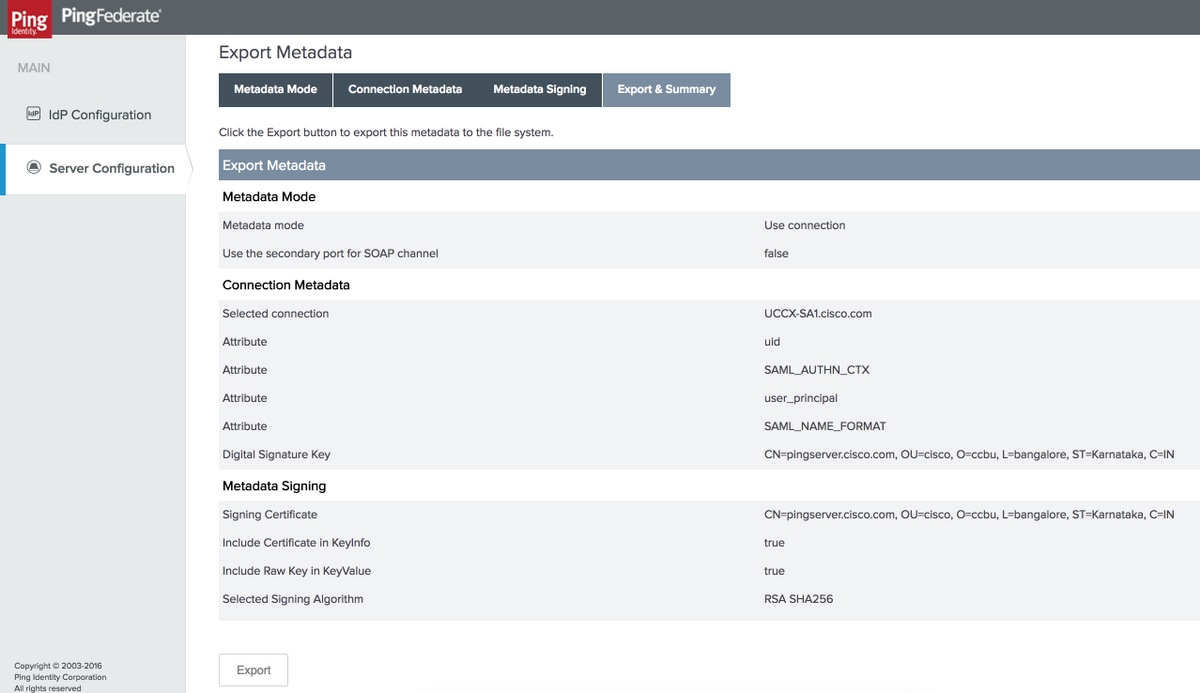
Click Export and save file in your local system.
- Edit the downloaded metadata XML file to remove the 'md' namespace entries and save it
- Then, upload saved metadata file to IdS from idsadmin page to establish IDP trust
Sample Metadata

Troubleshoot
|
Problem
|
Tool
|
Possible Cause
|
|---|---|---|
| Upload of PingFederate metadata fails in IdS Admin page | text file editor |
Ensure that the metadata XML file does not have the 'md' namespace entries. |
| SAML Flow fails | SAML Tracer | Check whether 'StatusCode' indicates 'Success' i.e. <samlp :StatusCode Value="urn:oasis:names:tc:SAML:2.0:status:Success" />
|
| SAML Flow fails | SAML Tracer | Check the <saml:AuthnContextClassRef>element – its value must be urn:oasis:names:tc:SAML:2.0:ac:classes:PasswordProtectedTransport
If it's value is set to urn:oasis:names:tc:SAML:2.0:ac:classes:unspecified – then check whether or not the SAML_AUTHN_CTXcontract is configured and mapped properly. |
| SAML Flow fails | SAML Tracer |
Check for the <saml:AttributeStatement>element – it must be present and must contain child elements that correspond to 'uid' and 'user_principal' If not found, then check the 'Assertion Creation' settings followed by 'Contract Fulfillment' settings to ensure that the contract attributes are defined and mapped properly |
| SAML Flow fails | SAML Tracer |
Check for 'Invalid Signature' message either in Cisco IdS or PingFederate logs. If confirmed, re-establish the metadata trust across IdS & PingFederate |
| SAML Flow fails | SAML Tracer |
Check the time conditions, the time when Cisco IdS received the SAML response must be between the times stated in <saml:Conditions NotBefore="2016-12-18T07:24:10.191Z" NotOnOrAfter="2016-12-18T07:34:10.191"> |
Further Configuration for SSO:
This document describes the configuration from the IdP aspect for SSO to integrate with the Cisco Identity Service. For further details, refer to the individual product configuration guides:
Contributed by Cisco Engineers
- Arundeep NagarajCisco TAC
- Jalander RamagiriCisco Engineering
- Venkatesh VedurumudiCisco Engineering
 Feedback
Contact Cisco
- Open a Support Case

- (Requires a Cisco Service Contract)