Secured-Core Servers Enabling Guide
Available Languages
Bias-Free Language
The documentation set for this product strives to use bias-free language. For the purposes of this documentation set, bias-free is defined as language that does not imply discrimination based on age, disability, gender, racial identity, ethnic identity, sexual orientation, socioeconomic status, and intersectionality. Exceptions may be present in the documentation due to language that is hardcoded in the user interfaces of the product software, language used based on RFP documentation, or language that is used by a referenced third-party product. Learn more about how Cisco is using Inclusive Language.
The Secured-core functionality spans the following areas:
Hardware root-of-trust: Trusted Platform Module 2.0 (TPM 2.0) come standard with Secured-core servers. TPM 2.0 provides a secure store for sensitive keys and data, such as measurements of the components loaded during boot. This hardware root-of-trust raises the protection provided by capabilities like BitLocker which uses the TPM 2.0 and facilitates creating attestation-based workflows that can be incorporated into zero-trust security strategies.
Firmware protection: There is a clear rise in security vulnerabilities being reported in the firmware space given the high privileges that firmware runs with and the relative opacity of what happens in firmware to traditional anti-virus solutions. Using processor support for Dynamic Root of Trust of Measurement (DRTM) technology, along with DMA protection, Secured-core systems isolate the security critical hypervisor from attacks such as this.
Virtualization-Based Security (VBS): Secured-core servers support VBS and Hypervisor-based Code Integrity (HVCI). VBS and HVCI protects against this entire class of vulnerabilities given the isolation VBS provides between the privileged parts of the operating system such as the kernel and the rest of the system. VBS also provides additional capabilities that customers can enable like Credential Guard which better protects domain credentials.
For more information on Secured-core server, click on the following link:
https://learn.microsoft.com/en-us/windows-server/security/secured-core-server.
This document provides guidance for product-specific steps to configure secured-core server AQ–certified servers to a fully protected state.
The configuration guidance applies to the following products.
● Cisco UCS® C240 M6 Rack Servers
The Secured-core Server AQ for Cisco UCS C240 M6 can be viewed by clicking on the link below:
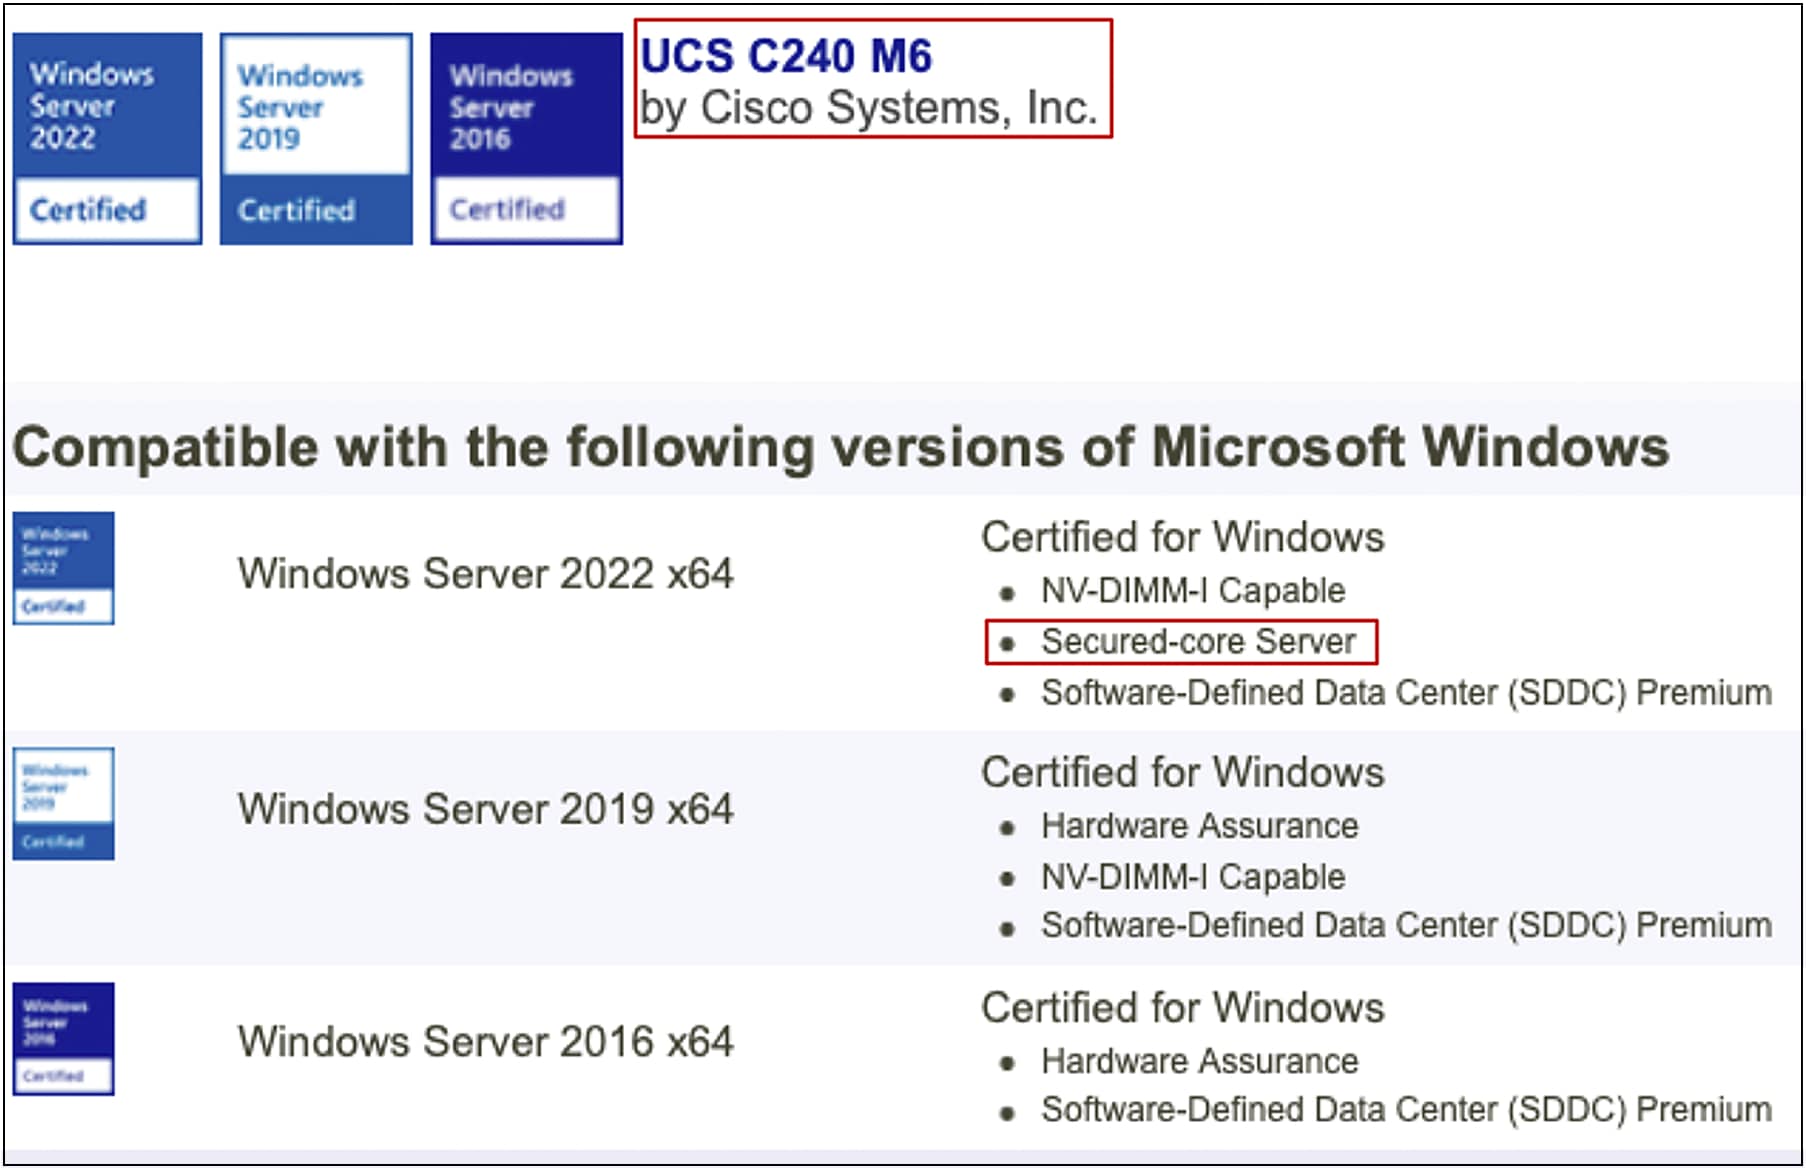
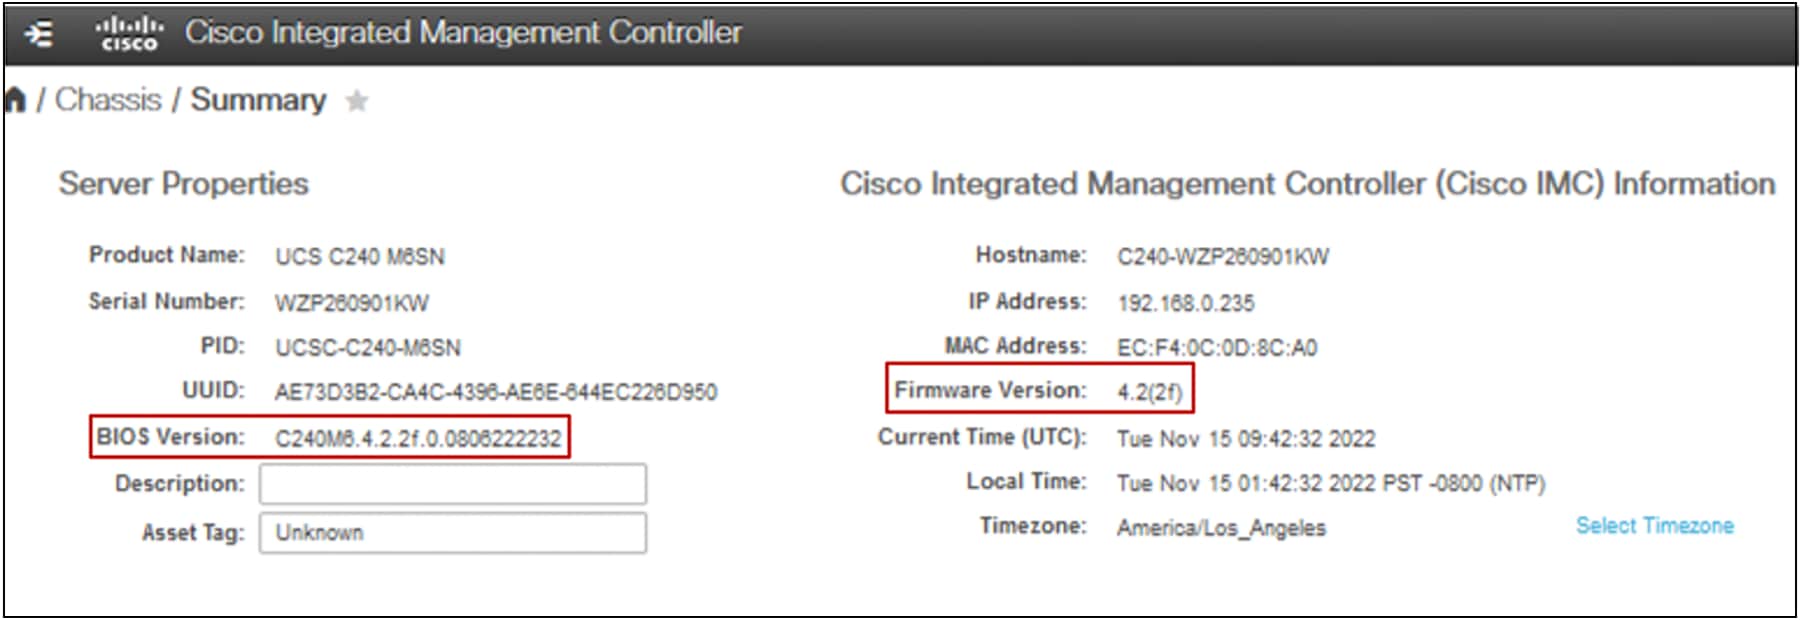
Cisco UCS server firmware release 4.2(2f) or later is required to enable and configure secured core on Cisco UCS C240 M6 standalone rack servers. The image below shows the minimum server firmware and BIOS version required to enable Secured-core feature on UCS C240 M6 servers:
Download and upgrade the server firmware using the Cisco UCS Host Upgrade Utility (HUU) from the link below:
https://software.cisco.com/download/home/286329285/type.
Refer to the link below for a step-by-step guide to upgrade the server firmware using the Cisco UCS Host Upgrade Utility:
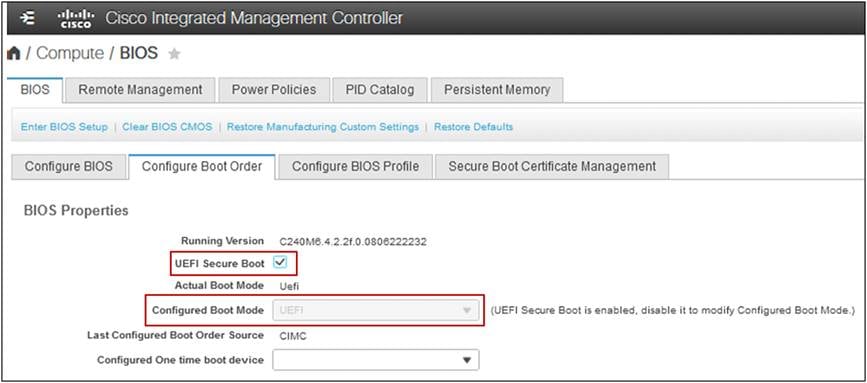
Log in to Cisco® Integrated Management Controller (IMC) and navigate to the Compute > BIOS > Configure Boot Order tab and complete the below steps:
● Select UEFI from the drop-down menu for Configured Boot Mode.
● Enable UEFI Secure Boot by clicking on the check box and click on the Save Changes box to save the settings.
You will be prompted for a reboot for the changes to take effect.
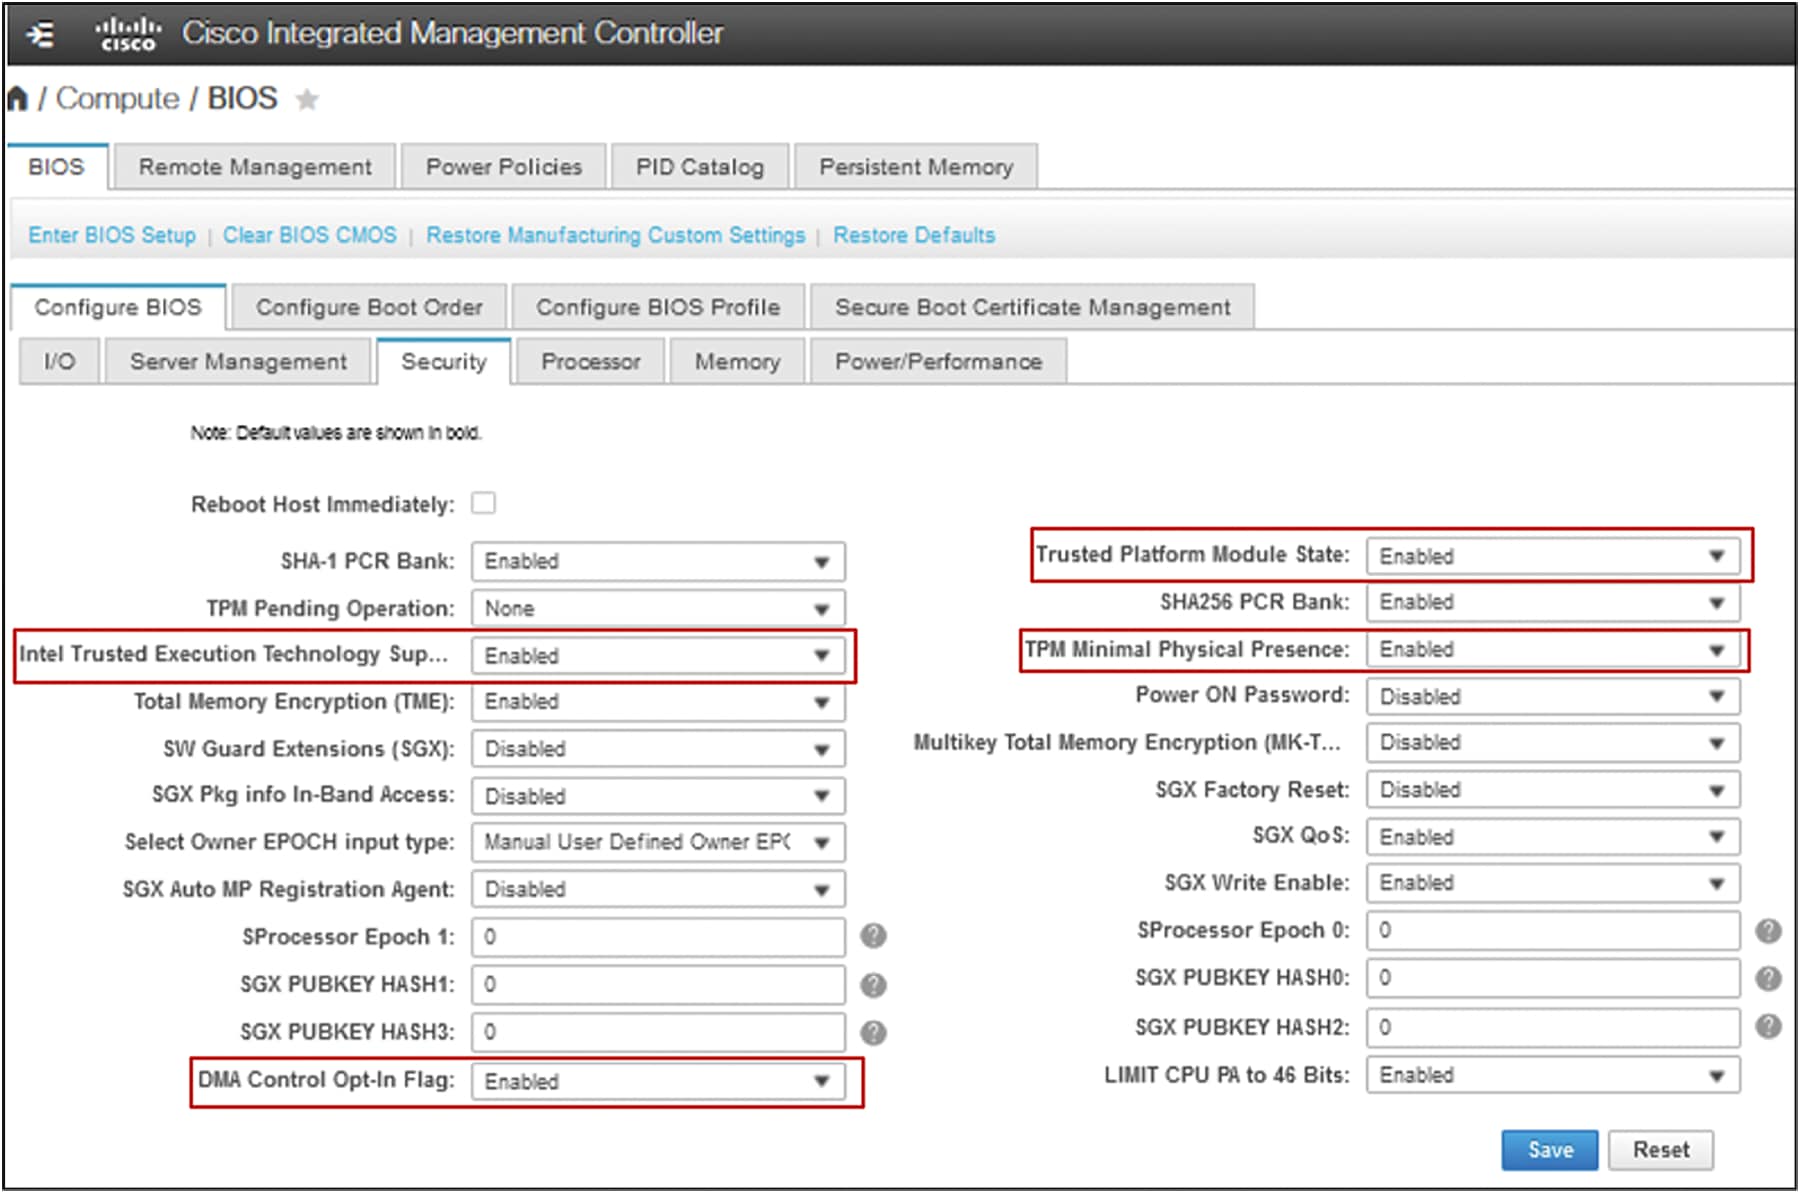
In Cisco Integrated Management Controller (IMC), navigate to the Compute > BIOS > Configure BIOS > Security tab and enable the following settings and click Save.
● Trusted Platform Module State - Trusted Platform Module (TPM), which is a component that securely stores artifacts that are used to authenticate the server. The platform-default setting is enabled.
● TPM Minimal Physical Presence - TPM Minimal Physical Presence, which enables or disables the communication between the OS and BIOS for administering the TPM without compromising the security. The platform-default setting is disabled.
● Intel Trusted Execution Technology (TXT) Support - Intel Trusted Execution Technology (TXT), which provides greater protection for information that is used and stored on the business server. The platform-default setting is enabled and when you only enable TXT, it implicitly enables TPM, VT, and VTDio.
● DMA Control Opt-In Flag - Enabling this token enables Windows 2022 Kernel DMA Protection feature. The OS treats this as a hint that the IOMMU should be enabled to prevent DMA attacks from possible malicious devices. The platform-default setting is disabled.
4.1. Install platform-specific drivers (optional)
Post OS installation, download the relevant Windows driver image for the Cisco UCS server software from the link below, and install the drivers for chipset, storage, network, etc.
https://software.cisco.com/download/home/286329285/type/283853158/release/4.2(2d).
4.2. Configure OS to enable VBS, HVCI, and Windows Defender System Guard
To configure secured-core features on the OS, there are several different ways to do so. Choose one of the following three options to enable VBS, HVCI, and Windows Defender System Guard.
4.2.1 Windows Admin Center (WAC)
From any PC or server configured for PowerShell remoting to the test target, download the Windows Admin Center and install. Add the target server for management in the Windows Admin Center.
From the Server Manager view, choose the target server.

Scroll down for “Security” in the Tools menu on the left.
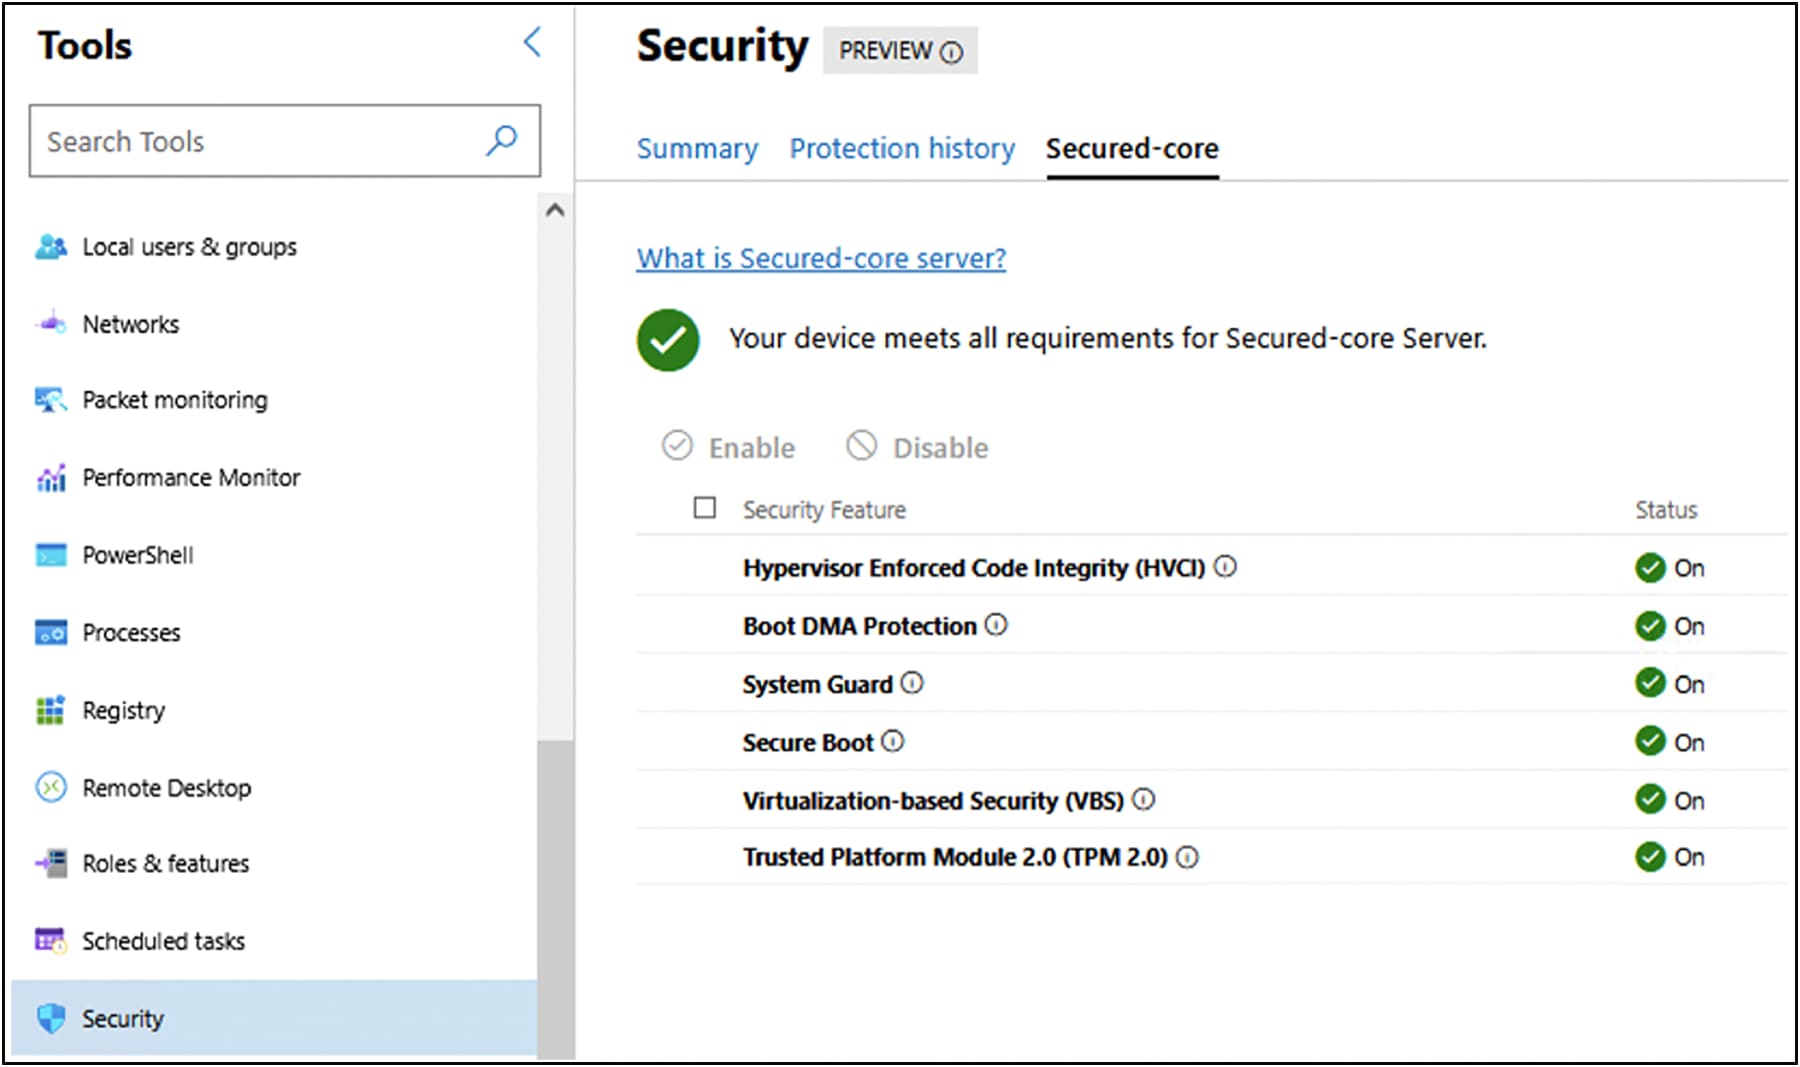
You can enable HVCI, Windows Defender System Guard, and VBS from the Windows Admin Center.
Click on a feature name that does not show as “On,” and click “Enable.” Repeat this for all disabled features.
If the Boot DMA Protection, Secure Boot, or TPM2.0 are not shown as “On,” you will need to enable the feature in the UEFI.
Ensure that all of the secured-core features are showing as “On” before proceeding to validation.
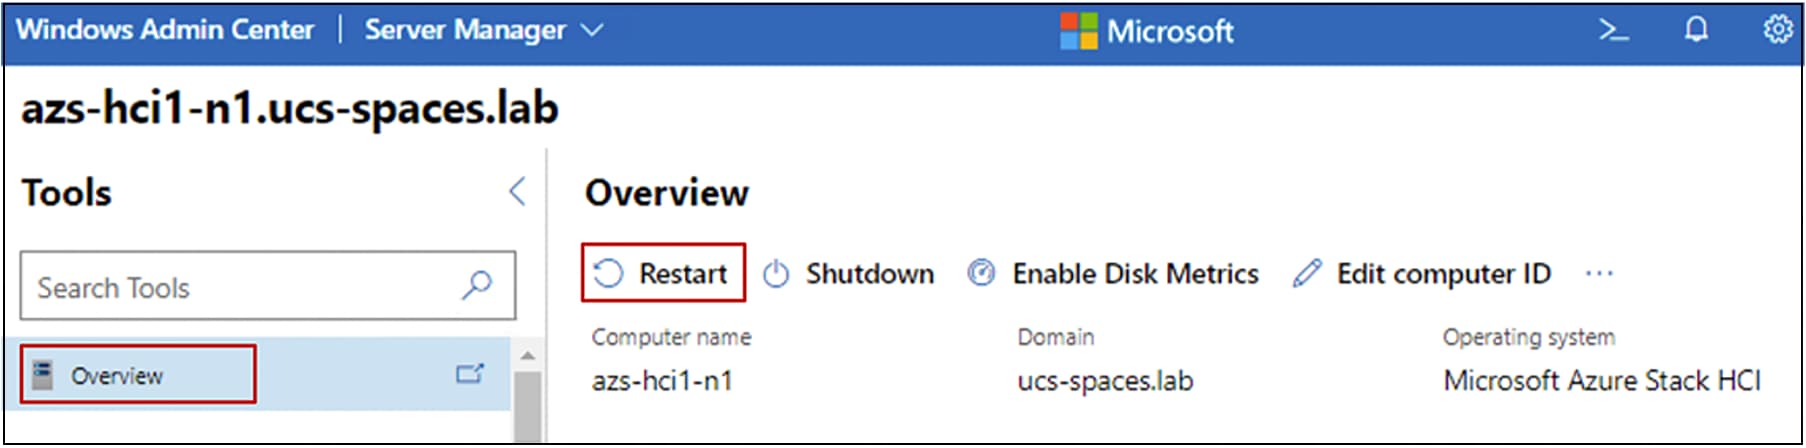
You will be prompted for a reboot for the changes to take effect. Go to “Overview” and click “Restart.”
Alternatively, you can configure the following registry key settings to achieve the same result.
reg add "HKLM\SYSTEM\CurrentControlSet\Control\DeviceGuard\Scenarios\HypervisorEnforcedCodeIntegrity" /v "Enabled" /t REG_DWORD /d 1 /f
reg add "HKLM\SYSTEM\CurrentControlSet\Control\DeviceGuard\Scenarios\HypervisorEnforcedCodeIntegrity" /v "WasEnabledBy" /t REG_DWORD /d 0 /f
reg add "HKLM\SYSTEM\CurrentControlSet\Control\DeviceGuard\Scenarios\SystemGuard" /v "Enabled" /t REG_DWORD /d 1 /f
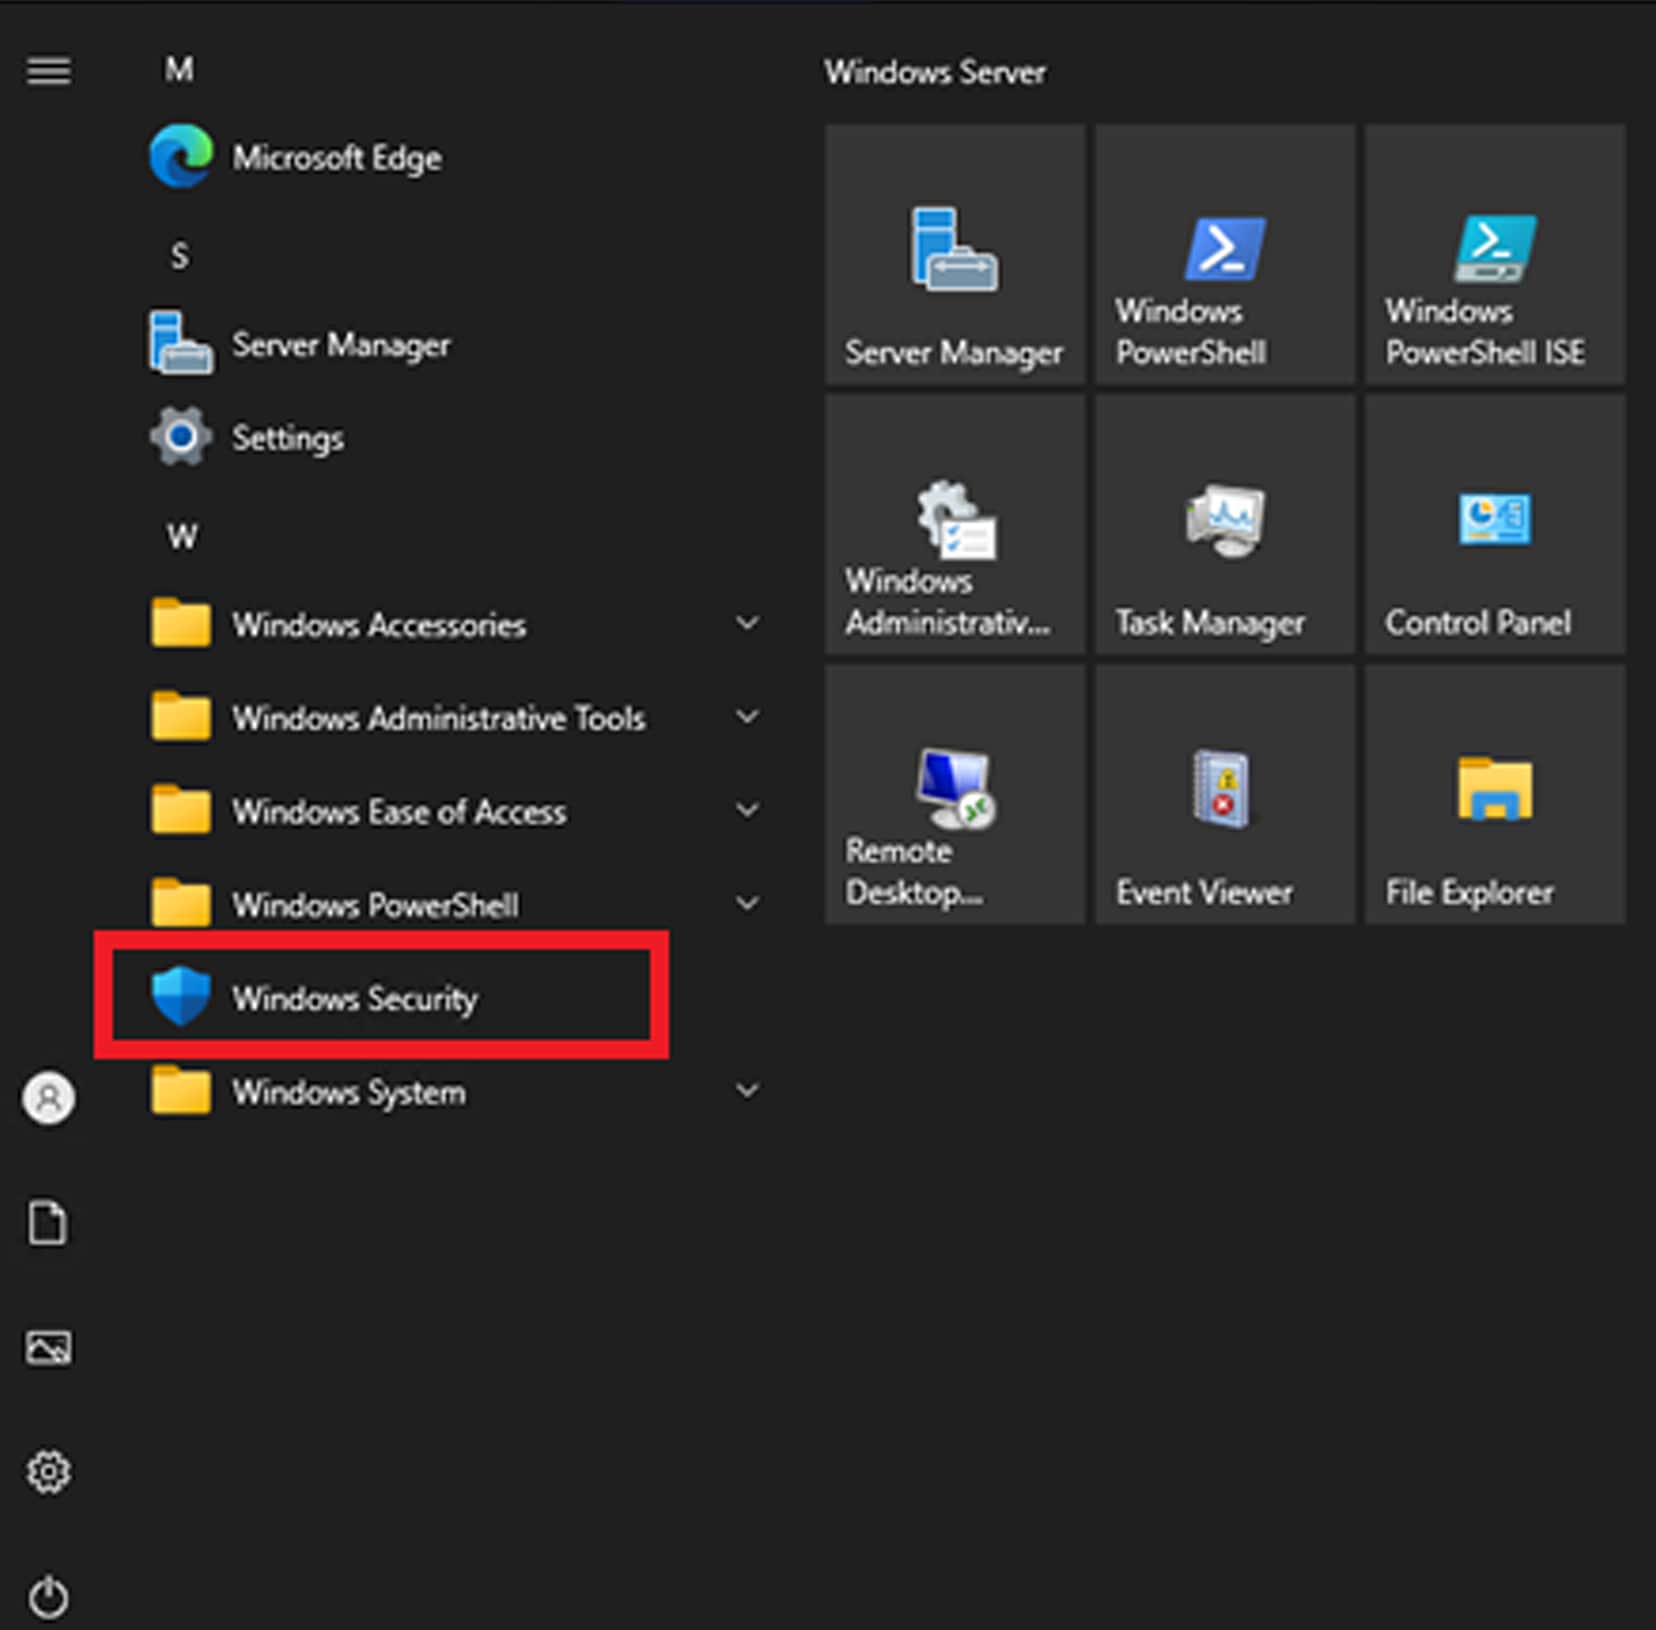
4.2.3 Windows Security App (for Windows Server OS with Desktop experience only)
Launch the Windows Security app from the start menu.
Choose “Device security” and then Click the “Core isolation details.”
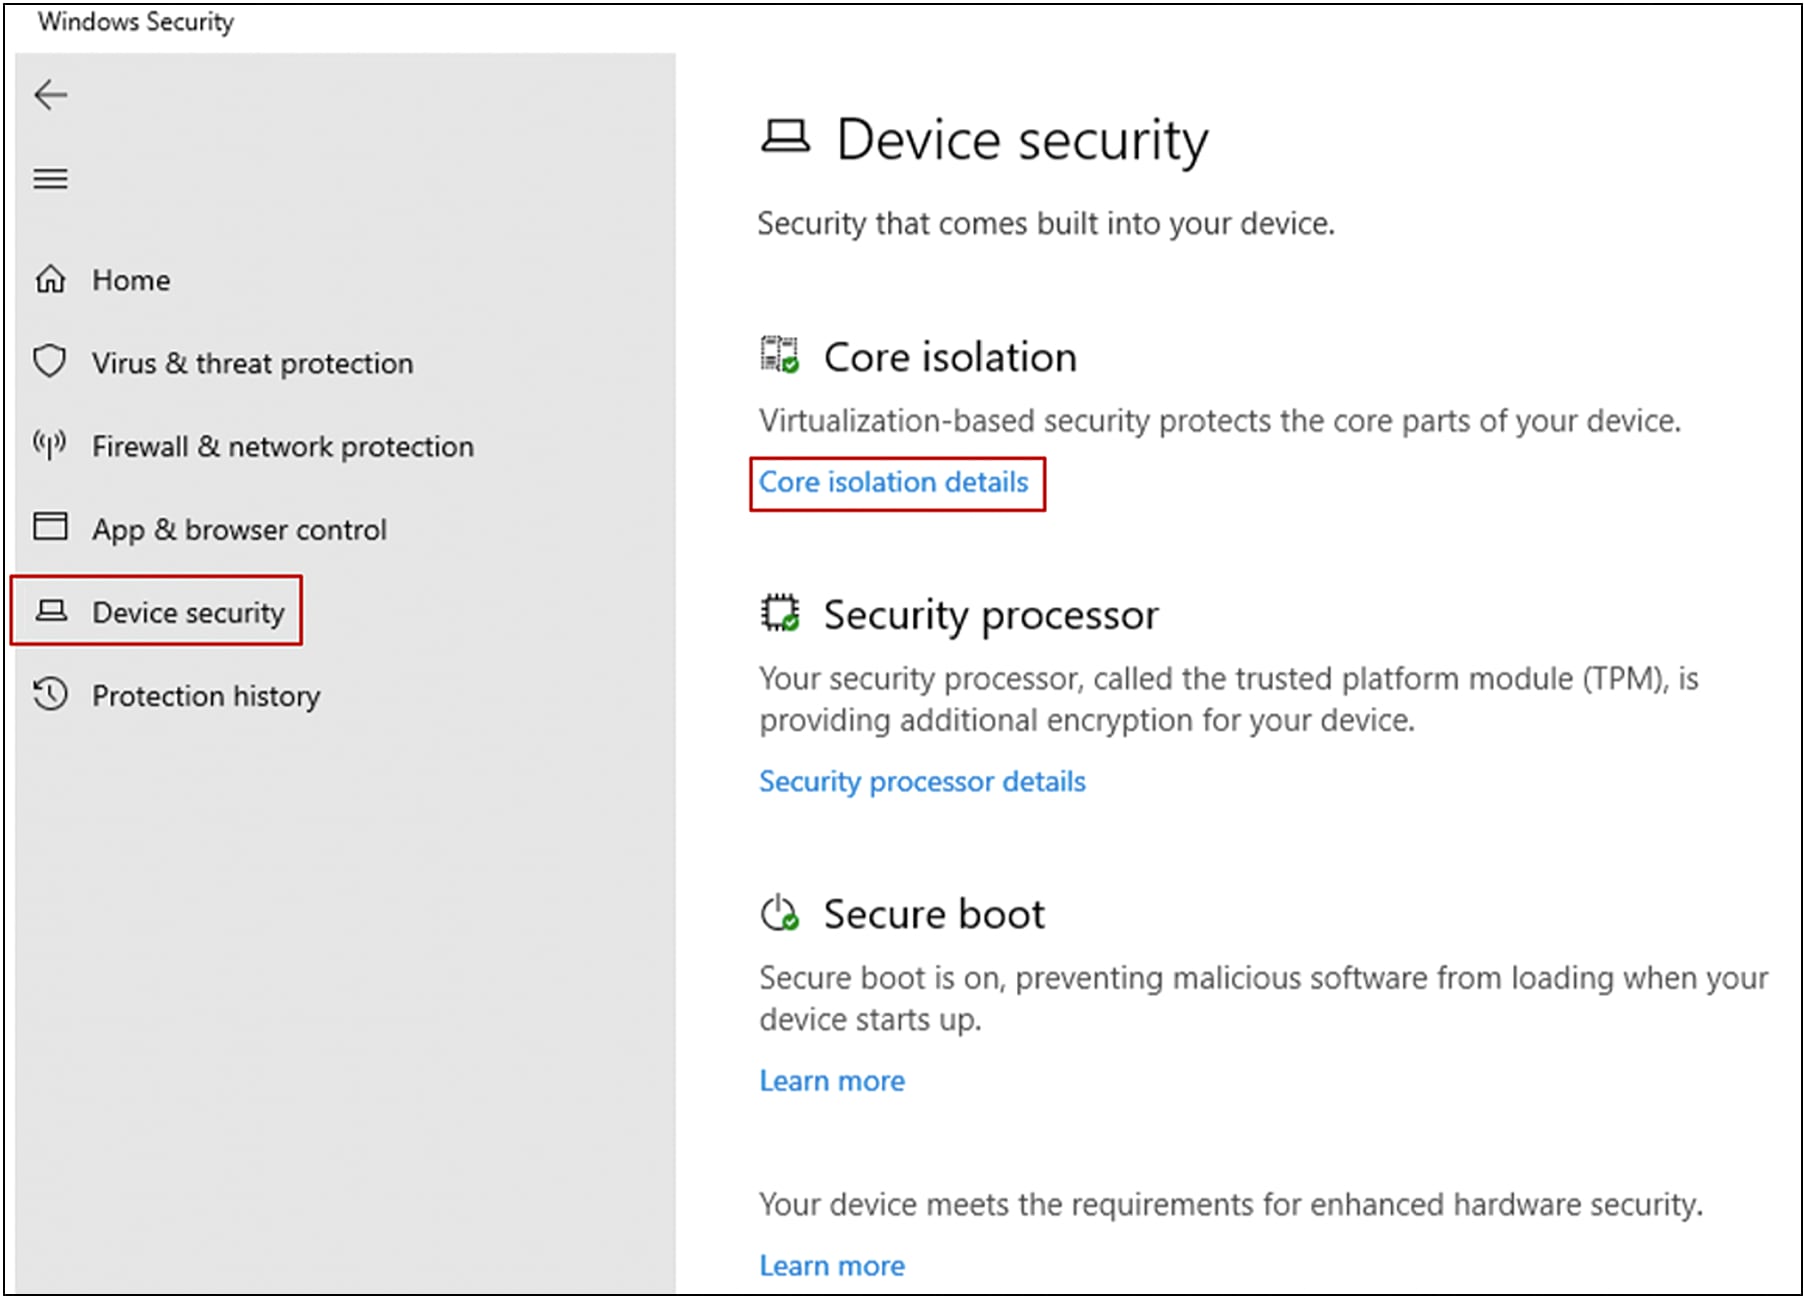
Set the slider switches for both “Memory integrity” and “Firmware protection” to “On.”
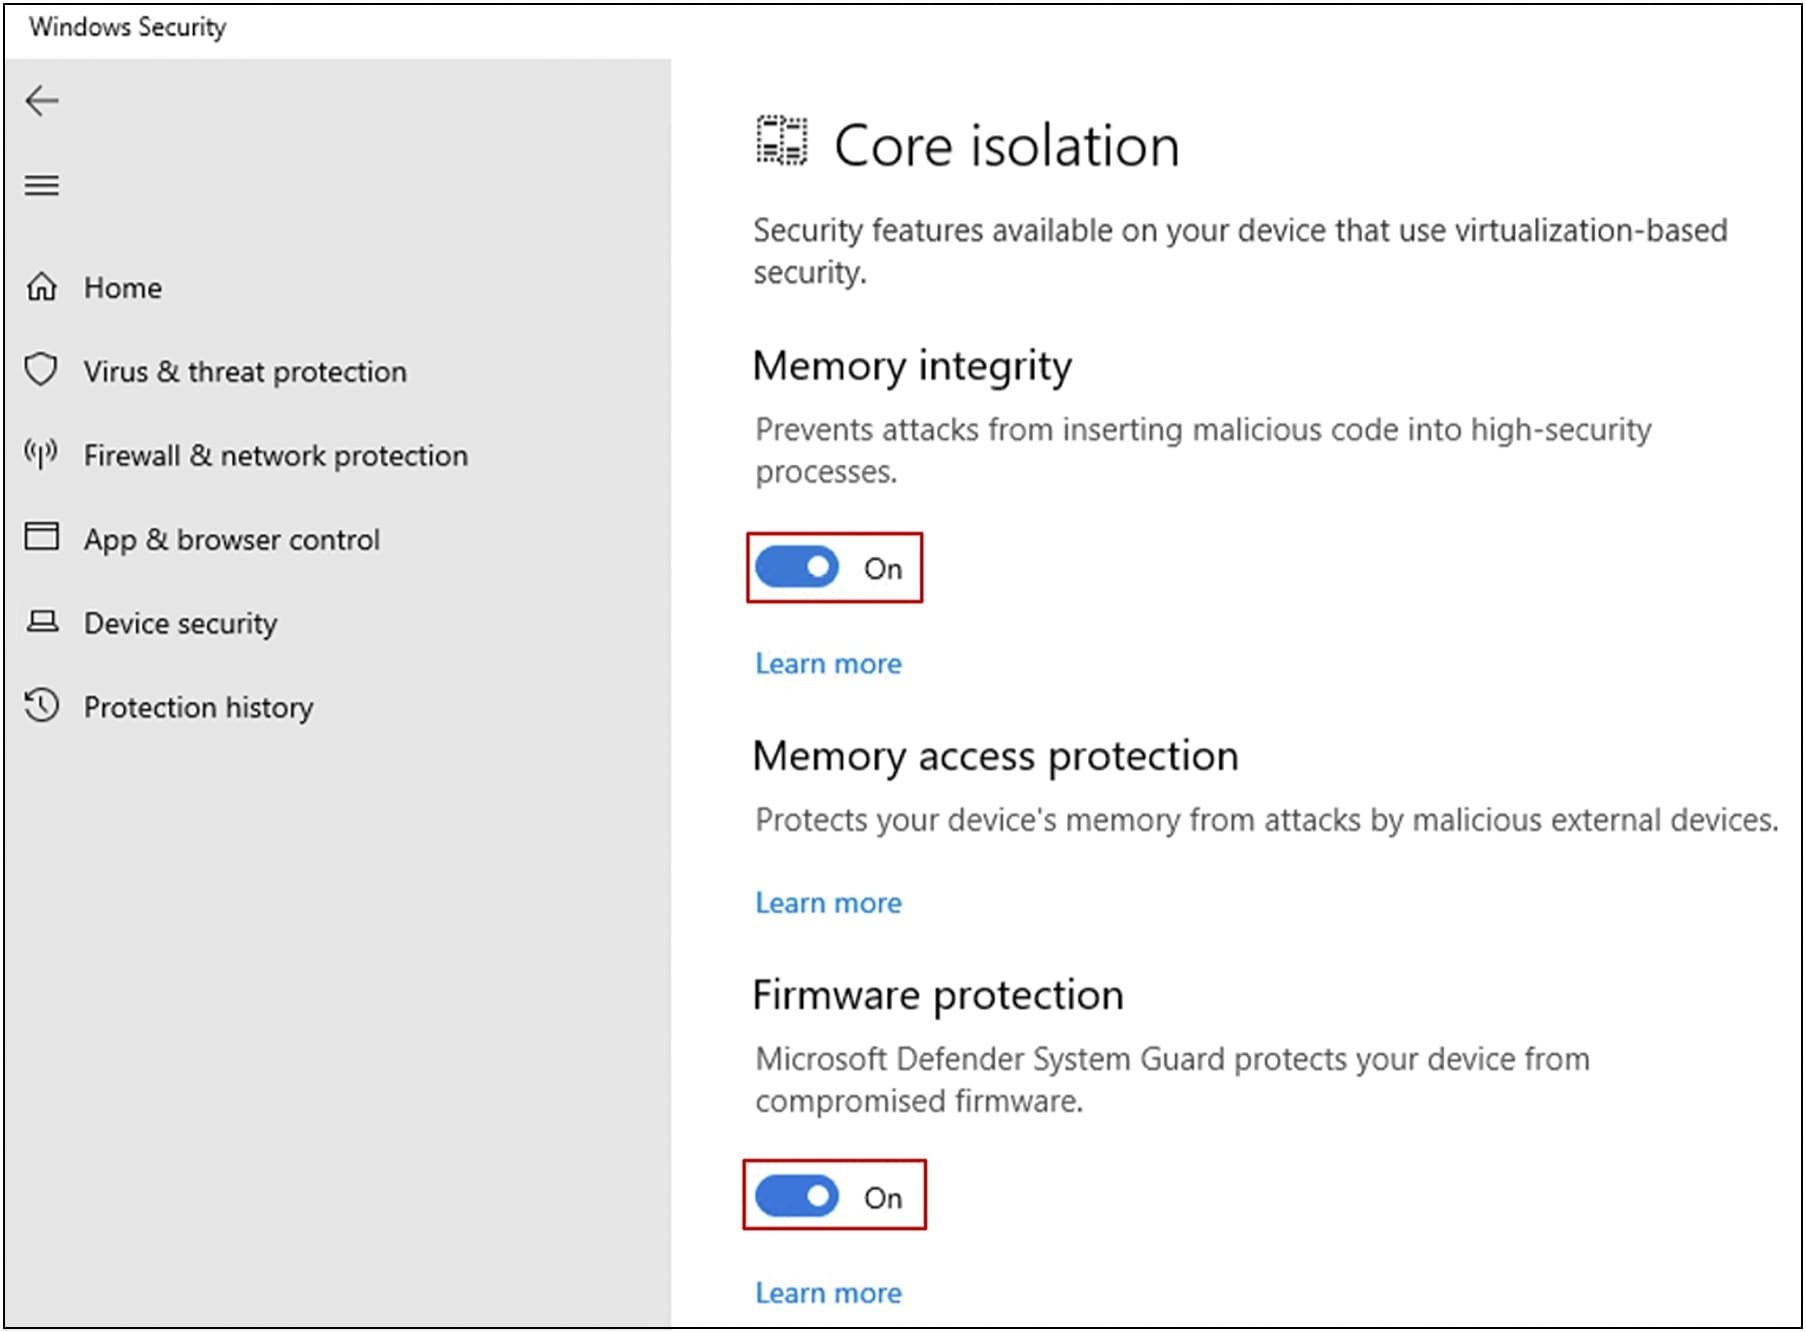
You will be prompted for a reboot for these settings to take effect.
Alternatively, you can configure the following registry key settings to achieve the same result.
reg add "HKLM\SYSTEM\CurrentControlSet\Control\DeviceGuard\Scenarios\HypervisorEnforcedCodeIntegrity" /v "Enabled" /t REG_DWORD /d 1 /f
reg add "HKLM\SYSTEM\CurrentControlSet\Control\DeviceGuard\Scenarios\HypervisorEnforcedCodeIntegrity" /v "WasEnabledBy" /t REG_DWORD /d 0 /f
reg add "HKLM\SYSTEM\CurrentControlSet\Control\DeviceGuard\Scenarios\SystemGuard" /v "Enabled" /t REG_DWORD /d 1 /f
5. Confirm the secured-core state
To confirm that all of the secured-core features are properly configured and running, complete the following steps:
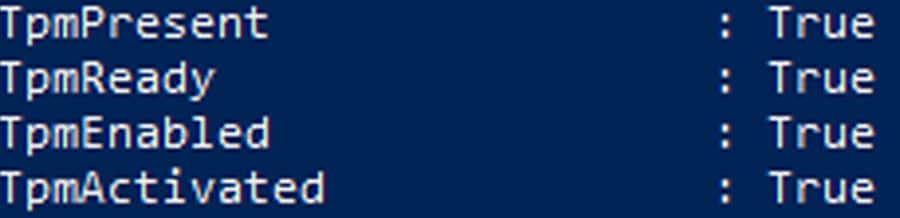
Run get-tpm in a PowerShell and confirm the following:
5.2. Secure boot, Kernel DMA Protection, VBS, HVCI and Windows Defender System Guard
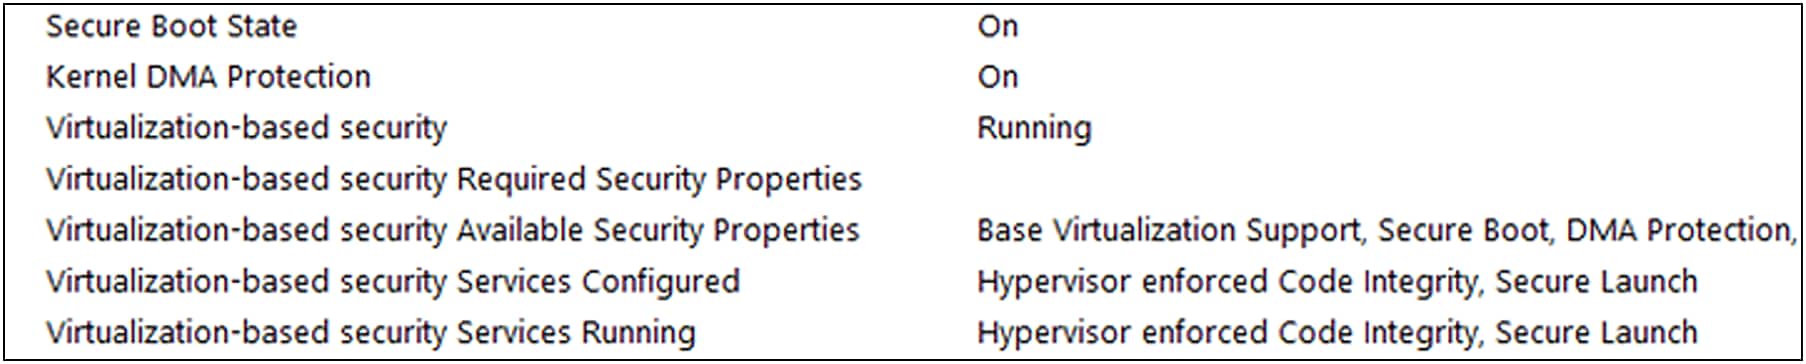
Launch msinfo32 from the command prompt and confirm the following values:
● “Secure Boot State” is “On.”
● “Kernel DMA Protection” is “On.”
● “Virtualization-Based Security” is “Running.”
● “Virtualization-Based Security Services Running” contains the value “Hypervisor enforced Code Integrity” and “Secure Launch.”
https://www.cisco.com/c/en/us/support/web/tsd-cisco-worldwide-contacts.html.