-
Cisco NAM Appliances Installation and Configuration Note_2204, 5.1
-
About This Guide
-
Introducing the Cisco NAM 2204 Appliances
-
Preparing to Install the Cisco NAM 2204 Appliance
-
Installing the Cisco NAM 2204 Appliance
-
Configuring the Cisco NAM 2204 Appliance
-
Backing up and Restoring NAM Configuration
-
Maintaining the Cisco 2204 NAM Appliance
-
Monitor Port Requirements
-
Troubleshooting
-
Site Log
-
BIOS Settings
-
Using the Recovery CD
-
Index
-
 Feedback
Table Of Contents
Option 1 - Download Application Image and Write to HDD
Option 2 - Download Application Image and Reformat HDD
Option 3 - Install Application Image from CD
Option 4 - Display Software Versions
Option 5 - Reset Application Image CLI Passwords to Default
Option 6 - Change File Transfer Method
Option r- Exit and Reset Services Engine
Option h- Exit and Shutdown Services Engine
Restoring the NAM Appliance Configuration
Using the Recovery CD
You can use the recovery CD to re-install NAM application software on your Cisco NAM 2204 appliance if your appliance should suffer a catastrophic event, such as a hard disk crash, and you can no longer boot the NAM application.
Note
The information found in Chapter 5, "Backing up and Restoring NAM Configuration", helps you prepare to recover from a catastrophic event.
After you use the recovery CD to re-install the NAM application image, you can use the command-line interface (CLI) to restore the most recent configuration file to the NAM appliance if you have stored a configuration file at an accessible location. See "Backing Up Your Configuration" section on page 5-1, for more information.
The recovery CD is part of the NAM software kit (part number NAM-APPL-SW-5.1).
Booting the Recovery CD
When you boot the Cisco NAM 2204 appliance from the recovery CD, the NAM appliance console will temporarily display the bootloader window. After this window displays for ten seconds, the Cisco NAM 2204 appliance will automatically boot the NAM application software.
When using the recovery CD, choose helper and press Enter within that 10 second interval to get to the helper utility Menu. Otherwise, you might have to reboot the Cisco NAM 2204 appliance again.
To use the recovery CD:
Step 1
Step 2
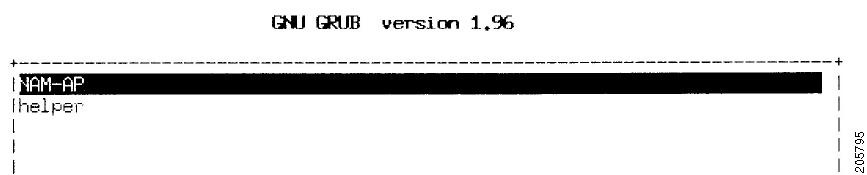
The Cisco NAM 2204 appliance performs a reset and launches the GNU GRUB boot loader and displays the window shown in Figure F-1. This window displays for about ten seconds enabling you to select to boot the helper utility instead of the NAM application software (NAM-AP in Figure F-1).
Figure F-1 GNU GRUB Boot Loader
Per the instructions, use the ^ and v keys to select which entry is highlighted. Press Enter to boot the selected OS, `e' to edit the commands before booting or `c' for a GNU command-line.
Step 3
The helper utility menu displays as shown in Figure F-2.
Figure F-2 Helper Utility Menu
==============================================================================Cisco Systems, Inc.Network Analysis Module (NAM2200) helper utilityVersion 1.1(0.5-Eng)-----Main menu1 - Download application image and write to HDD2 - Download application image and reformat HDD3 - Install application image from CD4 - Display software versions5 - Reset application image CLI passwords to default6 - Change file transfer method (currently ftp/http)7 - Send Pingn - Configure networkr - Exit and reset Services Engineh - Exit and shutdown Services EngineSelection [1234567dnfrh]:See the next section, Helper Utility Menu Options, for more information about the options.
Helper Utility Menu Options
This section describes the Helper Utility Menu, what each option does, and any requirements for using a particular option.
Note
Possible selections for the top level of the helper utility menu are 1, 2, 3, 4, 5, 6, 7 d, n, f, r, and h.
Option n - Configure Network
Use Option n to configure the network parameters for the appliance.
Step 1
-----Configure Network interface:1 - Use application image configuration2 - Configure manually3 - Show configr - return to main menuSelection [123r]: 2Step 2
Enter IP configuration:IP address []: 172.20.122.93netmask []: 255.255.255.128default gateway []: 172.20.122.1-----Configure Network interface:1 - Use application image configuration2 - Configure manually3 - Show configr - return to main menuSelection [123r]Step 3
Selection [123r]: 3eth0 Link encap:Ethernet HWaddr 00:0E:0C:EE:50:3Einet addr:172.20.122.93 Bcast:172.20.122.127 Mask:255.255.255.128UP BROADCAST RUNNING MULTICAST MTU:1500 Metric:1RX packets:210 errors:0 dropped:0 overruns:0 frame:0TX packets:0 errors:0 dropped:0 overruns:0 carrier:0collisions:0 txqueuelen:1000RX bytes:13632 (13.3 KiB) TX bytes:0 (0.0 b)Kernel IP routing tableDestination Gateway Genmask Flags Metric Ref Use Iface172.20.122.0 0.0.0.0 255.255.255.128 U 0 0 eth00.0.0.0 172.20.122.1 0.0.0.0 UG 0 0 eth0-----Configure Network interface:1 - Use application image configuration2 - Configure manually3 - Show configr - return to main menuSelection [123r]:Option 1 - Download Application Image and Write to HDD
Prior to using Option 1, first use Option n to configure the network.
Use Option 1 to download a version of the NAM application image from an FTP server location and write the image to the hard disk drive. This option requires network connectivity and that network parameters be configured for the Cisco NAM 2204 appliance using helper menu item n.
This option enables you to download an image you might have stored at an FTP location or at a location you can access using http. You can download the latest version of NAM software from the following URL:
http://www.cisco.com/pcgi-bin/tablebuild.pl/nam-appl
This URL requires you to have a Cisco service agreement and access to the internet to download the zipped software.
Option 2 - Download Application Image and Reformat HDD
Prior to using Option 2, first use Option n to configure the network.
Use Option 2 to download the NAM application image and write the image to the hard disk drive. This option downloads a version of the NAM application image from an FTP server location or at a location you can access using http.
Using this option reformats the hard disk drives before writing the application image and will destroy all data such as reports or data captures.
You can also download the latest version from Cisco.com.
Option 3 - Install Application Image from CD
Use Option 3 to install the NAM application image from the recovery CD. This option might be necessary if you are unable to connect to your network and download a version of NAM software you archived earlier.
Note
This option reformats the hard disk drives before writing the application image and will destroy all data such as reports or data captures.
Option 4 - Display Software Versions
Use Option 4 to display the current NAM application image version stored on your hard disk.
Selection [123456789dnfrh]:5-----NAM application version: 5.1(1)Selection [123456789dnfrh]:Option 5 - Reset Application Image CLI Passwords to Default
Use Option 5 to reset the password for users root and admin to their default values.
Option 6 - Change File Transfer Method
Use Option 6 to change the file transfer method. This option is only necessary if you change the file transfer method by mistake. Only FTP and http are supported.
Selection [123456789dnfrh]: 7-----Change file transfer method menuThe current file transfer method is ftp/http.1 - Change to FTP/HTTPr - return to main menuOption 7- Send Ping
Use Option 7 to send a ping to determine if network connectivity exists. When prompted, enter the IP address or full domain name of the location to send the ping.
IP address to ping []: 172.20.122.91Sending 5 ICPM ECHO_REQUEST packets to 172.20.122.91.PING 172.20.122.91 (172.20.122.91) 56(84) bytes of data.64 bytes from 172.20.122.91: icmp_seq=1 ttl=64 time=0.151 ms64 bytes from 172.20.122.91: icmp_seq=2 ttl=64 time=0.153 ms64 bytes from 172.20.122.91: icmp_seq=3 ttl=64 time=0.125 ms64 bytes from 172.20.122.91: icmp_seq=4 ttl=64 time=0.102 ms64 bytes from 172.20.122.91: icmp_seq=5 ttl=64 time=0.166 ms--- 172.20.122.91 ping statistics ---5 packets transmitted, 5 received, 0% packet loss, time 4000msrtt min/avg/max/mdev = 0.102/0.139/0.166/0.025 msOption r- Exit and Reset Services Engine
Use Option r to reset the NAM appliance prior to rebooting the newly installed NAM application image.
Before using Option r, remove the recovery CD from the CD drive to enable the NAM appliance to boot the application image.
Option h- Exit and Shutdown Services Engine
Use Option h to reset and shut down the NAM appliance.
------------------------------------------------------------------------Option h for recovery CDSelection [123456789dnfrh]: hAbout to exit and reset NAM.Are you sure? [y/N] :yStopping internet superserver: inetd.Stopping OpenBSD Secure Shell server: sshd.Stopping internet superserver: xinetd.Stopping internet superserver: xinetd-ipv4.: done.Shutting down NAM (NAM2200), part 1:Stopping klogd . . .Stopping syslogd . . .Sending all processes the TERM signal... done.Sending all processes the KILL signal... done.Unmounting remote filesystems... done.Deactivating swap...done.Unmounting local filesystems...done.Starting halt command: haltmd: stopping all md devices.Synchronizing SCSI cache for disk sdb:FAILEDstatus = 1, message = 00, host = 0, driver = 08<6>sd: Current: sense key=0x5ASC=0x20 ASCQ=0x0Synchronizing SCSI cache for disk sda:FAILEDstatus = 1, message = 00, host = 0, driver = 08<6>sd: Current: sense key=0x5ASC=0x20 ASCQ=0x0ACPI: PCI interrupt for device 0000:07:00.1 disabledACPI: PCI interrupt for device 0000:07:00.0 disabledPower down.acpi_power_off called-----------------------------------------------------------------------------------------Restoring the NAM Appliance Configuration
If you have stored your NAM configuration file at a remote server location you can access using FTP or HTTP, you can restore your NAM configuration file after a system recovery. See "Backing Up Your Configuration" section on page 5-1 and Restoring Your Configuration, page 5-2.