Configuring RAID
You can choose to store the E-Series Server data files on local Redundant Array of Inexpensive Disks (RAID). The following RAID levels are supported:
-
The single-wide E-Series Server supports RAID 0 and RAID 1 levels.
-
The double-wide E-Series Server supports RAID 0, RAID 1, and RAID 5 levels.
-
The double-wide E-Series Server with the PCIe option supports RAID 0 and RAID 1 levels.
 Note |
On Cisco UCS M1 and M2 servers, you can use the CIMC GUI or the WebBIOS, which is accessible from the KVM console, to configure RAID. On Cisco UCS M3 servers, you can use the CIMC GUI or the MegaRAID controller, which is accessible from the KVM console, to configure RAID. |
Configuring RAID Using the CIMC GUI
Note |
On Cisco UCS M1 and M2 servers, you can use the CIMC GUI or the WebBIOS, which is accessible from the KVM console, to configure RAID. On Cisco UCS M3 servers, you can use the CIMC GUI or the MegaRAID controller, which is accessible from the KVM console, to configure RAID. |
Use this procedure to configure the RAID level, strip size, host access privileges, drive caching, and initialization parameters on a virtual drive. You can also use this procedure to designate the drive as a hot spare drive and to make the drive bootable.
Procedure
| Step 1 |
In the Navigation pane, click the Server menu. |
||||||||||||||||||||||||||||||||||||||
| Step 2 |
On the Server tab, click RAID. Do one of the following:
|
||||||||||||||||||||||||||||||||||||||
| Step 3 |
In the tabbed menu of the Storage Cards area, click the Virtual Drive Info tab.  |
||||||||||||||||||||||||||||||||||||||
| Step 4 |
In the Actions area of the Virtual Drive Info tab, click Create. The Configure Virtual Drive dialog box appears. 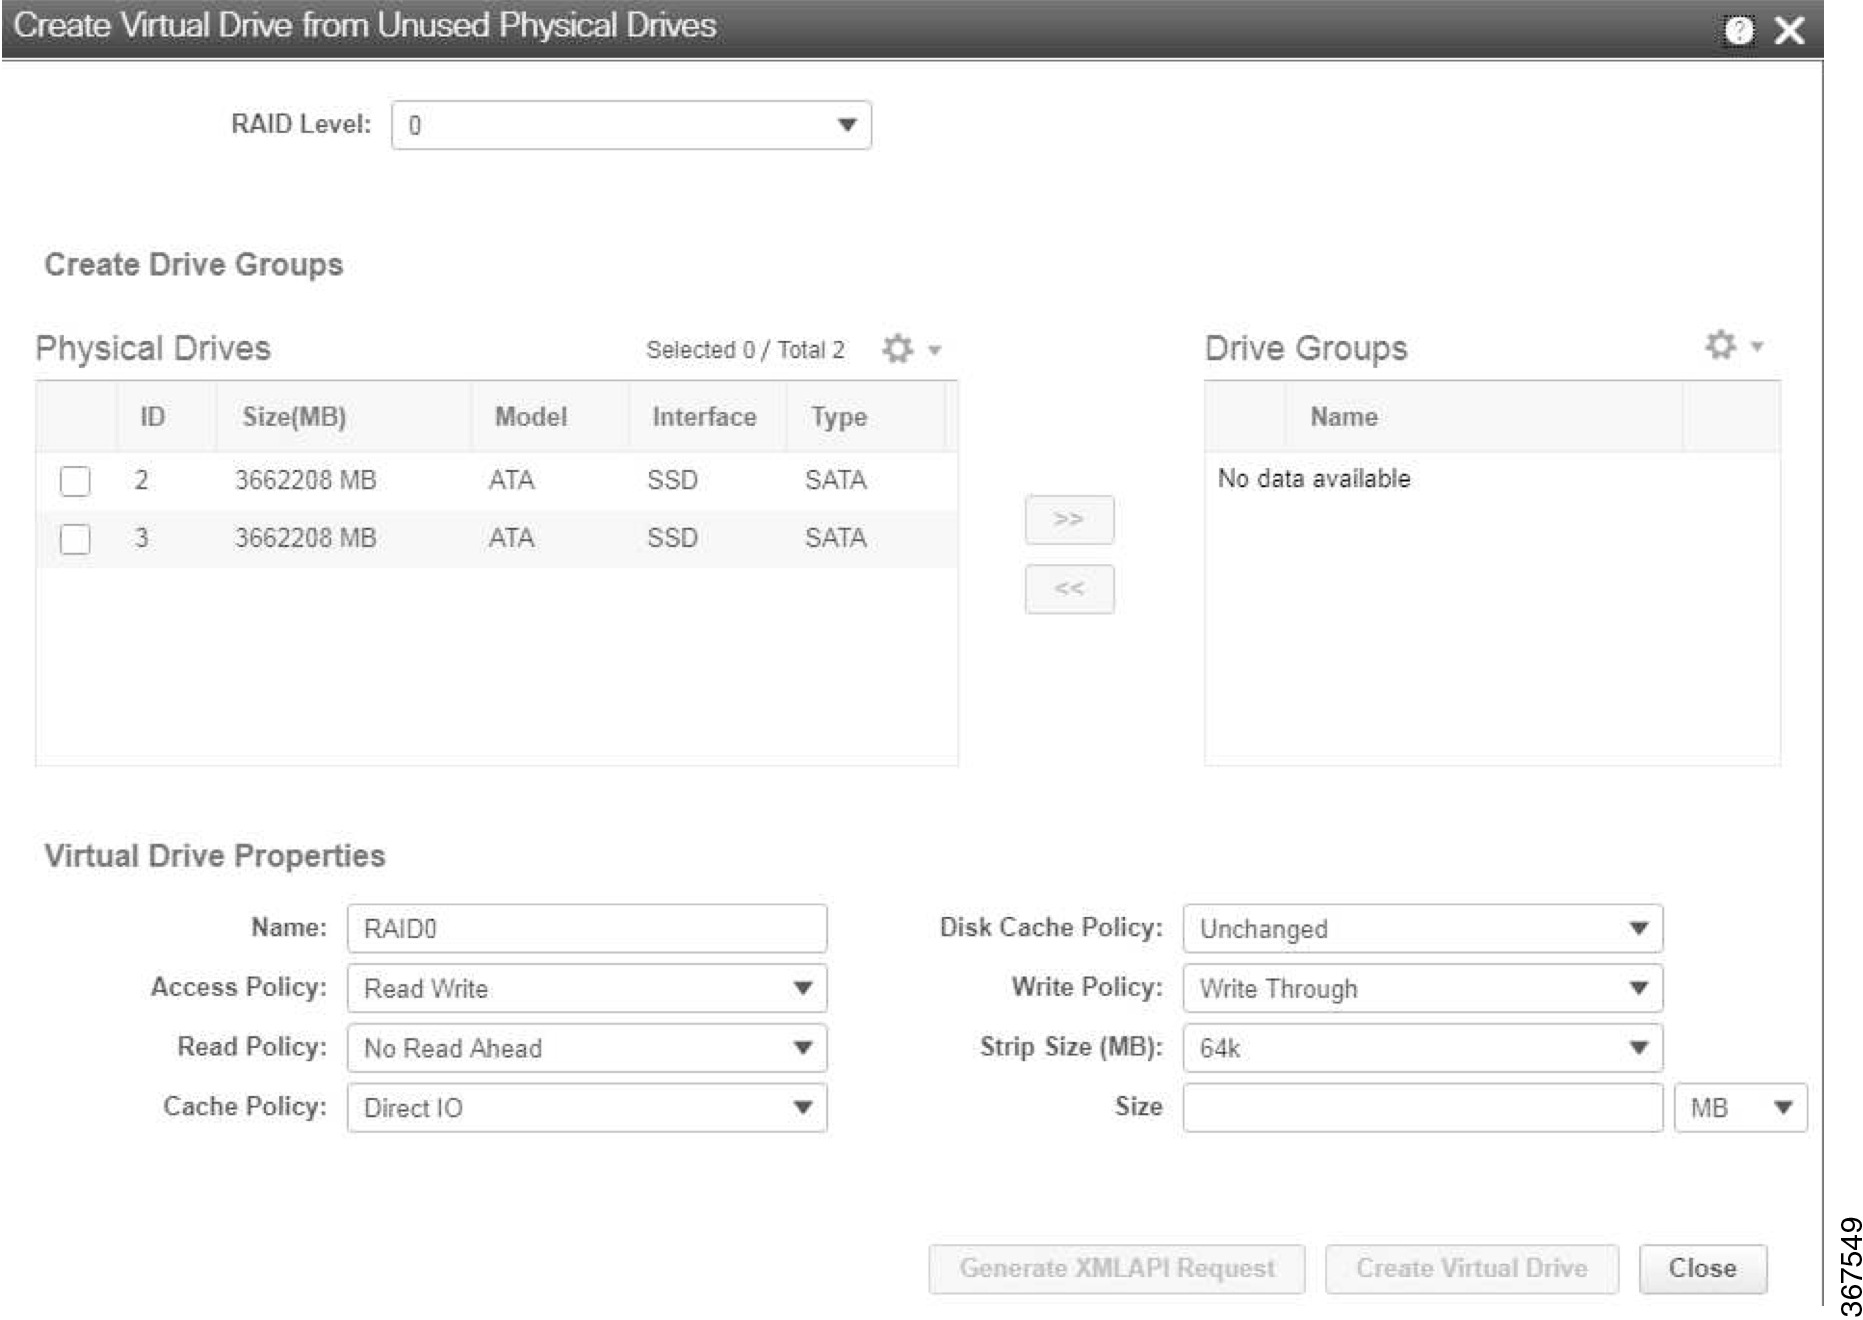 Configure Virtual Drive Dialog Box Configure Virtual Drive Dialog Box
|
||||||||||||||||||||||||||||||||||||||
| Step 5 |
Complete the following fields as appropriate:
|
||||||||||||||||||||||||||||||||||||||
| Step 6 |
Review the RAID configuration, and then click Confirm to accept the changes. |
Configuring RAID Using the WebBIOS
Important |
The RAID feature is applicable to E-Series Servers and the SM E-Series NCE. The RAID feature is not applicable to the EHWIC E-Series NCE and the NIM E-Series NCE. |
Note |
Use WebBIOS to configure RAID on M1 and M2 servers. Use MegaRAID controller to configure RAID on M3 servers. See Configuring RAID Using the MegaRAID Controller |
Procedure
| Step 1 |
In the Navigation pane, click the Server menu. |
| Step 2 |
In the work pane, click Host Image Mapping tab. |
| Step 3 |
From the Actions area, click Launch KVM Console. The KVM Console opens in a separate window. |
| Step 4 |
From the Server Summary page, click Power Cycle Server to reboot the server. |
| Step 5 |
Press the Ctrl key, and then press H during bootup to access the WebBIOS. The Adapter Selection page from LSI Logic appears, which allows you to configure RAID. For information about this page, see the LSI Logic documentation. 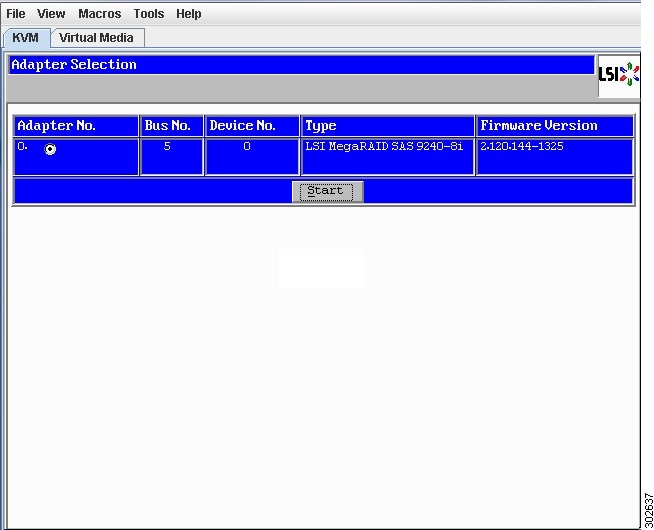 |
Configuring RAID Using the MegaRAID Controller
Important |
The RAID feature is applicable to E-Series Servers and the SM E-Series NCE. The RAID feature is not applicable to the EHWIC E-Series NCE and the NIM E-Series NCE. |
Procedure
| Step 1 |
In the Navigation pane, click the Server menu. |
| Step 2 |
In the work pane, click Host Image Mapping tab. |
| Step 3 |
From the Actions area, click Launch KVM Console. The KVM Console opens in a separate window. |
| Step 4 |
From the Server Summary page, click Power Cycle Server to reboot the server. |
| Step 5 |
Press the Ctrl key, and then press R during bootup to access the MegaRAID Controller. The Virtual Drive Management page appears, which allows you to configure MegaRAID Controller. 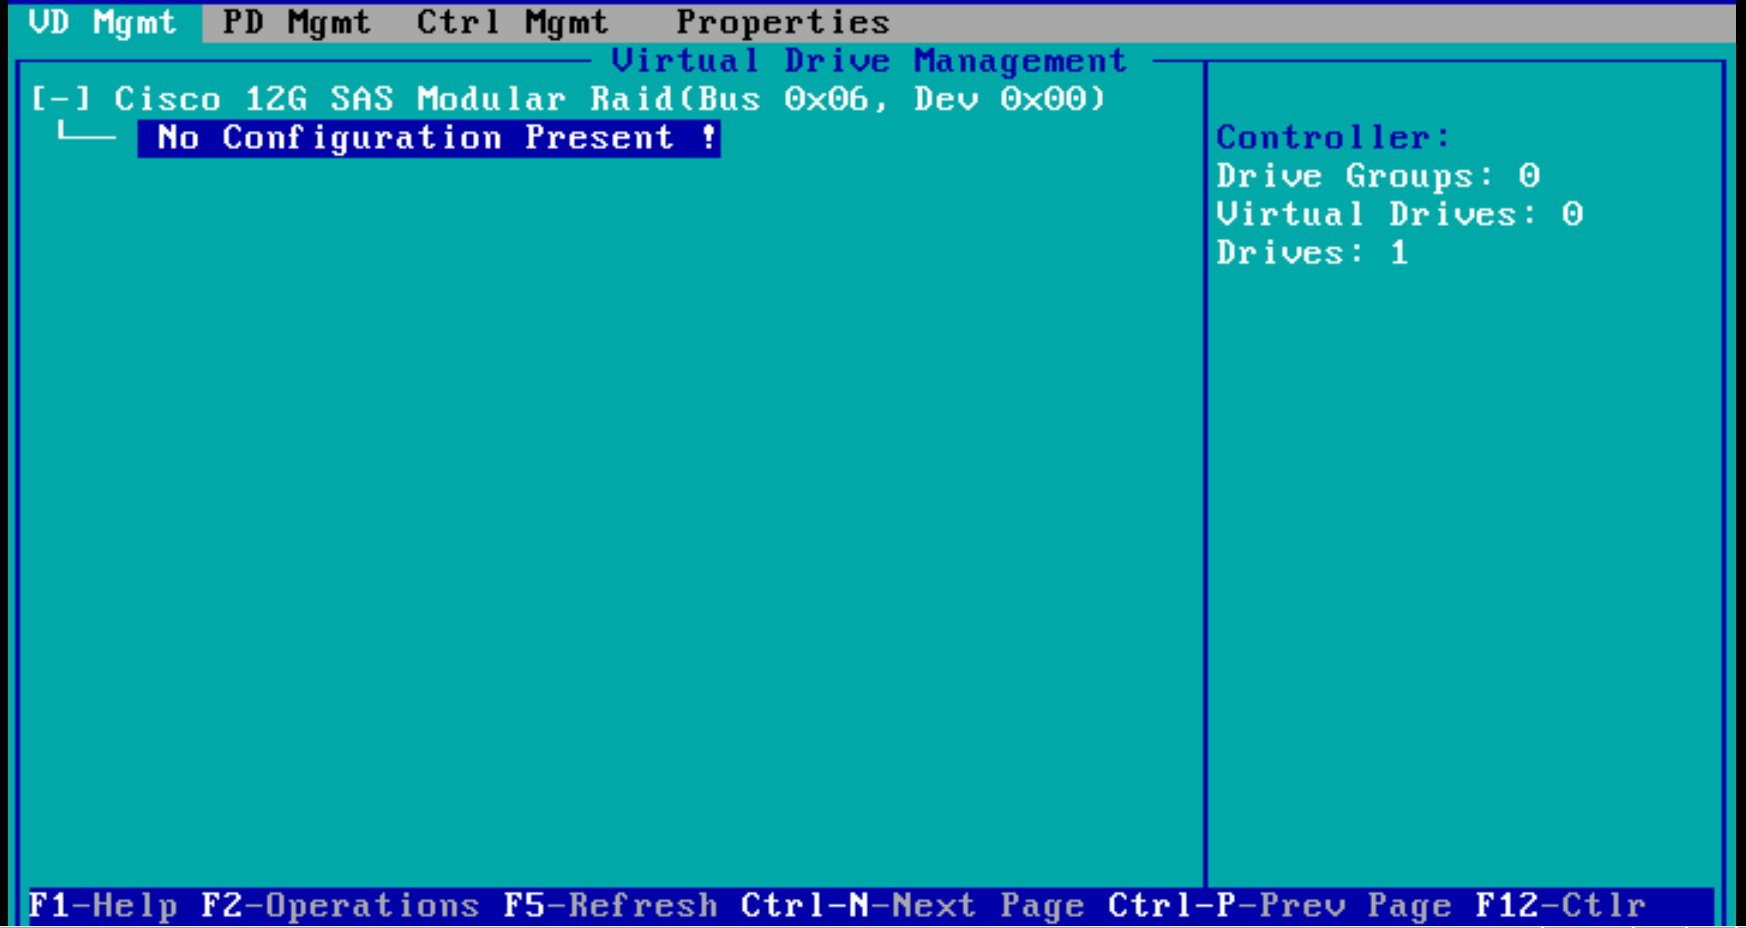 |
What to Do Next
If you purchased E-Series Server or NCE Option 1 (E-Series Server or NCE without a preinstalled operating system or hypervisor), install the operating system. See Installing the Operating System or Hypervisor.
 Feedback