- Preface
- Overview
- Installing Cisco Virtual Switch Update Manager
- Installing Cisco Nexus 1000V Using Cisco Virtual Switch Update Manager
- Managing an Existing Cisco Nexus 1000V Switch
- Migrating Hosts to Cisco Nexus 1000V Using Cisco Virtual Switch Update Manager
- Upgrading Cisco Nexus 1000V Using Cisco Virtual Switch Update Manager
- Monitoring Cisco Nexus 1000V Using Cisco Virtual Switch Update Manager
- Installing a License Using Cisco Virtual Switch Update Manager
- Dashboard-Cisco Nexus 1000V
- Information About Cisco Virtual Switch Update Manager
- Compatibility Information for Cisco Virtual Switch Update Manager
- System Requirements
- Prerequisites
- Verifying the Authenticity of the Cisco-Signed Image (Optional)
- Installing the Cisco Virtual Switch Update Manager
- About the Cisco Virtual Switch Update Manager GUI
- Upgrading Cisco Virtual Switch Update Manager
- Replacing Cisco Virtual Switch Update Manager—Windows vCenter Server
- Replacing Cisco Virtual Switch Update Manager—Linux vCenter Appliance
- Feature History for Installing Cisco Virtual Switch Update Manager
Installing Cisco Virtual Switch Update Manager
This chapter contains the following sections:
- Information About Cisco Virtual Switch Update Manager
- Compatibility Information for Cisco Virtual Switch Update Manager
- System Requirements
- Prerequisites
- Verifying the Authenticity of the Cisco-Signed Image (Optional)
- Installing the Cisco Virtual Switch Update Manager
- About the Cisco Virtual Switch Update Manager GUI
- Upgrading Cisco Virtual Switch Update Manager
- Replacing Cisco Virtual Switch Update Manager—Windows vCenter Server
- Replacing Cisco Virtual Switch Update Manager—Linux vCenter Appliance
- Feature History for Installing Cisco Virtual Switch Update Manager
Information About Cisco Virtual Switch Update Manager
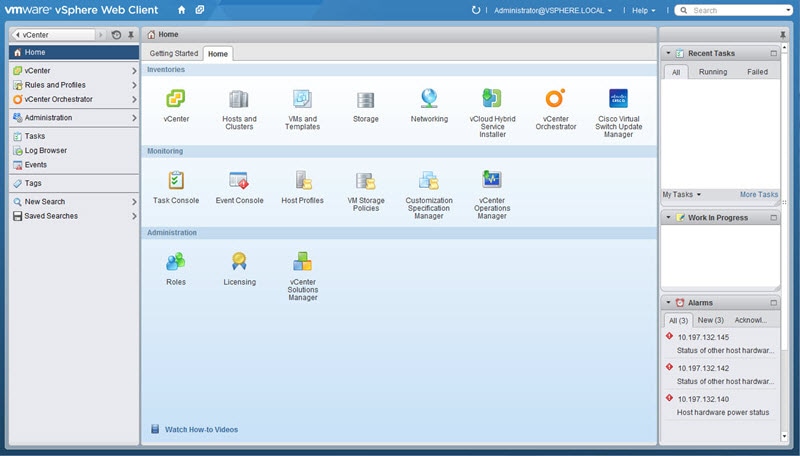
Cisco Virtual Switch Update Manager (VSUM) is a virtual appliance that is registered as a plug-in to VMware vCenter Server. The VSUM graphical user interface (GUI) is an integral part of VMware vSphere Web Client; it can only be accessed by logging into the VMware vSphere Web Client.
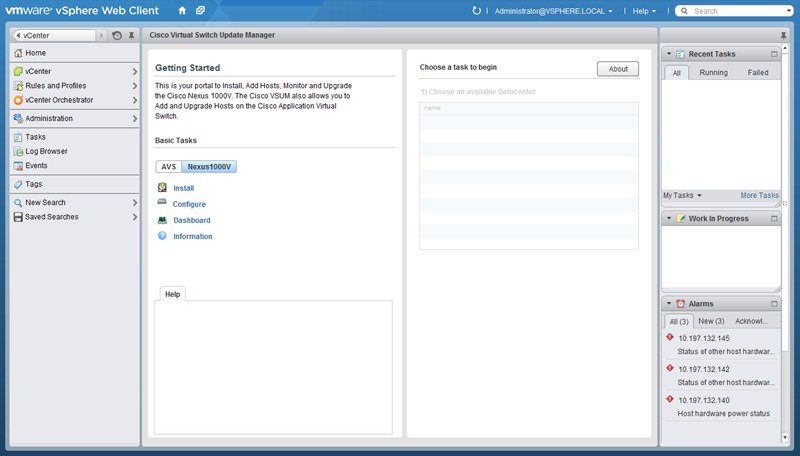
The Cisco VSUM enables you to install, migrate, monitor, and upgrade the VSMs in high availability (HA) or standalone mode and the VEMs on ESX/ESXi hosts.
The Cisco VSUM software is available on the Cisco Nexus 1000V VSUM download page on Cisco.com.
Compatibility Information for Cisco Virtual Switch Update Manager
The following table lists the compatibility information for Cisco Virtual Switch Update Manager.
See the Cisco Nexus 1000V and VMware Compatibility Information for more information about the compatibility for the Cisco Nexus 1000V.
System Requirements
Prerequisites
Cisco Virtual Switch Update Manager has the following prerequisites:
-
You have installed the VMware Enterprise Plus license on the hosts.
-
You have installed the vCenter Server 5.1 or 5.5 with Web Client.
-
You must have administrative credentials for vCenter Server.
-
You must have a username, IP address, subnet mask, and a gateway IP address for deploying the OVA.
-
Cisco Virtual Switch Update Manager must have IP connectivity on port 443 to all ESXi hosts.
-
Ensure that ports 80 and 443 are open in the vCenter to communicate with the host.
-
Ensure that the IP address used for deploying the OVA can communicate with the IP address of vCenter Server.
Verifying the Authenticity of the Cisco-Signed Image (Optional)
Before you install the Nexus1000v-vsum.1.1-pkg.zip image, you have the option to validate the authenticity of it. In the zip file, there is a signature.txt file that contains a SHA-512 signature and an executable script that can be used to verify the authenticity of the Nexus1000v-vsum.1.1-pkg.zip image.
 Note | Verifying the authenticity of an image is optional. You can still install the image without validating its authenticity. |
Installing the Cisco Virtual Switch Update Manager
You can install the Cisco Virtual Switch Update Manager OVA using the following steps.
- Ensure that the Cisco Virtual Switch Update Manager OVA image is available in the file system.
- Ensure that you have the IP
address, subnet mask, gateway IP address, domain name, DNS server, and vCenter
IP address and credentials for deploying the OVA.

Note
It is important that you use the credentials that you use for the thick client and vCenter Managed Object Browser (MOB) while installing Cisco Virtual Switch Update Manager.
About the Cisco Virtual Switch Update Manager GUI
Cisco Virtual Switch Update Manager is a virtual appliance that is registered as a plug-in to VMware vCenter Server.
The Cisco Virtual Switch Update Manager is the graphical user interface (GUI) that you use to install, migrate, monitor, and upgrade the VSMs in high availability (HA) or standalone mode and the VEMs on ESX/ESXi hosts.


Upgrading Cisco Virtual Switch Update Manager
| Step 1 | Log in to Cisco
Virtual Switch Update Manager (VSUM) as the root user.
The default Cisco VSUM username is root and the default Cisco VSUM password is cisco. | ||
| Step 2 | Download from
Cisco.com the zipped file containing the upgrade file for the version of VSUM
that you want to upgrade to.
The upgrade file name is vsum-upgrade-bundle-1.1.zip. | ||
| Step 3 | Copy the zipped file to VSUM by entering the following command: scp://vsum-upgrade-bundle-1.1.zip user_name@VSUM_IP:destination_directory | ||
| Step 4 | Unzip the file and display its contents. | ||
| Step 5 | Upgrade VSUM by
entering the following command:./upgrade-file-name.sh
vCenter-username vCenter-password
|
What to Do Next
Wait until the upgrade is complete. You can then log back into vCenter and use the upgraded VSUM.
Replacing Cisco Virtual Switch Update Manager—Windows vCenter Server
Use this procedure to replace an existing Cisco Virtual Switch Update Manager in the VMware vSphere Web Client.
Ensure that you power off the current Cisco Virtual Switch Update Manager before you begin this procedure.
| Step 1 | Power off the current active Cisco Virtual Switch Update Manager VM. |
| Step 2 | Enter https://VCIP/mob and log in with the default credentials. |
| Step 3 | In a web browser, choose . |
| Step 4 | Enter com.cisco.n1kv and click Invoke method. |
| Step 5 | Choose . |
| Step 6 | Right click the VMware vSphere Web Client and click stop. |
| Step 7 | From the C:\ProgramData\VMware\vSphere Web Client\ vc-packages\vsphere-client-serenity directory, delete the com.cisco.n1kv folder. |
| Step 8 | Choose . |
| Step 9 | Right click the VMware vSphere Web Client and click Start. |
| Step 10 | Install the new version of the Cisco Virtual Switch Update Manager VM. |
| Step 11 | After Cisco Virtual Switch Update Manager is successfully deployed, login to the VMware vSphere Web Client to view the Cisco Virtual Switch Update Manager plugin. |
Replacing Cisco Virtual Switch Update Manager—Linux vCenter Appliance
Use this procedure to replace an existing Cisco Virtual Switch Update Manager in the VMware vSphere Web Client.
Ensure that you power off the current Cisco Virtual Switch Update Manager before you begin this procedure.
| Step 1 | Power off the current active Cisco Virtual Switch Update Manager VM. |
| Step 2 | Enter https://VCIP/mob and log in with the default credentials. |
| Step 3 | In a web browser, choose . |
| Step 4 | Enter com.cisco.n1kv and click Invoke method. |
| Step 5 | Enter the rm -rf /var/lib/vmware/vsphere-client/vc-packages/vsphere-client-serenity/com.cisco.n1kv-1.0/ command. |
| Step 6 | Enter the /etc/init.d/vsphere-client restart command. |
| Step 7 | Install the new version of the Cisco Virtual Switch Update Manager VM. |
| Step 8 | After Cisco Virtual Switch Update Manager is successfully deployed, login to the VMware vSphere Web Client to view the Cisco Virtual Switch Update Manager plugin. |
Feature History for Installing Cisco Virtual Switch Update Manager
This table includes only the updates for those releases that have resulted in additions or changes to the feature.
|
Feature Name |
Releases |
Feature Information |
|---|---|---|
|
Installing Cisco Virtual Switch Update Manager |
Release 1.0 |
This feature was introduced. |
|
Upgrading Cisco Virtual Switch Update Manager |
Release 1.1 |
Upgrades from Release 1.0. |
 Feedback