Cisco Smart+Connected Spaces Mobile Application User Guide
Bias-Free Language
The documentation set for this product strives to use bias-free language. For the purposes of this documentation set, bias-free is defined as language that does not imply discrimination based on age, disability, gender, racial identity, ethnic identity, sexual orientation, socioeconomic status, and intersectionality. Exceptions may be present in the documentation due to language that is hardcoded in the user interfaces of the product software, language used based on RFP documentation, or language that is used by a referenced third-party product. Learn more about how Cisco is using Inclusive Language.
- Updated:
- February 5, 2015
Chapter: Getting Started
- About the Smart Spaces Mobile Application
- Supported Operating Systems
- Installing the Smart Spaces Mobile Application
- Configuring the Server IP Address
- Accessing the Smart Spaces Mobile Application
- Understanding the Smart Spaces Home Screen
- Icons and Descriptions
- Viewing Information About the Application
Getting Started
This chapter describes the Smart Spaces mobile application for the Cisco Smart+Connected Spaces solution.
About the Smart Spaces Mobile Application
The Cisco Smart+Connected Spaces solution enables you to plan the utilization of resources at your workspace by maximizing office use and minimizing energy consumption. It provides features for workspace check in and conference/TelePresence (TP) room booking by using your mobile phone.
You can search for and book available workspaces and conference/TP rooms and set your preferences.
The Smart Spaces mobile application offers you the following features:
- Viewing your upcoming meeting and workspace reservation details.
- Checking into and checking out of a reserved workspace using your mobile device.
- Searching for the required conference/TP room.
- Viewing the availability status of all of the rooms on any floor in any building within the enterprise.
- Booking conference/TP rooms using your mobile device based on your requirements, such as, the features available, seating capacity, location, and time.
- Inviting people in your enterprise to participate in meetings (during the room booking process).
- Ad-hoc checking in from the list of available workspaces and checking out using the QR code scanning feature.
- Marking workspaces and people within the enterprise as favorites.
- Set your preferences for building and floor.
- Searching for people within the enterprise.
- Initiating either a call or sending text messages and emails using the mobile device.
Supported Operating Systems
The Smart Spaces mobile application is compatible with the following mobile operating systems:
Installing the Smart Spaces Mobile Application
To install the Smart Spaces mobile application on your smartphone, perform the following steps:
Step 1![]() Open a web browser on your mobile device and enter the URL for the Smart Spaces mobile application. For example, http:// Smart Spaces IP Address : Smart Spaces port #/ipsapp/mobile_download/index.jsp
Open a web browser on your mobile device and enter the URL for the Smart Spaces mobile application. For example, http:// Smart Spaces IP Address : Smart Spaces port #/ipsapp/mobile_download/index.jsp
The Smart Spaces mobile application welcome screen appears.
The installer (SmartSpaces_Mobile.apk for Android phones or SmartSpacesMobileIOSNew.ipa for iPhone) appears asking you to confirm the download.

Note![]() To install the application on an Android device, select Unknown sources in Settings > More > Security as we are not installing the application from the Google Play Store.
To install the application on an Android device, select Unknown sources in Settings > More > Security as we are not installing the application from the Google Play Store.
The Smart Spaces mobile application is downloaded to your iPhone and the S+C Spaces icon  is created for the application. Tap the icon to launch the application.
(Alternatively) Proceed to Step 4 if you are installing the application on an Android device.
Step 4![]() Tap the downloaded installer file.
Tap the downloaded installer file.
The S+C Spaces screen appears.
Step 5![]() Read the privacy and device access conditions and tap Install.
Read the privacy and device access conditions and tap Install.
You get a confirmation message that the Smart Spaces mobile application is installed on your mobile device.
Step 6![]() Tap Done to exit the installer or tap Open to launch the Smart Spaces mobile application.
Tap Done to exit the installer or tap Open to launch the Smart Spaces mobile application.
Configuring the Server IP Address
To configure the server IP address for Smart Spaces mobile application, perform the following steps:
Step 1![]() Click the settings button on the upper right corner of the screen.
Click the settings button on the upper right corner of the screen.
Step 2![]() Enter the IP address and the Port number of the spaces server.
Enter the IP address and the Port number of the spaces server.
Step 3![]() Click Save to save the settings
Click Save to save the settings
Step 4![]() Click OK on the success message.
Click OK on the success message.
(Alternatively) Click Cancel to cancel the settings and go to the login screen.
Accessing the Smart Spaces Mobile Application
To access the Smart Spaces mobile application on your smartphone, perform the following steps:
Step 1![]() Tap the S+C Spaces icon on your mobile device.
Tap the S+C Spaces icon on your mobile device.
The Smart Spaces login screen appears.
Step 2![]() Enter the username and password in the Username and Password fields.
Enter the username and password in the Username and Password fields.
Step 3![]() (Optional) Check the Keep me signed-in check box if you do not want to be logged off automatically, unless you want to log out of the application.
(Optional) Check the Keep me signed-in check box if you do not want to be logged off automatically, unless you want to log out of the application.
The Smart Spaces home screen appears.
Note![]() The first time that you log in you are directed to the Preferences screen, where you need to set the default building or floor for yourself. After this is set, the next log in instance directs you to the home screen.
The first time that you log in you are directed to the Preferences screen, where you need to set the default building or floor for yourself. After this is set, the next log in instance directs you to the home screen.
Note![]() Contact the administrator if you are unable to log in to the application.
Contact the administrator if you are unable to log in to the application.
Understanding the Smart Spaces Home Screen
The Smart Spaces mobile application home screen has the basic details of a user, such as, user’s name and location, home, QR scan, and logout buttons at the top of the screen, and a quick launch bar at the bottom of the screen to access other resources.
The Smart Spaces mobile application home screen displays your location details and the list of meetings for the current day. You can view your future schedule by choosing a different date, use the side arrows to toggle the dates. Alternatively, you can select a specific date using the date picker to view the list of meetings for that date. Tapping the slider on any of the meeting in the meeting list displays the following icons:
- Invitees—Tap the invitees
 icon to view the list of invitees of the selected meeting. Tap on any of the invitee in the attendee list to view their details. The Attendee Details screen displays the following information:
–![]() Profile picture. If the profile picture is not available, then the default silhouette image is displayed.
Profile picture. If the profile picture is not available, then the default silhouette image is displayed.
–![]() Location details with the locate
Location details with the locate  icon if the contact has checked in to a workspace.
–![]() The favorite
The favorite  icon next to each contact detail.
–![]() Contact details such as the mobile number, office number, and email ID of the associate.
Contact details such as the mobile number, office number, and email ID of the associate.
- WebEx—Tap the WebEx
 icon to launch the WebEx application The WebEx application can be launched only when it is installed on your device. This icon is displayed only when a selected meeting is a WebEx meeting.
- Conference— Tap the conference
 icon to view the list of conference rooms where the meeting is scheduled. To view the exact location of a conference room, tap the locate
 icon on any of the conference room. Tapping the locate icon launches/loads the floor plan with a dialog box showing the exact location of the conference room. The dialog box displays the conference room name, availability status, Route and the Cancel button. Tap the Route button to view the direction to the conference room, tap the Book button to book the room, or tap the Cancel button to close the dialog box. The Book button is displayed only for the available rooms.
Figure 1-1 displays the home screen user interface of the Smart Spaces mobile application.
Figure 1-1 Home Screen User Interface of the Smart Spaces Mobile Application

Table 1-1 describes the elements of the Smart Spaces mobile application user interface.
|
|
|
|---|---|
The Home icon displays the meetings for the current date from the MS Exchange server. You can also select the date using the available date picker, to view the list of meetings for that date. |
|
The scan icon allows you to scan the QR code using the camera application available on the smartphone to either check in, or check out of a reserved or available workspace.
Note |
|
The Log out icon allows you to log out from the Smart+Connected Spaces mobile application. |
|
The Check Out icon allows you to check out of the location that you are checked in to. |
|
The Check In icon displays your current checked-in location, if you have checked in. |
|
Displays a list of your meetings1 for the current day. You can use the side arrows to toggle the dates. Alternatively, you can select a specific date using the available date picker, to view the list of meetings for that date. |
|
The People icon allows you to navigate to the list of available people within your enterprise. It also allows you to mark or unmark a person as favorite. |
|
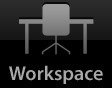
The Workspace icon allows you to access your bookings and also view the availability of all the workspaces within your enterprise. It also allows you to mark workspaces as favorites. |
|
The Conference icon allows you to book available conference rooms on any floor of any building in your enterprise. |
|
The Buildings icon allows you to view and locate buildings of an enterprise. |
|
The More icon allows you to set your building and floor preferences. It also lets you view a brief description of the Smart+Connected Spaces mobile application. |
|
|
Icons and Descriptions
Table 1-2 lists the available icons and their descriptions.


Viewing Information About the Application
To view the information about the available main tasks in the Smart Spaces mobile application, perform the following steps:
Step 1![]() Log in to the Smart Spaces mobile application.
Log in to the Smart Spaces mobile application.
The Smart Spaces home screen appears.
A screen appears listing the Preferences and About options.
The About screen appears. It provides the version number and description of the Smart Spaces mobile application.
 Feedback