- Prime Network Customization Overview
- Modeling and Displaying Additional NE Properties
- Adding Support for New Devices, Software Versions and Modules Using the VCB
- Creating Commands and Command Scripts to Perform Device Configuration Operations
- Deploying Activation Workflows to Devices Using Transaction Manager
- Adding Support for New Events Using the VCB
- Adding New Threshold-Crossing Alarms
- Adding External Launch Points to the GUI Client
- Soft Properties: Supported Parsing Operators, Rules, and Regular Expressions
- VCB: CLI Commands and Template Reference
- Command Manager and Command Builder: Macro Language and Beanshell Reference
Cisco Prime Network Customization Guide, 5.0
Bias-Free Language
The documentation set for this product strives to use bias-free language. For the purposes of this documentation set, bias-free is defined as language that does not imply discrimination based on age, disability, gender, racial identity, ethnic identity, sexual orientation, socioeconomic status, and intersectionality. Exceptions may be present in the documentation due to language that is hardcoded in the user interfaces of the product software, language used based on RFP documentation, or language that is used by a referenced third-party product. Learn more about how Cisco is using Inclusive Language.
- Updated:
- March 2, 2016
Chapter: Deploying Activation Workflows to Devices Using Transaction Manager
- What is Transaction Manager?
- Setup Tasks for Transaction Manager
- Steps for Creating and Deploying Transactions
- Transaction Manager Window and Repository
- Creating Transactions Using the Prime Network XDE SDK
- Importing Transactions Into Prime Network
- Previewing and Executing Transactions
- Running Transactions Using Input Stored in a File
- Finding and Controlling Transaction Jobs
- Cancelling Transaction Manager Jobs
Deploying Activation Workflows to Devices Using Transaction Manager
The following topics explain how to use the Transaction Manager to deploy activation workflows (transactions) to devices:
- What is Transaction Manager?
- Setup Tasks for Transaction Manager
- Steps for Creating and Deploying Transactions
- Transaction Manager Window and Repository
- Creating Transactions Using the Prime Network XDE SDK
- Importing Transactions Into Prime Network
- Previewing and Executing Transactions
- Finding and Controlling Transaction Jobs
- Cancelling Transaction Manager Jobs
What is Transaction Manager?
Transaction Manager provides a GUI framework you can use to schedule and run transactions (workflows) that are created using the Prime Network XDE Eclipse SDK. You can also run transactions using the NBI.
Transactions are XDE procedures that contain tasks that are grouped together and specified into a flow, with certain sequences, branches, and failure policies (including rollback procedures). Transactions can include commands that you created using Command Manager or Command Builder. To include Command Builder commands, you need to perform the tasks outlined in the required extensions to the XDE Eclipse SDK (which has special features to work with Command Builder scripts).
Transaction rules, parameters, and implementation are stored on the gateway. Transactions (XDE procedures) are saved as archive files (.xar) and maintained at XMP_HOME /xmp_inventory/xde-home/packages/site. Jobs are also stored on the gateway and are purged according to the global settings in Prime Network.
Setup Tasks for Transaction Manager
Before you use Transaction Manager, check the Administration GUI client settings that controls whether users must enter their credentials before running transactions that include command scripts.
A user must have Administrator or Configurator privileges to run transactions. If per-user job authorization is enabled, Administrator and Configurator users must also be granted job privileges. The following table explains this and other global settings that can affect the transactions function. (These are in the Administration GUI client under Global Settings > Security Settings > User Account Settings .
For more information on these global settings, see the Cisco Prime Network 5.0 Administrator Guide .
Steps for Creating and Deploying Transactions
The following table lists the steps you must follow to create and execute a transaction.
Transaction Manager Window and Repository
You can launch Transaction Manager from Change and Configuration Management, as shown in the following figure. (You may have to expand the title bar by clicking the arrow at the top left.)

When you select Transactions > Transactions , Prime Network displays all of the transactions on the Prime Network gateway. After you create transactions, you can import them into Transaction Manager and they will be listed in the transaction repository.
Figure 5-1 Transaction Manager Repository
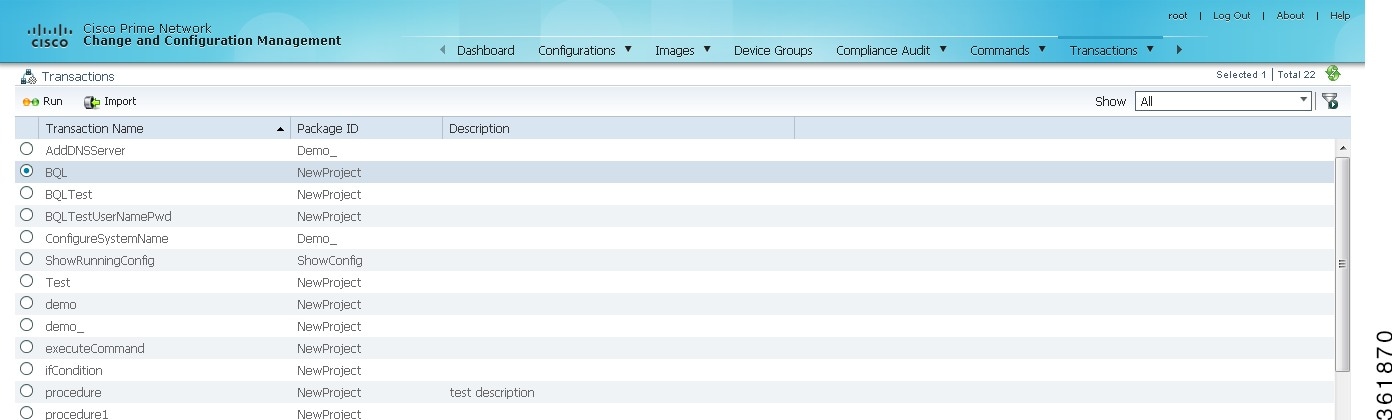
For information on the user roles required to run transactions, see Setup Tasks for Transaction Manager.
Creating Transactions Using the Prime Network XDE SDK
Use the Prime Network XDE SDK to create procedures called transactions (activation workflows). The XDE SDK is an Eclipse-based plug-in that provides a complete development environment for creating flowchart and device interaction packages. The XDE SDK includes a graphical flowchart editor for creating procedures, and uses an expression language that is focused on string-based and XML-oriented data processing.
Transactions can include Command Manager commands, Command Builder commands, SNMP commands, and CLI commands—or a combination of the four. However, if you want to use Command Builder commands in a transaction, you must create an XDE Protocol Abstraction Layer (PAL) Action to use in transactions. For installing XDE and creating the necessary PAL action, contact Advanced Services.
Importing Transactions Into Prime Network
You can import user-created commands and packages, either from the local system or a gateway server. Import operations will query you for the location of the zip file that contains the transactions.
Step 1 Select Transaction > Transactions , and then click the Import icon at the top left of the screen.
Step 2 Choose either Local System or Gateway Server to import the file, and then click Browse.
Step 3 Select the XDE package to be added to transaction repository. Only the files with a .xar extension is accepted.
Preview and execute the transaction as described in Previewing and Executing Transactions.
Previewing and Executing Transactions
When you preview a transaction, you can see how it will appear to users. Use the preview feature to see the Telnet and SNMP commands called by the transaction. This includes all Telnet and SNMP commands in Command Builder and Command Manager scripts. You can either choose a device or a device group on which you want to run the transaction.
After you execute a transaction with Create Job , Prime Network displays the job status page from which you can get job details.
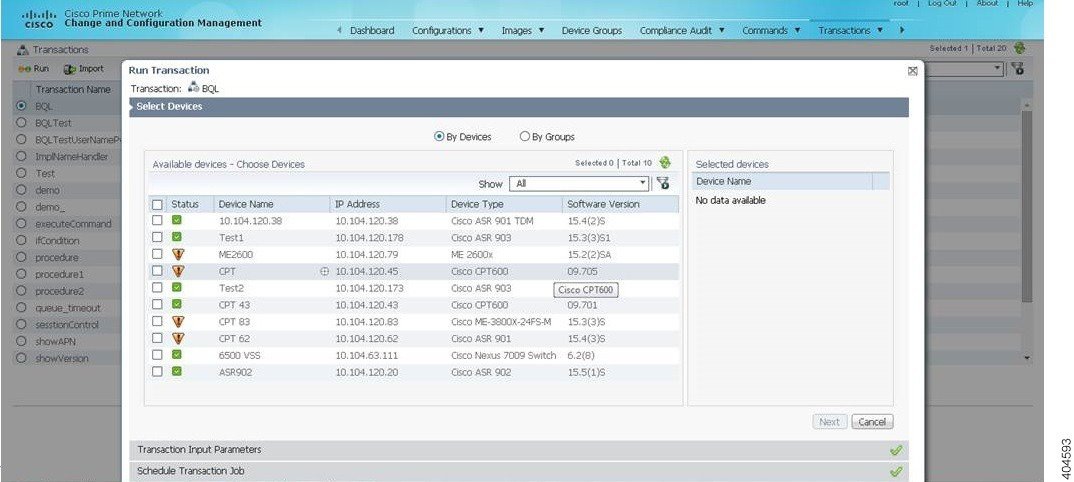
Step 1 Choose Transactions > Transactions , select the transaction from the list, and then click the Run icon at the top left of the screen.
Step 2 In the Select Device pane, choose one of the following options:
- By Devices—Choose this option to select the device(s) on which you want to run the transaction.
- By Groups—Choose this option to select the device group(s) on which you want to run the transaction. There must be at least one device added to a device group for the transaction to run on that group. If a device is added to multiple device groups that are selected, the transaction will run only once on that device. For information on how to set up a device group, see the Setting up CCM Device Groups in Cisco Prime Network 5.0 User Guide .

Note The transaction will run on the devices that are available in the device group at the time of execution.
You can quickly check the device properties by clicking the icon next to the device IP address, as shown in Figure 5-2.
Figure 5-2 Device Properties in Transactions Manager
Step 4 In the Transaction Input Parameters pane, enter the input parameters for the transaction, if required. (Not all transactions require input parameters.)
You can import or export input parameters for all or individual devices during transaction execution. For more information see, Running Transactions Using Input Stored in a File.
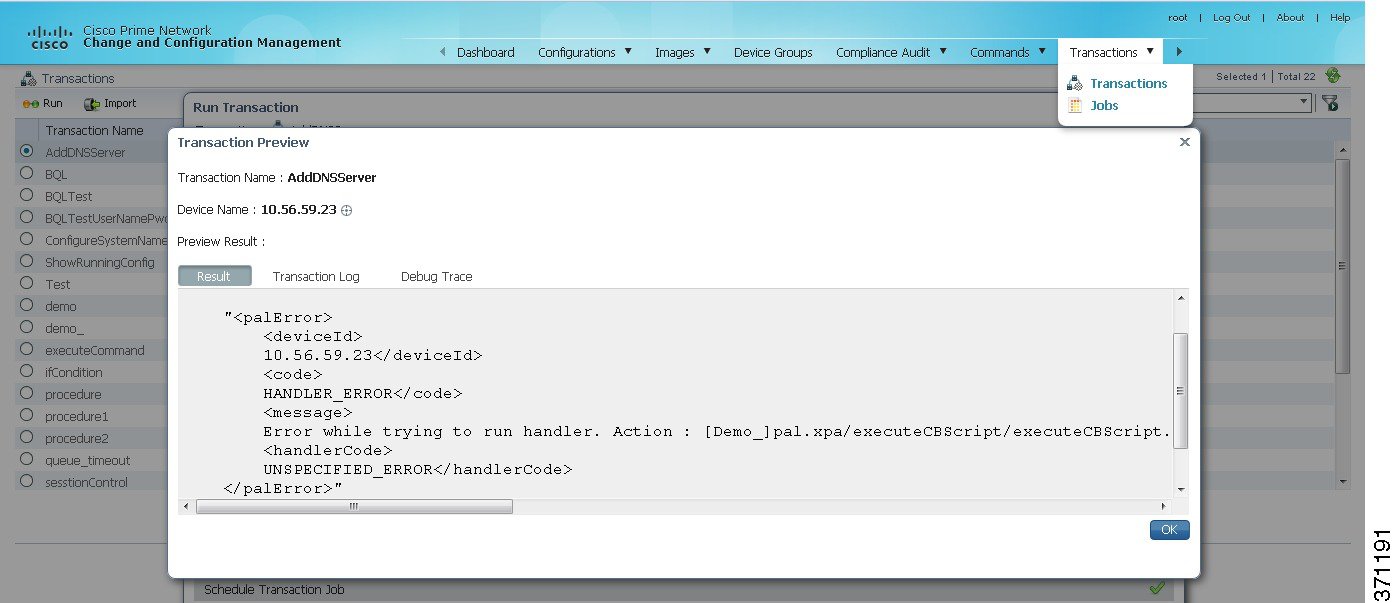
Click Preview to see the CLI commands called by the transaction.
Figure 5-3 Transaction Preview
Step 5 Click Next. The Schedule Transaction Job pane is displayed.
Step 6 In the Job Name field, enter a meaningful name for the transaction job. The default email ID is displayed in the E-Mail ID(s) text area. You can configure the default email ID in the Configuration Management Settings page ( Configurations > Settings ).
Step 8 In the job dialog box, click the job hyperlink to view the status in the Transaction Jobs page.
Note An email with the job information is sent to the default email ID.
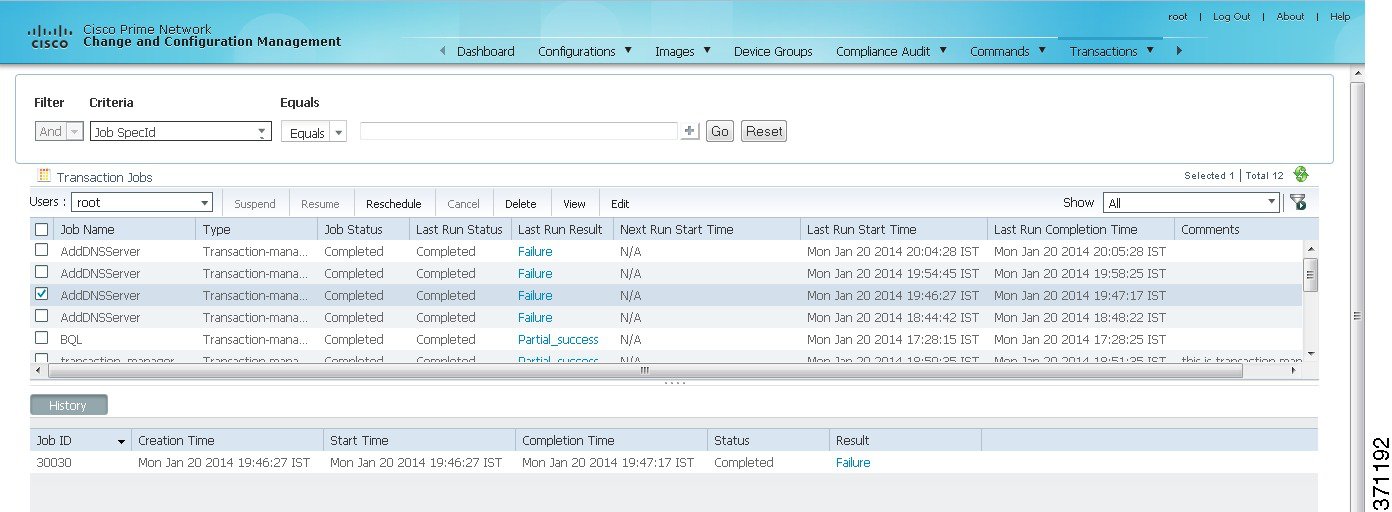
Step 9 To view the job details, select the job and click the hyperlink under the Last Run Result column. The Transaction Job Details page is displayed with the job detail for that job instance.
Figure 5-5 Transaction Job Details
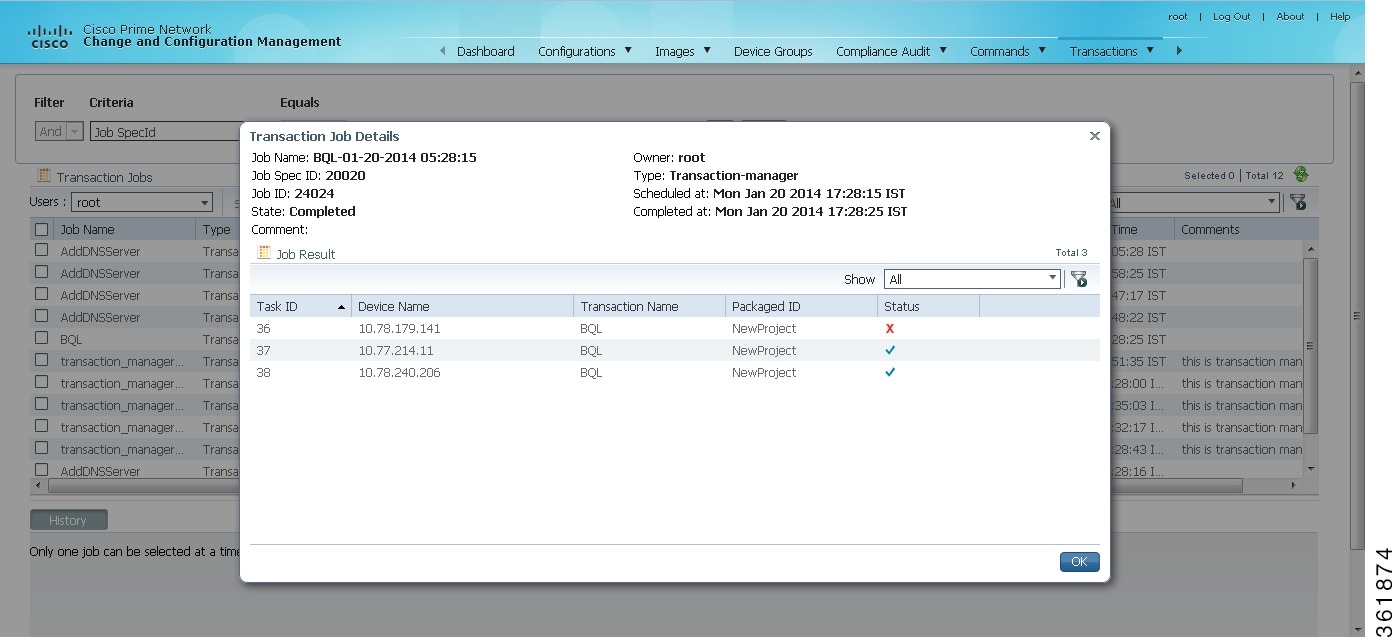
You can check the results of each step in the transaction by clicking the hyperlink in the Status column.
The last step result of the transaction (provided by the transaction) |
|
Log containing the results of device interaction (for example, the result of a command execution). |
|
Running Transactions Using Input Stored in a File
For bulk configurations, you can create an XLS or CSV files with parameter values and import the file into the transaction.
Step 1 Create a file that contains the parameter values.
a. Select the transaction from the repository, and then click Run .
b. Select the devices you want to configure, and then click the Export icon at the top right of the Transaction Input Parameters pane.
c. In the Export File dialog box, choose either Export to Local System or Export to Gateway Server to export the file.
Note If you choose the Export to Gateway Server option, the file name transaction.csv is populated in the Gateway Export Filename text box.
Step 2 Populate the trsnasction .csv file with your desired attribute values. One column is dedicated to each attribute.
Step 3 Run the command using your trsnasction .csv file as input.
a. Select the command in the repository, and then click Run .
b. Select the devices you want to configure. They must match the devices in your spreadsheet.
c. In the Parameters area, click the Import icon.
Figure 5-6 Transaction Input Parameters
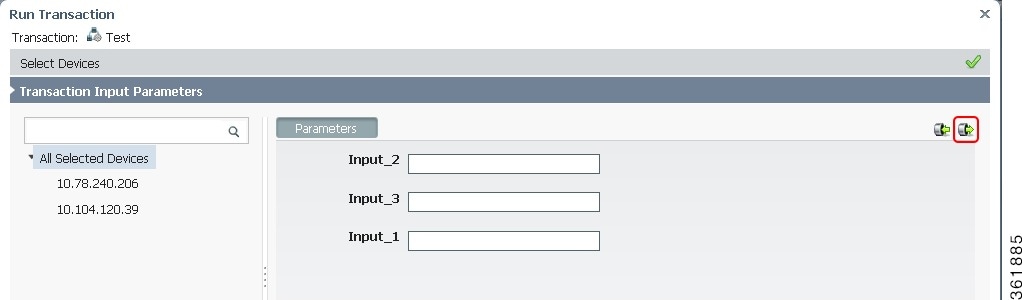
d. Choose Local System or Gateway Server , as required to navigate to the file that contains your input, and then click OK .
Finding and Controlling Transaction Jobs
Transaction Manager jobs are automatically deleted according to the Prime Network job purging settings. By default, these jobs are never purged. For information on the user roles required to manage transaction jobs, see Setup Tasks for Transaction Manager.
For an example of how to get details about an executed job, see Previewing and Executing Transactions.
You can use the filter mechanism to locate executed and scheduled jobs using different search criteria, such as username, device name or IP, time stamps, and so forth. To view all of the possible criteria, click the Criteria drop-down list. When you choose a criteria, you then supply a value and click Go .
You can also locate transactions using a search based on input parameters. In this case, you supply the search criteria (in addition to the value), as shown in the following procedure.
Step 1 Choose Transaction > Jobs , select the transaction from the list, and click Next .
Step 2 From the Criteria drop-down list, choose Input Parameters . The Criteria field becomes an editable text box.
Step 3 In the Criteria text box, overwrite the Input Parameter text with any string; for example, Interface .
Step 4 Select an operator from the drop-down list; for example, Contains .
Step 5 Enter a value; for example, gigabit/0/1 .
Cancelling Transaction Manager Jobs
To cancel the job that is in the running state:
Step 1 Select the job in the Transaction Manager Jobs window.
Step 2 Click Cancel.
The Job Status displays as Cancelled and the Lastrun Status displays as Cancelled with a hyperlink.
Step 3 Click the Cancelled hyperlink in the Lastrun Status field to display the Transaction Manager Job Result window.
The job results display the information about successful, unsuccessful, and cancelled tasks.
 Feedback