User Guide for Cisco Network Registrar 7.2
Bias-Free Language
The documentation set for this product strives to use bias-free language. For the purposes of this documentation set, bias-free is defined as language that does not imply discrimination based on age, disability, gender, racial identity, ethnic identity, sexual orientation, socioeconomic status, and intersectionality. Exceptions may be present in the documentation due to language that is hardcoded in the user interfaces of the product software, language used based on RFP documentation, or language that is used by a referenced third-party product. Learn more about how Cisco is using Inclusive Language.
- Updated:
- March 20, 2015
Chapter: User Interfaces
- Introduction to the Web-Based User Interfaces
- Local Cluster Web UI
- Regional Cluster Web UI
- Command Line Interface
- Central Configuration Management Server
Cisco Network Registrar User Interfaces
Cisco Network Registrar provides a regional and a local web-based user interface (web UI) and a regional and local command line interface (CLI) to manage the DNS, DHCP, TFTP, and Central Configuration Management (CCM) servers:
•![]() Web UI for the regional cluster to access local cluster servers—See the "Regional Cluster Web UI" section).
Web UI for the regional cluster to access local cluster servers—See the "Regional Cluster Web UI" section).
•![]() Web UI for the local cluster—See the "Local Cluster Web UI" section).
Web UI for the local cluster—See the "Local Cluster Web UI" section).
•![]() CLI for the local clusters—Open the CLIContent.html file in the installation /docs directory (see the "Command Line Interface" section).
CLI for the local clusters—Open the CLIContent.html file in the installation /docs directory (see the "Command Line Interface" section).
•![]() CCM servers that provide the infrastructure to support these interfaces—See the "Central Configuration Management Server" section).
CCM servers that provide the infrastructure to support these interfaces—See the "Central Configuration Management Server" section).
This chapter describes the Cisco Network Registrar user interfaces and the services that the CCM servers provide. Read this chapter before starting to configure the Cisco Network Registrar servers so that you become familiar with each user interface capability.
Introduction to the Web-Based User Interfaces
The web UI provides granular access to configuration data through user roles and constraints. The web UI granularity is described in the following sections.
See Also
Supported Web Browsers
Access Security
Logging In to the Web UIs
Multiple Users
Changing Passwords
Navigating the Web UIs
Waiting for Page Resolution Before Proceeding
Committing Changes in the Web UIs
Role and Attribute Visibility Settings
Displaying and Modifying Attributes
Help Pages
Logging Out
Supported Web Browsers
The minimum web browsers supported in Cisco Network Registrar are Internet Explorer 5.5 and Netscape 6.2. It will also support Internet Explorer 7.1 and 8.0, and Firefox 3.0 and 3.5.
Access Security
At Cisco Network Registrar installation, you can choose to configure HTTPS to support secure client access to the web UIs. You must specify the HTTPS port number and provide the keystore at that time. With HTTPS security in effect, the web UI Login page (see Figure 2-1) indicates that the "Page is SSL1 Secure."

Note ![]() Do not use a dollar sign ($) symbol as part of a keystore password.
Do not use a dollar sign ($) symbol as part of a keystore password.
Logging In to the Web UIs
You can log in to the Cisco Network Registrar local or regional cluster web UIs either by HTTPS secure or HTTP nonsecure login. After installing Cisco Network Registrar, open one of the supported web browsers and specify the login location URL in the browser address or netsite field. Login is convenient and provides some memory features to increase login speed.
You can log in using a nonsecure login in two ways:
•![]() On Windows, from the Start menu, choose Start > Programs > Cisco Network Registrar 7.2 > Cisco Network Registrar 7.2 {local | regional} Web UI. This opens the local or regional cluster web UI from your default web browser.
On Windows, from the Start menu, choose Start > Programs > Cisco Network Registrar 7.2 > Cisco Network Registrar 7.2 {local | regional} Web UI. This opens the local or regional cluster web UI from your default web browser.
•![]() Open the web browser and go to the web site. For example, if default ports were used during the installation, the URLs would be http://hostname:8080 for the local cluster web UI, and http://hostname:8090 for the regional cluster web UI.
Open the web browser and go to the web site. For example, if default ports were used during the installation, the URLs would be http://hostname:8080 for the local cluster web UI, and http://hostname:8090 for the regional cluster web UI.
This opens the New Product Installation page if no valid license is added at the time of installation. You have to browse and add the valid license. If the license key is acceptable, the Add Superuser Administrator page is displayed. Enter the Name and Password and click Add. The password is case sensitive (See the "Managing Passwords" section on page 5-7). If you already added the valid license and superuser and configured a password at the time of installation, then you can login to the web UI using that username and password.
Note ![]() There is no default username or password for login.
There is no default username or password for login.
With a conventional login, the page indicates "Page is not secure" (see Figure 2-1); with an SSL-secured login, the page indicates "Page is SSL Secure."
Note ![]() To prepare for an HTTPS-secured login, see the Installation Guide for Cisco Network Registrar.
To prepare for an HTTPS-secured login, see the Installation Guide for Cisco Network Registrar.
Figure 2-1 Web UI Login Page
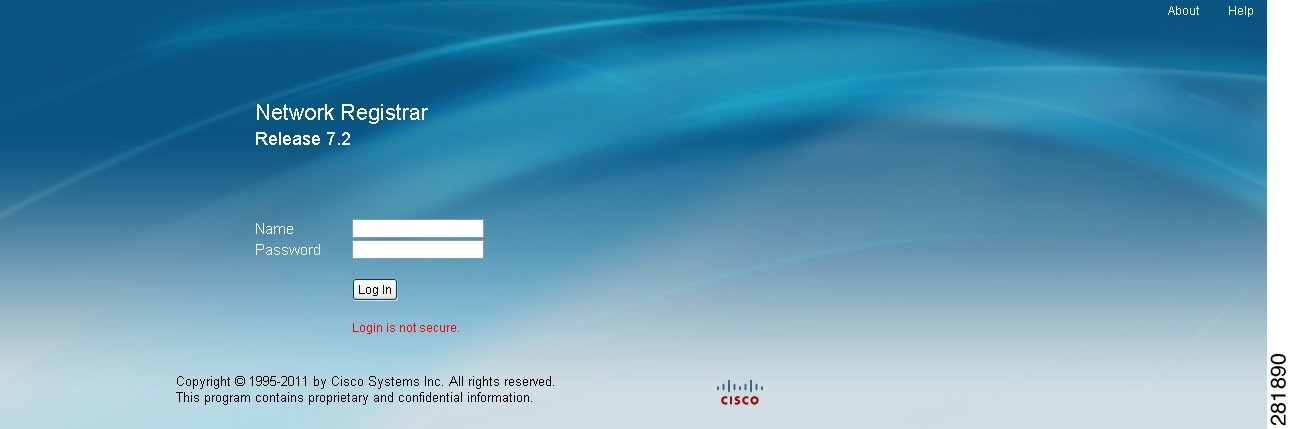
Depending on how your browser is set up, you might be able to abbreviate the account name or choose it from a drop-down list while setting the username.
To log in, click Login.
Adding License
Cisco will e-mail you one or more license files after you register the Cisco Network Registrar Product Authorization Key (PAK) on the web according to the Software License Claim Certificate shipped with the product. Cisco administers licenses through a FLEXlm system. Once you have the file or files:
1. ![]() Locate the license file or files in a directory (or on the desktop) that is easy to find.
Locate the license file or files in a directory (or on the desktop) that is easy to find.
2. ![]() On the Add Product License page, browse for each file by clicking the Browse button.
On the Add Product License page, browse for each file by clicking the Browse button.
3. ![]() In the Choose file window, find the location of the initial license file, then click Open.
In the Choose file window, find the location of the initial license file, then click Open.
4. ![]() If the license key is acceptable, the Add Superuser Administrator page appears immediately.
If the license key is acceptable, the Add Superuser Administrator page appears immediately.
5. ![]() To add further licenses, click Administration, then Licenses to open the List/Add Product License page. Click Browse to open the Choose file window, locate the additional license file, then click Open. If the key in the file is acceptable, the key, type, count, and expiration date appear, along with whether it is an evaluation key. If the key is not acceptable, the page shows the license text along with an error message. For the list of license types, see the "Licensing" section on page 5-20.
To add further licenses, click Administration, then Licenses to open the List/Add Product License page. Click Browse to open the Choose file window, locate the additional license file, then click Open. If the key in the file is acceptable, the key, type, count, and expiration date appear, along with whether it is an evaluation key. If the key is not acceptable, the page shows the license text along with an error message. For the list of license types, see the "Licensing" section on page 5-20.
Under the table of licenses is a License Utilization area that, when expanded, shows the license types along with the total nodes that you can use and those actually used.
To reenter a previously active session, click Reuse current session (assuming that you did not remove cookies in the web browser).

Tip ![]() If you log back in to a previously active session without clicking Reuse current session, you could have two active sessions open, which can cause failures. For example, if your active session was the first one after an installation, when you enter the license key, you are prompted for it again indefinitely. To avoid this, click Reuse current session, or close and reopen the browser to initiate a new session.
If you log back in to a previously active session without clicking Reuse current session, you could have two active sessions open, which can cause failures. For example, if your active session was the first one after an installation, when you enter the license key, you are prompted for it again indefinitely. To avoid this, click Reuse current session, or close and reopen the browser to initiate a new session.
Multiple Users
The Cisco Network Registrar user interfaces support multiple, concurrent users. If two users try to access the same object record or data, a Modified object error will occur for the second user. If you receive this error while editing user data, do the following:
•![]() In the web UI—Cancel the edits and refresh the list. Changes made by the first user will be reflected in the list. Redo the edits, if necessary.
In the web UI—Cancel the edits and refresh the list. Changes made by the first user will be reflected in the list. Redo the edits, if necessary.
•![]() In the CLI—Use the session cache refresh command to clear the current edits, before viewing the changes and making further edits. Make changes, if you feel that it is necessary even after the other user's changes.
In the CLI—Use the session cache refresh command to clear the current edits, before viewing the changes and making further edits. Make changes, if you feel that it is necessary even after the other user's changes.
Changing Passwords
Whenever you edit a password on a web UI page, it is displayed as a string of eight dots. The actual password value is never sent to the web browser. So, if you change the password, the field is automatically cleared. You must enter the new password value completely, exactly as you want it to be.
Note ![]() The password should not be more than 255 characters long.
The password should not be more than 255 characters long.
For details on changing administrator passwords at the local and regional cluster, see the "Managing Passwords" section on page 5-7.
Navigating the Web UIs
The web UI provides a hierarchy of pages based on the functionality you desire and the thread you are following as part of your administration tasks. The page hierarchy prevents you from getting lost easily.

A single sign-on feature is available to connect between the regional and local cluster web UIs. Many of the regional cluster web UI pages include the Go Local icon ( ), which you can click to connect to the local cluster associated with the icon. If you have single sign-on privileges to the local cluster, the connection takes you to the related local server management page (or a related page for related server configurations). If you do not have these privileges, the connection takes you to the login page for the local cluster. To return to the regional cluster, local cluster pages have the Go Regional icon (
 ) at the top right corner of the page.
Note ![]() Navigation bar items can vary based on if you have the role privileges for IPv4 or IPv6. For example, the Address Space menu bar can be Address Space v4 and Address Space v6 if you have the ipv6-management subrole of the addrblock-admin role assigned. In this User Guide, the convention is to use only the generic label of the menu bar in instructions. Similarly, DHCP can mean the DHCP, DHCPv4, or DHCPv6 tabs.
Navigation bar items can vary based on if you have the role privileges for IPv4 or IPv6. For example, the Address Space menu bar can be Address Space v4 and Address Space v6 if you have the ipv6-management subrole of the addrblock-admin role assigned. In this User Guide, the convention is to use only the generic label of the menu bar in instructions. Similarly, DHCP can mean the DHCP, DHCPv4, or DHCPv6 tabs.
Waiting for Page Resolution Before Proceeding
Operations performed in the web UI, such as resynchronizing or replicating data from server clusters, are synchronous in that they do not return control to the browser until the operation is completed. These operations display confirmation messages in blue text. Also, both the Netscape and IE browsers display a wait cursor while the operation is in progress.
Tip ![]() Wait for each operation in the web UI to finish before you begin a new operation. If the browser becomes impaired, close the browser, reopen it, then log in again.
Wait for each operation in the web UI to finish before you begin a new operation. If the browser becomes impaired, close the browser, reopen it, then log in again.
Committing Changes in the Web UIs
You do not actually commit the page entries you make until you click Add... or Modify... on the page. You can delete items using the Delete icon ( ). To prevent unwanted deletions, a Confirm Delete page appears in many cases so that you have a chance to confirm or cancel the deletion.
Role and Attribute Visibility Settings
In Advanced user mode (see the "Local Advanced Main Menu Page" section), the Main Menu page shows the administrative roles assigned to the logged-in administrator. It also presents a choice of which visibility you want the configuration attributes to be in the web UI:
•![]() To view the user groups and roles for the administrator, click the plus sign (+) next to the User Role and Group Data heading. Superuser is a special kind of administrator. (For details how to set up these administrator roles, see the "Create the Administrators" section on page 5-32.)
To view the user groups and roles for the administrator, click the plus sign (+) next to the User Role and Group Data heading. Superuser is a special kind of administrator. (For details how to set up these administrator roles, see the "Create the Administrators" section on page 5-32.)
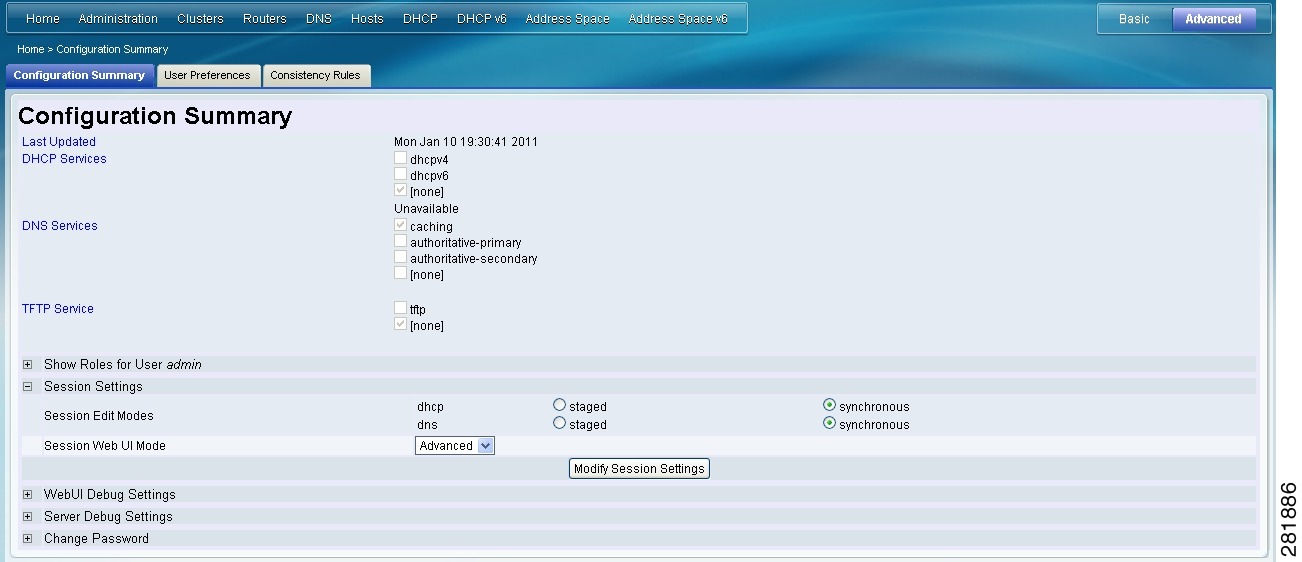
•![]() To set the attribute visibility settings for this user session only, click the plus sign (+) next to the Session Settings heading (see Figure 2-5). Pull down the choices next to the Session Web UI Mode, choose a mode, then click Modify Session Settings:
To set the attribute visibility settings for this user session only, click the plus sign (+) next to the Session Settings heading (see Figure 2-5). Pull down the choices next to the Session Web UI Mode, choose a mode, then click Modify Session Settings:
–![]() Basic—Basic user mode (the preset choice).
Basic—Basic user mode (the preset choice).
–![]() Advanced—Advanced user mode that exposes the normal attributes.
Advanced—Advanced user mode that exposes the normal attributes.
–![]() Expert—Expert user mode that exposes a set of attributes that are relevant for fine-tuning or troubleshooting the configuration. In most cases, you would accept the default values for these expert attributes and not change them without guidance from the Cisco Technical Assistance Center (TAC). Each Expert mode attribute is marked with a Warning icon (
Expert—Expert user mode that exposes a set of attributes that are relevant for fine-tuning or troubleshooting the configuration. In most cases, you would accept the default values for these expert attributes and not change them without guidance from the Cisco Technical Assistance Center (TAC). Each Expert mode attribute is marked with a Warning icon ( ) on the configuration pages. Each page is clearly marked as being in Expert mode.
When you leave Expert mode (click Basic or Advanced), the Expert button disappears. To reenter Expert mode, you must set the web UI mode to Expert again.
Displaying and Modifying Attributes
Many of the web UI pages, such as those for servers, zones, and scopes, include attribute settings that correspond to those you can set using the CLI. (The CLI name equivalents appear under the attribute name.) The attributes are categorized into groups by their function, with the more prominent attributes listed first and the ones less often configured nearer the bottom of the page.
Grouping and Sorting Attributes
On many Advanced mode web UI pages, you can toggle between showing attributes in groups and in alphabetical order. These pages generally open by default in group view so that you can see the attributes in their respective categories. However, in the case of large numbers of attributes, you might want to see the attributes alphabetized. Click Show A-Z View to change the page to show the attributes alphabetically. Click Show Group View to change the page to show the attributes in groups. Figure 2-2 and Figure 2-3 show the difference between group and A-Z views for a sample web UI page.
Figure 2-2 Attributes in Group View (Local Advanced)
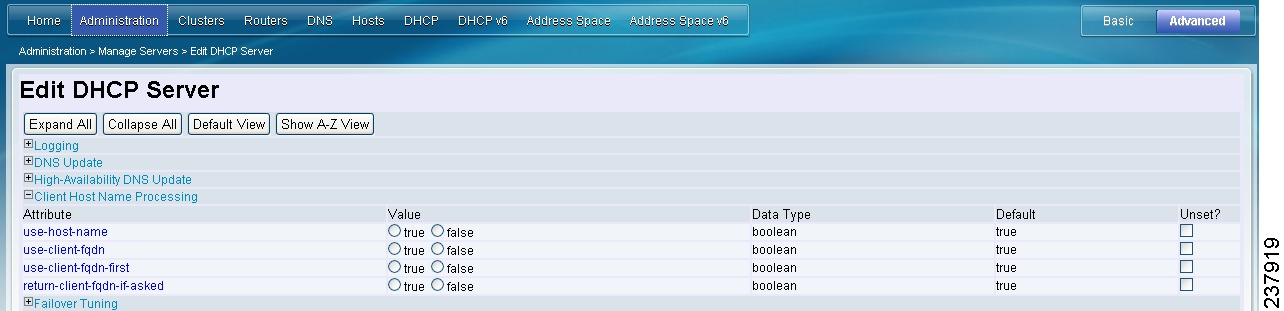
You can also expand or collapse the attribute groups in group view by clicking Expand All or Collapse All. Figure 2-3 shows the alphabetized view with the example of being in Expert mode.
Figure 2-3 Attributes in Alphabetical View (Local Advanced)
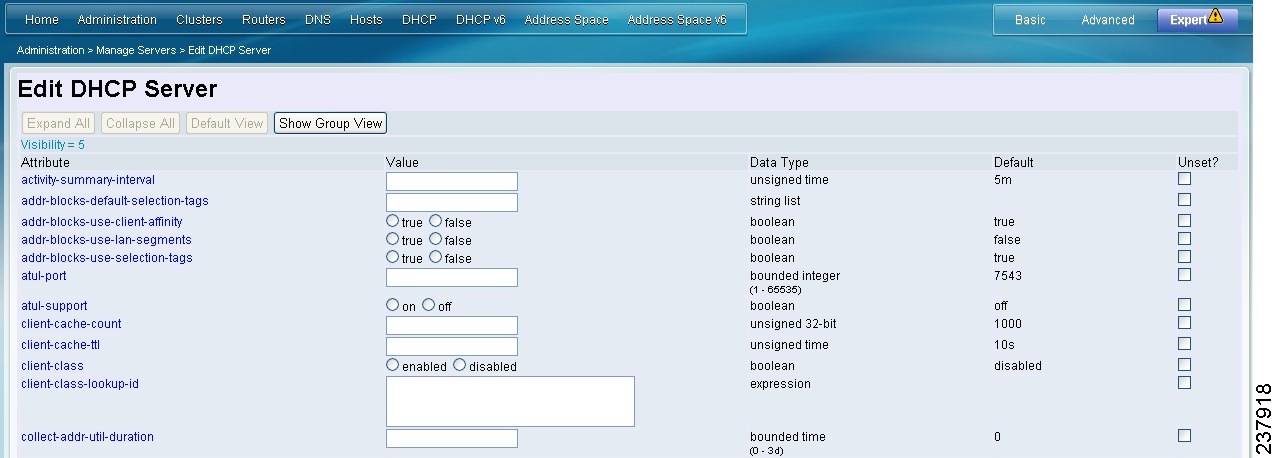
Tip ![]() In Expert mode, the Expert mode attributes are alphabetized separately further down the page under the Visibility=3 heading and are all marked with the Warning icon ().
In Expert mode, the Expert mode attributes are alphabetized separately further down the page under the Visibility=3 heading and are all marked with the Warning icon ().
Modifying Attributes
You can modify attribute values and unset those for optional attributes. In many cases, these attributes have preset values, which are listed under the Default column on the page. The explicit value overrides the default one, but the default one is always the fallback. If there is no default value, unsetting the explicit value removes all values for that attribute.
Displaying Attribute Help
For contextual help for an attribute, click the name of the attribute to open a separate popup window.
Help Pages
The web UI provides a separate window that displays help text for each page. The Help pages provide:
•![]() A context-sensitive help topic depending on which application page you have open.
A context-sensitive help topic depending on which application page you have open.
•![]() A clickable and hierarchical Contents and Index, and a Favorites setting, as tabs on a left-hand pane that you can show or hide.
A clickable and hierarchical Contents and Index, and a Favorites setting, as tabs on a left-hand pane that you can show or hide.
•![]() A Search facility that returns a list of topics containing the search string, ordered by frequency of appearance of the search string.
A Search facility that returns a list of topics containing the search string, ordered by frequency of appearance of the search string.
•![]() Forward and backward navigation through the history of Help pages opened.
Forward and backward navigation through the history of Help pages opened.
•![]() A Print function.
A Print function.
•![]() A Glossary.
A Glossary.
Logging Out
Log out of the web UI by clicking Logout in the top right corner of any application page.
Local Cluster Web UI
The local cluster web UI provides concurrent access to Cisco Network Registrar user and protocol server administration and configuration. It provides granular administration across servers with permissions you can set on a per element or feature basis. The local cluster web UI is available in three user modes:
•![]() Basic mode—Provides a more simplified configuration for the more frequently configured objects, such as DHCP scopes and DNS zones (see the "Local Basic Main Menu Page" section).
Basic mode—Provides a more simplified configuration for the more frequently configured objects, such as DHCP scopes and DNS zones (see the "Local Basic Main Menu Page" section).
•![]() Advanced mode—Provides the more advanced configuration method familiar to past users of the Cisco Network Registrar web UI, with some enhancements (see the "Local Advanced Main Menu Page" section).
Advanced mode—Provides the more advanced configuration method familiar to past users of the Cisco Network Registrar web UI, with some enhancements (see the "Local Advanced Main Menu Page" section).
•![]() Expert mode (marked with the icon)—For details on Expert mode, see the "Role and Attribute Visibility Settings" section.
Expert mode (marked with the icon)—For details on Expert mode, see the "Role and Attribute Visibility Settings" section.
Change to Basic or Advanced mode by clicking Basic or Advanced at the top right of the page. You can also add Expert mode by setting User Preferences (see the "Setting Local User Preferences" section.
Note ![]() If you change the IP address of your local cluster machine, see the Note in the "Configuring Clusters in the Local Web UI" section.
If you change the IP address of your local cluster machine, see the Note in the "Configuring Clusters in the Local Web UI" section.
See Also
Introduction to the Web-Based User Interfaces
Regional Cluster Web UI
Local Basic Main Menu Page
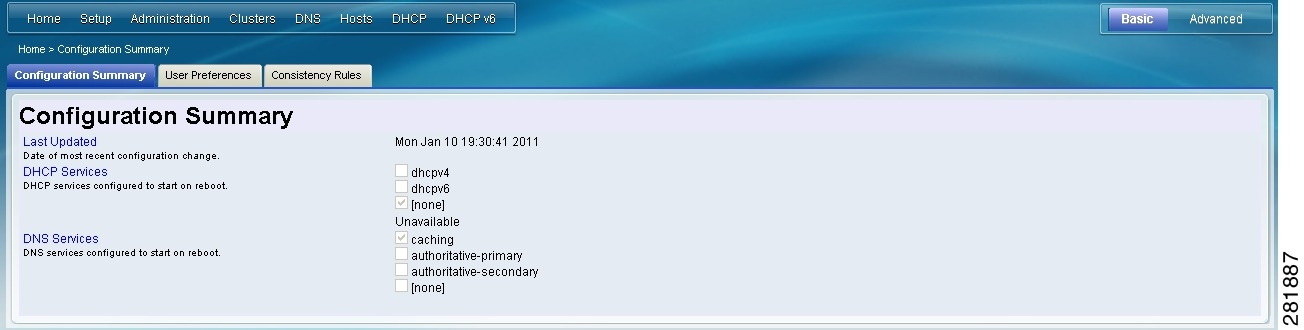
The Basic tab activated at the top right corner of the page implies that you are in Basic user mode (see Figure 2-4). Otherwise, click Basic to activate Basic user mode.
You can see the submenu items under the navigation bar item by placing the cursor on the main menu. To choose a submenu under a navigation bar item, place the cursor over the navigation bar item. For example, place the cursor on Administration to choose the Manage Servers.
Also, you can select any submenu under the required navigation bar and then navigate to the required submenu page. For example, place the cursor on Administration, choose Schedule Tasks. You can see List/Add Scheduled task page with Manage Servers, Schedule Tasks, Administrators, Tenants, Licenses, and Change Log tabs on top of it. Click the Manage Servers tab to view the Manage Servers page.
Figure 2-4 Local Basic Main Menu Page
This page provides functions with which you can:
•![]() Open the dashboard to monitor system health—Click Dashboard in the top right part of the page. See Chapter 3, "Server Status Dashboard."
Open the dashboard to monitor system health—Click Dashboard in the top right part of the page. See Chapter 3, "Server Status Dashboard."
•![]() Set up a basic configuration by using the Setup interview pages—Place the cursor on Setup menu and select any option from the drop-down list. See the Quick Start Guide for Cisco Network Registrar for more details.
Set up a basic configuration by using the Setup interview pages—Place the cursor on Setup menu and select any option from the drop-down list. See the Quick Start Guide for Cisco Network Registrar for more details.
•![]() Administer licenses, users, groups, roles, encryption keys, and access control lists (ACLs)—Place the cursor on Administration menu and select any option from the drop-down list. See Chapter 5, "Configuring Administrators."
Administer licenses, users, groups, roles, encryption keys, and access control lists (ACLs)—Place the cursor on Administration menu and select any option from the drop-down list. See Chapter 5, "Configuring Administrators."
•![]() Manage the Cisco Network Registrar protocol servers—Place the cursor on Administration menu and select Manage Servers or Schedule Tasks option from the drop-down list. See Chapter 7, "Maintaining Servers and Databases."
Manage the Cisco Network Registrar protocol servers—Place the cursor on Administration menu and select Manage Servers or Schedule Tasks option from the drop-down list. See Chapter 7, "Maintaining Servers and Databases."
•![]() Manage clusters—Place the cursor on Clusters menu and select any option from the drop-down list. See the "Configuring Server Clusters" section on page 6-2.
Manage clusters—Place the cursor on Clusters menu and select any option from the drop-down list. See the "Configuring Server Clusters" section on page 6-2.
•![]() Configure DHCP—Place the cursor on DHCP menu and select any option from the drop-down list. See Chapter 20, "Configuring Scopes and Networks."
Configure DHCP—Place the cursor on DHCP menu and select any option from the drop-down list. See Chapter 20, "Configuring Scopes and Networks."
•![]() Configure DNS—Place the cursor on DNS menu and select any option from the drop-down list. See Chapter 15, "Managing Zones."
Configure DNS—Place the cursor on DNS menu and select any option from the drop-down list. See Chapter 15, "Managing Zones."
•![]() Manage hosts in zones—Place the cursor on Hosts menu and select any option from the drop-down list. See Chapter 10, "Managing Hosts."
Manage hosts in zones—Place the cursor on Hosts menu and select any option from the drop-down list. See Chapter 10, "Managing Hosts."
•![]() Go to Advanced mode—Click Advanced in the top right corner of the page. See the "Local Advanced Main Menu Page" section.
Go to Advanced mode—Click Advanced in the top right corner of the page. See the "Local Advanced Main Menu Page" section.
Local Advanced Main Menu Page
To switch to Advanced user mode from the Basic user Main Menu page (see Figure 2-4), click Advanced in the top right corner of the page. Doing so opens another Main Menu page, except that it shows the Advanced user mode functions (see Figure 2-5 for a view that shows the Session Settings). To switch back to Basic mode at any time, click Basic in the top right corner of the page.
Figure 2-5 Local Advanced Main Menu Page
The local Advanced mode Main Menu page includes advanced Cisco Network Registrar functions that are in addition to the ones in Basic mode:
•![]() Open the dashboard to monitor system health—Click Dashboard in the top right part of the page. See Chapter 3, "Server Status Dashboard."
Open the dashboard to monitor system health—Click Dashboard in the top right part of the page. See Chapter 3, "Server Status Dashboard."
•![]() Administer licenses, users, groups, roles, encryption keys, owners, regions, and ACLs, plus view change logs—Place the cursor on Administration menu and select any option from the drop-down list. See Chapter 5, "Configuring Administrators."
Administer licenses, users, groups, roles, encryption keys, owners, regions, and ACLs, plus view change logs—Place the cursor on Administration menu and select any option from the drop-down list. See Chapter 5, "Configuring Administrators."
•![]() Manage the Cisco Network Registrar protocol servers—Place the cursor on Administration menu and select Manage Servers or Schedule Tasks option from the drop-down list. See Chapter 7, "Maintaining Servers and Databases."
Manage the Cisco Network Registrar protocol servers—Place the cursor on Administration menu and select Manage Servers or Schedule Tasks option from the drop-down list. See Chapter 7, "Maintaining Servers and Databases."
•![]() Manage clusters—Place the cursor on Clusters menu and select any option from the drop-down list. See the "Configuring Server Clusters" section on page 6-2.
Manage clusters—Place the cursor on Clusters menu and select any option from the drop-down list. See the "Configuring Server Clusters" section on page 6-2.
•![]() Configure Routers—Place the cursor on Routers menu and select any option from the drop-down list. See Chapter 11, "Managing Router Interface Configurations."
Configure Routers—Place the cursor on Routers menu and select any option from the drop-down list. See Chapter 11, "Managing Router Interface Configurations."
•![]() Configure DHCPv4—Place the cursor on DHCPv4 menu and select any option from the drop-down list. See Chapter 20, "Configuring Scopes and Networks."
Configure DHCPv4—Place the cursor on DHCPv4 menu and select any option from the drop-down list. See Chapter 20, "Configuring Scopes and Networks."
•![]() Configure DHCPv6—Place the cursor on DHCPv6 menu and select any option from the drop-down list. See Chapter 26, "Managing DHCPv6 Addresses."
Configure DHCPv6—Place the cursor on DHCPv6 menu and select any option from the drop-down list. See Chapter 26, "Managing DHCPv6 Addresses."
•![]() Configure DNS—Place the cursor on DNS menu and select any option from the drop-down list. See Chapter 15, "Managing Zones."
Configure DNS—Place the cursor on DNS menu and select any option from the drop-down list. See Chapter 15, "Managing Zones."
•![]() Manage hosts in zones—Place the cursor on Hosts menu and select any option from the drop-down list. See Chapter 10, "Managing Hosts."
Manage hosts in zones—Place the cursor on Hosts menu and select any option from the drop-down list. See Chapter 10, "Managing Hosts."
•![]() Manage IPv4 address space—Place the cursor on Address Space v4 menu and select any option from the drop-down list. (Clicking the Address Space link on the page opens the Address Space v4 view.) See Chapter 9, "Managing Address Space."
Manage IPv4 address space—Place the cursor on Address Space v4 menu and select any option from the drop-down list. (Clicking the Address Space link on the page opens the Address Space v4 view.) See Chapter 9, "Managing Address Space."
•![]() Configure IPv6 address space—Place the cursor on Address Space v6 menu and select any option from the drop-down list. See Chapter 26, "Managing DHCPv6 Addresses."
Configure IPv6 address space—Place the cursor on Address Space v6 menu and select any option from the drop-down list. See Chapter 26, "Managing DHCPv6 Addresses."
•![]() Go to Basic mode—Click Basic in the top right corner of the page. See the "Local Basic Main Menu Page" section.
Go to Basic mode—Click Basic in the top right corner of the page. See the "Local Basic Main Menu Page" section.
The Advanced user mode page provides additional functions:
•![]() View the user role and group data for the logged-in user—See the "Role and Attribute Visibility Settings" section.
View the user role and group data for the logged-in user—See the "Role and Attribute Visibility Settings" section.
•![]() Set your preferred session settings—See the "Role and Attribute Visibility Settings" section.
Set your preferred session settings—See the "Role and Attribute Visibility Settings" section.
•![]() Set server debugging—You can set debug flags for the protocol servers. Set these values only under diagnostic conditions when communicating with the Cisco Technical Assistance Center (TAC).
Set server debugging—You can set debug flags for the protocol servers. Set these values only under diagnostic conditions when communicating with the Cisco Technical Assistance Center (TAC).
•![]() Change your login administrator password—See the "Changing Passwords" section.
Change your login administrator password—See the "Changing Passwords" section.
Setting Local User Preferences
You can maintain a short list of web UI settings through subsequent user sessions. In either Basic or Advanced user mode, choose User Preferences from Home drop-down list to open the Edit User Preferences for Current User page. The only difference between the Basic and Advanced or Expert mode user preference pages is that Advanced and Expert modes have additional columns listing the data types and defaults.
The user preference attributes to set are:
•![]() Username—Username string, with a preset value of admin. You cannot modify this field.
Username—Username string, with a preset value of admin. You cannot modify this field.
•![]() Web UI list page size—Adjust the page size by the number of displayed lines in a list; the preset value is 10 lines.
Web UI list page size—Adjust the page size by the number of displayed lines in a list; the preset value is 10 lines.
•![]() Web UI mode—User mode at startup: Basic, Advanced, or Expert (see the "Role and Attribute Visibility Settings" section). If unset, the mode defaults to the one set in the CCM server configuration (see the "Managing Servers" section on page 7-1).
Web UI mode—User mode at startup: Basic, Advanced, or Expert (see the "Role and Attribute Visibility Settings" section). If unset, the mode defaults to the one set in the CCM server configuration (see the "Managing Servers" section on page 7-1).
You can unset the page size and web UI mode values by checking the check box in Unset? next to the attribute, then clicking Unset Fields. After making the user preference settings, click Modify User Preferences.
Configuring Clusters in the Local Web UI
You can define other local Cisco Network Registrar clusters in the local web UI. The local cluster on the current machine is called the localhost cluster. To set up other clusters, click Clusters and select the Cluster List option from the drop-down list to open the List/Add Clusters page. Note that the localhost cluster has the IP address and SCP port of the local machine.
Click Add Cluster to open the Add Cluster page. At a minimum, you must enter the name and ipaddr of the remote local cluster. You should also enter the admin name and password, along with possibly the SCP port (if not 1234), of the remote cluster. If you want to use secure access mode, select use-ssl as disabled, optional, or required (optional is the preset value; you need the security library installed if you choose required). Click Add Cluster. To edit a cluster, click the cluster name on the List/Add Clusters page to open the Edit Cluster page, make the changes, then click Modify Cluster.
Note ![]() If you change the IP address of your local cluster machine, you must modify the localhost cluster to change the address in the ipaddr field. Avoid setting the value to the loopback address (127.0.0.1); if you do, you must also set the actual IP addresses of main and backup servers for DHCP failover and High-Availability (HA) DNS configurations.
If you change the IP address of your local cluster machine, you must modify the localhost cluster to change the address in the ipaddr field. Avoid setting the value to the loopback address (127.0.0.1); if you do, you must also set the actual IP addresses of main and backup servers for DHCP failover and High-Availability (HA) DNS configurations.
Regional Cluster Web UI
The regional cluster web UI provides concurrent access to regional and central administration tasks. It provides granular administration across servers with permissions you can set on a per element or feature basis. After you log in to the application, the Home page appears. Regional cluster administration is described in Chapter 6, "Managing the Central Configuration."
See Also
Introduction to the Web-Based User Interfaces
Local Cluster Web UI
Command Line Interface
Using the Cisco Network Registrar CLI (the nrcmd program), you can control your local cluster server operations. You can set all configurable options, as well as start and stop the servers.
Note ![]() The CLI provides concurrent access, by at most 14 simultaneous users and processes per cluster.
The CLI provides concurrent access, by at most 14 simultaneous users and processes per cluster.
Tip ![]() See the CLIContents.html file in the /docs subdirectory of your installation directory for details.
See the CLIContents.html file in the /docs subdirectory of your installation directory for details.
The nrcmd program for the CLI is located on:
•![]() Windows—In the install-path\bin directory.
Windows—In the install-path\bin directory.
•![]() Solaris and Linux—In the install-path/usrbin directory.
Solaris and Linux—In the install-path/usrbin directory.
On a local cluster, once you are in the appropriate directory, use the following command at the prompt:
nrcmd -C clustername -N username -P password [-L | -R]
•![]() -C—Cluster name, preset value localhost.
-C—Cluster name, preset value localhost.
•![]() -N—Username. You have to enter the username that you created when first logged into the Web UI.
-N—Username. You have to enter the username that you created when first logged into the Web UI.
•![]() -P—User password. You have to enter the password that you created for the username.
-P—User password. You have to enter the password that you created for the username.
•![]() The local cluster (-L) is implied; use -R to open the regional cluster CLI.
The local cluster (-L) is implied; use -R to open the regional cluster CLI.
Tip ![]() Change the initial password right away (see the "External Authentication Servers" section on page 5-14). For additional command options, see the CLIGuide.html file in /docs.
Change the initial password right away (see the "External Authentication Servers" section on page 5-14). For additional command options, see the CLIGuide.html file in /docs.
Note ![]() If you change the IP address of your local cluster machine, you must modify the localhost cluster to change the address in the ipaddress attribute. Do not set the value to 127.0.0.1.
If you change the IP address of your local cluster machine, you must modify the localhost cluster to change the address in the ipaddress attribute. Do not set the value to 127.0.0.1.
You can also pipe output to a file. For example:
nrcmd> dns getStats all > dnsstats.txt
To disconnect from the cluster, use exit:
nrcmd> exit
Tip ![]() The CLI operates on a coordinated basis with multiple user logins. If you receive a cluster lock message, determine who has the lock and discuss the issue with that person. (See also the "Multiple Users" section.)
The CLI operates on a coordinated basis with multiple user logins. If you receive a cluster lock message, determine who has the lock and discuss the issue with that person. (See also the "Multiple Users" section.)
Central Configuration Management Server
The CCM servers at the local and regional clusters provide the infrastructure for Cisco Network Registrar operation and user interfaces. The CCM Server reads, writes, and modifies the Cisco Network Registrar database (CCM DB). The main purpose of the CCM Server is to store and propagate data from the user to the protocol servers, and from the servers back to the user.
The change set is the fundamental unit of change to a data store. It sends incremental changes to a replicating server and provides an audit log for changes to the data store. Change sets consist of lists of change entries that are groups of one or more changes to a single network object. The web UI provides a view of the change sets for each data store.
 Feedback