Cisco Evolved Programmable Network Manager 2.1.1 User and Administrator Guide
Bias-Free Language
The documentation set for this product strives to use bias-free language. For the purposes of this documentation set, bias-free is defined as language that does not imply discrimination based on age, disability, gender, racial identity, ethnic identity, sexual orientation, socioeconomic status, and intersectionality. Exceptions may be present in the documentation due to language that is hardcoded in the user interfaces of the product software, language used based on RFP documentation, or language that is used by a referenced third-party product. Learn more about how Cisco is using Inclusive Language.
- Updated:
- June 1, 2017
Chapter: Create Templates To Automate Device Configuration Changes
- Why Create New Configuration Templates?
- Ways to Create Configuration Templates Using Cisco EPN Manager
- Create a New CLI Configuration Template Using a Blank Template
- Create a New CLI Configuration Template Using An Existing Template
- Entering Variables in a Template
- Use Global Variables in a Template
- Import and Export a CLI Configuration Template
- Create a New Composite Template
- Create a Shortcut to Your Templates Using Tags
- Deploy Templates to Devices
- Create Configuration Groups for Deploying Templates to Groups of Devices
- Deployment Flow for Configuration Templates Using the Wizard
- Deployment Flow for CLI Templates using the Wizard
- Deployment Flow for Composite Templates Using the Wizard
- Deploy Templates to Devices Without Using Configuration Groups
- Check the Status and Results of a Deployed Configuration Template
Create Templates To
Automate Device Configuration Changes
See Configure Devices for information on how to configure your devices using out-of-the-box configuration templates that are supplied with Cisco EPN Manager .
- Why Create New Configuration Templates?
- Ways to Create Configuration Templates Using Cisco EPN Manager
- Create a New CLI Configuration Template Using a Blank Template
- Create a New CLI Configuration Template Using An Existing Template
- Entering Variables in a Template
- Use Global Variables in a Template
- Import and Export a CLI Configuration Template
- Create a New Composite Template
- Create a Shortcut to Your Templates Using Tags
- Deploy Templates to Devices
- Check the Status and Results of a Deployed Configuration Template
Why Create New Configuration Templates?
Cisco EPN Manager provides a number of out-of-the-box configuration templates that you can use to make changes on your network devices. Those are described in Create a New CLI Configuration Template Using An Existing Template.
If you have sufficient privileges, you can also create new templates that meet the exact needs of your environment, and then make those templates available for others to use. You can make the templates as simple or as complex as needed, including grouping multiple templates together into a composite template. Finally, you can associate templates with particular devices by creating configuration groups.
Cisco EPN Manager provides out-of-the-box CLI commands that you can use in your templates. It also provides a blank CLI template you can use to create new CLI commands. You can use them singly or with other commands in a composite template.
How you use configuration templates can depend on factors such as how large your network is, the number of designers in your organization, and how much variation there is among devices configuration. For example:
- For a small network with only one or two designers and a limited number of device configurations, start by copying the CLI configurations you know are “good” into a set of templates. You could then combine them into composite templates and make them available to your operators.
- For a large network with many different device configurations, try to identify the configurations you can standardize. This lets you control the amount of exceptions to these standards, and lets you turn features on and off as needed.
Ways to Create Configuration Templates Using Cisco EPN Manager
Cisco EPN Manager provides different methods for creating new configuration templates, depending on your user account privileges. CLI configuration templates contain one or more CLI configuration commands (the same commands you would type when configuring a device). Composite configuration templates are comprised of two or more CLI or composite configuration templates. You can specify the order in which the commands are deployed to devices.
- Modify one of the out-of-the-box CLI templates. See Create a New Composite Template.
- Use the blank CLI template and enter code by hand. See Create a New CLI Configuration Template Using a Blank Template.
- Use the blank CLI template and copy and paste code from a command line configuration session, CLI script, or other stored set of configuration commands. See Create a New CLI Configuration Template Using An Existing Template.
- Merge several existing out-of-the-box or user-defined templates into a single template. You specify the order in which the templates contained in the composite template are deployed to devices. See Create Configuration Groups for Deploying Templates to Groups of Devices.
Once you have created a set of templates, you can export and import them.
Create a New CLI Configuration Template Using a Blank Template
Use templates to define a set of reusable device configuration commands. A description of CLI templates and how you can use them is displayed in the web GUI when you choose , then choose .
If you want to edit a template that is provided with Cisco EPN Manager , make a copy of the template, give it a new name, and then edit it. See Create a New CLI Configuration Template Using An Existing Template.
Templates that you create are stored under My Templates.
Configuration templates are not supported by default on Cisco Optical Netowrking devices. To enable configuration templates support, select an existing pre-defined CLI configuration template, and in its Device Type section, enable the Optical Networking checkbox. Save this CLI template as a new template. The template is now saved as a user-defined template which lists all optical networking devices such as Cisco NCS 2000, Cisco NCS 4000 devices, and so on.
Create a New CLI Configuration Template Using An Existing Template
The easiest way to create a new configuration template is to find a similar existing template, copy it, and edit it. You can also use this procedure to edit templates that you created. (You can only edit templates that you create.)
| Step 1 | Choose . |
| Step 2 | Expand CLI Templates, then choose System Templates - CLI. |
| Step 3 | In the Template navigation panel on the left, locate the template you want to copy, hover your mouse cursor over the i icon that is displayed next to the template name, then click Duplicate in the popup window. |
| Step 4 | In the
Duplicate Template Creation dialog, specify a name
and the folder (under
My
Templates) where you want the new template to be saved, and click
OK.
For example, if you copy a template that resides under , by default the template is saved under . |
| Step 5 | Add the validation criteria and CLI content as described in Create a New CLI Configuration Template Using a Blank Template . |
Entering Variables in a Template
These topics provide information that will help you when entering variables into a template:
- Data Types
- Manage Database Variables in CLI Templates
- Use Validation Expressions
- Add Multi-line Commands
- Add Enable Mode Commands
- Add Interactive Commands
Data Types
Table 1 lists data types that you can configure in the Manage Variables page.
|
Data Type |
Description |
|
String |
Enables you to create a text box for CLI templates. To specify a validation expression and a default value, expand the row and configure the Default Value and Validation Expression fields. |
|
Integer |
Enables you to create a text box that accepts only numeric value. If you want to specify a range for the integer, expand the row and configure the Range From and To fields. To specify a validation expression and a default value, expand the row and configure the Default Value and Validation Expression fields. |
|
DB |
Enables you to specify a database type. See the Manage Database Variables in CLI Templates. |
|
IPv4 Address |
Enables you to create a text box that accepts only IPv4 addresses for CLI templates. To specify a validation expression and a default value, expand the row and configure the Default Value and Validation Expression fields. |
|
Drop-down |
Enables you to create a list for CLI templates. To specify a validation expression and a default value, expand the row and configure the Default Value field (with a comma-separated value for multiple lists which appears in the UI). |
|
Check box |
Enables you to create a check box for CLI templates. To specify a validation expression and a default value, expand the row and configure the Default Value field. |
|
Radio Button |
Enables you to create a radio button for CLI templates. To specify a validation expression and a default value, expand the row and configure the Default Value field. |
|
Text Area |
Enables you to create a text area which allows multiline values for CLI templates. To specify a validation expression and a default value, expand the row and configure the Default Value and Validation Expression fields. |
Manage Database Variables in CLI Templates
You can use database (DB) variables for the following reasons:
-
DB variables are one of the data types in CLI templates. You can use the DB variables to generate device-specific commands.
-
DB variables are predefined variables. To view the list of predefined DB variables, see the CLITemplateDbVariablesQuery.properties file at the following location: folder/opt/CSCOlumos/conf/ifm/template/inventoryTagsInTemplate.
-
For example, SysObjectID, IPAddress, ProductSeries, ImageVersion are DB variables.When a device is added to Cisco EPN Manager , the complete details of the device is collected in the DB variables. That is, the OID of the devices is collected in SysObjectID, product series in ProductSeries, image versions of the device in ImageVersion, and so on.
-
Using the data collected by the DB variables, accurate commands can be generated to the device.
-
You can select the DB variable in the Type field (using the Managed Variables page). Expand the name field and fill in the default value field with any of the DB variables which you want to use.
-
When a device is discovered and added to Cisco EPN Manager , you can use the database values that were gathered during the inventory collection to create CLI templates.
 Note | While it is possible to create a customized query using Enterprise JavaBeans Query Language (EJB QL), only advanced developers should attempt this. We recommend you use the variables defined in the CLITemplateDbVariablesQuery.properties file only. |
Use Validation Expressions
The values that you define in the Validation Expression are validated with the associated component value. For example, if you enter a default value and a validation expression value in the design flow, this will be validated during the design flow. That is, if the default value does not match with the entered value in the validation expression, you will encounter a get error at the design flow.
Note | The validation expression value works only for the string data type field. |
^[\S]+$
Default value (optional)—ncs
The value should match with regular expression in the validation expression field.
Save the template, and then select a device. Try to enter a space in the text field. You will encounter a regular expression error.
Add Multi-line Commands
To enter multi-line commands in the CLI Content area, use the following syntax:
<MLTCMD>First Line of Multiline Command
Second Line of Multiline Command
......
......
Last Line of Multiline Command</MLTCMD>
where:
- <MLTCMD> and </MLTCMD> tags are case-sensitive and must be entered as uppercase.
- The multi-line commands must be inserted between the <MLTCMD> and </MLTCMD> tags.
- The tag cannot be started with a space.
- The <MLTCMD> and </MLTCMD> tags cannot be used in a single line.
Example 1:
<MLTCMD>banner_motd Welcome to
Cisco. You are using
Multi-line commands.
</MLTCMD>
Example 2:
<MLTCMD>banner motd ~ ${message}
</MLTCMD>
where {message} is a multi-line input variable.
Restrictions for Using Multi-Line Banner Commands
#conf t
Enter configuration commands, one per line. End with Ctrl-Z.
(config)#parameter-map type webauth global
(config-params-parameter-map)# type webauth
(config-params-parameter-map)#banner file tftp://209.165.202.10/banner.txt
(config-params-parameter-map)#^Z
#more tftp://192.168.0.0/banner.txt
Disclaimer:
Usage of this wireless network is restricted to authorized users only.
Unauthorized access is strictly forbidden.
All accesses are logged and can be monitored.
#
Add Enable Mode Commands
Use this syntax to add enable mode commands to your CLI templates:
#MODE_ENABLE<<commands >>#MODE_END_ENABLE
Add Interactive Commands
An interactive command contains the input that must be entered following the execution of a command.
To enter an interactive command in the CLI Content area, use the following syntax:
CLI Command<IQ>interactive question 1<R>command response 1 <IQ>interactive question 2<R>command response 2
where <IQ> and <R> tag are case-sensitive and must be entered as uppercase.
For example:
#INTERACTIVE
crypto key generate rsa general-keys <IQ>yes/no<R> no
#ENDS_INTERACTIVE
Combining Interactive Enable Mode Commands
Use this syntax to combine interactive Enable Mode commands:
#MODE_ENABLE
#INTERACTIVE
commands<IQ>interactive question<R>response
#ENDS_INTERACTIVE
#MODE_END_ENABLE
For example:
#MODE_ENABLE
#INTERACTIVE
mkdir <IQ>Create directory<R>XXX
#ENDS_INTERACTIVE
#MODE_END_ENABLE
Adding Interactive Multi-line Commands
This is an example of an interactive command that contains multiple lines:
#INTERACTIVE
macro name EgressQoS<IQ>Enter macro<R><MLTCMD>mls qos trust dscp
wrr-queue queue-limit 10 25 10 10 10 10 10
wrr-queue bandwidth 1 25 4 10 10 10 10
priority-queue queue-limit 15
wrr-queue random-detect 1
wrr-queue random-detect 2
wrr-queue random-detect 3
wrr-queue random-detect 4
wrr-queue random-detect 5
wrr-queue random-detect 6
wrr-queue random-detect 7
wrr-queue random-detect max-threshold 1 100 100 100 100
wrr-queue random-detect min-threshold 1 80 100 100 100
wrr-queue random-detect max-threshold 2 100 100 100 100
wrr-queue random-detect min-threshold 2 80 100 100 100
wrr-queue random-detect max-threshold 3 80 90 100 100
wrr-queue random-detect min-threshold 3 70 80 90 100
wrr-queue random-detect min-threshold 4 70 80 90 100
wrr-queue random-detect max-threshold 4 80 90 100 100
wrr-queue random-detect min-threshold 5 70 80 90 100
wrr-queue random-detect max-threshold 5 80 90 100 100
wrr-queue random-detect min-threshold 6 70 80 90 100
wrr-queue random-detect max-threshold 6 80 90 100 100
wrr-queue random-detect min-threshold 7 60 70 80 90
wrr-queue random-detect max-threshold 7 70 80 90 100
@</MLTCMD>
#ENDS_INTERACTIVE
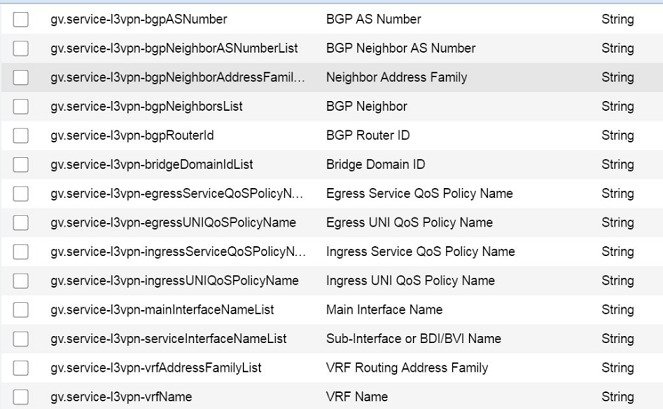
Use Global Variables in a Template
Cisco EPN Manager enables you to deploy customized CLI configuration to your devices by creating CLI templates which contain these customized configuration options. When you create CLI templates or modify existing ones, you can define the content of the template using global and/or template variables.
-
Template variables: allow you to input values to the variable during CLI template or service creation.
-
Global variables: are predefined and associated with the CLI template or with a service at a global level (by default). You cannot view a global variable or input its values during service creation.
All variables names start with words that identify them as global or template variable. Global variables are accessible to all Cisco EPN Manager templates such as CLI templates or Composite templates. They identify the type of service (CE, L3VPN, CEM, etc.) that the variable can be associated with. If you create a new global variable, you must ensure that you specify a name that starts with the letters 'gv' followed by other words that promote easy identification of the variable. Global variables that you create, can be further edited and deleted. The global variables available in Cisco EPN Manager by default, cannot be edited or deleted. While global variables are applicable to all template types, the variables created specifically during CLI template creation are applicable to that template alone. These variables created during CLI template creation cannot be associated with other CLI templates.
In the CLI template configuration example shown below, 'gv.service-ethernet-maintInterfaceName' represents the global variable. If this template is associated with a service, then during service creation, the dynamic part of the global variable, 'mainInterfaceName', is replaced by the values (such as the ethernet interface, in case of CE services) specified in the service. However, you will not be able to view or modify this global variable during service creation. '$descr' is a static value which represents the template variable. During service creation, this template variable will enable you to modify or specify a value of the type String (for the description field).
interface $gv.service-ethernet-mainInterfaceName
             description $descr
          exit
To use global variables to create CLI templates:
| Step 1 | Choose
to create new global variables.
To use existing global variables that are pre-poluated in Cisco EPN Manager for each service type (CE, L3VPN, and CEM), skip to Step 4. |
| Step 2 | Click the Add '+' icon. To edit existing variables, select the global variable and click the Edit button. |
| Step 3 | Specify the
following parameters and click
Save. Your changes are saved in the
Cisco EPN Manager
database and are not immediately deployed to the device.
|
| Step 4 | Associate the
global variable with a CLI template:
You can identify the services that the variables belong to by looking at the variable name. Variables applicable to CE services, have variable names that start with the letters 'gv.ce-service-ethernet*'. Variables applicable to L3VPN services, have variable names that start with the letters 'gv.l3vpn-service-l3vpn*'. These variables can be associated with new or existing CLI templates.
|
| Step 5 | (Optional) To provision services (L2, L3VPN, CEM, Flex LSP, Layer 3 link) using CLI templates (associated with global and template variables), see, Extend a Circuit/VC Using Templates. |

Import and Export a CLI Configuration Template
These topics explain how to export and import configuration templates. Templates can be exported templates have an .xml file name; multiple templates are exported as a zip file.
-
If you export multiple configuration templates, the .xml files are placed in a zip file with the prefix name Exported Templates.
-
Single files are exported and imported as .xml files
-
You can import multiple .xml files by selecting individual files or by importing a zip file.
-
When you import CLI templates, the user-defined global variables that are part of the file are not imported automatically. You need to add these variables to the CLI template manually.
Create a New Composite Template
All out-of-the-box and user-created templates can be added to a single composite template, which aggregates all of the individual feature templates that you need. When you create a composite template, you can also specify the order in which member templates should be executed. You can use composite templates to make changes to single or groups of devices.
| Step 1 | Choose . |
| Step 2 | Expand the Composite Templates folder and choose Composite Templates. |
| Step 3 | In the Template Basic area, enter a name for the template. |
| Step 4 | In the Validation Criteria area, choose the devices to which all of the templates contained in the composite template should apply. For example, if your composite template contains one template that applies to Cisco ASR 900 series routers and another that applies to all routers, you only need to choose from the Device Type list. If a device type is dimmed, the template cannot be applied on that device type. |
| Step 5 | In the Template Detail area, choose the templates to include in the composite template. Using the arrows, place the templates in the in the order in which they should be deployed to the devices. For example, to create an ACL and associate it with an interface, put the ACL template first, followed by the interface template. |
| Step 6 | Click Save as New Template. After you save the template, and apply it to your devices (see Create Configuration Groups for Deploying Templates to Groups of Devices). |
Create a Shortcut to Your Templates Using Tags
When you apply a tag to a template, the template is listed under the My Tags folder. Tagging a configuration template helps you:
- Search a template using the tag name in the search field
- Use the tagged template as a reference to configure more devices
To tag an existing template, follow these steps:
Deploy Templates to Devices
These topics describe the ways you can deploy (run) groups of commands on devices using configuration templates:
- Create Configuration Groups for Deploying Templates to Groups of Devices
- Deployment Flow for Configuration Templates Using the Wizard
- Deployment Flow for CLI Templates using the Wizard
- Deployment Flow for Composite Templates Using the Wizard
- Deploy Templates to Devices Without Using Configuration Groups
Create Configuration Groups for Deploying Templates to Groups of Devices
If you have devices that require the same configuration, you can create a configuration group that contains devices and templates that can be applied to those devices. Creating a configuration group allows you to quickly apply new templates without remembering to which devices the new templates should be deployed.
Composite templates allow you to group smaller templates together, but configuration groups specify the relationship between the templates and the groups of devices, and the order in which commands are executed.
Deployment Flow for Configuration Templates Using the Wizard
Note | This deployment flow is not applicable for Controller based templates. |
Deployment Flow for CLI Templates using the Wizard
Deployment Flow for Composite Templates Using the Wizard
Deploy Templates to Devices Without Using Configuration Groups
Once a template is saved, it can be deployed (run on) devices. You can deploy a template from the navigation area, or by using Configuration Groups, which is launched from (see Create Configuration Groups for Deploying Templates to Groups of Devices).
To deploy a customized or system template from the Features & Technologies navigation area:
Check the Status and Results of a Deployed Configuration Template
When you deploy a configuration template, Cisco EPN Manager displays a dialog box with a hyperlink that directs you to the Jobs window. From here you can:
- View the results of the command by clicking the History tab and expanding the job instance.
- Repeat the deployment, or schedule it for a later time
- Manage the job (delete it, pause it, resume it, and so forth).
 Feedback