- Cisco StadiumVision Director Dynamic Menu Board and Store Configuration Guide
- Preface
- Getting Started
- Overview of the Dynamic Menu Board Application
- Working with Stores in the DMB Application
- Working with Images in the DMB Application
- Working with the DMB Application User Interface
- Creating and Updating Menu Boards
- Appendix A: DMB Default Menu Theme Reference
- Appendix B: Advanced Architecture and DMB Customizations
Release 3.0 and Later Releases: Cisco StadiumVision Director Dynamic Menu Board and Store Configuration Guide
Bias-Free Language
The documentation set for this product strives to use bias-free language. For the purposes of this documentation set, bias-free is defined as language that does not imply discrimination based on age, disability, gender, racial identity, ethnic identity, sexual orientation, socioeconomic status, and intersectionality. Exceptions may be present in the documentation due to language that is hardcoded in the user interfaces of the product software, language used based on RFP documentation, or language that is used by a referenced third-party product. Learn more about how Cisco is using Inclusive Language.
- Updated:
- August 1, 2012
Chapter: Working with the DMB Application User Interface
Working with the DMB Application User Interface
This module includes the following topics:
•![]() Accessing the Dynamic Menu Board Application
Accessing the Dynamic Menu Board Application
•![]() Closing the Dynamic Menu Board Application
Closing the Dynamic Menu Board Application
Accessing the Dynamic Menu Board Application
The DMB application is a custom application that is available once you log into Cisco StadiumVision Director. Your Cisco StadiumVision Director account is the same account that is used to authenticate access to the Dynamic Menu Board application using Role-Based Access Control. Your StadiumVision Director account must be configured with the administrator or concessionaire role to access the DMB application.
When you access the DMB application for the first time, you will be presented a screen to acknowledge the Terms of Use. Once you agree to the terms, you will be asked to choose and configure a security question. This question will be presented if you need to obtain a password reminder for future access to the DMB application if you should forget your password.
After your initial access, your login to Cisco StadiumVision Director serves as your login to the DMB application.
This section includes the following tasks:
•![]() Accessing the Dynamic Menu Board Application for the First Time
Accessing the Dynamic Menu Board Application for the First Time
•![]() Accessing the Dynamic Menu Board Application From the Cisco StadiumVision Director Main Menu
Accessing the Dynamic Menu Board Application From the Cisco StadiumVision Director Main Menu
Accessing the Dynamic Menu Board Application for the First Time
To access the Dynamic Menu Board application for the first time, complete the following steps:
Step 1 ![]() Log into Cisco StadiumVision Director as an administrator or concessionaire.
Log into Cisco StadiumVision Director as an administrator or concessionaire.
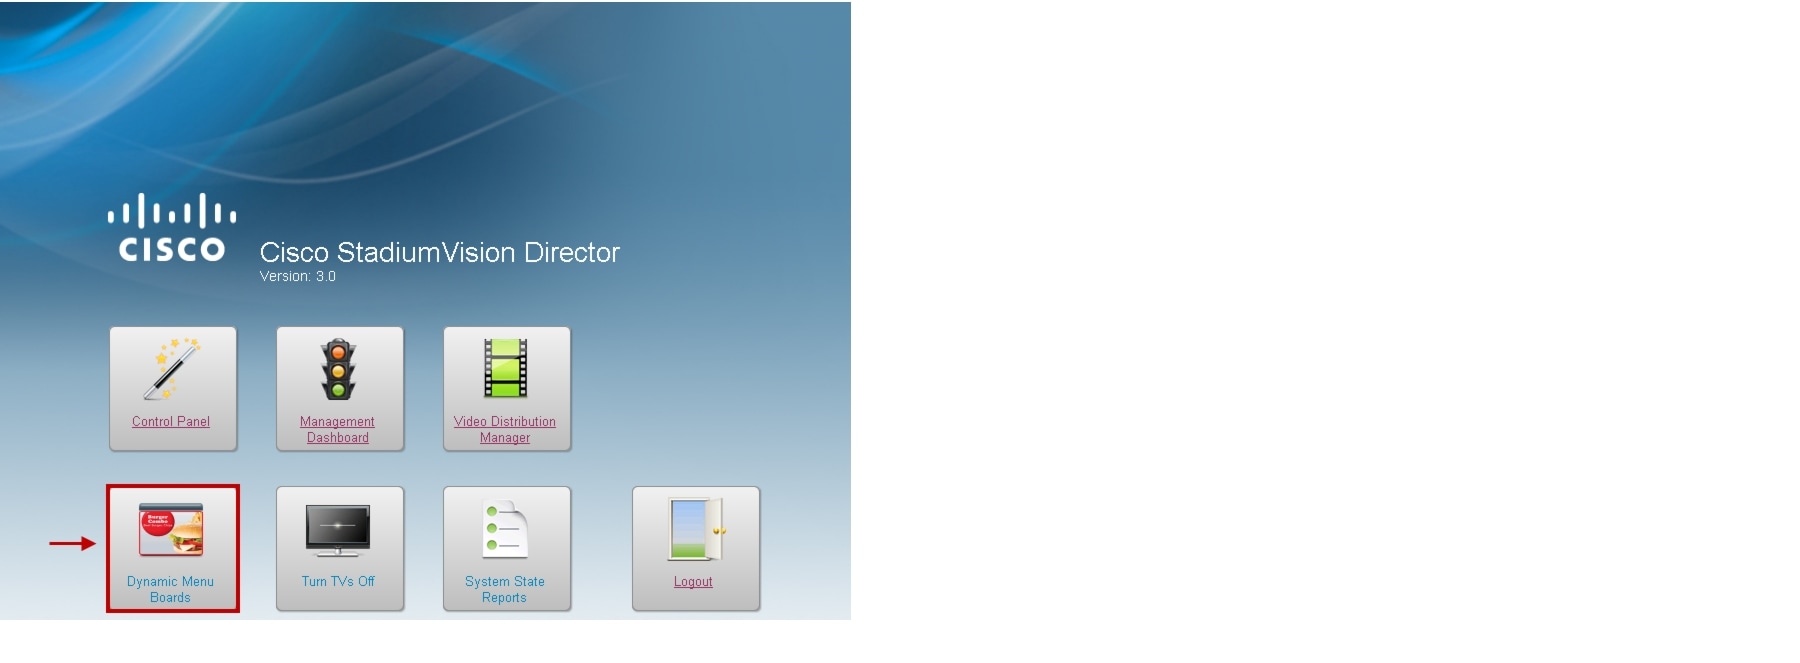
Step 2 ![]() From the main menu, click Dynamic Menu Boards.
From the main menu, click Dynamic Menu Boards.
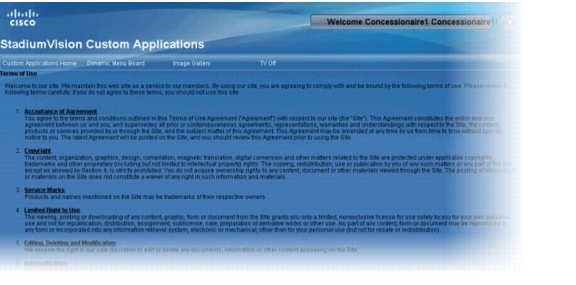
The Terms of Use agreement is displayed, as shown by the following excerpt as an example:
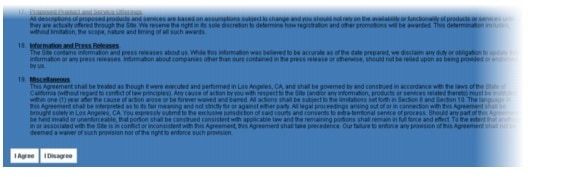
Step 3 ![]() Click I Agree.
Click I Agree.
Step 4 ![]() When the application asks you to choose a security question, select a question and type your answer to that question. Click Save.
When the application asks you to choose a security question, select a question and type your answer to that question. Click Save.
The DMB application opens in a new browser window.
Accessing the Dynamic Menu Board Application From the Cisco StadiumVision Director Main Menu
To access the Dynamic Menu Board application, complete the following steps:
Step 1 ![]() Log into Cisco StadiumVision Director as an administrator or concessionaire.
Log into Cisco StadiumVision Director as an administrator or concessionaire.
Step 2 ![]() From the main menu, click Dynamic Menu Boards.
From the main menu, click Dynamic Menu Boards.

The DMB application opens in a new browser window.
Closing the Dynamic Menu Board Application
When you access the DMB application, two browser sessions are actually opened—one for the Cisco StadiumVision Director Main Menu, and one for the DMB application. This can cause some confusion when you go to close your session for the DMB application because it can appear that you are still actively logged into Cisco StadiumVision Director when you are not.

Signing out of the DMB application closes both your DMB session as well as any Cisco StadiumVision Director sessions. However, the Cisco StadiumVision Director window remains at the Main Menu and any other sessions, such as with the Control Panel also remain open although they are invalidated. When you go to access these sessions, you are notified that your session is invalidated and that you need to login. In some cases, you might see a message about an invalid role.

Tip ![]() When you sign out of the DMB application or log out of Cisco StadiumVision Director, your web browser window is not closed, and you are returned to the login screen for Cisco StadiumVision Director. To prevent confusion, close any open browser windows from your previous sessions whenever you log out of the DMB application or Cisco StadiumVision Director.
When you sign out of the DMB application or log out of Cisco StadiumVision Director, your web browser window is not closed, and you are returned to the login screen for Cisco StadiumVision Director. To prevent confusion, close any open browser windows from your previous sessions whenever you log out of the DMB application or Cisco StadiumVision Director.
To close your DMB application session, do one of the following:
•![]() Sign out of the DMB application—Click the Sign Out option from the portal Welcome drop-down list box in the upper right corner of the DMB application screen.
Sign out of the DMB application—Click the Sign Out option from the portal Welcome drop-down list box in the upper right corner of the DMB application screen.
•![]() Log out of Cisco StadiumVision Director—Click the Logout option from the Cisco StadiumVision Director Main Menu.
Log out of Cisco StadiumVision Director—Click the Logout option from the Cisco StadiumVision Director Main Menu.
Using the Themes Menu Bar
When you first log into the DMB application, the Themes screen is displayed, and several of the themes menu options are consolidated into a drop-down list box as shown in Figure 1.
Figure 1 Themes Menu Bar

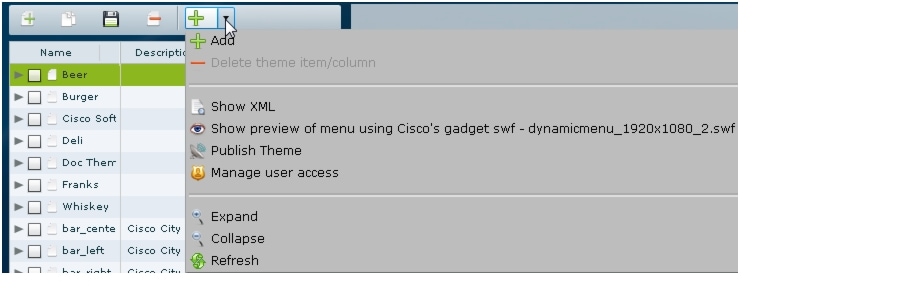
Figure 2 shows how to expand the drop-down list box by clicking the arrow and open the complete list of theme menu bar options.
Figure 2 Themes Menu Bar Drop-Down List Box
If you select and drag the handle on the right side of the themes pane to widen the pane view (Figure 3), the menu bar is also expanded as shown in Figure 4.
Figure 3 Themes Pane Handle
Notice that Figure 4 shows only the icons for the theme options in the expanded form of the menu bar:
Figure 4 Themes Menu Bar Expanded

Using the Themes Pane
The Themes pane includes three columns: Name, Description, and Modified On.
By default, the pane is sorted alphabetically by theme name. You also can sort the list of themes by the date modified by clicking the arrow beside the "Modified On" heading as shown in Figure 5. You can reverse the date sort order by clicking the arrow again.

Note ![]() The sort arrow does not appear by default in the theme pane view. You need to position your cursor over that area of the interface to reveal the option.
The sort arrow does not appear by default in the theme pane view. You need to position your cursor over that area of the interface to reveal the option.
Figure 5 SortingThemes by Date Modification

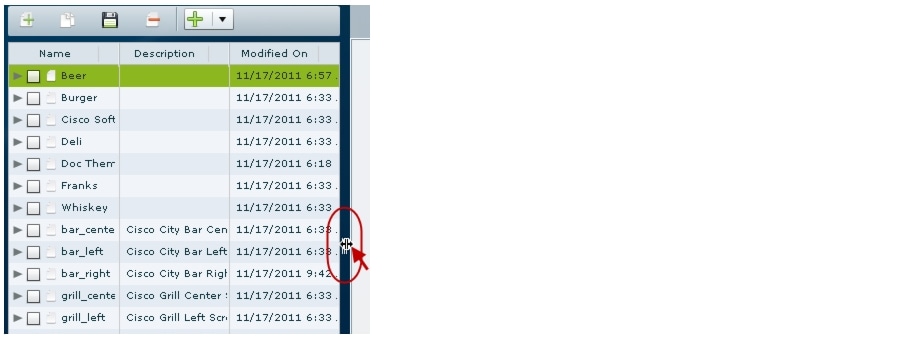
You will likely need to adjust the width of the Themes pane columns when you go to edit a menu theme, especially when modifying headers or adding items. You can adjust the width of the Themes pane columns by positioning your cursor over the vertical bar to the right of the column that you want to adjust, and dragging the slider to the left or right as shown in Figure 6.
Figure 6 Changing Column Width in Theme Pane
Selecting Themes
The DMB application supports both individual selection and multi-selection of themes for editing.
It is recommended that you select an individual theme for editing by clicking the theme name only (not the checkbox) to highlight it as shown in Figure 7.
Figure 7 Selecting an Individual Theme

Note ![]() Do not mark the checkbox to select a single theme for editing to prevent you from making unexpected updates with other themes later:
Do not mark the checkbox to select a single theme for editing to prevent you from making unexpected updates with other themes later:
You can select multiple themes for editing to a common configuration or to apply a common action by marking the checkboxes beside all of the themes that you want to modify as shown in Figure 8:
Figure 8 Selecting Multiple Themes for Edit

Editing Themes
There are a few things to be aware of as you use the interface to edit themes:
•![]() When selecting multiple themes for edit, consider the following behaviors of the interface:
When selecting multiple themes for edit, consider the following behaviors of the interface:
–![]() When you select multiple themes for edit, the characteristics of the last theme that you selected (such as currency format, layout, store, and background) are displayed in the right pane.
When you select multiple themes for edit, the characteristics of the last theme that you selected (such as currency format, layout, store, and background) are displayed in the right pane.
If you choose Save, then the characteristics of that last theme selected (whether or not you made any changes), will be applied to all of the selected themes. A message box appears that allows you to confirm that this is what you want to do (Figure 9).
Figure 9 Confirmation of Applying Common Characteristics to all Selected Themes

–![]() When applying the same user access to multiple themes, you do not need to save the themes to apply the changes to user access. This helps you avoid applying the other characteristics to all of the selected themes as described in the previous paragraph.
When applying the same user access to multiple themes, you do not need to save the themes to apply the changes to user access. This helps you avoid applying the other characteristics to all of the selected themes as described in the previous paragraph.
•![]() Although the user interface allows it, the names of the column definitions in a menu theme should never be changed or the formatting of the menu could fail.
Although the user interface allows it, the names of the column definitions in a menu theme should never be changed or the formatting of the menu could fail.
•![]() You can only use predefined layouts for themes in Cisco StadiumVision Director because the Adobe Shockwave Flash (SWF) gadget file controls the formatting and display of all layouts. Using the default gadget, you cannot create a new layout with new column, header, and item characteristics because the SWF file cannot process it. However, you can design additional layouts using a custom gadget. For more information see the "Appendix B: Advanced Architecture and DMB Customizations" or contact your Cisco Systems representative.
You can only use predefined layouts for themes in Cisco StadiumVision Director because the Adobe Shockwave Flash (SWF) gadget file controls the formatting and display of all layouts. Using the default gadget, you cannot create a new layout with new column, header, and item characteristics because the SWF file cannot process it. However, you can design additional layouts using a custom gadget. For more information see the "Appendix B: Advanced Architecture and DMB Customizations" or contact your Cisco Systems representative.
•![]() In the Themes pane, you can display a theme hierarchy to show its columns, headers, and items all at once using the Expand option from the menu bar while the theme is selected, or you can manually display the hierarchy by selecting the individual expansion arrows to the left of the theme name, column, and so on.
In the Themes pane, you can display a theme hierarchy to show its columns, headers, and items all at once using the Expand option from the menu bar while the theme is selected, or you can manually display the hierarchy by selecting the individual expansion arrows to the left of the theme name, column, and so on.
Figure 10 shows use of the Expand icon on an extended menu bar for the selected Burger theme.
Figure 10 Expand Icon on Extended Menu Bar

Figure 11 shows how the Burger theme is fully expanded after clicking the Expand icon. All levels of the theme are opened and shown in the pane down to the item level.
Figure 11 Fully Expanded Burger Theme
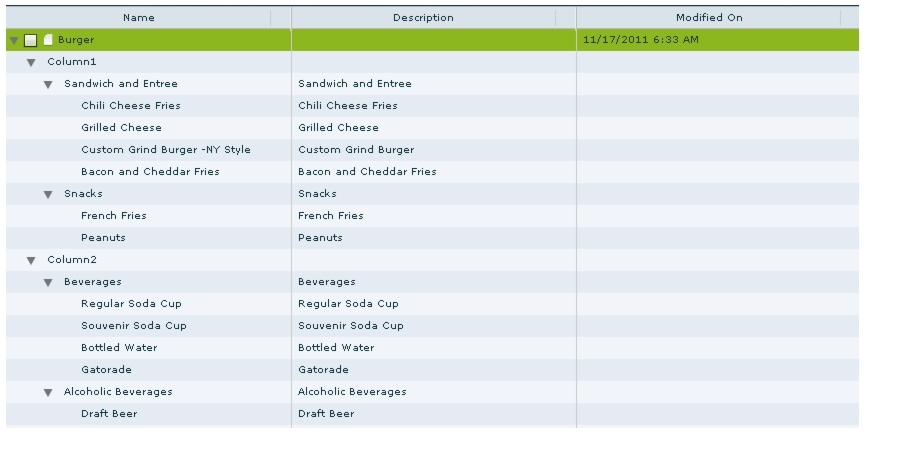
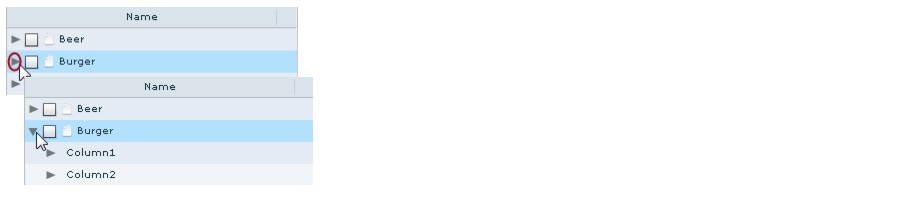
Figure 12 shows how to manually open the first level of the Burger theme hierarchy by clicking the expansion arrow. Only one level is opened.
Figure 12 Manually Expanding Themes Using the Expansion Arrows
•![]() Each default theme supports different configurable areas that are not readily determined by looking at the interface. For information about the specific characteristics that are defined and those that are configurable for each default theme, see "Appendix A: DMB Default Menu Theme Reference".
Each default theme supports different configurable areas that are not readily determined by looking at the interface. For information about the specific characteristics that are defined and those that are configurable for each default theme, see "Appendix A: DMB Default Menu Theme Reference".
Note ![]() Be aware that the interface might still allow you to make a change in an unsupported field for that theme. In addition, some fields are not visible on a menu based on the programming of the SWF gadget file.
Be aware that the interface might still allow you to make a change in an unsupported field for that theme. In addition, some fields are not visible on a menu based on the programming of the SWF gadget file.
 Feedback