Feedback
Table Of Contents
Installing a Memory Upgrade
You can install additional system memory in a PIX Firewall to bring the total RAM capacity to 128 MB. All models of PIX Firewalls can be upgraded including the PIX 515 (if you have a PIX-515-UR feature license), PIX Firewall, PIX10000, PIX 510, PIX 520 AC model, and PIX 520 DC model. References to "PIX Firewall" in this section refer to the model that preceded the PIX10000.
The memory upgrade requires PIX Firewall software version 4.2(1) or later.
For DC models:
Warning
Before performing any of the following procedures, ensure that power is removed from the DC circuit. To ensure that all power is OFF, locate the circuit breaker on the panel board that services the DC circuit, switch the circuit breaker to the OFF position, and tape the switch handle of the circuit breaker in the OFF position.
For both AC and DC models:
Warning
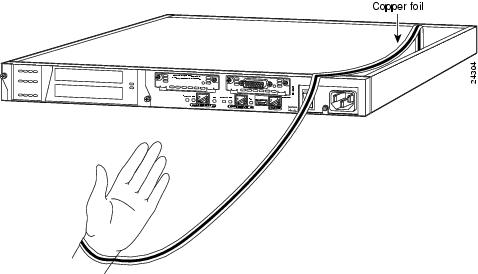
Before working on a system that has an On/Off switch, turn OFF the power and unplug the power cord.
Note
Always remove old memory before installing new memory. Do not attempt to install more than the 128 MB of memory in a PIX Firewall.
After you remove the power cord from the firewall unit, you can install additional system memory as follows:
Step 1
Step 2
Remove the top access panel from the firewall unit. Remove all screws holding the top access panel in place. Refer to "" for information on how to open the top access panel.
Step 3
•
•
•
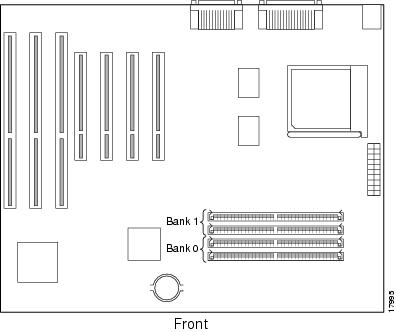
Figure 6-1 PIX 515 System Memory Location
Note
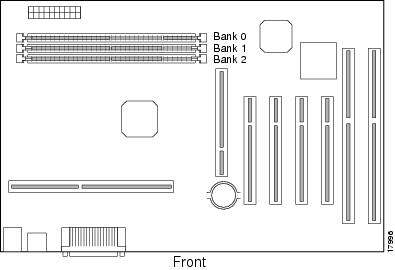
Figure 6-2 PIX Firewall and PIX10000 System Memory Location
Note
Figure 6-3 PIX Firewall Units with Serial Numbers Prior to 06004000
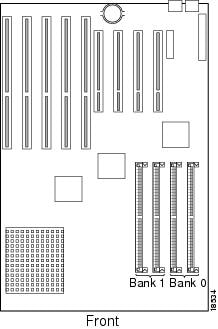
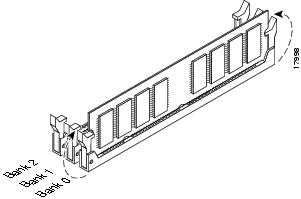
Figure 6-4 PIX 510 and PIX 520 System Memory Location
Step 4
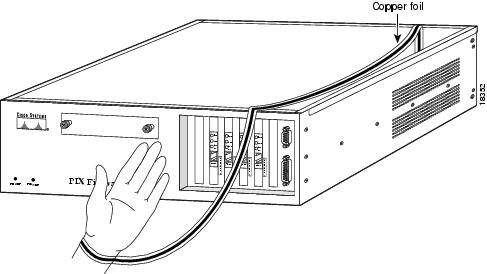
Figure 6-5 Attaching the Wrist Strap to a PIX 515
Figure 6-6 Attaching the Wrist Strap to a PIX Firewall
Step 5
Step 6
PIX Firewall "Classic" unit with a serial number before 06004000: refer to for how to remove the SIMM.
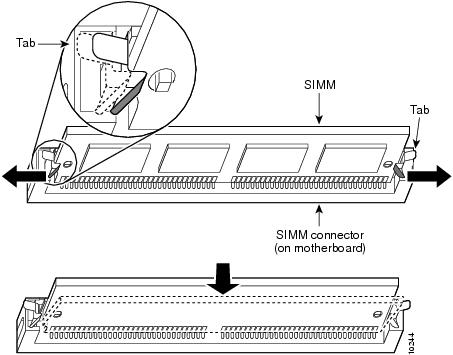
Figure 6-7 Removing a SIMM
from a PIX Firewall or PIX10000
Figure 6-8 Removing a SIMM from a PIX Firewall "Classic"
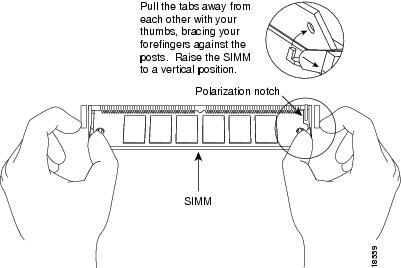
Step 7
PIX Firewall "Classic" unit with a serial number before 06004000: refer to and for how to insert the SIMM at an angle and then swing it down to secure it.
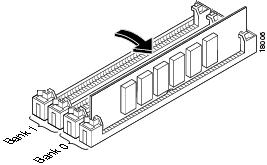
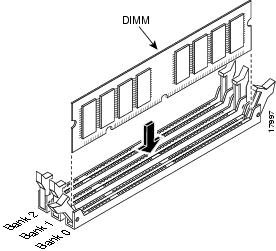
You can install the new memory strips both in either Bank 0 or both in Bank 1. Do not position the strips so that one is in one bank and the other is another.
Figure 6-9 Inserting a SIMM Memory Strip into a PIX Firewall or PIX10000
Figure 6-10 Swinging the SIMM Memory Strip Forward in a PIX Firewall or PIX10000
Figure 6-11 Inserting a SIMM in a PIX Firewall "Classic"
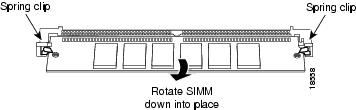
Figure 6-12 Swinging the SIMM Strip down into Place in a PIX Firewall "Classic"
Step 8
(a)
(b)
(c)
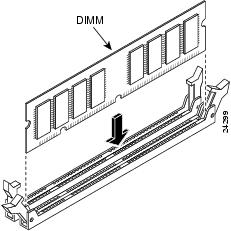
Figure 6-13 Inserting a DIMM Memory Strip in a PIX 515
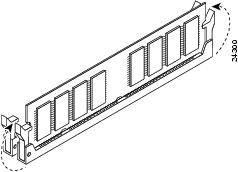
Figure 6-14 Securing a DIMM Memory Strip in a PIX 515
Figure 6-15 Inserting a DIMM Memory Strip in a PIX 510 or PIX 520
Figure 6-16 Securing a DIMM Memory Strip in a PIX 510 or PIX 520
When you finish inserting new RAM memory, close the top of the PIX Firewall case, reattach the screws, if desired, rack mount the PIX Firewall, and attach all cables and cords as discussed in previous sections. After the PIX Firewall is installed, you can view the amount of RAM memory in the system startup messages or with the show version command.