Feedback
Table Of Contents
Accessing the Administration Console
Creating Resource-based Policies
Reviewing Policies with Audit Entitlement
Quick Start Guide
Introduction
This guide takes you step-by-step through the following operations:
•
Accessing the Administration Console
•
•
•
Prerequisites
The Policy Administration Point (PAP) and Policy Decision Point (PDP) must be installed successfully and must be operational. If either or both of the components are not operational, follow the instructions given in the Cisco Enterprise Policy Manager Installation and Configuration Guide.
Starting the PAP and PDP
First you must start the PAP and PDP. If you are using the embedded Tomcat engine that ships with CEPM installer, then run startsecurentgui.bat (for Windows) or startsecurentgui.sh (for UNIX or Linux). If you are using a Cisco-supported application server, start the application server hosting the securent.war and pdp.war applications and make sure that the applications are started and operational.
Accessing the Administration Console
The PAP administration console is a GUI for policy administration, review, and reporting. You can access the administration console using a web browser.
To start the administration console, follow these steps:
Step 1
In the URL string, replace host and port with the values corresponding to those of your application server where the PAP is installed.
The login page is displayed, which prompts you to log in. If no screen is displayed, or if you get an error, see CEPM Installation and Configuration Guide [especially its troubleshooting section] to address the issue before proceeding.
During the setup process for the entitlements repository (database), a default administrator account is created that can be used to access the administration console initially. The default administrator credentials are:
•
•
Step 2
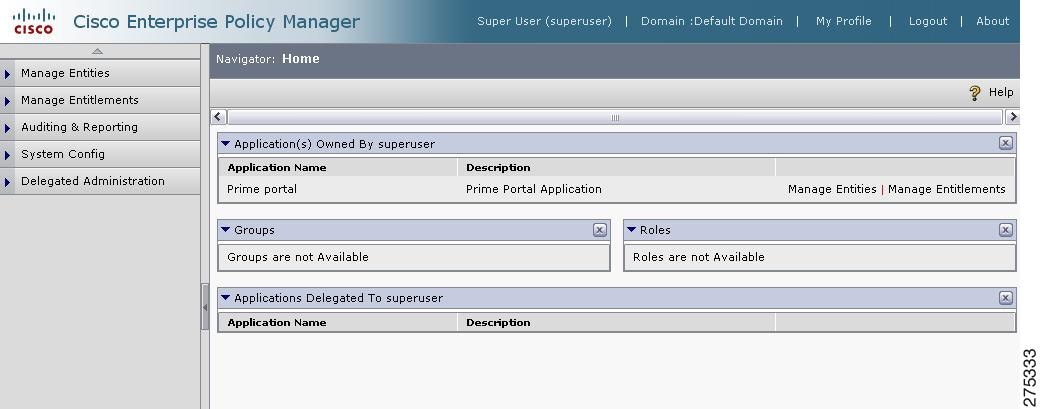
After you successfully login, the PAP home page is displayed showing all the application groups and applications that are you currently own. Initially, this page contains only default information created at the time of CEPM installation. (These default items are the Prime Portal application and Prime Group application group, which are displayed on the administration console home page.)
Figure 1-1 Home Page
Step 3
Creating an Application Group
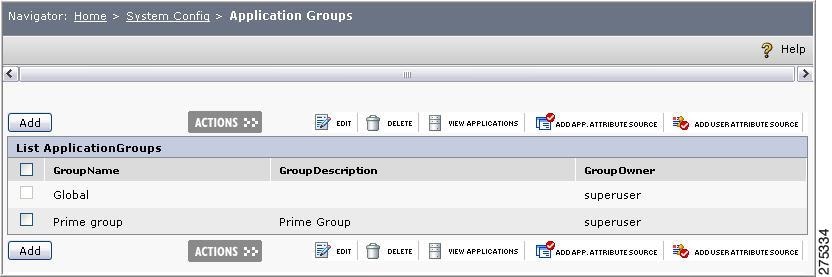
An application group is a group of applications that you intend to secure within CEPM. Groupings are used for various reasons, but applications are mainly grouped for administration and segregation purpose. You should create an application group first before creating an application.
To create a new application group, follow these s teps:
Step 1
Figure 1-2 Application Group
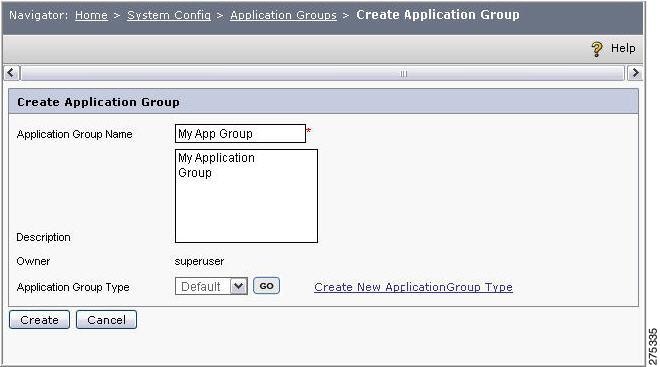
Step 2
Figure 1-3 Create Application Group
Step 3
Step 4
Step 5
The new application group (MyApplicationGroup) is now created in the PAP application.
Creating a PDP
Using the PAP console, you can create the PDPs, that is, PDPs that contain the entitlement decisions. The PDP component is shipped as a Java .war file, pdp.war, which should be deployed on your application server.
Note
To create a PDP, follow these steps:
Step 1
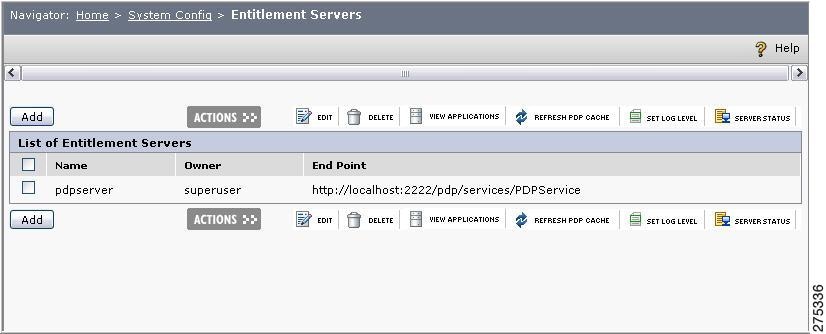
The List of PDPs page is displayed.
Figure 1-4 Entitlement Server
Step 2
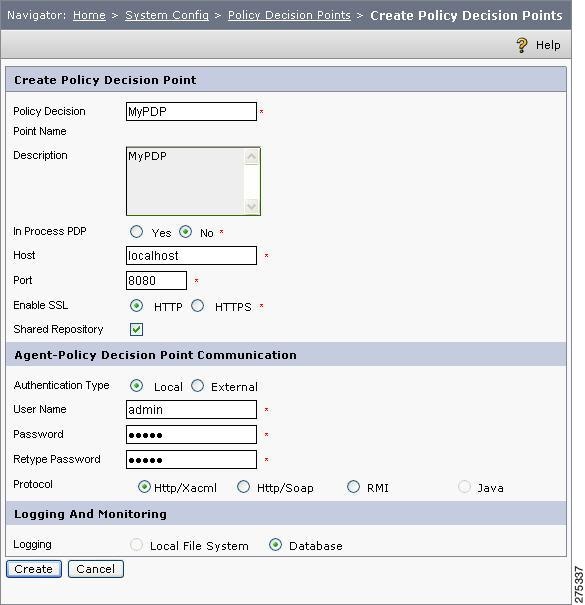
The Create PDP page is displayed.
Figure 1-5 Create Policy Decision Point
Step 3
•
•
•
•
Refer to CEPM User Guide for more information on SSL configuration.
•
•
–
–
–
•
–
–
Step 4
The PDP with the name MyPDP is created.
Creating an Application
An application in CEPM is the object used to represent the application or other entity you are providing entitlement services to. An application has a name, is created within an application group, and uses one or more PDPs for policy decisions, review, and auditing. Within CEPM, all resources and policies are created within an application.
To create a new application, follow these steps:
Step 1
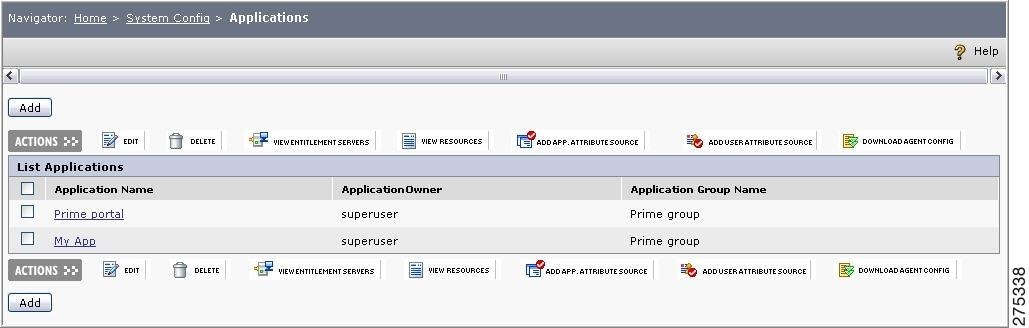
The List of Applications page is displayed.
Figure 1-6 Applications
Step 2
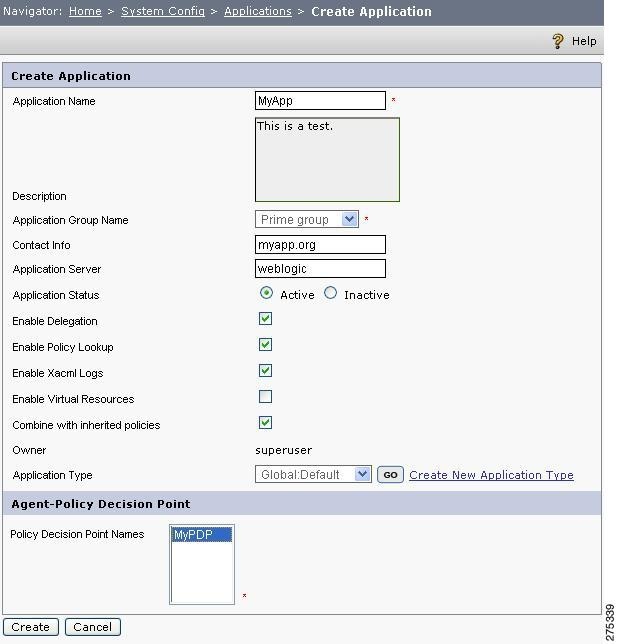
The Create Application page is displayed.
Figure 1-7 Create Application
Step 3
a.
b.
c.
d.
e.
f.
g.
h.
For example, when a request for Prime Group:Prime Portal:View reports: Report10 is sent to the PDP, though no resource called Report10 exists, the PDP will give the decision on the parent level of Report10. That is, view reports only if the Enable Partial FQN field is checked for the application Prime Portal.
i.
For example, consider a resource called Res2 under resource Prime group:Prime portal:Res1. Resource Res1 is having Allow:Internal Dev policy and resource Res2 is having Allow: Internal Dev Tokyo policy and the application Prime Portal is having Allow:Internal Dev London policy.
If the Combine with inherited policies check box is checked for the application and the request for Prime group:Prime portal:Res1:Res2 is sent, it will get all the three policies, such as Internal Dev Tokyo (itself), Internal Dev (its parent), and Internal Dev London (application policy). Then PDP will give the decision after applying the policy-combining algorithm.
j.
k.
In the Agent-PDP section, the PDP box contains all existing PDPs registered under the application. While creating a new application, you need to select PDP(s) to be associated with it. The main purpose of selecting multiple PDPs is to make it possible for the remaining PDPs to respond the request if the first PDP fails.
l.
m.
Creating Resources
Resources model the objects that are accessed (or which you want to secure) within your physical application. See the Cisco Enterprise Policy Manager Concepts Guide V 3.3.0.0 and the Cisco Enterprise Policy Manager Resource and Subject Modeling Best Practices Guide for further details on resources and modeling them within CEPM. These are the static resources. If you want to define dynamic resources or resources stored in a database, you do this using rules in a policy. An example of this would be patient claim data stored in a database. In this case, you would create a static resource, claims, for example, and then create an allow policy with rules to define the access to the claims or claim data. In this case, the rules would use dynamic database queries or procedures (called application attribute sources) to evaluate, and based on these rules, access would either be allowed or denied. For further information on dynamic rules and application attribute sources, see the Cisco Enterprise Policy Manager User Guide and Cisco Enterprise Policy Manager Concepts Guide.
To add new resources to an application, follow these steps:
Step 1
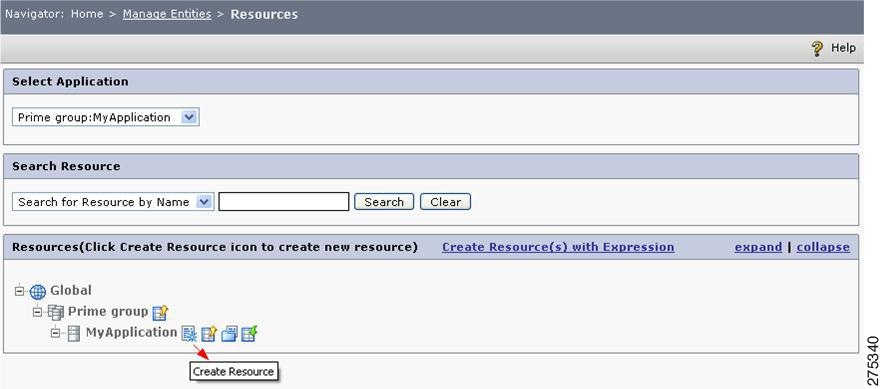
The Resources page is displayed, which contains the list of application groups, applications, and resources under the Global context.
Figure 1-8 Resource Page
Step 2
The Create Resource page is displayed.
Figure 1-9 Create or Update Resources
Step 3
Step 4
Step 5
Step 6
Step 7
Click View Attributes and Action displays the attributes associated with the resource type. You can create a new resource type by clicking the Create New Resource Type link. For details on how to create and use resource types, refer to the Cisco Enterprise Policy Manager User Guide.
Step 8
This creates the new resource in the PAP under the selected application, MyApplication.
You can also assign users, groups, and roles to this resource by clicking Next or by clicking the appropriate tab (Assign Users, Assign Groups, or Assign Roles) directly. Click Done after you have assigned appropriate users, groups, and roles to this resource.
You can add a new child resource under this newly created resource by clicking the Create Resource icon next to the newly created resource. You can also create additional resources for the application by repeating this entire process.
Creating Roles
CEPM supports the creation of roles, which are then used in creating policies. This mechanism is called Roles-based Access Control (RBAC). It is not mandatory to create RBAC policies in CEPM (which also supports group-based, user-based, and rule-based policies), but RBAC is an industry best practice and is the typical way to cretate policies.
Roles are created in CEPM under an application, application group, or role. The creation of a role under an application is referred to as an application or application-specific role. The following example creates an application role.
To create an application role, follow these steps:
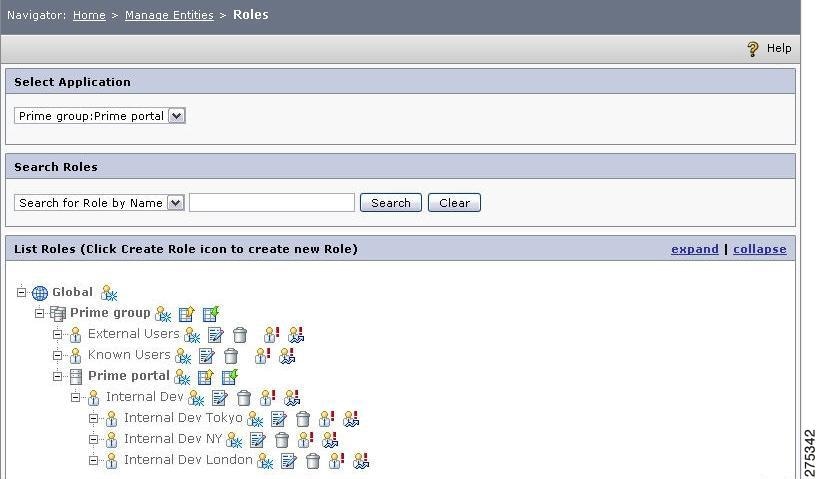
Step 1
The List of Roles page is displayed.
Figure 1-10 Roles Page
Step 2
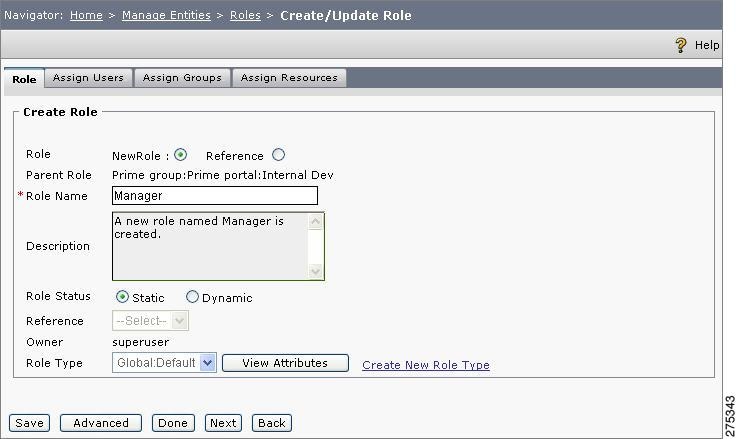
The Create Role page is displayed. (To create a role under an application group, application, or role, click the Create Role icon next to the application group, application, or role under which you want to create the role.)
Figure 1-11 Create or Update Role
Step 3
Step 4
Step 5
Step 6
Step 7
Step 8
Step 9
You can also assign users, groups, and resources to this role by clicking Next or by clicking the appropriate tab directly. Click Done after you have assigned appropriate users, groups, and resources to this role.
Repeat this same procedure to create any additional roles that you may need.
Creating Users
CEPM supports users in multiple ways. The users described in this section are application users and not users of the administration console (although most of the same concepts apply to both sets of users within CEPM). These users are also referred to as a subject in the application or Policy Enforcement Point (PEP). It is important to note that a subject is not the same as a user. A user is actually stored somewhere (in CEPM, in a directory or database, or elsewhere), whereas a subject is just an identifier (typically in the form of a string) of the user (or entity) performing a transaction.
CEPM supports users in the following three ways:
•
•
•
CEPM also supports users stored in various other systems (such as, provisioning systems, legacy databases, flat files, and meta directories) by using Java Application Attribute Source.
Some use cases require all of the mechanisms identified here for creating and accessing application users. However, for a basic use case, you need an easy way to create users and therefore only users created in CEPM entitlement repository (internal users) are discussed in this guide. Another reason to use internal users is that there is no other available way to manage users within the application environment. A reason for importing the users (and not referencing them externally) could be the need to create additional attributes that an external repository does not or will not support (CEPM supports type-casting internal users).
You might want to reference users externally (using external users) for the following reasons:
•
•
For details on working with users using various mechanisms, refer to the Cisco Enterprise Policy Manager User Guide, v3.0.
To create a new user in the entitlement repository, follow these steps:
Step 1
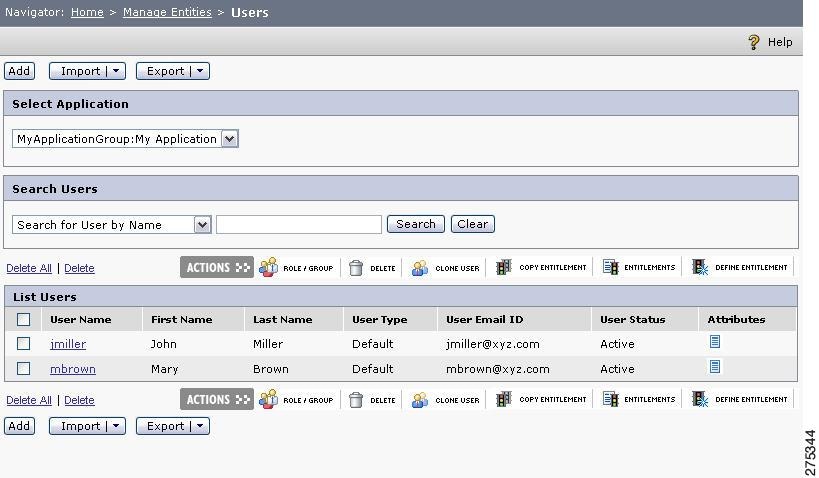
The Users List page is displayed, which provides the functionality of managing users for the selected application or application group.
Step 2
Figure 1-12 Users Page
Step 3
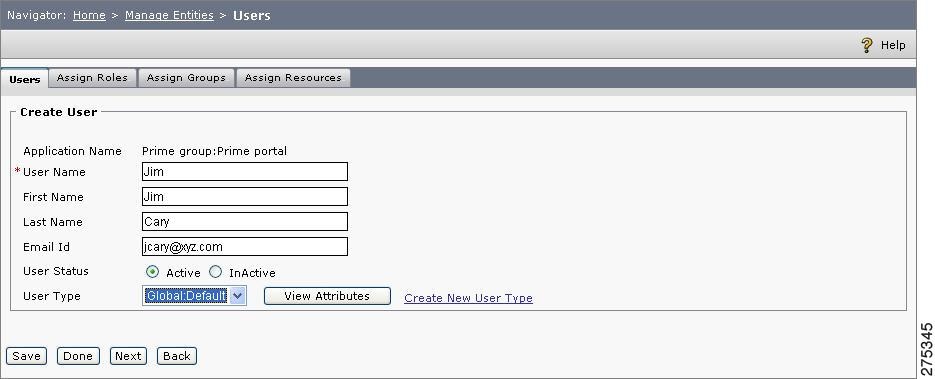
The Create User page is displayed.
Figure 1-13 Create Users
Step 4
Step 5
Step 6
You can also assign roles, groups and resources to this user by clicking Next or by clicking the appropriate tab directly. Click Done after you have assigned appropriate roles, groups, and resources to this user.
Mapping Users to Roles
After roles and users are created, you can map the users to the roles. One of the ways of mapping users to roles is explained here.
To map a user to a role, follow these steps:
Step 1
The User Role Map page is displayed.
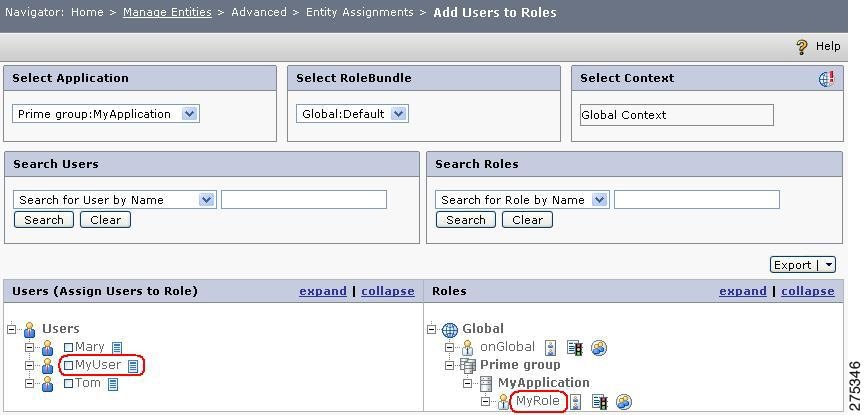
Figure 1-14 Add Users to Role
The User Role Map page has four areas.
•
•
•
•
Step 2
Step 3
Thus, in this example, the user MyUser is mapped to the role MyRole.
Creating Resource-based Policies
A policy decides whether a subject (generally, the application user) has access permissions for a particular resource. This guide provides procedures to create a resource-based policy. CEPM also supports role-, group-, and user-based policies. For further details on these types of policies, refer to the Cisco Enterprise Policy Manager User Guide.
A policy can also contain one or more rules. Rules can be either Dynamic or Static, and they typically use additional data beyond just the subject and the static resource name to evaluate. The policy evaluation (true or false) translates into the policy returning either an allow (access granted) or deny (access restricted) for the subject. Rules are covered in more detail in the Cisco Enterprise Policy Manager User Guide.
A resource-based policy is a policy that you create by assigning a role to a resource. You can create either an allow or a deny policy. The following example creates an allow policy on a resource.
To create a resource-based policy, follow these steps:
Step 1
Step 2
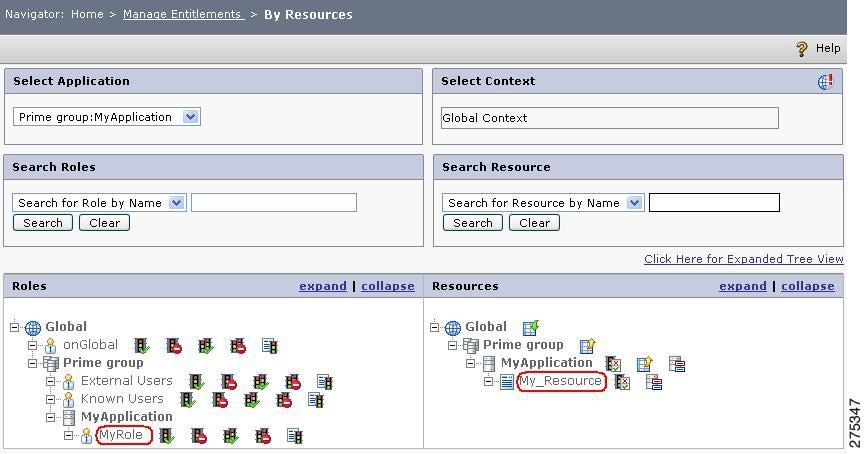
The Policy Management page shows the collapsed Roles and Resources lists. Click the expand link in the upper right of the Roles and Resources list sections to expand the lists.
Figure 1-15 By Resources
Step 3
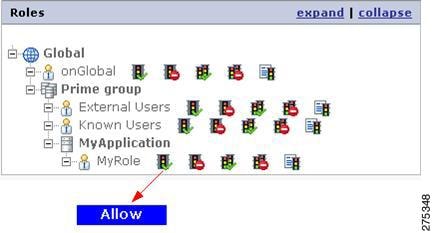
Figure 1-16 Roles
Step 4
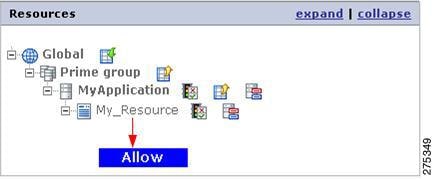
Figure 1-17 Resources
This creates an allow policy for the MyRole role on the MyResource resource and an allow policy for the selected role is displayed under the resource.
Figure 1-18 Allow Resource
You may also double-click the Deny icon present near the role name to map the Deny policy for the selected role for the selected resource.
This completes the setup for policies in the administration console.
Next, you can test the policies you have created using the Review Entitlement function in the administration console, and then you will use these policies in a PEP.
Reviewing Policies with Audit Entitlement
CEPM provides monitoring capabilities in the administration console. Part of this functionality includes the ability to review entitlements. Entitlements can be reviewed based on user, group, role, or resource. In this example, you will review the entitlements based on user.
To access the Audit Entitlement function, follow these steps:
Step 1
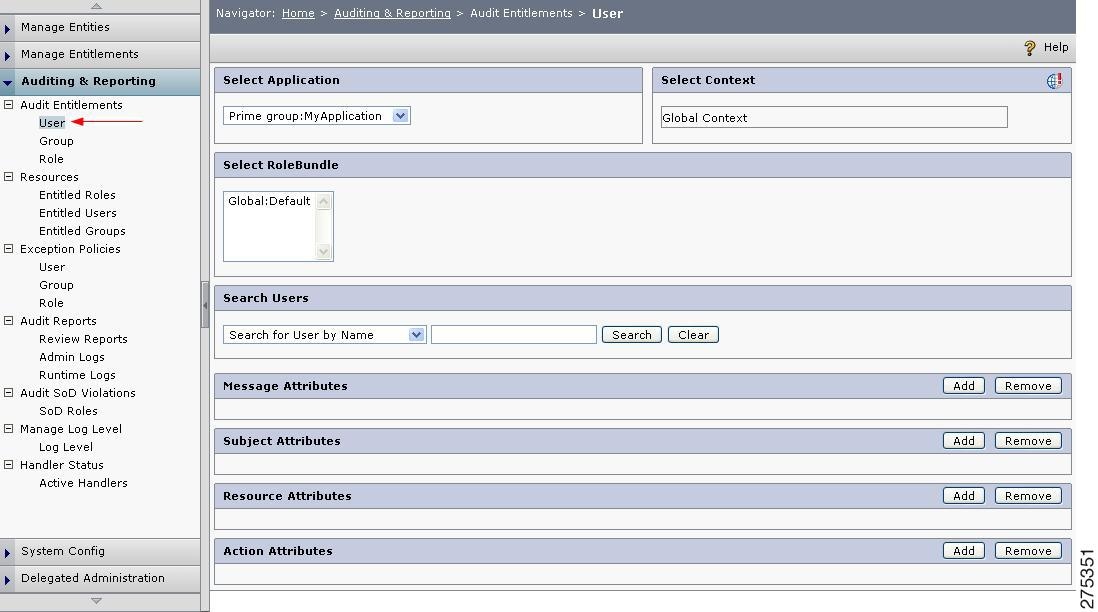
The Audit Entitlements By User page is displayed.
Figure 1-19 Audit Entitlement by Users
Step 2
Step 3
Step 4
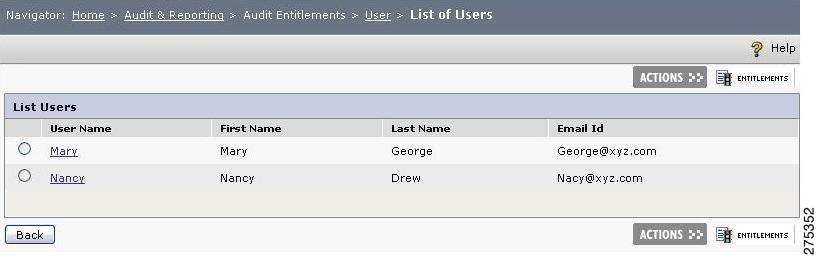
The List of Users page is displayed, with MyUser as one of the rows.
Figure 1-20 List of Users
Step 5
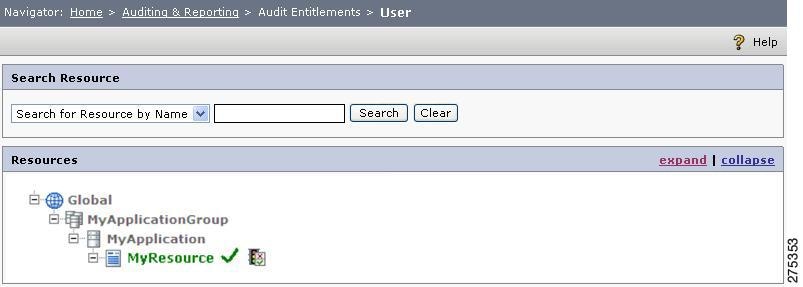
The List Entitlements page is displayed. Click the plus (+) sign next to the resources until MyResource is displayed. (You may also click the expand link so as to display the complete hierarchy.)
Figure 1-21 Audit Entitlement
Note
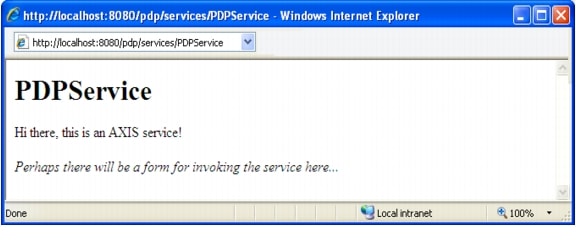
If everything is working fine and has been configured correctly, you will see the MyResource resource appear in Green with tick mark near it. This indicates that MyUser is allowed to access the MyResource resource. If the resource does not appear or if MyResource appears in Red with a cross mark, then something is configured incorrectly or the PDP is not working. If this is the case, revalidate that you have configured everything correctly, and that your PDP is accessible on the Host and Port specified in the PDP configuration. You can do this by accessing http://Host:Port/pdp/services/PDPService in your web browser. You should see the following message
Figure 1-22 PDP message window
If you do not see this message, refer to the Cisco Enterprise Policy Manager Installation and Configuration Guide to correct this issue before proceeding further.
Using Policies with a PEP
In this section we will test our policies with a PEP. The PEP is the decision enforcement API provided by CEPM. The PEP comes in two main types: Java-based and C-based. The Java-based API is used in this section for giving examples. CEPM includes a Java program with the PEP installation called the PEP Simulator. The PEP Simulator is a PEP simulator Java console program that includes all of the appropriate Java classes for the PEP for making a request to the PDP. Also included are the necessary configuration files for the PEP.
To configure the PEP Simulator, follow these steps:
Step 1
Step 2
Step 3
•
•
In either case, this will be referred to as the shell for the remainder of this guide.
Step 4
•
•
Step 5
Ensure that:
•
Note
•
Example for Windows:
set classpath=.;./pep-v3.3_[YYYYMMDD].jarExample for Linux or Unix:
export CLASSPATH=.;./pep-v3.3_[YYYYMMDD].jarStep 6
a.
b.
In the <pdps> section, make the following changes:
c.
d.
e.
Host is the host machine name or IP address of the machine where the pdp.war application is running and Port is the port at which the pdp.war application is running on.
In the <http-proxy> section, make the following changes:
f.
g.
In the <apis> section, make the following changes:
h.
i.
j.
Host is the host machine name or IP address of the machine where pap.war application is running and Port is the port at which the pap.war application is running.
k.
The final pep_config.xml file should look like the one in Appendix A, "PEP Configuration File."
Step 7
import net.securent.util.pep.*;import net.securent.pdp.user.UserContext;import java.util.*;public class PEPSimulator{public static void main(String x[]) throws Exception{String subject = "MyUser";String resource = "MyApplicationGroup:MyApplication:MyResource";String action = "any";IAuthorizationManager mgr =AuthorizationManagerFactory.getInstance().getAuthorizationManager();System.out.println(mgr.isUserAccessAllowed(subject, resource, action));System.exit(1);}}Step 8
javac PEPSimulator.java
Note
Step 9
java -Dlog4j.configuration=./logging.xml
-Dsecurent.agentconfig=./pep_config.xml;./oscache.properties  -cp
;.;./pep-v3.0_[YYYYMMDD].jar;./jbosscache.xml;./servlet-api.jar;./commons-httpclient-2.0.j
ar PEPSimulator
Note
When you execute the PEPSimulator.class, the PEP connects to the PDP and calls the isUserAccessAllowed() method. The PDP returns a response indicating whether or not you are allowed to access the given resource with the given action. In string form, this is either true or false. The IAuthorizationManager object is capable of containing additional information about the response from the PDP, including such things as the XACML response and any obligations. For further information on the PEP APIs, including the IAuthorizationManager object, see the Cisco Enterprise Policy Manager Developers Guide.
What's Next?
For additional information on the administration console and the features available that are not covered here, refer to the Cisco Enterprise Policy Manager User Guide.
For additional information on the PEP and PAP APIs, refer to the Cisco Enterprise Policy Manager Developers Guide.
For general information on entitlement management and CEPM, refer to the Cisco Enterprise Policy Manager Concepts Guide.
Cisco has also published several whitepapers on entitlements management that are not specific to CEPM, but provide very good overview of the potential capabilities of a solution like CEPM. One example is the Security in a Service-Oriented Architecture whitepapers.