Feedback Feedback
|
Table Of Contents
Cisco Configuration Professional Quick Start Guide
Task 1: Download The Cisco CP Files
Task 2: Install Interface Cards, and Cable the Router
Task 3: Configure the Router for Cisco CP
Copying the Default Configuration File to Router NVRAM
Entering the Configuration Commands Manually
Task 4: Configure the IP Address On the PC
Task 5: Connect the PC To the Router
Task 6: Run the Cisco CP Express Wizard
Task 7: Verify the Initial Configuration
Creating an Initial Configuration of a Feature
You're Done! Where to Go from Here
For More Information About Cisco CP and About Your Router
Cisco Configuration Professional Quick Start Guide
April 21, 2008
This document explains how to start using Cisco Configuration Professional Express (Cisco CP Express) and Cisco Configuration Professional (Cisco CP). Cisco CP Express is a graphical configuration tool that allows you configure a LAN and WAN connection on a router, and to secure the router and the LAN. It is installed in router Flash memory. Cisco CP is a full-featured device management tool that allows you to configure, monitor, and troubleshoot Cisco IOS security features and network connections. It is installed on a PC. This document shows you how to set up a PC to connect to the router, give the router an initial network configuration using Cisco CP Express, and then begin using Cisco CP.
This document is intended for users who have ordered the SKUs listed in Table 1, and for users who download these configuration tools from Cisco.com. Refer to the Release Notes for Cisco Configuration Professional for information about supported routers, web browsers and plug-ins.
Cisco CP SKUs are provided to suit a variety of deployments. Table 1 describes the Cisco CP SKUs, the deployment each supports, and how this document can be used.
Table 1 Cisco CP SKUs
Configuration File in:
NVRAM? Yes
Flash? Yes
Cisco CP CD? Yes
Use Cisco CP Express to set up an individual router when you receive it, and to install and begin using Cisco CP.
You can use the following task sections of this document:
•
Task 2: Install Interface Cards, and Cable the Router
•
•
•
•
Configuration File in:
NVRAM? No
Router Flash? Yes
Cisco CP CD? Yes
This SKU gives you the flexibility of loading a configuration on the router by using a TFTP server or by other means, and allows for batch configuration. If you start a console session, the Setup Command Facility starts automatically.
Cisco CP is shipped with the router.
You can use the following task sections of this document:
•
•
Configuration File in: NVRAM? Yes
Router Flash? Yes
Cisco CP CD? No
Use Cisco CP Express to set up an individual router when you receive it. If you want Cisco CP, you can download it from www.cisco.com.
You can use the following task sections of this document:
•
•
•
•
•
•
Configuration File in: NVRAM? No
Router Flash? Yes
Cisco CP CD? No
This SKU gives you the flexibility of loading a configuration on the router by using a TFTP server or by other means, and allows for batch configuration. If you start a console session, the Setup Command Facility starts automatically.
Cisco CP is not shipped with the router.
You can use the following task sections of this document:
•
•
•
Task 1: Download The Cisco CP Files
This task section explains how to download the Cisco CP files. See the following table to determine if you need to use this section.
If you did not receive the CD, but you want to install and use Cisco CP, use this section.
If you received the CD, skip this section, and go to Task 2: Install Interface Cards, and Cable the Router.
To download Cisco CP, complete the following tasks:
Step 1
http://www.cisco.com/go/ciscocp
Step 2
Step 3
Step 4
Step 5
Task 2: Install Interface Cards, and Cable the Router
This section advises you to follow the instructions in the setup guide for your router, before proceeding.
Before Cisco CP Express can be used, you must install all the necessary hardware accessories that are applicable to your router, such as WAN interface cards (WICs), network modules (NMs), or advanced interface module (AIM) cards that you will use to connect to the network. Refer to the quick start guide or hardware installation guide for your router for instructions on installing these interface cards, cabling the router, and verifying that all the connections are working properly.
Task 3: Configure the Router for Cisco CP
This task section explains how to configure the router to support Cisco CP Express and Cisco CP.
Cisco CP Express and Cisco CP require the following basic configuration in order to connect to the router and manage it.
•
•
•
•
•
There are two ways that you can ensure that the router configuration meets these requirements:
•
•
Copying the Default Configuration File to Router NVRAM
If you want to start with a factory default configuration that is designed to support Cisco CP, you can use the procedure in this section. The factory default configuration includes all the commands necessary to support Cisco CP and configures an Ethernet interface with the IP address 10.10.10.1.
To copy the default configuration file from router Flash memory to NVRAM, complete the following steps.:
Step 1
Step 2
--- System Configuration Dialog ---Continue with configuration dialog? [yes/no]:Enter no so that you can enter Cisco IOS CLI commands directly.
If the Setup Command Facility does not start automatically, a running configuration is present, and you should go to the next step.
Step 3
Router> enablepassword passwordRouter#Step 4
Router# show flash-#- --length-- -----date/time------ path1 2903 Apr 15 2008 20:34:48 +00:00 cpconfig-8xx.cfg2 115712 Apr 15 2008 20:34:50 +00:00 home.tar3 2279424 Apr 15 2008 20:34:54 +00:00 cpexpress.tarRouter#Step 5
Router# copy flash: cpconfig-8xx.cfg nvram:When the default configuration file is in NVRAM, it becomes the router startup configuration.
Step 6
Router# copy startup-config running-config
Entering the Configuration Commands Manually
If you don't want to use the factory default configuration because the router already has a configuration, or for any other reason, you can use the procedure in this section to add each required command to the configuration.
To enter the Cisco IOS commands manually, complete the following steps:
Step 1
Step 2
--- System Configuration Dialog ---Continue with configuration dialog? [yes/no]:Enter no so that you can enter Cisco IOS CLI commands directly.
If the Setup Command Facility does not start automatically, a running configuration is present, and you should go to the next step.
Step 3
Router> enablepassword passwordStep 4
Router> config terminalRouter(config)#Step 5
Router(config)# username name privilege 15 secret 0 passwordStep 6
Router(config)# int FastEthernet0Router(config-if)# ip address 10.10.10.1 255.255.255.248Router(config-if)# no shutdownRouter(config-if)# exitIf you are going to connect the PC directly to the router, the PC must be on the same subnet as this interface.
Step 7
To configure the router as an http server, enter the ip http server command shown in the example:
Router(config)# ip http serverTo configure the router as an https server, enter the ip http secure-server command shown in the example:
Router(config)# ip http secure-serverStep 8
Router(config)# ip http authentication localStep 9
Router(config)# ip http timeout-policy idle 60 life 86400 requests 10000Step 10
Router(config)# line vty 0 4Router(config-line)# privilege level 15Router(config-line)# login localRouter(config-line)# transport input telnetRouter(config-line)# transport input telnet sshRouter(config-line)# exitRouter(config)# line vty 5 15Router(config-line)# privilege level 15Router(config-line)# login localRouter(config-line)# transport input telnetRouter(config-line)# transport input telnet sshRouter(config-line)# end
Task 4: Configure the IP Address On the PC
This task section explains how to configure an IP address on the PC so that you can connect to Cisco CP Express and begin configuring the router.
The default configuration file assigns an IP address to a LAN interface on the router, and you must configure the PC to be on the same subnet as the router LAN interface. If the router is a fixed-interface model, it is configured as a DHCP server, and the PC must be configured to accept an IP address automatically. If the router can accept modular interfaces, it is not configured as a DHCP server, and you must configure the PC with a static IP address on the same subnet as the router.
To configure the IP address on the PC, complete the following steps:
Step 1
Step 2
a.
b.
c.
d.
To configure the PC to obtain an IP address from a DHCP server, click Obtain an IP address automatically. See Figure 1.
Figure 1 Configuring the PC To Obtain an IP Address Automatically
•
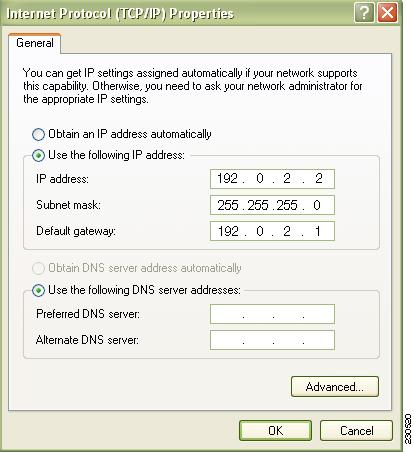
To configure the PC with a static IP address of 10.10.10.2 and a subnet mask of 255.255.255.248, complete the following steps in the General Tab:
•
Figure 2 Configuring the PC with a Static IP Address
•
10.10.10.2•
255.255.255.248•
Task 5: Connect the PC To the Router
This task section explains how to cable the PC to the router to perform initial configuration.
Use the information in Table 3 to connect the PC Ethernet port to the correct router Ethernet port.
Task 6: Run the Cisco CP Express Wizard
This task section explains how to run the Cisco CP Express wizard to give the router a basic configuration.
Cisco CP Express is a Cisco CP program that lets you quickly configure the router LAN and Internet connections. After you use Cisco CP Express to give the router these basic connections, you can use Cisco CP for more complex configurations. Cis co recommends that you use the Cisco CP Express wizard to configure the following features:
•
•
•
•
Although you can use the wizard to configure a WAN connection, a firewall, and security settings, it is not required that you do so. Cisco CP provides wizards to help you configure these features.
To use the Cisco CP Express wizard, perform the following steps:
Step 1
http://10.10.10.1
Step 2
Tip
•
•
•
Note
username username privilege 15 secret 0 password
Replace username and password with the username and password that you want to use. This command creates a new user with privilege level 15 and a password for that user. If you do not do this, you will not be able to log into the router after you end the session. Use the new credentials that you create for future sessions, instead of using the username cisco and password cisco.•
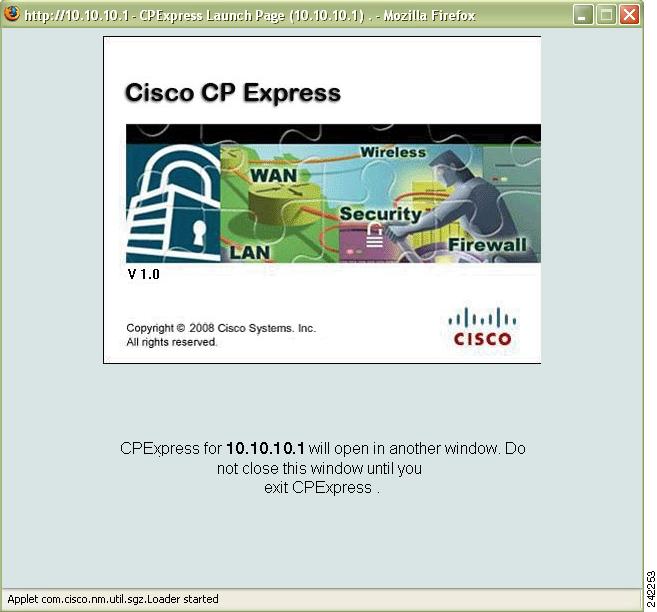
When you connect to the router, the Cisco CP Express Launch page (Figure 3) appears, followed by one or more certificate windows.
Figure 3 Cisco CP Express Launch Page
Step 3
Step 4
Figure 4 Cisco CP Express Overview and Wizard Pages
Tip
Step 5
Step 6
Task 7: Verify the Initial Configuration
This task section explains how to verify the initial configuration performed with Cisco CP Express.
To verify the initial configuration by reconnecting to Cisco CP Express, complete the following tasks:
Step 1
To configure the PC to obtain an IP address automatically, do the following:
a.
b.
c.
d.
e.
C:\> ipconfig /releaseEthernet adapter Local Area Connection:Connection-specific DNS Suffix . : somename.comIP Address. . . . . . . . . . . . : 0.0.0.0Subnet Mask . . . . . . . . . . . : 0.0.0.0Default Gateway . . . . . . . . . :C:\> ipconfig /renewEthernet adapter Local Area Connection:Connection-specific DNS Suffix . : somename.comIP Address. . . . . . . . . . . . : 192.168.1.147Subnet Mask . . . . . . . . . . . : 255.255.255.0Default Gateway . . . . . . . . . : 192.168.1.1
Note
To configure the PC with a new static IP address, do the following:
a.
b.
c.
Figure 5 Configuring the PC with a New Static IP address
Step 2
http://new-IP-addressFor example, if you gave the LAN interface the IP address 192.0.2.1, you would enter the following command in the browser.
http://192.0.2.1Step 3
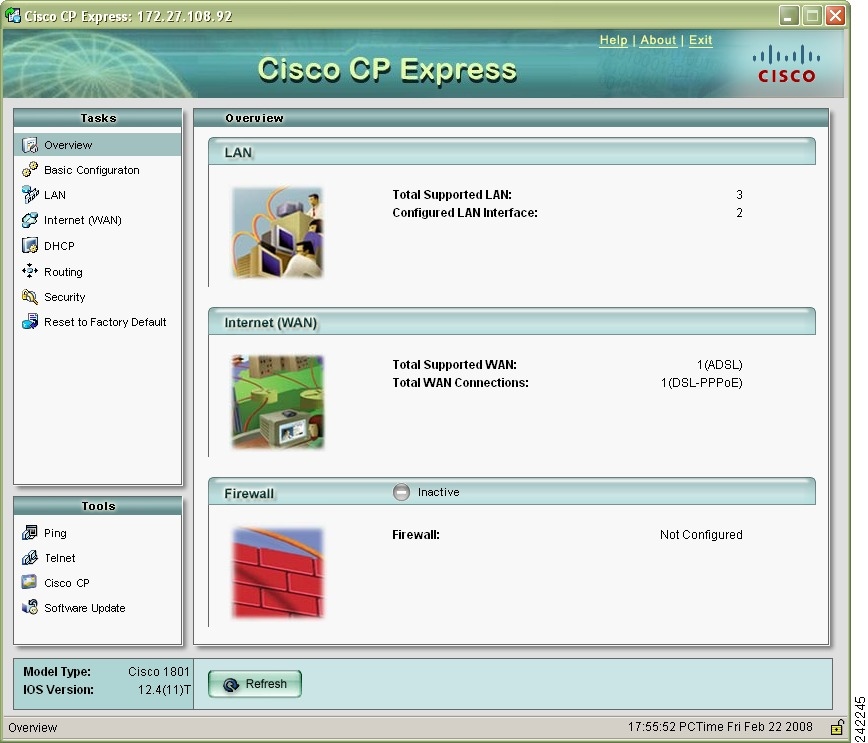
Figure 6 Cisco CP Express Overview Window
If the Cisco CP Express overview window is displayed, you have validated the LAN interface configuration.
Step 4
Step 5
Task 8: Install Cisco CP
This task section explains how to install Cisco CP on a PC so that you can use it to manage routers.
If you want to install Cisco CP on your PC to manage routers, use this section.
If you don't need to use Cisco CP, you can skip this section.
You can install Cisco CP on a PC using the CD, or using the Cisco CP download file from www.cisco.com. The download file has the same contents as the CD. First, locate the installation file, and then start the installation wizard.
Step 1
Step 2
Step 3
Step 4
Figure 7 Cisco CP Installshield Splash Screen
Step 5
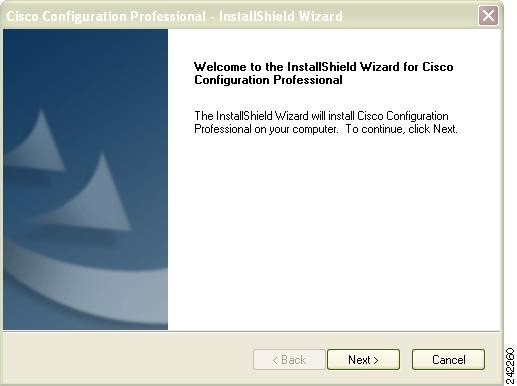
Figure 8 Welcome Window
Step 6
Step 7
Step 8
Step 9
Figure 9 Install Options
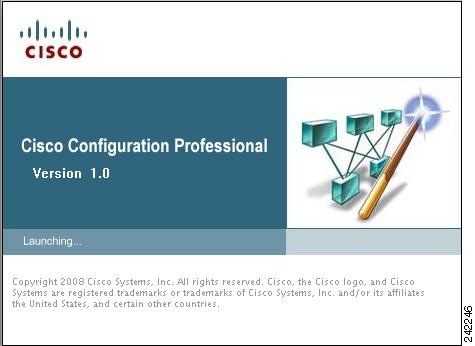
Step 10
Figure 10 Cisco Configuration Professional Splash Screen
Step 11
Task 9: Start Using Cisco CP
This task section describes how to start using Cisco CP.
If you installed Cisco CP on your PC to manage routers, use this section.
If you did not install Cisco CP, you can skip this section.
Cisco CP works with device communities. A community consists of one or more devices that you specify by providing their IP addresses and login credentials. After you create the community, you can begin working with the devices in it.
This section contains the following parts:
•
Creating a Community
To create a community, complete the following tasks:
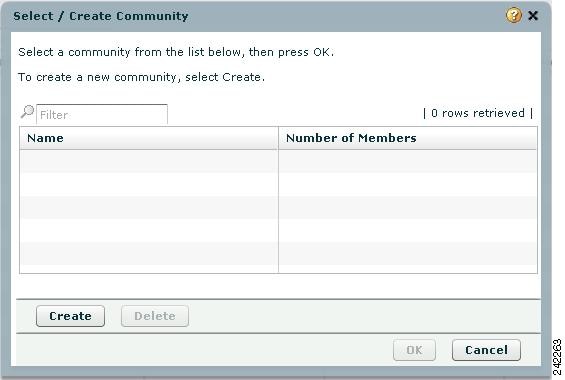
Step 1
Figure 11 Select / Create Community
Step 2
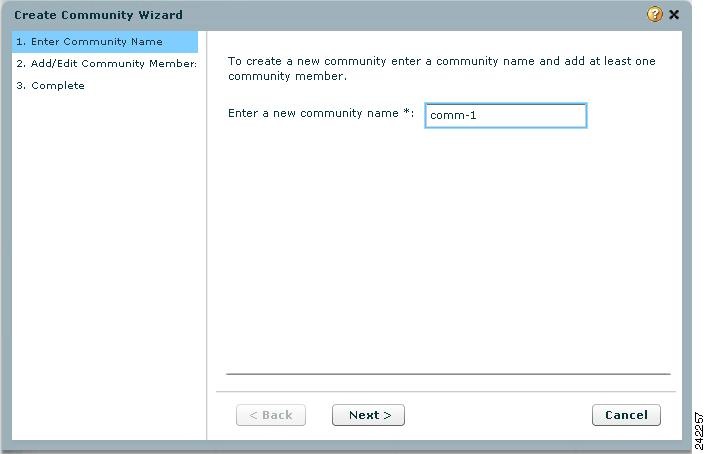
Step 3
Figure 12 Create Community Wizard Screen: Enter Community Name
Step 4
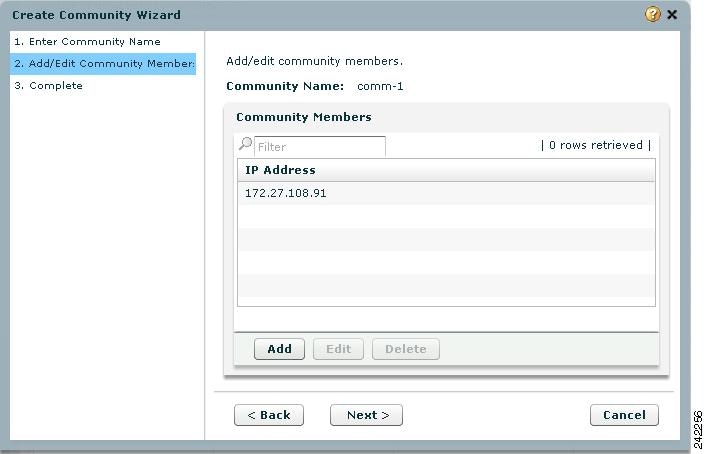
Figure 13 Create Community Member Dialog
Step 5
Step 6
Figure 14 Add/Edit Community Member Screen
Step 7
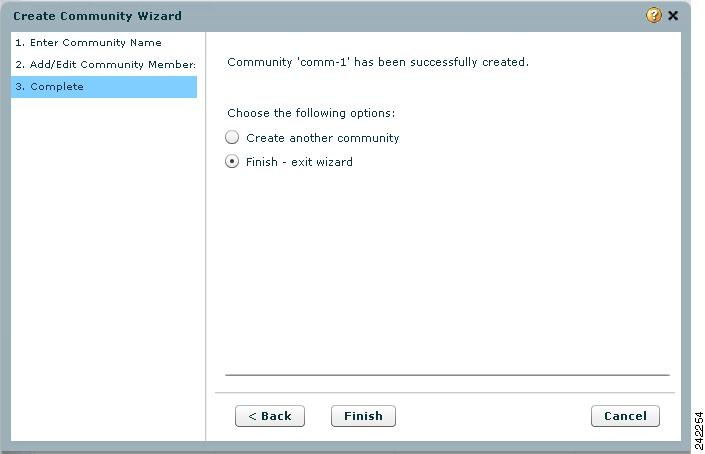
Step 8
Figure 15 Complete Screen
Step 9
•
•
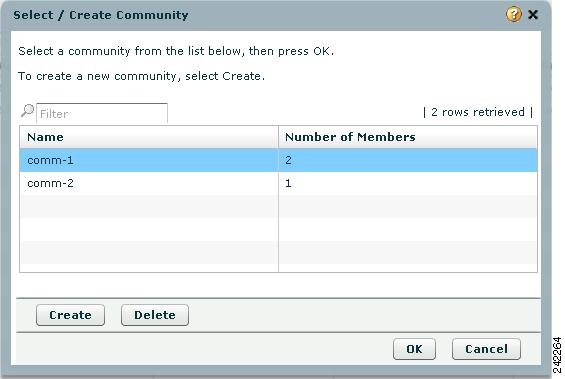
Figure 16 Select / Create Screen
Creating an Initial Configuration of a Feature contains a procedure for configuring a router interface that is a good example of how configuration tasks are performed using Cisco CP.
Creating an Initial Configuration of a Feature
This section provides a procedure for configuring a router interface. It is provided as an example of how you create an initial configuration of a feature using Cisco CP.
Step 1
Figure 17 Community Information Screen
Step 2
Step 3
Figure 18 Configure Tree
Step 4
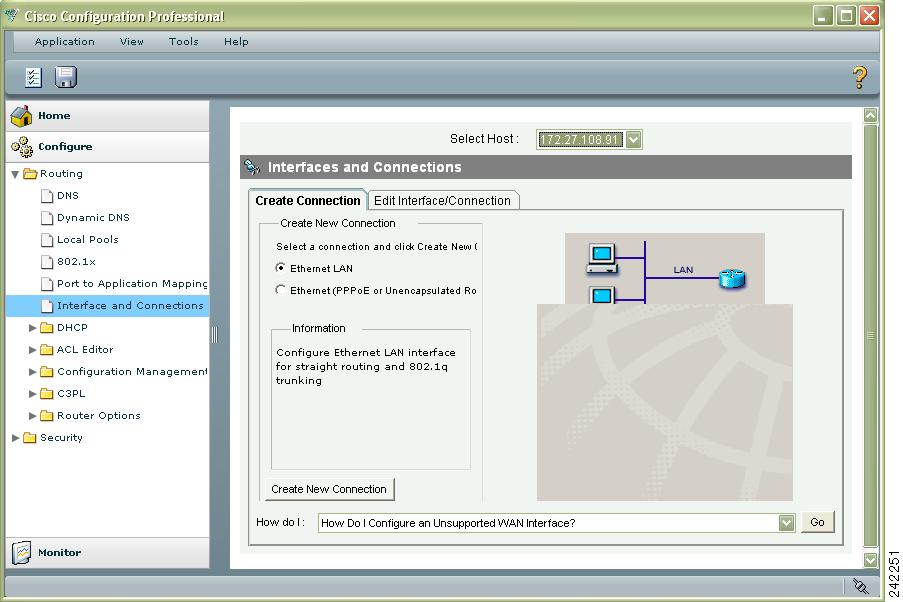
Figure 19 Interfaces and Connections
The Interfaces and Connections screen has a Create Connection Tab and an Edit Connection/Interface tab. The Create tabs in Cisco CP screens provide access to smart wizards that guide you through the configuration and that let you know if changes you are making will conflict with the existing configuration. The Edit tabs provide access to screens with additional settings. It is a good practice to create a starting configuration using the wizards, and then to examine the configuration in the screens available from the Edit tab and make any further changes that you need.
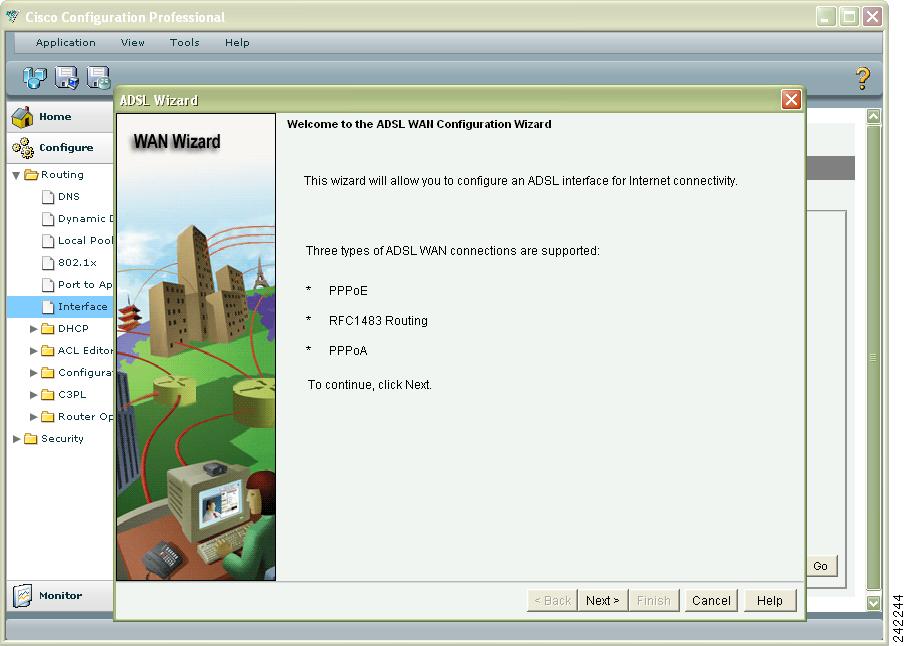
Step 5
Figure 20 ADSL Connection Wizard Welcome Screen
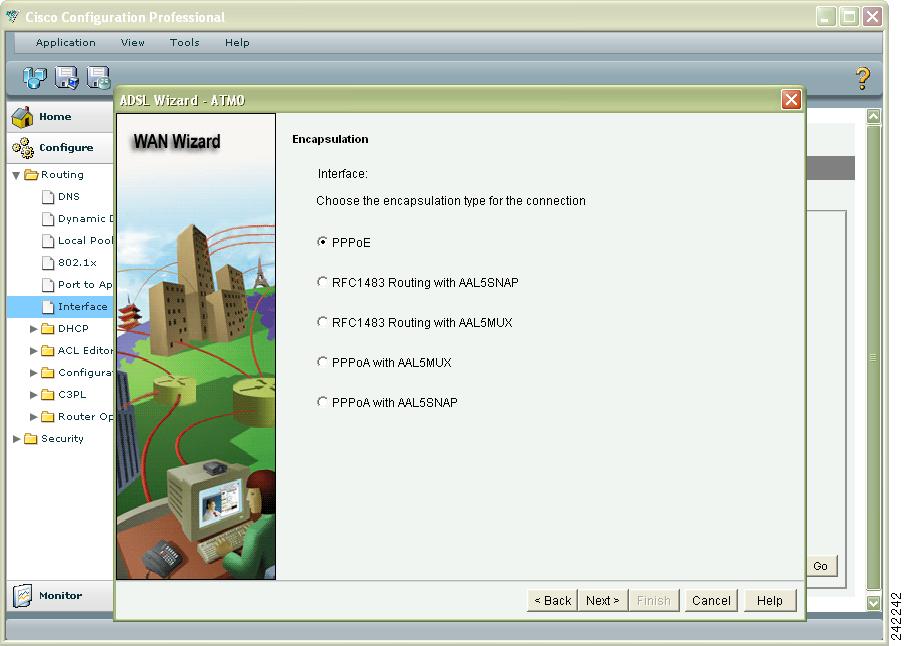
Step 6
Figure 21 ADSL Encapsulation Screen
Step 7
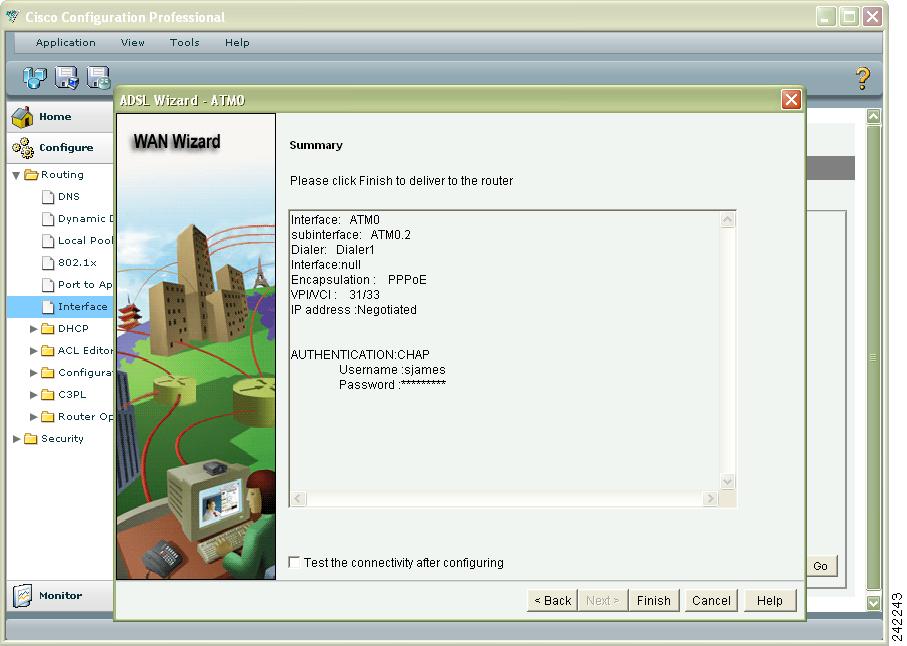
Step 8
Figure 22 ADSL Connection Summary Screen
Step 9
Step 10
Step 11
Table 4 Save Running Configuration Buttons
Save running configuration to PC.
Save running configuration to startup configuration.
Editing a Configuration describes how to change a configuration.
Editing a Configuration
Once a configuration has been created using a wizard, you can edit that configuration without returning to the wizard again. Editing the configuration gives you access to additional configuration values that are not available in the wizards. The following example procedure describes editing a Fast Ethernet connection.
To edit a configuration, complete the following tasks:
Step 1
Figure 23 Edit Interfaces/Connections
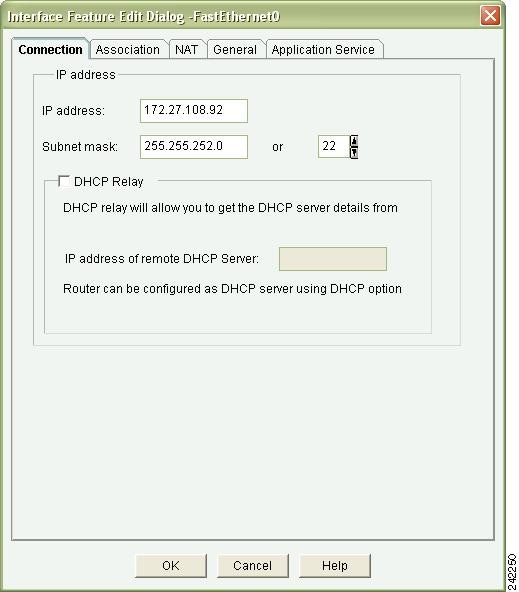
Step 2
Figure 24 Connection Dialog
Step 3
Step 4
Step 5
You're Done! Where to Go from Here
Now that you have used Cisco CP to give your router an initial configuration, you can continue to use Cisco CP to configure additional features or modify existing feature configurations.
For More Information About Cisco CP and About Your Router
For additional information about Cisco CP features, refer to the Cisco CP online help, and to the documentation available on Cisco.com.
Cisco.com
You can access the most current Cisco documentation on the World Wide Web at this URL:
http://www.cisco.com/univercd/home/home.htm
You can access the Cisco website at this URL:
See the quick start guide for the router you have just configured for information on obtaining other documentation, providing documentation feedback, and obtaining technical assistance.
Printed in the USA on recycled paper containing 10% postconsumer waste.
Copyright © 2008 Cisco Systems, Inc. All rights reserved.