![]() |
Table Of Contents
Using Cisco Administrative Policy Engine
About the Users page on the Management Interface
Assigning Advanced User Options
About the Locations Page on the Management Interface
Adding a User-Defined Location Attribute
Removing a User-Defined Location Attribute
About the Resources Page on the Management Interface
Assigning a Resource to an Authorization Device
Removing a Resource from an Authorization Device
Assigning a Role to a Resource
Removing a Role from a Resource
Assigning a Role to Hunt Group Resources
Removing a Role from a Hunt Group Resource
Assigning a Resource to a Hunt Group Resource
Removing a Resource from a Hunt Group Resource
About the Authorization Devices Page on the Management Interface
Adding an Authorization Device
Editing an Authorization Device
About the Resource Types Page on the Management Interface
About the Roles Page on the Management Interface
Assigning a Resource to a Role
Removing a Resource from a Role
Adding a Command Line Interface Permission
About the Policies Page on the Management Interface
Using Cisco Administrative Policy Engine
This chapter describes the following procedures:
•
Assigning Advanced User Options
•
About the Locations Page on the Management Interface
•
Removing a User-Defined Location Attribute
•
About the Resources Page on the Management Interface
•
Assigning a Resource to an Authorization Device
•
Removing a Resource from an Authorization Device
•
Assigning a Role to a Resource
•
Removing a Role from a Resource
•
Editing a Hunt Group Resource
•
Assigning a Role to Hunt Group Resources
•
Removing a Role from a Hunt Group Resource
•
Assigning a Resource to a Hunt Group Resource
•
Removing a Resource from a Hunt Group Resource
•
About the Authorization Devices Page on the Management Interface
•
Adding an Authorization Device
•
Editing an Authorization Device
•
About the Roles Page on the Management Interface
•
Assigning a Resource to a Role
•
Removing a Resource from a Role
•
Removing a Policy from a Role
•
Adding a Command Line Interface Permission
•
About the Policies Page on the Management Interface
Note
You can do the following tasks for different objects in any order. The objects appear in the same order as in the Management Interface.
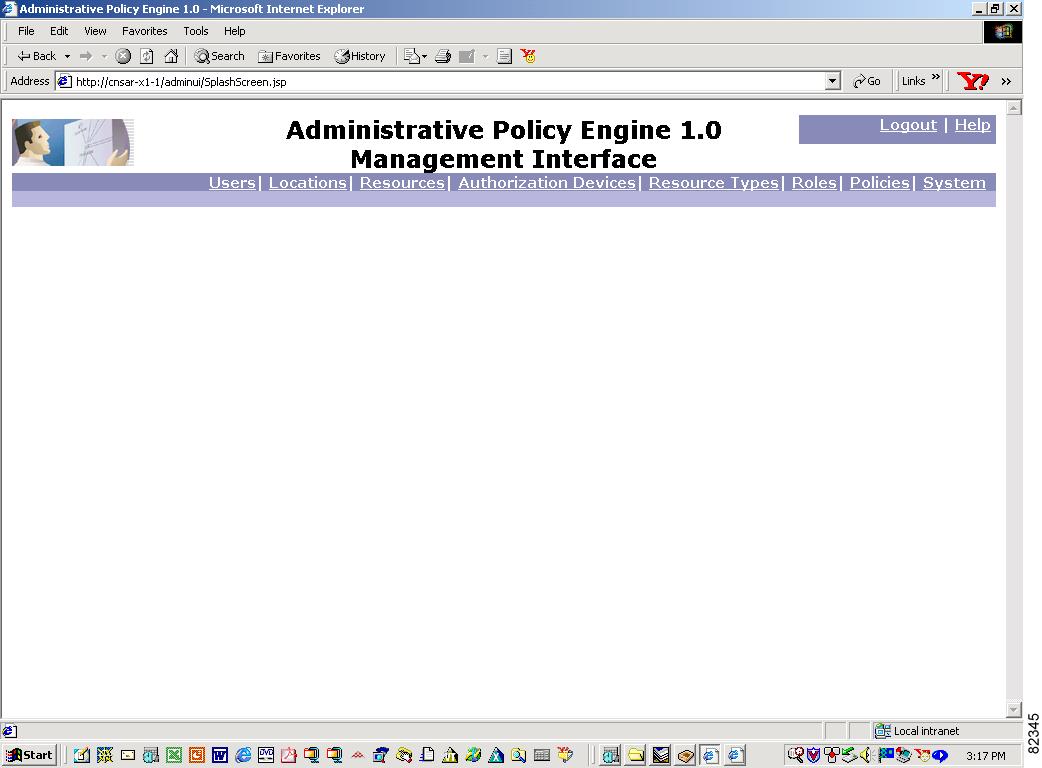
Figure 4-1 shows the Cisco Administrative Policy Engine Management Interface. The management interface includes comprehensive online help that you can use for doing the procedures described in this chapter.
Figure 4-1 Cisco Administrative Policy Engine Management Interface
About the Users page on the Management Interface
Note
To add a user, you require user details, like the user ID and location of the user.
To edit or find existing users, click an alphabet to see the list of all the unique user IDs beginning with that letter.
To find a specific user, enter the user id and click Apply Filter.
Note
You can enter a wild card if you do not know the user ID. Click Apply Filter.
To see a list of all users, enter * (asterisk) and click Apply Filter.
You can also use pattern matching. For example:
•
Dev* matches all devices that start with Dev
•
Dev? matches a single-digit number, like Dev1
To add a new user, see "Adding a User" section.
To edit a user, see "Editing a User" section.
Adding a User
To add a user, follow these steps:
Step 1
Enter the name of the user.
Step 2
(Optional) Enter a description of the user.
Step 3
Enter the password.
Note
The password is case sensitive.
Step 4
In the Confirm Password field, enter the password again. Make sure that this password is identical to the password you entered in Step 3.
Note
If a pop-up window appears saying that the passwords are not identical, re-enter the identical password.
Step 5
(Optional) Enter the first name of the user.
Step 6
(Optional) Enter the last name of the user.
Step 7
(Optional) Enter the ID number of the user.
Step 8
(Optional) Enter the phone number of the user.
Step 9
(Optional) Enter the name of the user's supervisor.
Step 10
Choose the location of the user from the location drop-down menu.
Note
To create a new location specific to a user, see "Adding a Location" section.
Step 11
Click Submit.
Step 12
To reset the information to the old values, click Reset.
Step 13
To cancel the information and to go back to the Users page, click Cancel.
Step 14
To delete a user, select the user and click Delete.
Editing a User
To edit a user, follow these steps:
Step 1
Click the user ID.
Step 2
On the Edit User page, enter the required changes.
Step 3
Click Submit.
Note
To assign Cisco IOS enable passwords to a user, click Advanced. The password levels are directly proportional to the authorizations a user has, that is, the higher the level number, the more authorizations the user has.
Assigning Advanced User Options
Step 1
To assign Cisco IOS enable passwords to a user, click Advanced.
Step 2
Enter the passwords you want to assign to a user.
Note
The password levels are directly proportional to the authorizations a user has, that is, the higher the level number, the more the authorizations are for the user.
Step 3
To save your changes, click Submit.
Step 4
(Optional) To delete the values, click Delete.
Step 5
(Optional) To reset the changes to the old values, click Reset.
Step 6
(Optional) To cancel and go back to the Edit Users page, click Cancel.
To go to the users page, click Users.
To assign a Role to the user, click Role Assignment.
About the Locations Page on the Management Interface
Note
The " /" root location is the default reserved location. You cannot delete or rename the root location.
To see a tree of all locations, click Locations. Click the + sign to see locations within a tree.
Note
A location is arranged by a geographical hierarchy. For example: /USA/Massachusetts/Boston
To edit a location, see the "Editing a Location" section.
To add a new location, see the "Adding a Location" section.
Adding a Location
To add a new location, follow these steps:
Step 1
From the Locations page, Click Add Location.
Step 2
Enter the name of the location.
Step 3
(Optional) Enter a description of the location.
Step 4
From the Parent drop-down menu, select the parent of the location.
Step 5
Click Submit.
Step 6
(Optional) To delete the location, click Delete.
Step 7
To reset the information to the old values, click Reset.
Step 8
To cancel and go back to the Locations page, click Cancel.
Editing a Location
To edit a Location, follow these steps:
Step 1
Click the Location name.
Step 2
On the Edit Location page, enter the required changes.
Step 3
Click Submit.
Step 4
(Optional) To delete the location, click Delete.
Step 5
(Optional) To reset the changes to the old values, click Reset.
Step 6
(Optional) To cancel and go back to the Edit Locations page, click Cancel.
Step 7
(Optional) To go to the Edit Locations page, click Edit Locations.
Step 8
(Optional) To go back to the Locations page, click Locations.
Adding a User-Defined Location Attribute
User defined location attributes are name-value pairs that you can define. You can add any number of named attributes to all locations. You can assign values to the attributes on the Editing a Location page.
To assign a user-defined location attribute, follow these steps:
Step 1
Click User-Defined Location Attributes.
Step 2
Enter the attribute that you want to add in the Attribute to Add field.
Step 3
Click Add.
Removing a User-Defined Location Attribute
To remove a user-defined location attribute, follow thses steps:
Step 1
Click on the attribute that you want to remove in the User-Defined Attributes column.
Step 2
Click Remove.
CautionRemoving a user-defined location attribute removes all the values from all the locations.
About the Resources Page on the Management Interface
To edit or find existing resources, click the index to see the list of all the resource names beginning with a letter.
To find a specific resource, enter the name of the resource and click Apply Filter.
To see a list of all resources, enter * (asterisk) and click Apply Filter.
You can also use pattern matching. For example:
Dev* matches all devices that start with Dev
Dev? matches a single-digit number, like Dev1
To add a resource, see "Adding a Resource" section.
To edit a resource, see "Editing a Resource" section.
To add a Hunt group resource, see "Adding a Hunt Group Resource" section.
Adding a Resource
To add a new resource, follow these steps:
Step 1
From the Resources page, click Add Resource.
Step 2
Enter the name of the resource.
Note
You cannot add a special character, for example, an apostrophe (') or a semi-colon (;) to the resource name.
Step 3
(Optional) Enter a description of the resource.
Step 4
Enter the IP Address of the resource.
Step 5
Enter the Network Port number.
Step 6
To enable the resource, click Enabled.
Step 7
(Optional) Enter the Domain Name System (DNS) name of the resource.
Step 8
From the Locations drop-down menu, select the location of the resource.
Step 9
From the Resource Type drop-down menu, select the resource type.
Note
To add a new resource type, go to the Resource Types page.
Step 10
From the Authorization Device drop-down menu, select the authorization device.
Step 11
Click Submit.
Step 12
(Optional) To delete the resource, click Delete.
Step 13
(Optional) To reset the information to the old values, click Reset.
Step 14
(Optional) To cancel and go back to the Resources screen, click Cancel.
Step 15
(Optional) To go back to the Resources page, click Resources.
Editing a Resource
To edit a resource, follow these steps:
Step 1
Click the resource name.
Step 2
On the Resource Information page, enter the required changes.
Step 3
Click Submit.
Assigning a Resource to an Authorization Device
You can assign resources to an authorization device from the Resource Assignment page:
Step 1
To assign a resource to an authorization device, click Resource Assignment.
Step 2
From the Assignable Resources field, select the resources that you want to add.
Step 3
Click Add.
Removing a Resource from an Authorization Device
Step 1
To remove a resource from an authorization device, click Resource Assignment.
Step 2
From the Assigned Resources field, select the resources that you want to remove.
Step 3
Click Remove.
Assigning a Role to a Resource
To assign a role to a resource, follow these steps:
Step 1
Click Roles or Role Assignment.
Step 2
From the list of Assignable Roles, select the role that you want to assign to the resource.
Step 3
Click Add.
Step 4
Click Submit.
Removing a Role from a Resource
To remove a role from a resource, follow these steps:
Step 1
Click Roles or Role Assignment.
Step 2
From the list of Assigned Roles, select the role that you want to remove from the resource.
Step 3
Click Remove.
Step 4
Click Submit.
Step 5
(Optional) To delete the resource, click Delete.
Step 6
(Optional) To reset the information to the old values, click Reset.
Step 7
(Optional) To cancel and go back to the Edit Resources page, click Cancel.
Step 8
(Optional) To go to the Edit Resources page, click Edit Resources.
Step 9
(Optional) To go back to the Resources page, click Resources.
Adding a Hunt Group Resource
You can add a Hunt group resource to a role instead of manually adding all the resources in that Hunt group to that role.
Step 1
To add a Hunt group resource from the Resources page, click Add Hunt Group Resource.
Step 2
Enter the name of the Hunt group resource.
Note
You cannot add a special character, for example, an apostrophe (') or a semi-colon (;) to a hunt group resource name.
Step 3
(Optional) Enter a description of the Hunt group resource.
Step 4
Enter the IP Address of the Hunt group resource.
Step 5
Enter the Network Port number.
Step 6
To enable the Hunt group resource, click Enabled.
Step 7
(Optional) Enter the Domain Name System (DNS) name of the Hunt group resource.
Step 8
From the Locations drop-down menu, select the location of the Hunt group resource.
Step 9
From the Resource Type drop-down menu, select the Hunt group resource type.
Step 10
From the Authorization Device drop-down menu, select the authorization device.
Step 11
Click Submit.
Step 12
(Optional) To delete the resource, click Delete.
Step 13
(Optional) To reset the information to the old values, click Reset.
Step 14
(Optional) To cancel and go back to the Resources page, click Cancel.
Step 15
(Optional) To go back to the Resources page, click Resources.
Editing a Hunt Group Resource
Step 1
To edit a hunt group resource, click the hunt group resource name.
Step 2
On the Edit Hunt Group Resource page, enter the required changes.
Step 3
To save your changes, click Submit.
Step 4
(Optional) To delete the resource, click Delete.
Step 5
(Optional) To reset the information to the old values, click Reset.
Step 6
(Optional) To cancel and go back to the Edit Hunt Group Resources page, click Cancel.
Step 7
(Optional) To go back to the Resources page, click Resources.
Step 8
(Optional) To assign a role to a hunt group resource, click Role Assignment.
Step 9
(Optional) To assign a resource to a hunt group resource, click Resource Assignment.
Assigning a Role to Hunt Group Resources
Step 1
To assign a role to a hunt group resource, click Roles or Role Assignment.
Step 2
Select the role from the list of Assignable Roles that you want to assign to the resource.
Step 3
Click Add.
Step 4
To save your changes, click Submit.
Step 5
(Optional) To delete the resource, click Delete.
Step 6
(Optional) To reset the information to the old values, click Reset.
Step 7
(Optional) To cancel and go back to the Edit Resources page, click Cancel.
Step 8
(Optional) To go to the Edit Hunt Group Resources page, click Edit Hunt Group Resources.
Step 9
(Optional) To assign a role to the hunt group resource, click on Role Assignment.
Step 10
(Optional) To go back to the Resources page, click Resources.
Removing a Role from a Hunt Group Resource
Step 1
To remove a role from the hunt group resource, click Roles or Role Assignment.
Step 2
Select the role from the list of Assigned Roles that you want to remove from the hunt group resource.
Step 3
Click Remove.
Step 4
To save your changes, click Submit.
Step 5
(Optional) To delete the resource, click Delete.
Step 6
(Optional) To reset the information to the old values, click Reset.
Step 7
(Optional) To cancel and go back to the Edit Resources page, click Cancel.
Step 8
(Optional) To go to the Edit Hunt Group Resources page, click Edit Hunt Group Resources.
Step 9
(Optional) To assign a role to the hunt group resource, click on Role Assignment.
Step 10
(Optional) To go back to the Resources page, click Resources.
Assigning a Resource to a Hunt Group Resource
Step 1
To assign a resource to a hunt group resource, click Resource Assignment or Resources.
Step 2
From the list of Assignable Resources, select the resource that you want to assign to the hunt group resource.
Step 3
Click Add.
Step 4
To save your changes, click Submit.
Step 5
(Optional) To reset the changes to the old values, click Reset.
Step 6
(Optional) To cancel and go back to the Edit Hunt Group Resource page, click Cancel.
Removing a Resource from a Hunt Group Resource
Step 1
To remove a resource from a hunt group resource, click Resource Assignment or Resources.
Step 2
From the Assigned Resources column, select the resource you want to remove.
Step 3
Click Remove.
Step 4
(Optional) To save your changes, click Submit. To reset the changes to the old values, click Reset.
Step 5
(Optional) To cancel and go back to the Edit Hunt Group Resource page, click Cancel.
Step 6
(Optional) To assign a role to the hung group resource, click Role Assignment.
About the Authorization Devices Page on the Management Interface
To edit or find existing authorization devices, click the index to see the list of all the authorization device names beginning with a letter.
To find a specific authorization device, enter the name of the authorization device and click Apply Filter.
To see a list of all authorization devices, enter * (asterisk) and click Apply Filter.
You can also use pattern matching. For example:
•
Dev* matches all devices that start with Dev
•
Dev? matches a single-digit number, like Dev1
Adding an Authorization Device
To add an authorization device, follow these steps:
Step 1
From the Authorization Device page, click Add Authorization Devices.
Step 2
(Optional) Enter a description of the authorization device.
Step 3
Enter the TACACS+ key string. This can be a string of words and numbers unique to Cisco Administrative Policy Engine and the authorization device, and the string must be identical at both ends.
Note
The TACACS+ key must have the same information as the router configuration. This is essential for encryption.
Step 4
Enter the name of the authorization device.
Step 5
Enter the IP address of the authorization device.
Step 6
Select the location of the authorization device from the drop-down menu.
Step 7
To save your changes, click Submit.
Step 8
(Optional) To delete the authorization device, click Delete.
Step 9
(Optional) To reset the information to the old values, click Reset.
Step 10
(Optional) To cancel and go back to the Authorization Devices page, click Cancel.
Step 11
(Optional) To go back to the Authorization Devices page, click Authorization Devices.
Editing an Authorization Device
To edit an authorization device, follow these steps:
Step 1
Click the authorization device name.
Step 2
On the Authorization Device Information page, enter the required parameters.
Step 3
Click Submit.
About the Resource Types Page on the Management Interface
To see a tree of all resource types, click Resource Types. Click on the + sign to see the resource types within a tree.
To add a new resource type, see "Adding a Resource Type" section.
To edit a resource type, see "Editing a Resource Type" section.
Adding a Resource Type
To add a resource type, follow these steps:
Step 1
From the Resource Types page, click Add Resource Types.
Step 2
Enter the name of the resource type.
Step 3
(Optional) Enter a description of the resource type.
Step 4
From the drop-down menu, select the parent of the resource type.
Step 5
Click Submit.
Step 6
(Optional) To delete the resource type, click Delete.
Step 7
To reset the information to the old values, click Reset.
Step 8
To cancel and go back to the Resource Types page, click Cancel.
Step 9
To go back to the Resource Types page, click Resource Types.
Editing a Resource Type
To edit a resource type, follow these steps:
Step 1
Click the resource type name.
Step 2
On the Edit Resource Type page, enter the required changes.
Step 3
Click Submit.
Step 4
(Optional) To delete the resource type, click Delete.
Step 5
(Optional) To clear the information from all the fields, click Reset.
Step 6
(Optional) To cancel and go back to the Edit resource type page, click Cancel.
Step 7
(Optional) To go to the Edit Resource Type page, click Edit Resource Type.
Step 8
(Optional) To go back to the Resource Type page, click Resource Type.
About the Roles Page on the Management Interface
Note
You can assign a user to one or more roles. You can also give permissions to a role which would allow a user assigned to that role to perform a limited number of tasks.
To find existing roles, click the index to see the list of all the role names beginning with a letter.
To find a specific role, enter the name of the role and click Apply Filter.
To see a list of all roles, enter * (asterisk) and click Apply Filter.
You can also use pattern matching. For example:
•
Dev* matches all devices that start with Dev
•
Dev? matches a single-digit number, like Dev1
To add a new role, see "Adding a Role" section.
To edit an existing role, see "Editing a Role" section.
Adding a Role
To add a new role, follow these steps:
Step 1
From the Roles page, click Add Role.
Step 2
Enter the name of the role, for example, administrator.
Step 3
(Optional) Enter a description of the role.
Step 4
Select the hierarchical parent of the role from the drop-down menu. For example, if you specify role B, and mark it as "contained by A," then role B inherits properties from role A.
Step 5
Select the permission that you want to apply to the role. For example, if you want to give permissions to a user having the role of an administrator to access resources, click Resource Access.
Note
You must assign a user to a role that has a permission, or a role can inherit the permission from a parent role.
Step 6
Click Submit.
Step 7
(Optional) To delete the role, click Delete.
Step 8
(Optional) To reset the information to the old values, click Reset.
Step 9
(Optional) To cancel and go back to the Roles page, click Cancel.
Step 10
(Optional) To go back to the Roles page, click Roles.
Editing a Role
To edit a role, follow these steps:
Step 1
Click the role name.
Step 2
On the User Information page, enter the required changes.
Step 3
Click Submit.
Assigning a User to a Role
To assign a user to the role, follow these steps:
Step 1
Click User Assignment or Users.
Step 2
From the list of assignable users, select a user.
Step 3
Click Add.
Removing a User from a Role
To remove a user from a role, follow these steps:
Step 1
Click User Assignment or Users.
Step 2
From the Assigned Users column, select the user.
Step 3
Click Remove.
Assigning a Resource to a Role
To assign a resource to the role, follow these steps:
Step 1
Click Resource Assignment or Resources.
Step 2
From the list of Assignable Resources, select the resource that you want to assign to a role.
Step 3
Click Add.
Removing a Resource from a Role
To remove a resource from a role, follow these steps:
Step 1
Click User Assignment or Resources.
Step 2
From the Assigned Users column, select the resource that you want to remove.
Step 3
Click Remove.
Assigning a Policy to a Role
To assign a policy to a role, follow these steps:
Step 1
Click Policy Assignment or Policies.
Step 2
From the list of Assignable Policies, select the policy that you want to assign to the role.
Step 3
Click Add.
Removing a Policy from a Role
To remove a policy from a role, follow these steps:
Step 1
Click User Assignment or Policies.
Step 2
From the Assigned Users column, select the policy that you want to remove.
Step 3
Click Remove.
Adding a Command Line Interface Permission
To assign a CLI permission to a role, follow these steps:
Step 1
In the Expression to Add field, add the CLI permission expression.
Step 2
Click Add.
Removing a CLI Permission
To remove a CLI permission from a role, follow these steps:
Step 1
From the CLI Permission Expressions field, select the CLI permission expression.
Step 2
Click Remove.
About the Policies Page on the Management Interface
Policies are rules or logic that are applied to roles to control access to devices. This logic ensures that certain conditions are true before a role authorizes a request.
While conditions follow the Boolean logic of "and", policies follow "or" shown in the following example:
Example
If Policy A has two conditions:
Condition 1 = user.location in /MA
Condition 2 = resource.type in /Cisco/Router
and Policy B has one condition:
Condition 3 = Remote IP address = 1.2.3.4
and a Role R that has Policies A and B assigned to it, the decision is based on
Role Outcome = Policy A or Policy B.
That means
Outcome of Policy A = Condition 1 and Condition 2
or
Outcome of Policy B = Condition 3
In this example, "and" and "or" are Boolean logic operators. The result of the policies is true or false.
For detailed information on conditions, see "About Conditions Governing Policies" section
To find existing policies, click the index to see the list of all the policy names beginning with a letter.
To find a specific policy, enter the name of the policy and click Apply Filter.
To see a list of all policies, enter * (asterisk) and click Apply Filter.
You can also use pattern matching. For example:
•
Dev* matches all devices that start with Dev
•
Dev? matches a single-digit number, like Dev1
To add a new policy, see "Adding a Policy" section.
To edit an existing policy, see "Editing a Policy" section.
Adding a Policy
To add a new policy, follow these steps:
Step 1
From the Policies page, click Add Policy.
Step 2
Enter the name of the policy.
Step 3
(Optional) Enter a description of the policy.
Step 4
Select the conditions applicable to the policy.
Note
You can enable one or more conditions for a policy.
Step 5
Click Submit.
Step 6
(Optional) To delete the policy, click Delete.
Step 7
(Optional) To reset the information to the old values, click Reset.
Step 8
(Optional) To cancel and go back to the Policies page, click Cancel.
Step 9
(Optional) To go back to the Policies page, click Policies.
Note
Conditions follow the Boolean logic of "and", that is, if you click more than one condition for a user, a user has access only if all the conditions that you have selected are evaluated to be true.
Click Enabled for the conditions you want to enable.
Editing a Policy
To edit an existing policy, follow these steps:
Step 1
Click the policy name.
Step 2
On the User Information page, enter the required changes.
Step 3
Click Submit.
To add a new policy, see "Adding a Policy" section.