Feedback
Table Of Contents
Installing the Cisco IPICS Server Software
Obtaining the IP Addresses for Your Cisco IPICS System
Installing the Cisco Linux Operating System
Installing Cisco IPICS Server Software
Installing the Cisco IPICS Server Software at the Server
Installing Cisco IPICS from a Remote Location
Purchasing Additional Licenses
Uploading the Cisco IPICS Licenses
Managing Licenses with the Ops Views Feature
Tracking Your License Consumption
Generating the Cisco IPICS PMC Application Installer
Installing the Cisco IPICS Server Software
This chapter describes the procedures you need to follow to install the Cisco Linux operating system and the Cisco IPICS server software. There are also tasks you must complete before you begin the installation. After you complete the installation procedures for Cisco Linux and Cisco IPICS, there are additional tasks you must accomplish before you can use the Cisco IPICS software.
This chapter includes the following sections:
•
Installing the Cisco Linux Operating System
•
Before You Begin
This section describes the tasks that are necessary to prepare for the Cisco Linux operating system and Cisco IPICS installations. This section includes the following topics:
•
Obtaining the IP Addresses for Your Cisco IPICS System
To facilitate communications between your users, your Cisco IPICS system requires a supply of IP addresses that can be reached by all users in your network domain.
Cisco IPICS requires a multicast address for each of the following purposes:
•
•
Consult your network administrator to obtain IP addresses for the following Cisco IPICS purposes:
•
•
•
For information on how to use the IP addresses to configure Cisco IPICS, refer to the Cisco IPICS Server Administration Guide.
Preinstallation Checklist
Before you begin the installation, ensure that you have performed the following tasks:
Installing the Cisco Linux Operating System
Cisco IPICS runs on Cisco Linux, which is based on the Red Hat Enterprise Linux AS 3 operating system (OS). This section describes the steps to install the Cisco Linux operating system. You may install the Cisco IPICS server software any time after you finish the Cisco Linux installation.
To perform this installation, you must have the Cisco Linux installation CD that was included with your product package. The Cisco Linux installation should take approximately 15-20 minutes.
Note
The virtual install disk is a holding place within the system ROM that contains embedded boot drivers. These boot drivers assist in completing the operating system installation.
The Cisco Linux operating system that is provided with Cisco IPICS does not support RAID or the virtual install disk. Because RAID and virtual install disk are enabled by default as part of the factory settings, you must disable these features.To install Cisco Linux, perform the following procedure:
Procedure
Step 1
Step 2
Step 3
To enter the System Maintenance menu, follow these steps:
a.
b.
The System Maintenance menu displays with the following choices:
–
–
–
c.
The ROM-Based Setup Utility displays. The Utility provides information about the server in the right pane, such as the model number, serial number (S/N), and other product information.
The left pane displays a menu of settings, which you can access by pressing the Up Arrow and Down Arrow keys.
d.
The Advanced Options menu displays.
e.
When you highlight Virtual Install Disk, the current status displays below the menu.
f.
If the Virtual Install Disk displays as Enabled, change the Configuration Selection. To change the selection, press Enter to open the menu and then press the Down Arrow key to highlight Disabled.
g.
The Virtual Install Disk setting displays as Disabled.
h.
The current status displays below the menu.
i.
If the SATA Software Raid status displays as Enabled, press Enter to open the menu and press the Down Arrow key to highlight Disabled.
j.
k.
l.
If you press any other key, you will be returned to the Main Menu of the Setup Utility.
The server begins to boot from the CD. This time, when the system beeps, let it continue to boot from the CD.
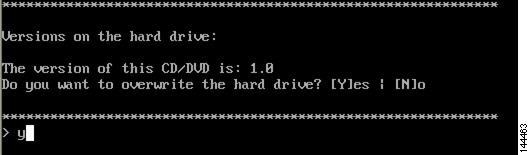
The Cisco Linux installation displays the CD version and the option to overwrite the hard drive. See Figure 2-1 for an example of this message.
Note
Figure 2-1 Overwrite Hard Drive Message
Step 4
a.
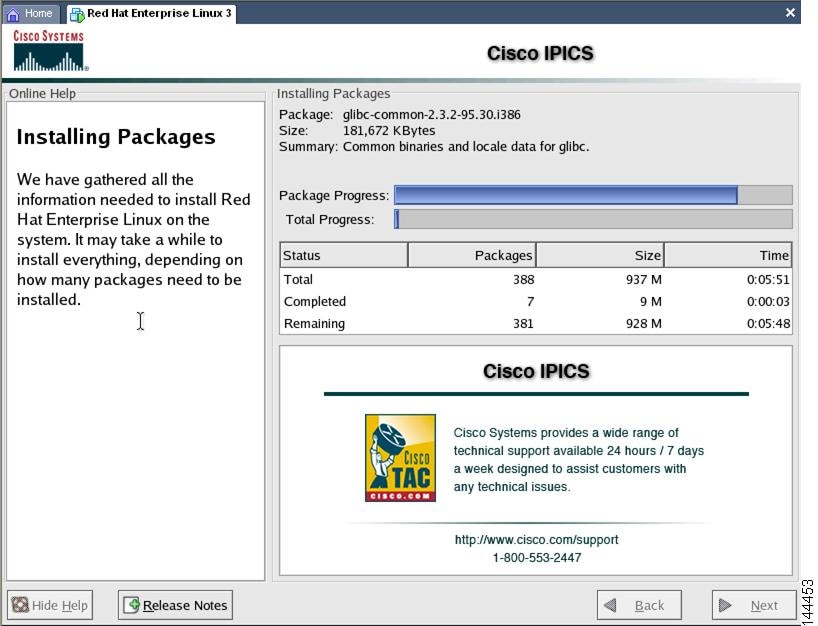
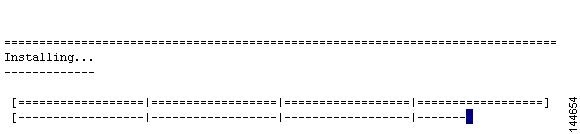
The Cisco Linux Installation Progress window displays information about the version of Cisco Linux that you are installing. A table displays the progress of the installation and the number of software packages that remain to be installed. See Figure 2-2 for an example of this window.
Figure 2-2 Cisco Linux Installing Packages Window
The Cisco Linux installer first formats the file system and then proceeds with installing the software packages.
Note
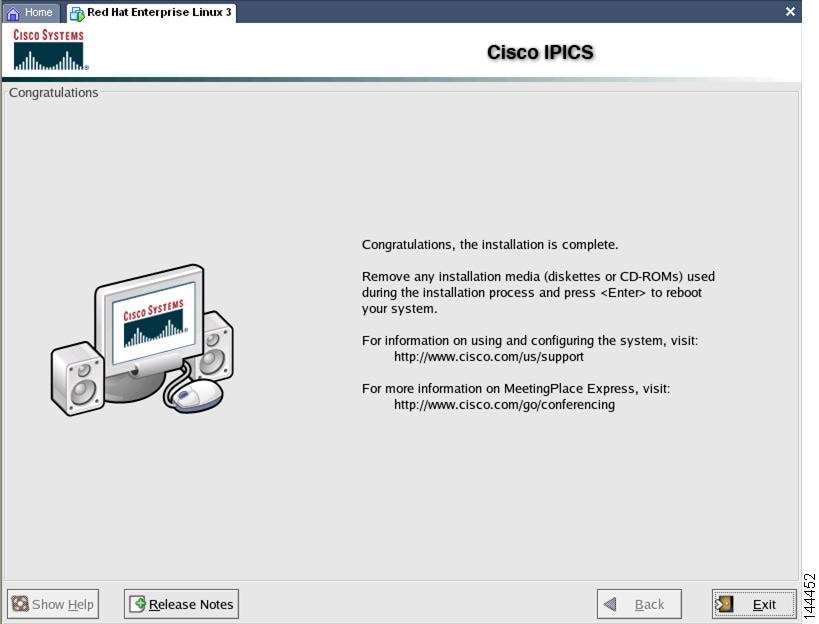
The MCS server ejects the installation CD and the Installation Complete window displays (see Figure 2-3 for an example of the Installation Complete window).
b.
Note
Figure 2-3 Installation Complete Window
c.
Note
d.
The server reboots.
Note
The Linux hardware detection utility window displays with a message that it has detected the Intel SATA Controller in your server. The utility allows you to configure controller.
Step 5
A Hardware Added window displays and states that the Intel SATA Controller was added to your system. The window displays the following options:
•
•
•
Step 6
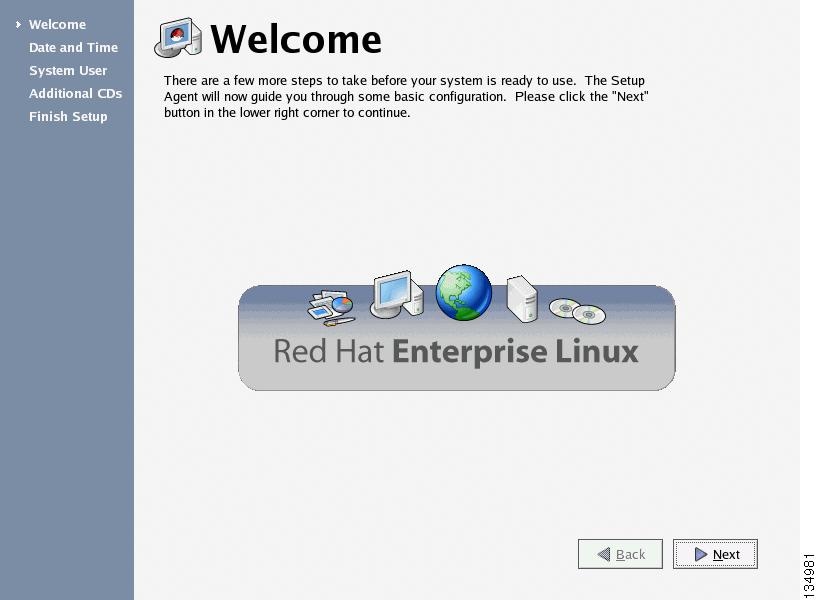
A Cisco Linux Welcome window displays. See Figure 2-4 for an example of this window.
Figure 2-4 Cisco Linux Welcome Window
Step 7
a.
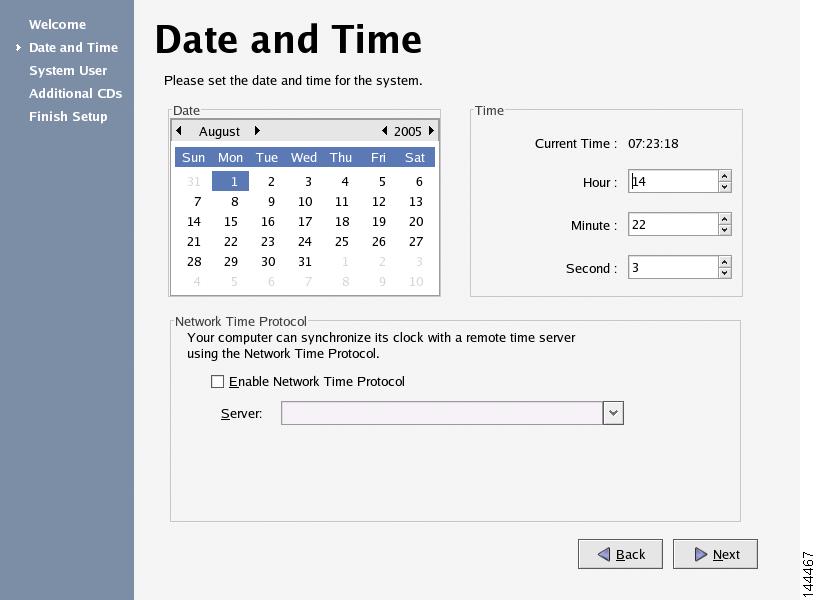
The Date and Time Window displays. See Figure 2-5 for an example of this window.
Figure 2-5 Date and Time Window
b.
Caution
Note
c.
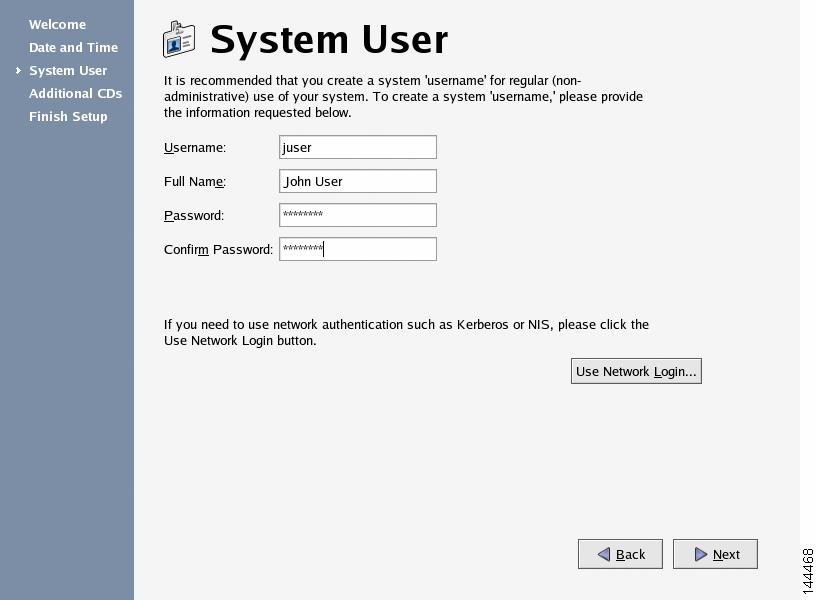
The System User window displays.
Note
See Figure 2-6 for an example of the window.
Figure 2-6 System User Window
d.
e.
•
•
Note
f.
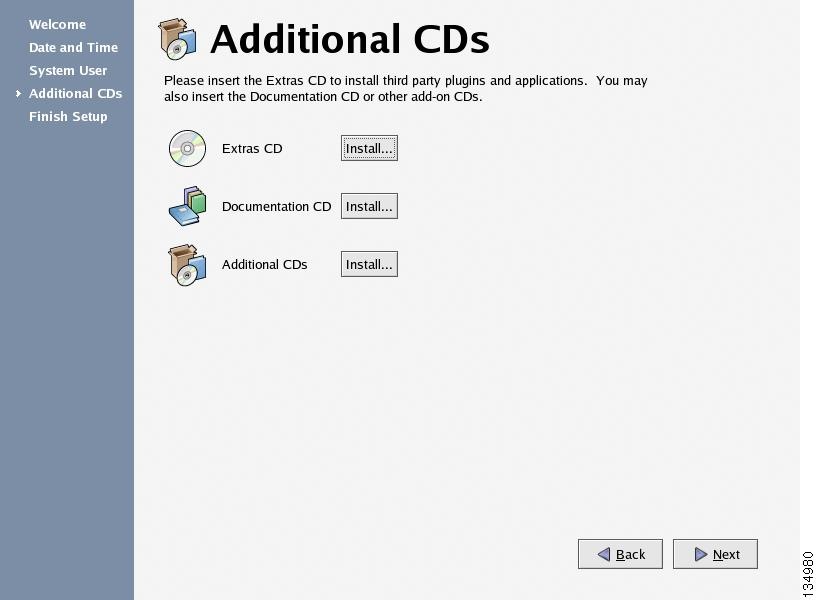
The Additional CDs window displays. See Figure 2-7 for an example.
Figure 2-7 Additional CDs Window
.
Note
g.
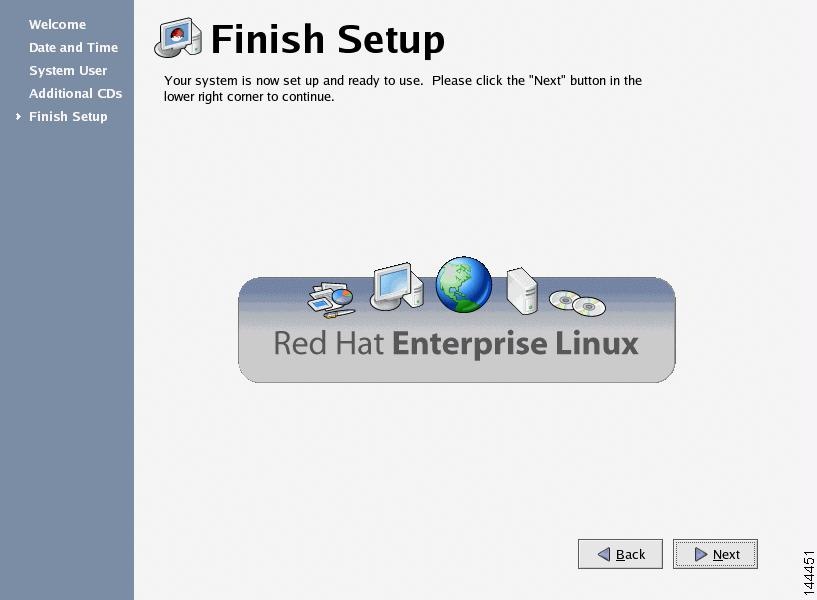
The Finish Setup window displays. See Figure 2-8 for an example of this window.
Figure 2-8 Finish Setup Window
h.
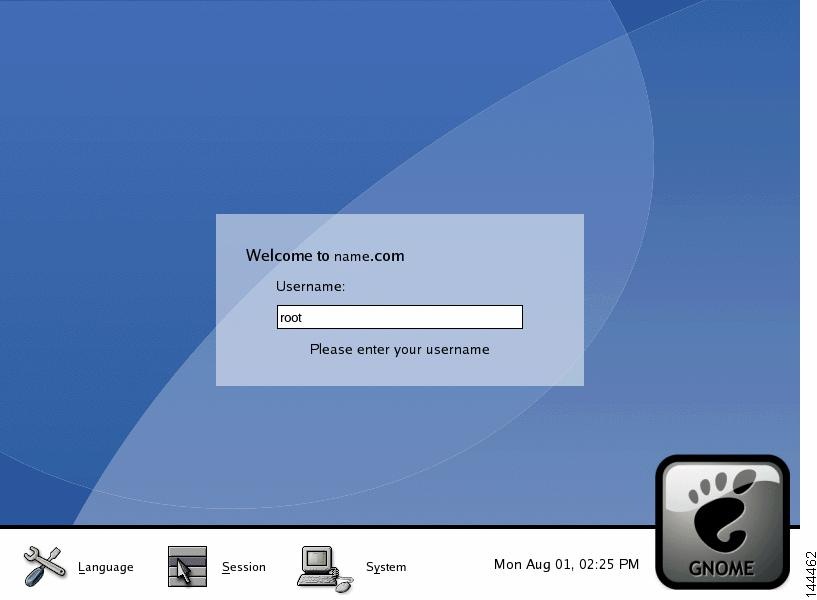
The GNOME login window displays with a Username field. See Figure 2-9 for an example.
Figure 2-9 GNOME Username Field
Note
Step 8
The GNOME login window displays with a password field.
Step 9
The Cisco Linux desktop displays.
Note
Step 10
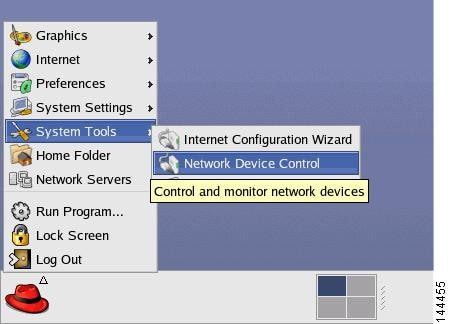
a.
b.
Figure 2-10 Using the Red Hat Menu
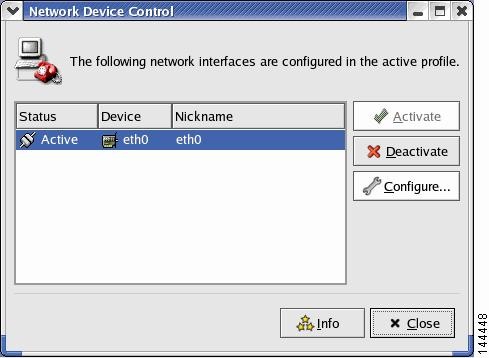
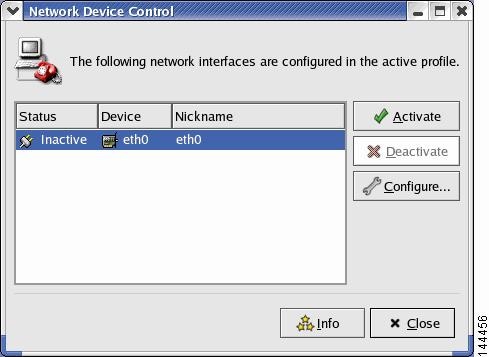
The Network Device Control window displays at least one active port. See Figure 2-11 for an example of the window.
Note
Also, ensure that your Ethernet cable is plugged into NIC1 and not NIC2.Figure 2-11 Network Device Control Window
c.
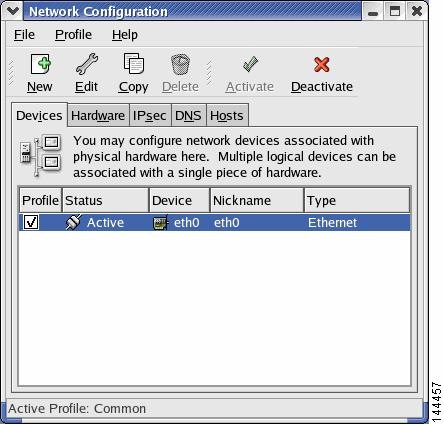
The Network Configuration window displays. See Figure 2-12 for an example of the window.
Figure 2-12 Network Configuration Window
d.
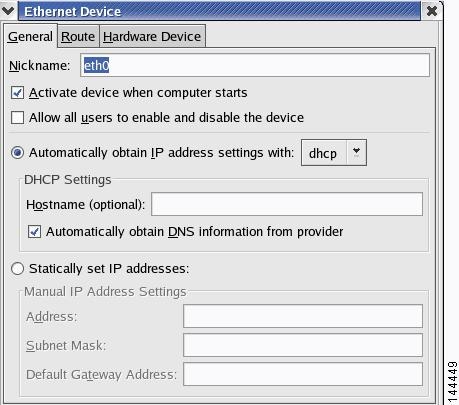
The Ethernet Device window displays. See Figure 2-13 for an example of the window.
Figure 2-13 Ethernet Device Window
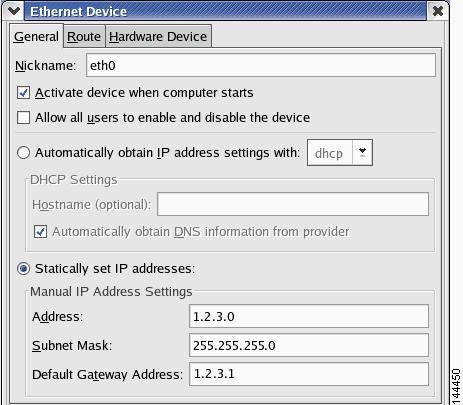
e.
The Statically set IP addresses fields become active.
Note
Figure 2-14 Entering the Static IP Address
f.
g.
h.
Note
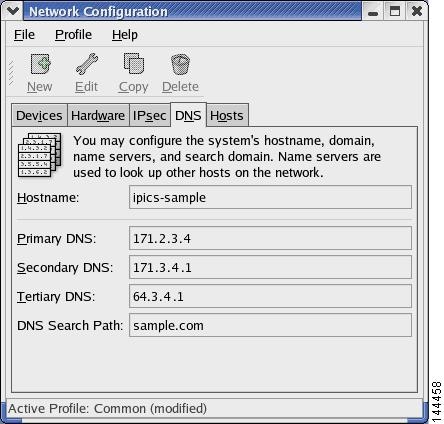
If you do not want to enter DNS information, proceed to Step m.i.
Figure 2-15 Entering DNS Information
j.
k.
l.
m.
A window displays and allows you to save your changes.
n.
The system displays a message that indicates that you may want to restart network services or restart the system.
o.
The Network Device Control window displays that eth0 is inactive (see Figure 2-15 for an example of the window).
Figure 2-16 Network Device Control Window
p.
The status for eth0 changes to active.
Note
q.
Cisco Linux activates eth0 and closes the window. The Cisco Linux desktop displays.
Step 11
a.
The Log Out window displays.
b.
The server reboots and returns you to GNOME Login window.
Step 12
Step 13
The Cisco Linux desktop displays.
Step 14
a.
b.
ping <destination IP address>
where destination IP address represents the default gateway address, or an IP address of another server on the network.
If the ping is not successful, troubleshoot the network connectivity with your network administrator.
Step 15
a.
[root] #ifconfig -a
Information displays about the network interface cards.
b.
c.
The Cisco Linux operating system installation is now complete. You can continue with the installation of the Cisco IPICS server software. If you do not want to install Cisco IPICS immediately, you can resume the installation at a later time.
To install the Cisco IPICS server software, see the "Installing Cisco IPICS Server Software" section.
Installing Cisco IPICS Server Software
To install the Cisco IPICS server, you must have successfully completed the Cisco Linux operating system installation. For more information on installing Cisco Linux, see the "Installing the Cisco Linux Operating System" section.
You can install the Cisco IPICS server software by using the installation CD at the Cisco IPICS server or you may install it remotely by copying the installer file to the server.
This installation procedure includes a choice of the following install options:
•
•
•
If you choose not to install CSA during the Cisco IPICS server software installation, you can install CSA any time after the Cisco IPICS installation is complete.
This section includes the following topics:
•
•
Installing the Cisco IPICS Server Software at the Server
To perform the Cisco IPICS server software installation, you must have the Cisco IPICS installation CD that was included with your product package.
Caution
For information about setting the date and time as part of the operating system installation, see the "Installing Cisco IPICS Server Software" section.
Note
To install the Cisco IPICS server software, perform the following procedure:
Procedure
Step 1
Cisco Linux displays a window with a password field.
Step 2
The Cisco Linux desktop displays.
Step 3
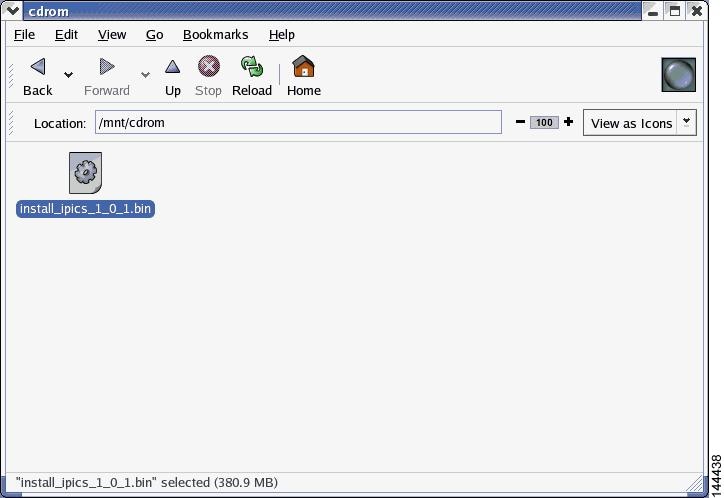
The Cisco IPICS CD icon displays on the desktop. See Figure 2-17 for an example.
Figure 2-17 Cisco IPICS CD Icon
Step 4
Cisco Linux displays a window that shows the Cisco IPICS installer file. See Figure 2-18 for an example.
Figure 2-18 Installer File on the Cisco IPICS CD
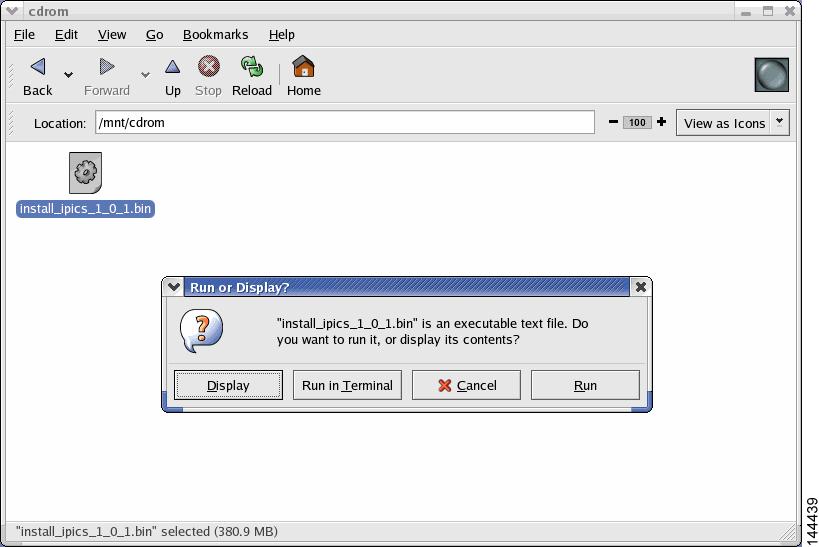
Step 5
Cisco Linux displays a message window that offers options to display or run the installer file. See Figure 2-19 for an example of the window.
Figure 2-19 Run or Display Message Window
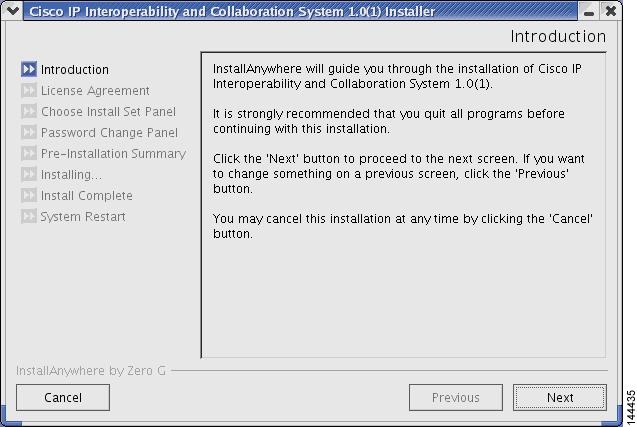
Step 6
The Cisco IPICS installer window displays with an introduction to the process. See Figure 2-20 for an example of the window.
Note
Figure 2-20 Introduction in the Installer Window
Step 7
The Cisco IPICS installer displays the End User License Agreement.
Step 8
Note
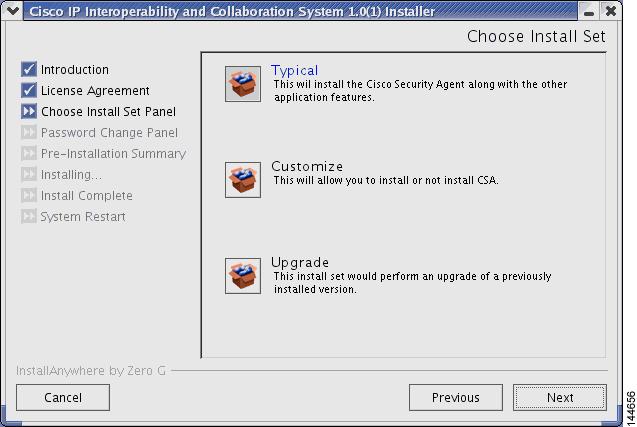
The Choose Install Set window displays with the following installation option (see Figure 2-21 for an example of the window):
•
•
•
Figure 2-21 Install Set Window
Step 9
Note
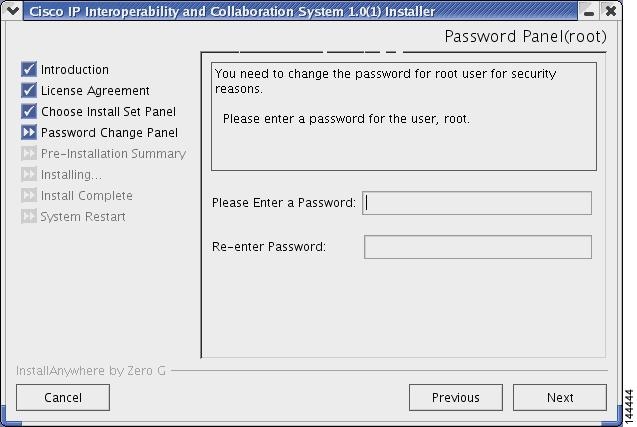
The Cisco IPICS installer displays the Password Change Panel for the root user. See Figure 2-22 for an example. The root user has complete privileges in the Cisco Linux environment.
Caution
Figure 2-22 Password Panel for root User
Step 10
Caution
For information about single user mode and changing the root password, see "Changing the Cisco Linux Root Password."
Step 11
The Cisco IPICS installer displays the Password Change Panel for the ipicsadmin user.
Note
Step 12
•
•
Caution
The Cisco IPICS installer displays the Preinstallation Summary. See Figure 2-23 for an example.
The Preinstallation Summary displays the following information:
•
•
•
–
–
Figure 2-23 Preinstallation Summery
Step 13
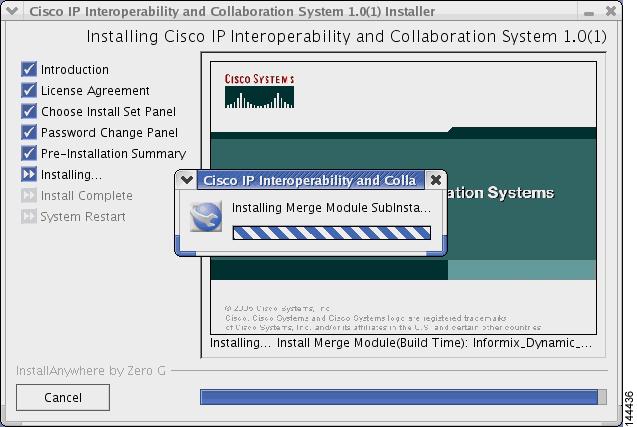
The Installation Progress window displays, showing the files and folders being written to the disk. See Figure 2-24 for an example.
Note
Figure 2-24 Cisco IPICS Installation Progress Window
Step 14
Figure 2-25 Install Complete Window
Step 15
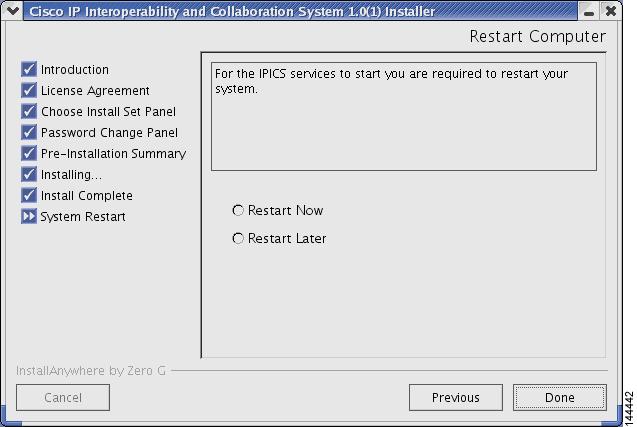
The Restart Computer window displays to provide you the option of restarting the computer now or at a later time. See Figure 2-26 for an example.
Figure 2-26 Restart Computer Window
Step 16
•
•
Note
Installing Cisco IPICS from a Remote Location
You may find it necessary or desirable to perform the Cisco IPICS server software installation from a remote location on your network. This section describes the method for installing Cisco IPICS from a PC that is connected to the network.
Before you start the remote installation, you must transfer the installer file from the Cisco IPICS installation CD to the Cisco IPICS server. You use the one of the following methods to transfer the file:
•
•
After you transfer the file to the Cisco IPICS server, you can execute the installer from an SSH Tectia Client window with the -i console option.
To install the Cisco IPICS server software from a remote location, perform the following procedure:
Procedure
Step 1
Copying the File from the CD Drive in the Server
a.
b.
SSH Tectia Client.c.
The Connect to Remote Host window displays.
d.
e.
The Enter Password window displays.
f.
An SSH Tectia Client window displays.
g.
[root] #cd /mnt/cdrom
[root] #ls -l
The name of the Cisco IPICS installer file displays with a .bin extension.
h.
[root] #cp /mnt/cdrom/<name of Cisco IPICS installer file>.bin .
where name of Cisco IPICS installer file represents the name of the .bin file that was displayed in Step g.
The file copies from the CD to your root directory.
Transferring the File from the your PC to the Server
a.
b.
All Programs > SSH Tectia Client > SSH Tectia Client - File Transfer.The SSH Tectia File Transfer window displays. The desktop of your PC displays in the left pane.
c.
The Connect to Remote Host window displays.
d.
e.
The Enter Password window displays.
f.
The SSH Tectia File Transfer Client connects to the Cisco IPICS server and displays the contents of the root directory in the right pane of the window.
g.
h.
A progress window displays while the file copies to the server. When the copy completes, the upgrade file displays in the right pane.
i.
Step 2
a.
SSH Tectia Client > SSH Tectia Client.The SSH Tectia Client displays.
b.
The Connect to Remote Host window displays.
c.
d.
The Enter Password window displays.
e.
After the login completes, the SSH Tectia Client displays a root prompt for the Cisco IPICS server.
Step 3
[root] #ls -l
Step 4
Step 5
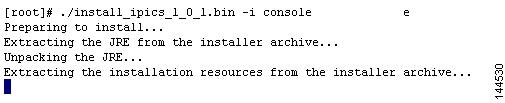
[root] #./<name of installer file>.bin -i console
where name of upgrade file represents the name of the .bin file you transferred to the server.
The window displays a message that informs you that the installer is extracting. See Figure 2-27 for an example of the message. Please wait while the server extracts the files.
Figure 2-27 Starting the Remote Installation
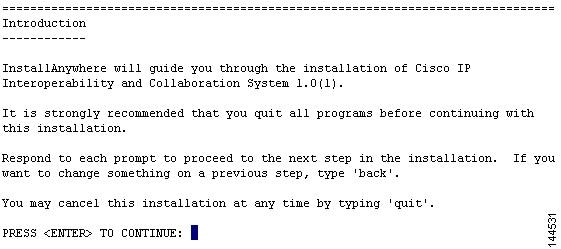
After the files are extracted, the installer displays an introduction. See Figure 2-28 for an example.
Figure 2-28 Introduction to the Remote Installation
Step 6
The first page of the End User License Agreement displays. There are approximately eight pages to the agreement.
Step 7
At the end of the final page of the End User License Agreement, the installer prompts you to accept the terms of the license agreement.
Step 8
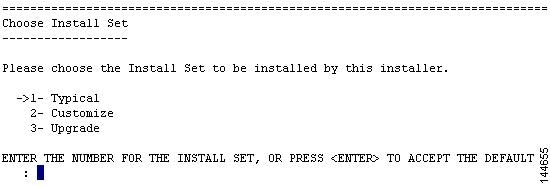
The Choose Install Set menu displays. You can choose from the following options:
•
•
•
Figure 2-29 Install Set Options
Step 9
Note
The installer prompts you to enter a new password for the root user.
Step 10
Caution
For information about single user mode and changing the root password, see "Changing the Cisco Linux Root Password."
The installer prompts you to re-enter the root password.
Step 11
The installer prompts you to enter a password for the ipicsadmin user.
Step 12
•
•
Caution
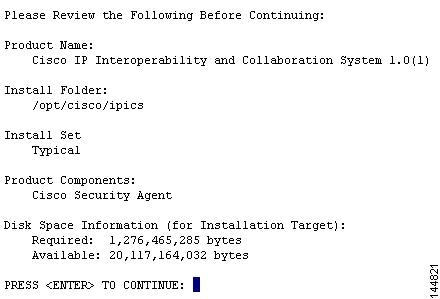
The Cisco IPICS installer displays the Preinstallation Summary. See Figure 2-30 for an example.
The Preinstallation Summary displays the following information:
•
•
•
–
–
Figure 2-30 Preinstallation Summary
Step 13
The installation process begins. Figure 2-31 shows an example of the installation progress indicator.
Figure 2-31 Installation Progress Indicator
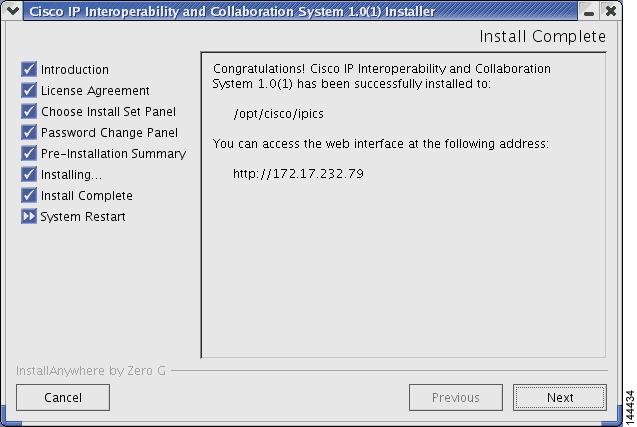
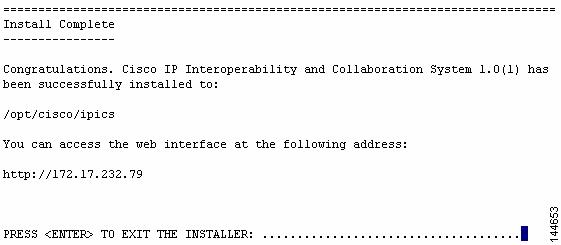
The Cisco IPICS Install Complete message displays. See Figure 2-32 for an example of the window. This window lists the directory in which Cisco IPICS was installed, along with the URL where you may access the Cisco IPICS Administration Console.
Figure 2-32 Install Complete Message
To continue, press Enter.
The Restart Computer page displays an option for you to restart the server now or later. See Figure 2-33 for an example.
Figure 2-33 Restart Computer Option
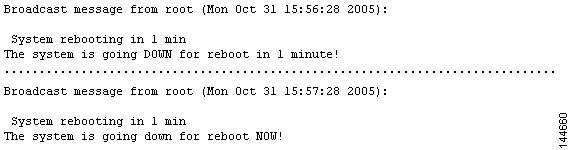
Step 14
A broadcast message from root displays an announcement that the system will reboot in one minute. See Figure 2-34 for an example. After one minute, another broadcast message displays another announcement that the system is rebooting.
Figure 2-34 Cisco Linux Reboot Broadcast Messages
When the system reboots, the connection to the server is disrupted.
Step 15
Manually Installing CSA
If you did not install CSA at the time of the Cisco IPICS server software installation, you can perform the CSA installation manually at any time. To install CSA manually, perform the following procedure:
Procedure
Step 1
The Cisco Linux desktop displays.
Step 2
A terminal window displays.
Step 3
[root] #rpm -Uv kernel-source-2.4.21-32.0.1.EL.i386.rpm
Step 4
[root] #cd /tmp
Step 5
[root tmp] #tar xvf /root/CSAStandAlone.tar
Step 6
[root tmp] #cd CSCOcsa
Step 7
[root CSCOcsa] #sh install_rpm.sh
Step 8
[root] #reboot
For information about manually uninstalling CSA, see the "Uninstalling CSA" section.
Preparing to Use Cisco IPICS
Now that you have completed the Cisco IPICS installation, complete the following tasks, so that you can begin using the software:
•
For information on other Cisco IPICS setup and configuration tasks, refer to the Cisco IPICS Server Administration Guide.
Checking the Installation
When you complete the Cisco IPICS server software installation, you should be able to access the Cisco IPICS Administration Console by using a browser. You can test the installation by opening a browser and logging in to the Administration Console.
Note
To access the Cisco IPICS Administration Console from a browser and check the installation, perform the following procedure:
Procedure
Step 1
Step 2
http://<static IP address or DNS name>The Cisco IPICS Login window displays.
Step 3
Note
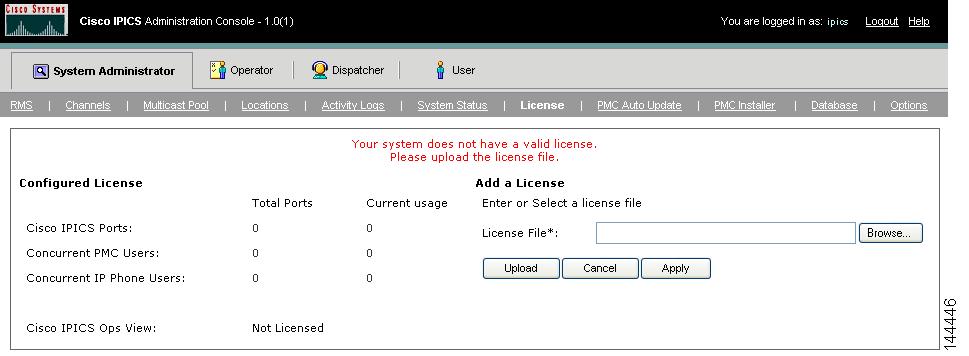
The Manage License window of the Cisco IPICS Administration Console displays with a message that you must upload a license file before you can use the software. See Figure 2-35 for an example.
Figure 2-35 Cisco IPICS Manage License Window
To obtain your license file, see the "Obtaining Your License File" section.
Managing Your Licenses
Cisco IPICS manages the number of concurrent PMC and Cisco IP Phone users and the number of active voice ports with the license manager. As you use Cisco IPICS, the license manager tracks the number of PMC users and Cisco IP Phone users who are logged in at one time and the number of voice ports that are currently active. The number of users or voice ports cannot exceed the number of licenses that you have.
When you finish the Cisco IPICS installation, you can use the Product Authorization Key that was included in your Cisco IPICS product package to obtain a license file. You can then upload the license file to the Cisco IPICS server and begin using the system.
After you begin using Cisco IPICS, you may find that you require more user or voice port licenses. You can increase the number of licenses by purchasing more from Cisco. Cisco IPICS does not support removal or reduction of the number of licenses.
This section includes the following topics:
•
•
•
•
When you install Cisco IPICS, you may log in the Administration Console, but you cannot operate any features, such as configuring channels or creating VTGs, until you upload the licenses.
Obtaining Your License File
Your Cisco IPICS product package includes a Software License Claim Certificate that contains a Product Authorization Key (PAK), which is uniquely created from your sales order. You use this key to obtain licenses for your Cisco IPICS installation.
After you upload your licenses and begin using Cisco IPICS, the license manager component monitors the concurrent usage of PMC users, Cisco IP Phone users, and active ports. If you find that you need additional licenses, you can purchase them from Cisco. For information on purchasing additional licenses, see the "Purchasing Additional Licenses" section.
You can order your initial licenses any time after you begin the installation process.
To use your PAK to obtain your Cisco IPICS licenses, perform the following procedure:
Procedure
Step 1
Note
Step 2
Obtain the MAC address using the Network Device Control window
To gather the MAC address information from the Network Device Control window, follow these steps:
a.
b.
c.
Figure 2-36 Using the Red Hat Menu
The Network Device Control window displays at least one active port. See Figure 2-11 for an example of the window.
Note
Figure 2-37 Network Device Control Window
d.
The Network Configuration window displays. See Figure 2-12 for an example of the window.
Figure 2-38 Network Configuration Window
e.
The Ethernet Device window displays.
f.
The MAC displays in the Bind to MAC Address field.
g.
Obtain the MAC address with a Cisco Linux command:
To gather the information using a Cisco Linux command, perform the following procedure:
a.
b.
A terminal window displays.
c.
[root] #ifconfig -a
Information displays about the network interface cards.
d.
e.
f.
Step 3
•
http://www.cisco.com/go/license
•
http://www.cisco.com/go/license/public
After you process your license order at Cisco.com, Cisco sends you an e-mail with the license file as an attachment.
Note
Step 4
If you processed several separate Product Authorization Keys, then you would receive several e-mail responses with a license file attached to each. When you upload these files, Cisco IPICS adds the licenses from each file and monitors your system activity according to the total number.
For information about uploading the license files, see the "Uploading the Cisco IPICS Licenses" section.
Purchasing Additional Licenses
After you begin using Cisco IPICS, you may find that you need additional licenses, so that you can provide access to more PMC or Cisco IP Phone users or accommodate more voice ports. You can purchase additional licenses from Cisco and then process them in the same way as the licenses that came with your original Cisco IPICS purchase.
When you need to purchase additional licenses, perform the following procedure:
Procedure
Step 1
Cisco processes your order and mails you a package that contains a license certificate with a new Product Authorization Key.
Note
Step 2
Step 3
Step 4
After you upload your license file, the license manager processes the new licenses and updates your total number of licences.
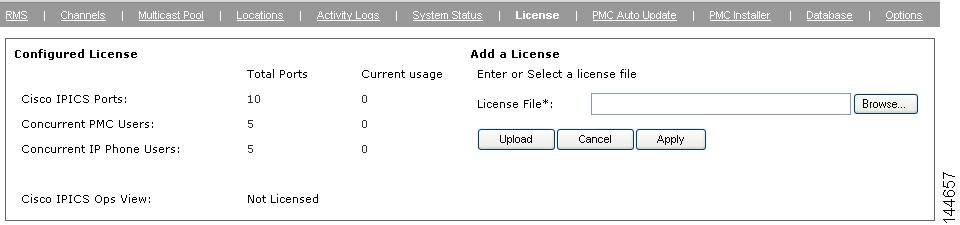
Uploading the Cisco IPICS Licenses
When you receive your license file(s), you can upload them by accessing the Manage License window of the Cisco IPICS Administration Console.
Note
/opt/cisco/ipics/tomcat/current/webapps/ipics_server/licenseTo upload a license file, perform the following procedure:
Procedure
Step 1
Step 2
http://<static IP address or DNS name>The Cisco IPICS Login window displays.
Step 3
The Manage License window displays.
Step 4
A navigation window displays files and folders on your PC.
Step 5
The file name displays in the License File field.
Step 6
A message displays with the status of the license file upload.
Step 7
Figure 2-39 Refreshing the License Window
The license manager processes the new licenses and updates your total number of licences in the Configured Licenses area of the Manage License window.
Step 8
a.
The Cisco Linux desktop displays.
b.
A terminal window displays.
c.
[root] #/etc/init.d/ipics_tomcat restart
After stopping, and then again after starting, the Tomcat service, Cisco Linux displays the message, [OK].
Note
For more information on Cisco IPICS licenses and the ops views feature, refer to the Cisco IPICS Server Administration Guide.
Managing Licenses with the Ops Views Feature
When the ops views feature is enabled on the server, the system displays a Cisco Ops View entry under the Configured License area in the Administration Console License window, along with the word "Licensed" to indicate that the ops views functionality has been enabled. (When ops views is not enabled, this entry displays "Not Licensed.")
Note
Tracking Your License Consumption
Cisco IPICS uses the following criteria to determine license consumption for ports and PMC usage:
•
Cisco IPICS bases license usage for ports on the unique combination of a multicast address and a location; that is, if a channel has two multicast addresses that are assigned to the channel, two licenses are used. If one of the multicast addresses is removed, the system releases one of the licenses so that the port now consumes one license.
Note
•
If the same PMC user logs in to multiple PMC sessions from different PMC client machines, that user will consume multiple licenses (one for each PMC session).
Note
Generating the Cisco IPICS PMC Application Installer
Cisco IPICS allows a user to download the PMC application installer from the Administration Console to a PMC client machine. After the user installs the PMC software, Cisco IPICS manages the automatic download of updates to the application. The Manage PMC window of the Administration Console allows a Cisco IPICS system administrator to upload version updates to the Cisco IPICS server and manage the distribution of the current and previous PMC versions to PMC users.
Before a user can access the installer from the Cisco IPICS server, you must first use the Administration Console to generate the installer. This procedure places the application onto the server, so that the PMC users can easily download the PMC application. When you generate the PMC installer, the Cisco IPICS server also writes the IP address of the server into the installer. Then, after the user downloads and installs the software, the PMC application can locate the server to log in.
To generate a new PMC installer for your system, perform the following procedure:
Procedure
Step 1
Step 2
http://<static IP address or DNS name>The Cisco IPICS Login window displays.
Step 3
The User tab displays of the Administration Console displays.
Step 4
The Manage PMC Installer window displays with information about the last time and date that the installer was generated.
Figure 2-40 Manage PMC Installer Window
Step 5
Step 6
A message displays to inform you whether the PMC installer was successfully generated.
For more information on managing PMCs, refer to the Cisco IPICS Server Administration Guide.