簡介
本檔案介紹如何在Python環境中部署Yang Suite及在Cisco Catalyst 9800 WLC上測試XPath。
必要條件
需求
思科建議您瞭解以下主題:
- Catalyst 9800 WLC組態
- Python和虛擬環境的基本知識
採用元件
本文中的資訊係根據以下軟體和硬體版本:
本文中的資訊是根據特定實驗室環境內的裝置所建立。文中使用到的所有裝置皆從已清除(預設)的組態來啟動。如果您的網路運作中,請確保您瞭解任何指令可能造成的影響。
設定
步驟1.在Windows PC上安裝Python。
下載並安裝Python 3.8.2 for Windows。
下載連結:Windows版Python版本
說明:
運行YANG Suite需要Python。此處使用3.8.2版本是為了相容。
步驟2.驗證Python和PIP安裝。
安裝後,確認Python和PIP工作正常。
指令:
C:\Users\Administrator>python --version
C:\Users\Administrator>pip --version
預期結果(示例):
C:\Users\Administrator>python --version
Python 3.8.2

C:\Users\Administrator>pip --version
pip 25.0.1 from c:\users\administrator\appdata\local\programs\python\python38-32\lib\site-packages\pip (python 3.8)
步驟3.將PIP升級為最新版本,以確保與YANG Suite的相容性。
指令:
C:\Users\Administrator>python -m pip install --upgrade pip
說明:
此命令將解除安裝舊版本的PIP並安裝最新版本以確保與YANG Suite的相容性。
預期結果(示例):
— 解除安裝舊版本(例如pip 19.2.3)。
— 新版本(例如pip 25.0.1)已成功安裝。
步驟4.建立一個虛擬環境,使依賴關係與系統Python保持隔離。
指令:
C:\Users\Administrator>python -m venv yangsuitevenv
預期結果:
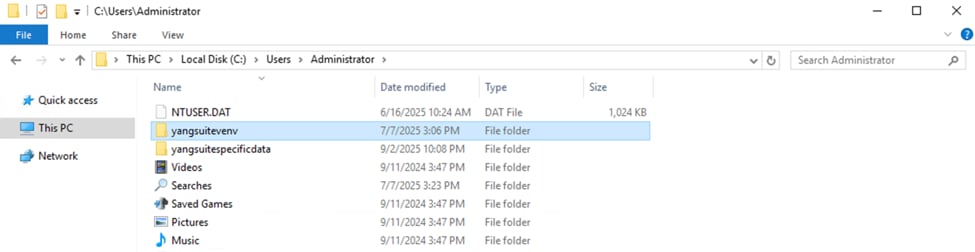
在您的PC C:\Users\Administrator上建立一個名為yangsuitevenv的新資料夾。
步驟5.啟用虛擬環境。
在安裝軟體包之前啟用環境。
指令:
C:\Users\Administrator>.\yangsuitevenv\Scripts\activate
預期結果:
命令提示符將更改為顯示活動環境,例如:
(楊綏特文)C:\Users\Administrator>

步驟6.安裝YANG Suite。
安裝YANG Suite及其所需的模組,以確保安裝YANG Suite及其依賴項時不會出現錯誤。
指令:
(yangsuitevenv) C:\Users\Administrator>pip install yangsuite[core]
如果您遇到代理錯誤:
WARNING: Retrying (Retry(total=4, connect=None, read=None, redirect=None, status=None)) after connection broken by 'ProxyError('Your proxy appears to only use HTTP and not HTTPS, try changing your proxy URL to be HTTP. See: https://xxx.xxx.xx/en/1.26.x/advanced-usage.html#https-proxy-error-http-proxy', SSLError(SSLError(1, '[SSL: WRONG_VERSION_NUMBER] wrong version number (_ssl.c:1108)')))': /simple/yangsuite/請檢查網路連線或代理。如果您的環境要求使用Proxy,請改用以下命令:
指令:
(yangsuitevenv) C:\Users\Administrator>pip install yangsuite[core] --proxy http://x.x.x.x:port
步驟7.升級YANG套件模組。
更新所有YANG Suite模組以確保其全部功能。
指令:
pip3 install --upgrade yangsuite yangsuite-devices yangsuite-filemanager yangsuite-yangtree yangsuite-coverage yangsuite-gnmi yangsuite-grpc-telemetry yangsuite-netconf yangsuite-restconf
說明:
此步驟可確保YANG Suite具有用於NETCONF、RESTCONF、gNMI和遙測的最新外掛。
步驟8.初始化YANG套件。
運行初始化進程以進入互動式配置模式。
指令:
(yangsuitevenv) C:\Users\Administrator>yangsuite
步驟9.配置YANG套件設定。
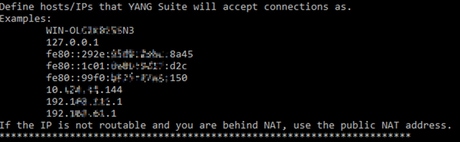
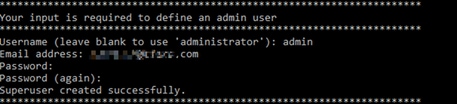
初始化期間,系統會提示您配置服務埠、主機名、使用者名稱和密碼:
建立一個名為yangsuitespecificdata的資料夾,以儲存使用者特定資料(YANG模組、裝置配置檔案等)。

服務埠號:預設為8480。

主機名:建議使用localhost或127.0.0.1。
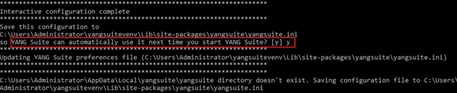
儲存設定:與y確認。
建立使用者名稱和密碼:用於訪問YANG Suite Web UI。
預期結果:
配置已儲存,並且可以使用yangsuite命令啟動服務:
(yangsuitevenv) C:\Users\Administrator>yangsuite
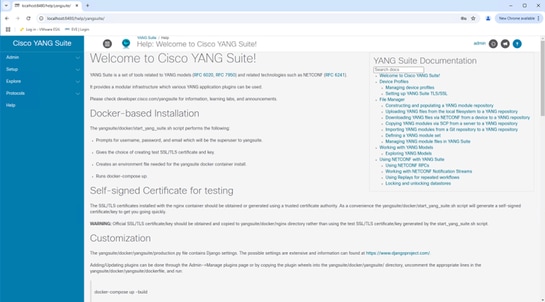
步驟10.透過瀏覽器登入Yang Suite:http://localhost:8480/訪問Cisco Yang套件:
驗證
步驟1.設定Catalyst 9800 WLC。
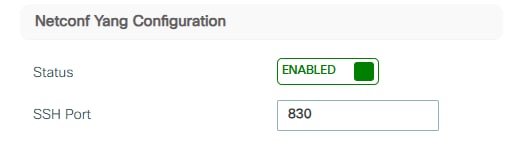
確保WLC上啟用了Netconf Yang Status和SSH埠。
導覽至WLC > Administration > Management > HTTP/HTTPS/Netconf/VTY,以啟用Netconf Yang配置狀態並啟用SSH埠830。
CLI配置:
9800(config)#netconf-yang
配置AAA設定。
CLI配置:
9800(config)#aaa authentication login default local
9800(config)#aaa authorization exec default local
步驟2.將WLC新增到YANG Suite。
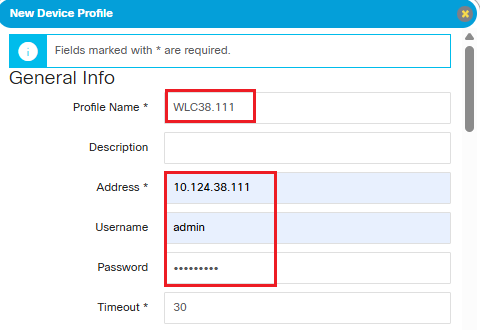
在YANG Suite中,導航到Setup > Device Profiles > Create New Device。

輸入Profile Name、WLC IP address、username和密碼。
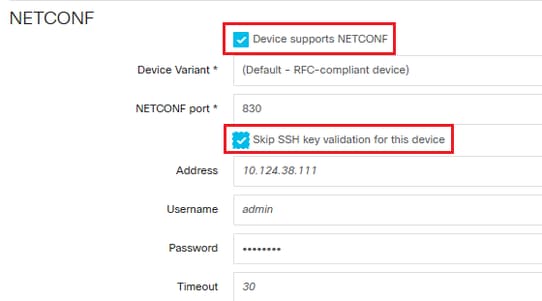
通過按一下Device supports NETCONF並按一下Skip SSH key validation for this device啟用netconf。
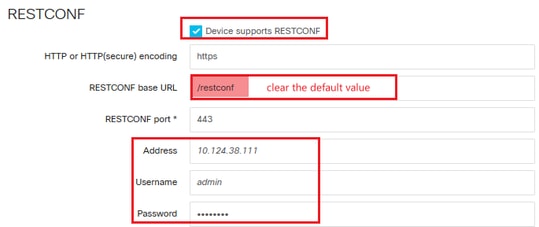
按一下Device supports RESTCONF並清除預設RESTCONF基本URL以啟用Restconf。
按一下Device allowes SSH login(設備允許SSH登入)啟用SSH,然後驗證WLC資訊。

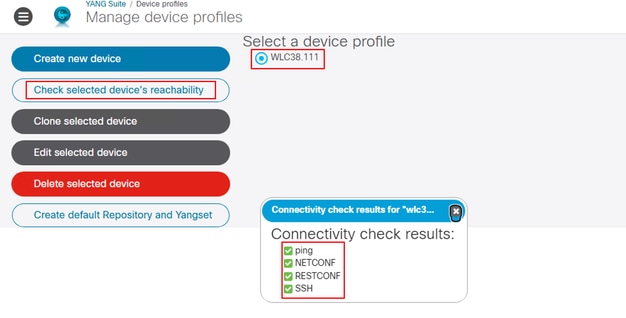
步驟3.驗證裝置的可達性。
按一下「Check selected device's reachability」,然後選擇裝置設定檔,以檢查是否可從YANG Suite連線至WLC。
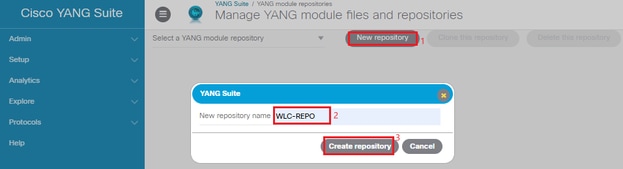
步驟4.建立YANG Suite Repository。
建立repository以儲存所需的WLC YANG模型。
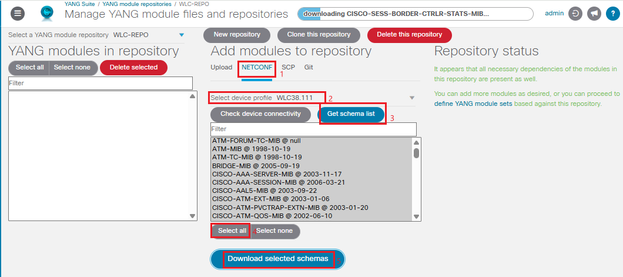
選擇NETCONF並選擇device profile以Get schema List,以便從WLC下載所有架構
步驟5.建立一個新的YANG模塊集到關聯的YANG檔案儲存庫。

例如,如果需要特定於Catalyst 9800的YANG型號的無線資訊,請輸入wireless以選擇所有模組,然後按一下Add selected。
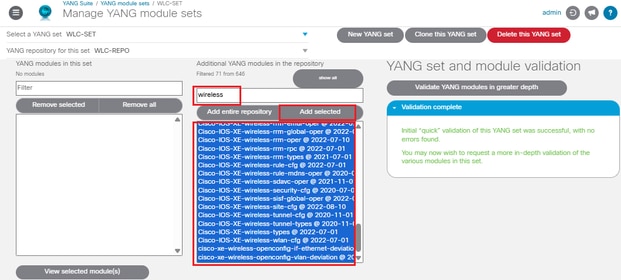
如果您需要的不僅僅是無線元件,只需在此步驟中按一下Add entire repository即可。
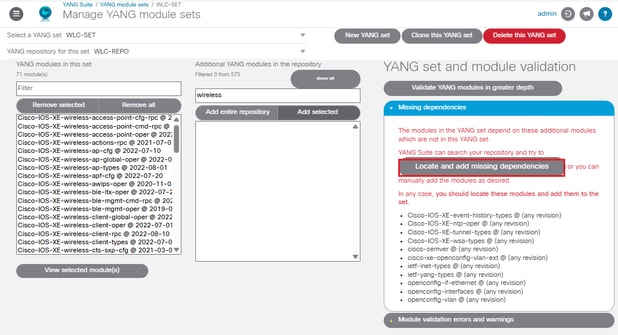
如果只新增無線模組,還有一個名為查詢和新增缺少的相關項的按鈕。按一下它可自動拉入無線模組所需的任何其它模組。
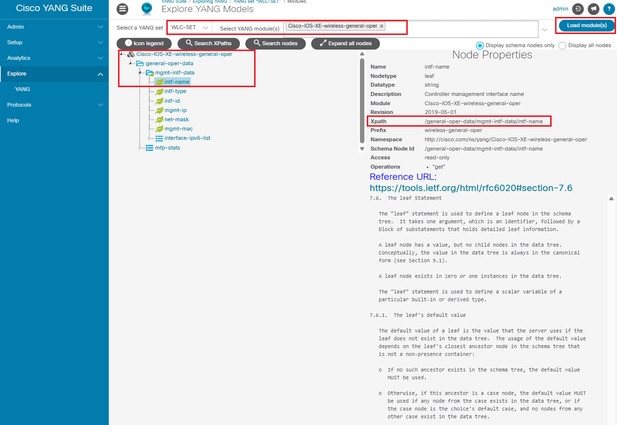
步驟6.測試Path查詢。
使用YANG Suite提供的XPath從WLC獲取資料。
在YANG Suite中獲取所需的XPath。
此處以控制器管理介面名稱為例。
在WLC CLI上配置遙測ietf
C9800(config)#telemetry ietf subscription <subscription-id>
C9800(config-mdt-subs)#encoding encode-kvgpb
C9800(config-mdt-subs)#filter xpath <xpath-expression>
C9800(config-mdt-subs)#source-address <wlc-ip>
C9800(config-mdt-subs)#stream yang-push
C9800(config-mdt-subs)#update-policy periodic <interval-in-centiseconds>
C9800(config-mdt-subs)#receiver ip address <collector-ip> <collector-port> protocol grpc-tcp
舉例來說:
C9800(config)#telemetry ietf subscription 104
C9800(config-mdt-subs)#encoding encode-kvgpb
C9800(config-mdt-subs)#filter xpath /general-oper-data/mgmt-intf-data/intf-name
C9800(config-mdt-subs)#source-address 10.124.38.111
C9800(config-mdt-subs)#stream yang-push
C9800(config-mdt-subs)#update-policy periodic 2500
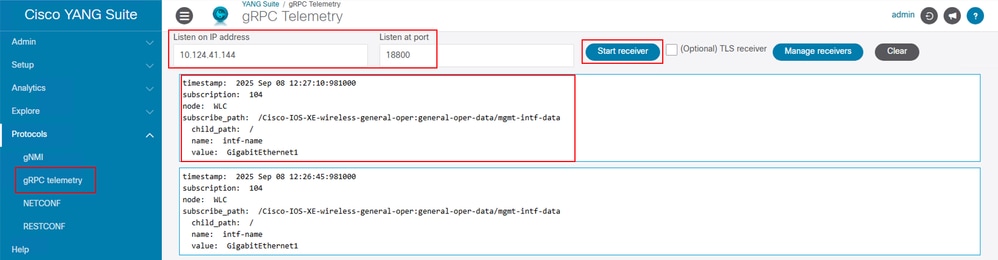
C9800(config-mdt-subs)#receiver ip address 10.124.41.144 18800 protocol grpc-tcp
在gRPC遙測中啟用監視,以獲取WLC傳送的所需資料。
相關資訊
 意見
意見