簡介
本文檔介紹從思科安全終端私有雲裝置收集支援快照並啟用即時支援會話的步驟。
背景資訊
與TAC合作時,有時需要收集支援快照或允許TAC建立到您的安全終端(先前稱為高級惡意軟體防護)私有雲裝置的支援隧道。這有助於徹底調查或遠端應用修復。
此方法可節省時間,並為TAC工程師提供有效解決問題所需的全面資訊。
支援快照
從管理門戶生成支援快照
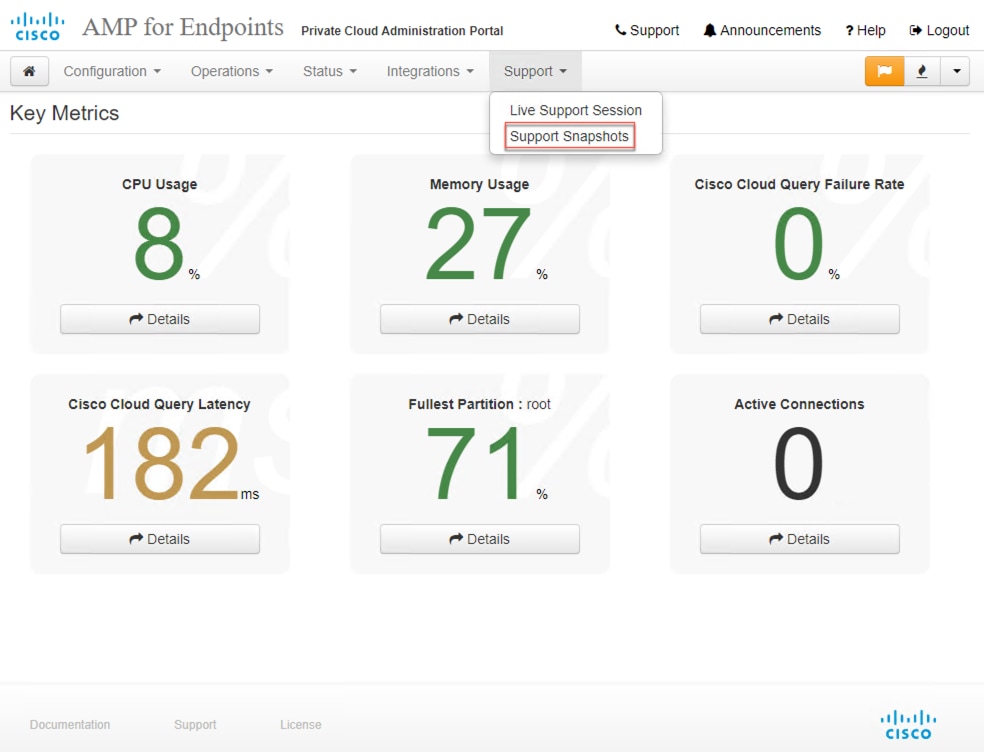
要從管理門戶收集支援快照,請執行以下步驟:
步驟 1:登入到管理門戶。
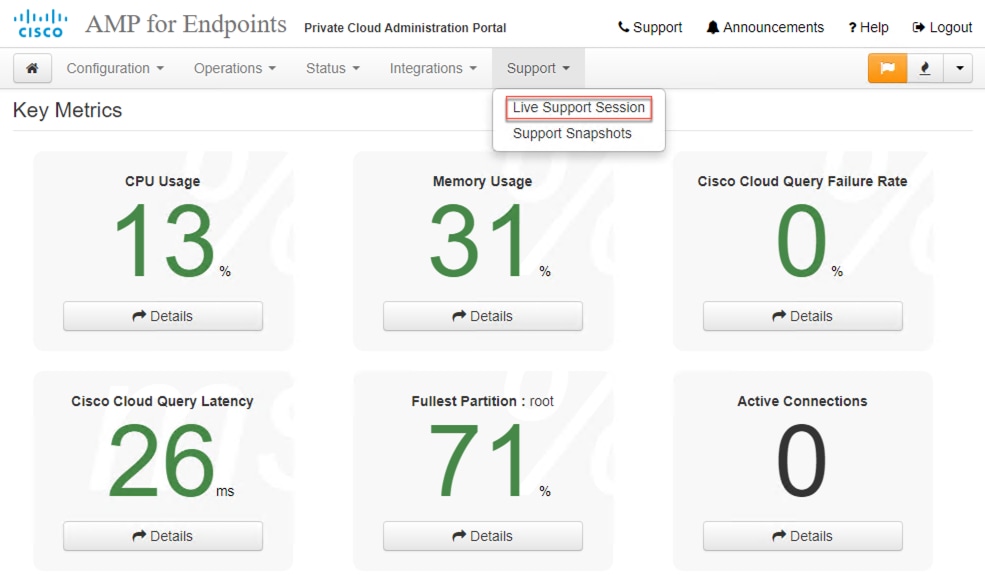
步驟 2:選擇Support,然後選擇Support Snapshots,如下圖所示。
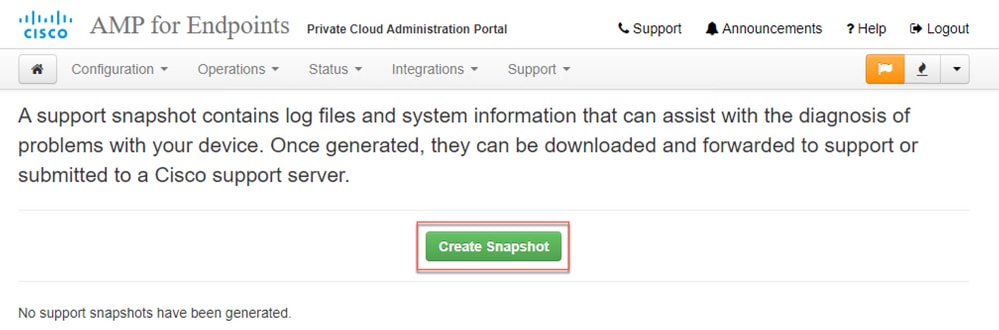
步驟 3:按一下Create Snapshot。
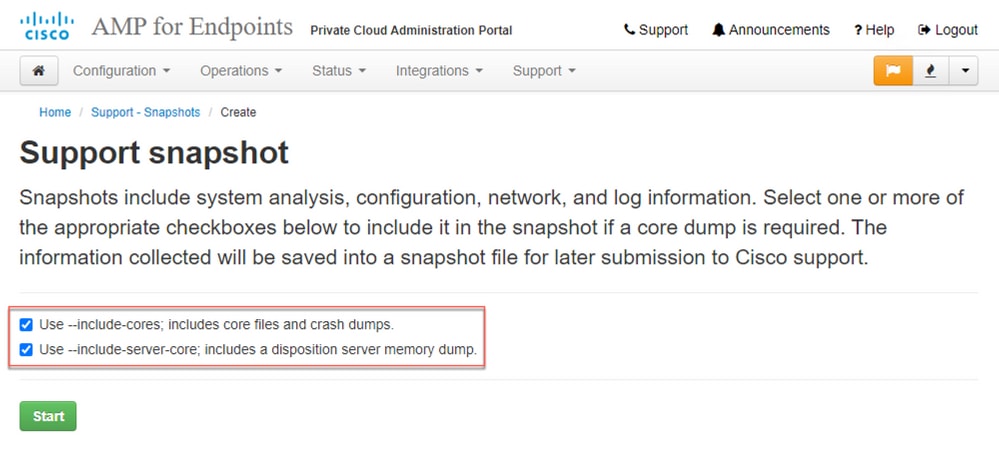
步驟 4:您可以選擇「Include the Core Files and other Memory Dump and the Snapshot(包括核心檔案和其他記憶體轉儲以及預設情況下未選擇的快照)」,如下圖所示。
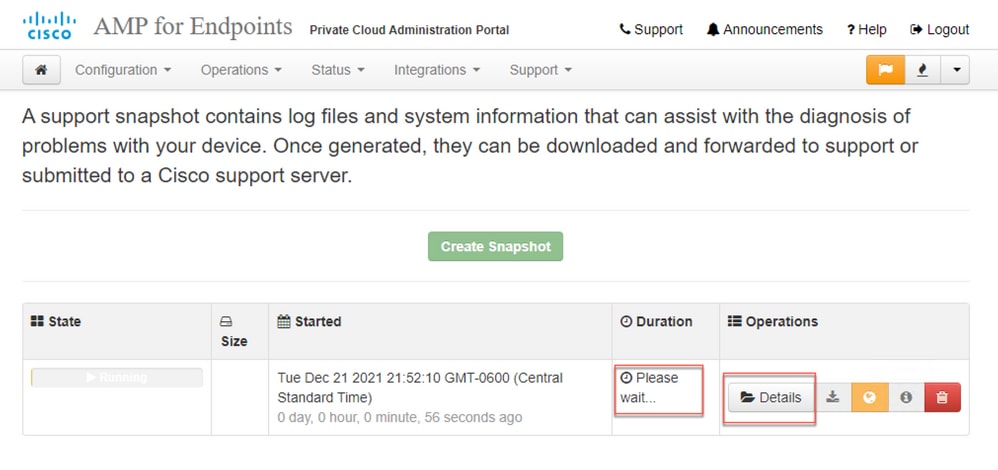
步驟 5:您會發現快照已啟動,這可能需要一段時間。若要監控進度,請按一下Details,如下圖所示。
步驟 6:快照生成完成後,您必須能夠選擇  圖示將快照下載到您訪問門戶的本地電腦上。
從管理門戶SSH生成支援快照
要從管理門戶SSH建立支援快照,請執行以下步驟:
步驟 1:通過SSH連線到管理門戶。
步驟 2:這是可用於生成快照的CLI。
[root@fireamp ~]# amp-support snapshot -A

usage: /opt/opadmin/embedded/bin/amp-support snapshot [options]

Create a snapshot of the current system; this includes log files, system
status, run processes, crash dumps, and other information that can be
used by a support engineer to diagnose problems with your system.
If no explicit options are provided the default ones are assumed.  The
default options are: include-configs, include-logs, include-network,
include-cores, and include-status

    -A, --all                        Include everything.
    -a, --include-analysis           Include system analysis. (SLOW!)
    -C, --include-configs            Include configuration files.
    -c, --include-cores              Include core files.
    -F, --include-firehose-cassandra Include firehose-cassandra status.
    -i, --include-inodes             Include filesystem inode usage.
    -I, --include-integrations       Include appliance integration information.
    -k, --include_kafka              Include Kafka status.
    -L, --include-flink              Include Flink status.
    -l, --include-logs               Include log files.
    -m, --include-mongo              Include MongoDB status.
    -N, --include-cassandra          Include Cassandra status.
    -n, --include-network            Include network analysis.
    -r, --include-redis              Include Redis status.
    -S, --include-server-core        Include a disposition server memory dump.
    -s, --include-status             Include system status.
    -d, --include-docker             Include docker status.
    -z, --include_zookeeper          Include Zookeeper status.
    -f, --fs-check FILE              Include filesystem check results from file.
    -v, --verbose                    Increase output verbosity.
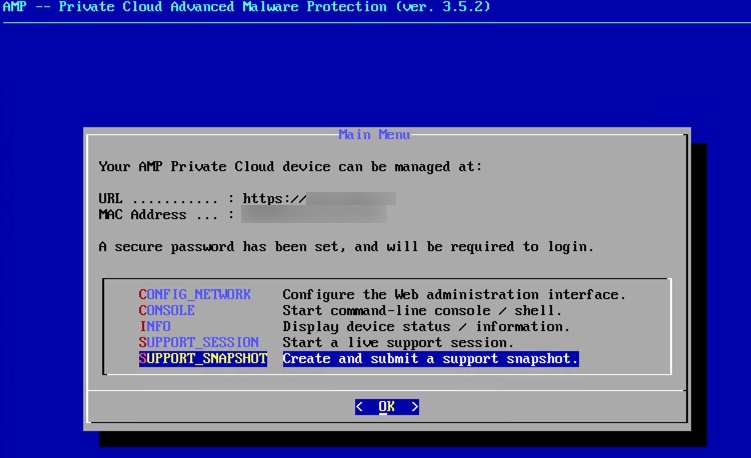
從裝置控制檯生成支援快照
要從私有雲裝置控制檯建立支援快照,請執行以下步驟:
步驟 1:登入到私有雲裝置控制檯。
步驟 2:選擇SUPPORT_SNAPSHOT。
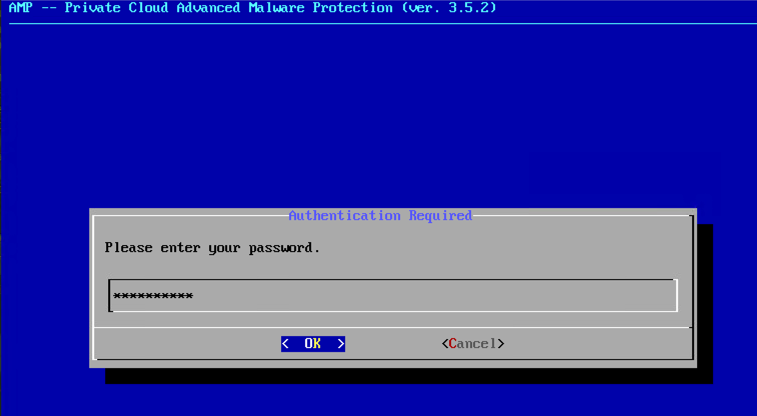
步驟 3:輸入管理門戶密碼,如下圖所示。
第4步:您可以選擇「Include the Core Files and other Memory Dumps and the Snapshot」(包括核心檔案和其他記憶體轉儲以及預設情況下未選擇的快照),如下圖所示。
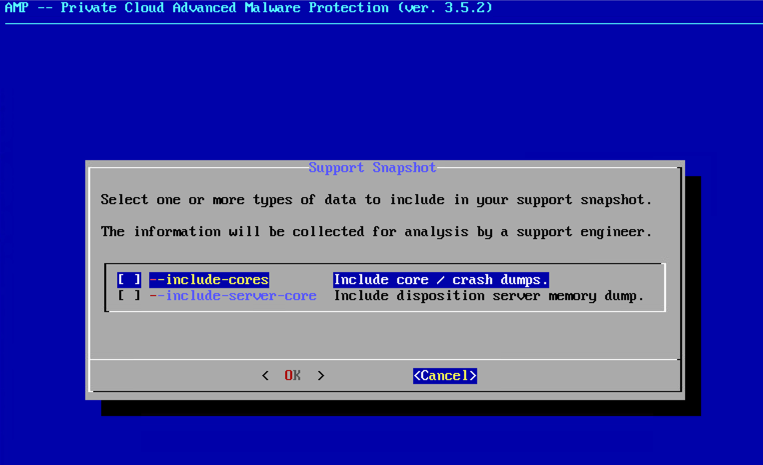
步驟 5:然後,選擇OK,開始建立快照。
即時支援會話
從管理門戶啟用即時支援會話
要從管理門戶建立啟用即時支援會話,請執行以下步驟:
步驟 1:登入到管理門戶。
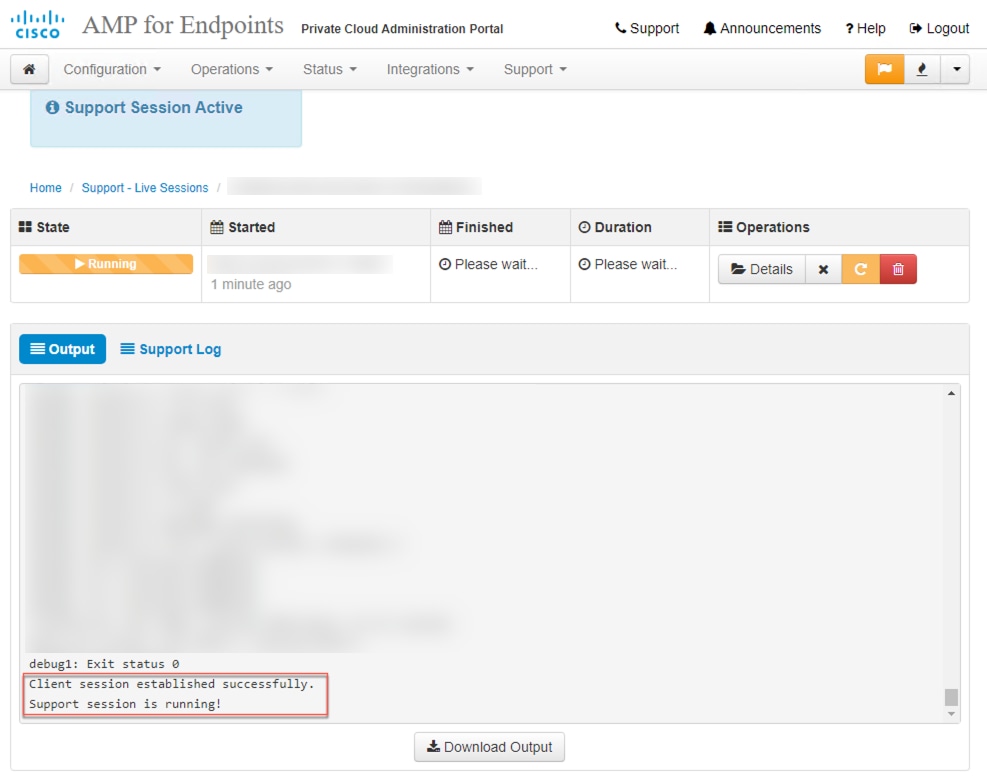
步驟 2:按一下或選擇Support,然後選擇Live Support Session。
步驟 3:按一下或選擇Start Support Session(如所示),然後選擇Download,獲取TAC遠端連線到裝置所需的SSH身份。然後按一下或選擇開始以啟動即時支援會話,如下圖所示。

步驟 4:裝置成功連線即時支援會話後,您會注意到如圖所示的日誌,如圖所示。
從管理門戶SSH啟用即時支援會話
若要從管理門戶SSH建立啟用即時支援會話,請執行以下步驟:
步驟 1:登入到管理門戶SSH。
步驟 2:這是可用於從SSH啟用即時支援會話的CLI。
[root@fireamp ~]# amp-support session -l support.log -s support-sessions.amp.cisco.com -p 22
usage: /opt/opadmin/embedded/bin/amp-support session [options]

Manage a support session with a remote server; this facilitates a secure method of
provide unrestricted shell access to your machine to an engineer on a remote
system. Note that when restart a session, the same parameters as the previous
session are used unless new parameters are supplied. The UUID is expected to be
version 4.

Note that the `--log` option provides an optional log file for the support
engineer to log their shell activity to. A script is provided to the remote
user to collect this log data, but it is not and cannot be enforced by the
support script.

OPTIONS

    -b, --batch                      Use batch (non-interactive) mode.
    -d, --delete                     Delete a support session and all files.
    -l, --log FILE                   Log remote shell commands to file.
    -p, --port PORT                  Connect to an alternative port.
    -s, --support-server SERVER      Set the server of a session.
    -t, --terminate                  Terminate an active session.
    -v, --verbose                    Increase output verbosity.

NOTE: UUID can be any random string as long as it has the format: xxxxxxxx-xxxx-xxxx-xxxx-xxxxxxxxxxxx. Also, you can keep the Port as default to 22

EXAMPLES

    /opt/opadmin/embedded/bin/amp-support session -l support.log -s support.example.com -p 2222 xxxxxxxx-xxxx-xxxx-xxxx-xxxxxxxxxxxx
    /opt/opadmin/embedded/bin/amp-support session xxxxxxxx-xxxx-xxxx-xxxx-xxxxxxxxxxxx
    /opt/opadmin/embedded/bin/amp-support session -t -d xxxxxxxx-xxxx-xxxx-xxxx-xxxxxxxxxxxx
從裝置控制檯啟用即時支援會話
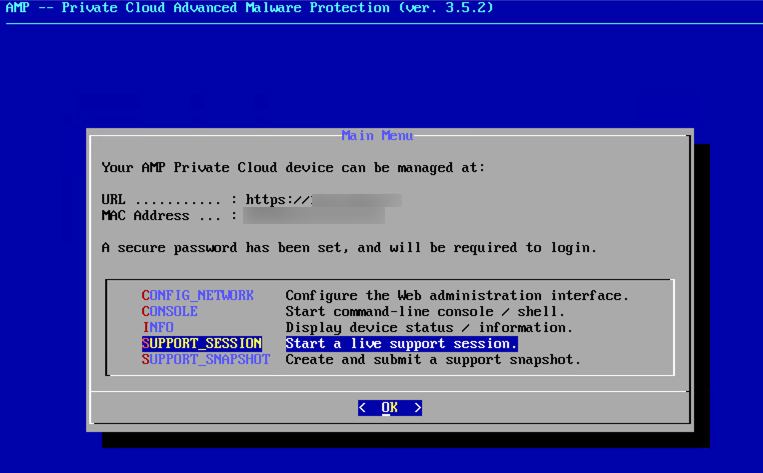
要從私有雲裝置控制檯建立啟用即時支援會話,請執行以下步驟:
步驟 1:登入到私有雲裝置控制檯。
步驟 2:選擇SUPPORT_SESSION以啟用即時支援會話,如下圖所示。
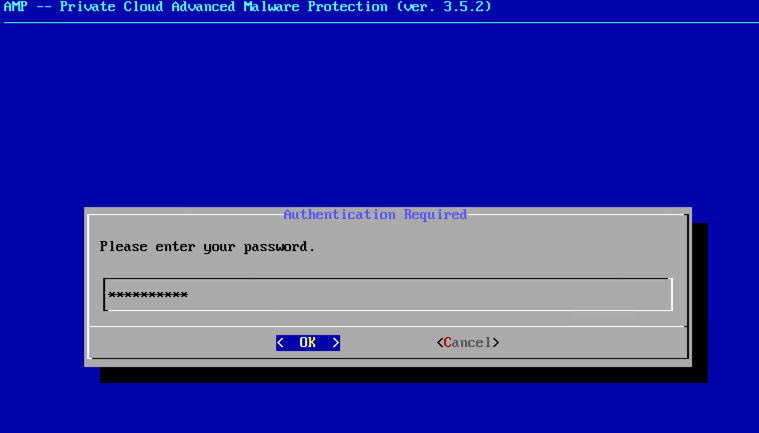
第3步:輸入管理門戶密碼,如下圖所示。
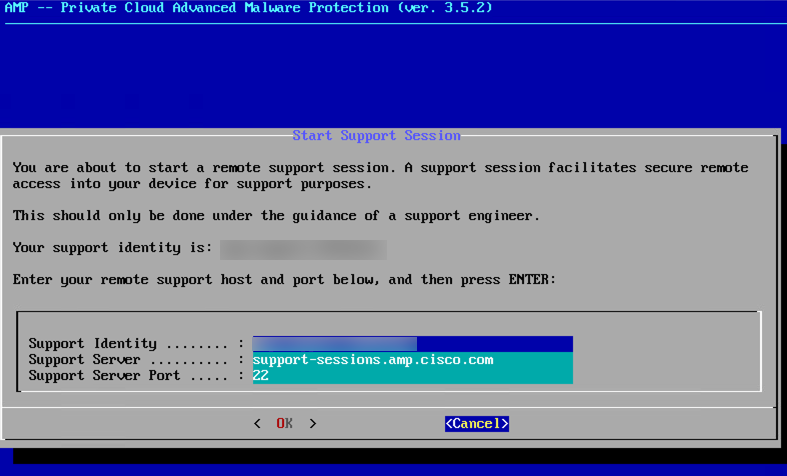
步驟 4:您可以保持所有預設設定不變。選擇OK以啟用即時支援會話,如下圖所示。
 意見
意見