Inleiding
In dit document wordt beschreven hoe u IOx-toepassingen kunt bouwen met behulp van Vagrant en Virtualbox en deze kunt implementeren in de IOx-gebruikersinterface voor lokaal beheer.
Voorwaarden
Windows/MAC/Intel/Linux
MAC ARM-gebaseerd - M1/M2/M3
- Git
- zwerver
- VMWare Fusion
- Vagrant-VMware-desktop plugin
Downloaden:
Procedure voor het instellen van de Bouwomgeving met behulp van Vagrant
Overzicht van acties
- De vagrantfile-configuratie stelt een VM-omgeving in op basis van de architectuur van de hostmachine.
- De VM wordt geconfigureerd voor gebruik van VMware Fusion of VirtualBox, afhankelijk van de architectuur
- Het voorziet de VM van de nodige software en tools, waaronder QEMU (Quick EMUlator) , Docker en ioxclient.
- Configuratie bouwt automatisch een voorbeeldtoepassing voor het doel-Cisco-platform voor amd64-apparaten.
Stap 1. Kloon de GitHub-repository in uw lokale systeem:
git clone https://github.com/suryasundarraj/cisco-iox-app-build.git
U kunt de inhoud van de configuratiebehuizing ook kopiëren en plakken in "Vagrantfile". Hierdoor wordt een bestand gemaakt met de naam "Vagrantfile" in het lokale systeem:
# -*- mode: ruby -*-
# vi: set ft=ruby :

# All Vagrant configuration is done below. The "2" in Vagrant.configure
# configures the configuration version (we support older styles for
# backwards compatibility). Please don't change it unless you know what
# you're doing.
Vagrant.configure('2') do |config|
  arch = `arch`.strip()
  if arch == 'arm64'
    puts "This appears to be an ARM64 machine! ..."
    config.vm.box = 'gyptazy/ubuntu22.04-arm64'
    config.vm.boot_timeout = 600
    config.vm.provider "vmware_fusion" do |vf|
      #vf.gui = true
      vf.memory = "8192"
      vf.cpus = "4"
    end
    config.vm.define :ioxappbuild
  else
    puts "Assuming this to be an Intel x86 machine! ..."
    config.vm.box = "bento/ubuntu-22.04"
    config.vm.network "public_network", bridge: "ens192"
    config.vm.boot_timeout = 600
    config.vm.provider "virtualbox" do |vb|
      #vb.gui = true
      vb.memory = "8192"
      vb.cpus = "4"
    end
    config.vm.define :ioxappbuild
  end

  config.vm.provision "shell", inline: <<-SHELL
    #!/bin/bash
    # apt-cache madison docker-ce
    export VER="5:24.0.9-1~ubuntu.22.04~jammy"
    echo "!!! installing dependencies and packages !!!"
    apt-get update
    apt-get install -y ca-certificates curl unzip git pcregrep
    install -m 0755 -d /etc/apt/keyrings
    curl -fsSL https://download.docker.com/linux/ubuntu/gpg -o /etc/apt/keyrings/docker.asc
    chmod a+r /etc/apt/keyrings/docker.asc
    echo "deb [arch=$(dpkg --print-architecture) signed-by=/etc/apt/keyrings/docker.asc] https://download.docker.com/linux/ubuntu $(. /etc/os-release && echo "$VERSION_CODENAME") stable" |  tee /etc/apt/sources.list.d/docker.list > /dev/null
    apt-get update
    apt-get install -y qemu binfmt-support qemu-user-static
    apt-get install -y docker-ce=$VER docker-ce-cli=$VER docker-ce-rootless-extras=$VER containerd.io docker-buildx-plugin docker-compose-plugin
    # apt-get install -y docker.io docker-compose docker-buildx
    usermod -aG docker vagrant
    echo "!!! generating .ioxclientcfg.yaml file !!!"
    echo 'global:' > /home/vagrant/.ioxclientcfg.yaml
    echo '  version: "1.0"' >> /home/vagrant/.ioxclientcfg.yaml
    echo '  active: default' >> /home/vagrant/.ioxclientcfg.yaml
    echo '  debug: false' >> /home/vagrant/.ioxclientcfg.yaml
    echo '  fogportalprofile:' >> /home/vagrant/.ioxclientcfg.yaml
    echo '    fogpip: ""' >> /home/vagrant/.ioxclientcfg.yaml
    echo '    fogpport: ""' >> /home/vagrant/.ioxclientcfg.yaml
    echo '    fogpapiprefix: ""' >> /home/vagrant/.ioxclientcfg.yaml
    echo '    fogpurlscheme: ""' >> /home/vagrant/.ioxclientcfg.yaml
    echo '  dockerconfig:' >> /home/vagrant/.ioxclientcfg.yaml
    echo '    server_uri: unix:///var/run/docker.sock' >> /home/vagrant/.ioxclientcfg.yaml
    echo '    api_version: "1.22"' >> /home/vagrant/.ioxclientcfg.yaml
    echo 'author:' >> /home/vagrant/.ioxclientcfg.yaml
    echo '  name: |' >> /home/vagrant/.ioxclientcfg.yaml
    echo '    Home' >> /home/vagrant/.ioxclientcfg.yaml
    echo '  link: localhost' >> /home/vagrant/.ioxclientcfg.yaml
    echo 'profiles: {default: {host_ip: 127.0.0.1, host_port: 8443, auth_keys: cm9vdDpyb290,' >> /home/vagrant/.ioxclientcfg.yaml
    echo '    auth_token: "", local_repo: /software/downloads, api_prefix: /iox/api/v2/hosting/,' >> /home/vagrant/.ioxclientcfg.yaml
    echo '    url_scheme: https, ssh_port: 2222, rsa_key: "", certificate: "", cpu_architecture: "",' >> /home/vagrant/.ioxclientcfg.yaml
    echo '    middleware: {mw_ip: "", mw_port: "", mw_baseuri: "", mw_urlscheme: "", mw_access_token: ""},' >> /home/vagrant/.ioxclientcfg.yaml
    echo '    conn_timeout: 1000, client_auth: "no", client_cert: "", client_key: ""}}' >> /home/vagrant/.ioxclientcfg.yaml
    cp /home/vagrant/.ioxclientcfg.yaml /root/.ioxclientcfg.yaml
    chown vagrant:vagrant /home/vagrant/.ioxclientcfg.yaml
    arch=$(uname -m)
    if [[ $arch == x86_64 ]]; then
      # download page https://developer.cisco.com/docs/iox/iox-resource-downloads/
      echo "!!! downloading and extracting ioxclient for x86_64 architecture !!!"
      curl -O https://pubhub.devnetcloud.com/media/iox/docs/artifacts/ioxclient/ioxclient-v1.17.0.0/ioxclient_1.17.0.0_linux_amd64.tar.gz
      tar -xvf /home/vagrant/ioxclient_1.17.0.0_linux_amd64.tar.gz
      cp /home/vagrant/ioxclient_1.17.0.0_linux_amd64/ioxclient /usr/local/bin/ioxclient
      rm -rv /home/vagrant/ioxclient_1.17.0.0_linux_amd64
    elif  [[ $arch = aarch64 ]]; then
      # download page https://developer.cisco.com/docs/iox/iox-resource-downloads/
      echo "!!! downloading and extracting ioxclient for arm64 architecture !!!"
      curl -O https://pubhub.devnetcloud.com/media/iox/docs/artifacts/ioxclient/ioxclient-v1.17.0.0/ioxclient_1.17.0.0_linux_arm64.tar.gz
      tar -xvf /home/vagrant/ioxclient_1.17.0.0_linux_arm64.tar.gz
      cp /home/vagrant/ioxclient_1.17.0.0_linux_arm64/ioxclient /usr/local/bin/ioxclient
      rm -rv /home/vagrant/ioxclient_1.17.0.0_linux_arm64
    fi
    chown vagrant:vagrant /usr/local/bin/ioxclient
    echo "!!! pulling and packaging the app for x86_64 architecture !!!"
    docker pull --platform=linux/amd64 mlabbe/iperf3
    ioxclient docker package mlabbe/iperf3 .
    cp package.tar /vagrant/iperf3_amd64-$(echo $VER | pcregrep -o1 ':([0-9.-]+)~').tar
  SHELL
end
Stap 2. Zorg ervoor dat de regel "export VER="5:24.0.9-1~ubuntu.22.04~jammy" geen commentaar krijgt en dat alle andere exportverklaringen worden becommentarieerd. Dit komt overeen met de Docker Engine-versie die u in deze Vagrant-omgeving wilt installeren:
cisco@cisco-virtual-machine:~/Desktop/ioxappbuild$ cat Vagrantfile | grep 'export' | grep -v '#'
export VER="5:24.0.9-1~ubuntu.22.04~jammy"
Stap 3. Start de Vagrant-omgeving met de opdracht vagrant up in de directory waarin het Vagrant-bestand zich bevindt en bekijk een succesvolle build van de iperf IOx-toepassing voor het AMD64-tar-bestand:
vagrant up

Procedure voor het bouwen van een aangepaste IOx-toepassing
In dit gedeelte wordt beschreven hoe u een aangepaste IOx-toepassing kunt maken met behulp van de vagrantomgeving.

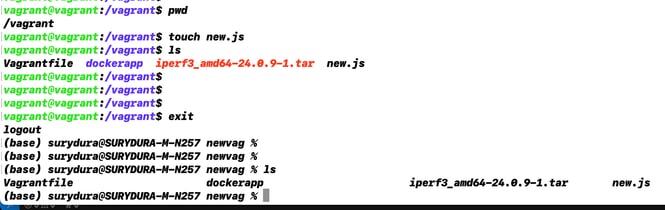
Opmerking: de directory "/vagrant" in de VM en de directory die het "Vagrantfile" in het hostsysteem bevat, zijn gesynchroniseerd.
Zoals in het image wordt getoond, wordt het bestand new.js gemaakt in de VM en is het ook toegankelijk op het hostsysteem:
Stap 1. Kloon een voorbeeldtoepassing naar dezelfde map als waarin "Vagrantfile" zich bevindt. In dit voorbeeld wordt "iox-multiarch-nginx-nyancat-sample" gebruikt:
git clone https://github.com/etychon/iox-multiarch-nginx-nyancat-sample.git
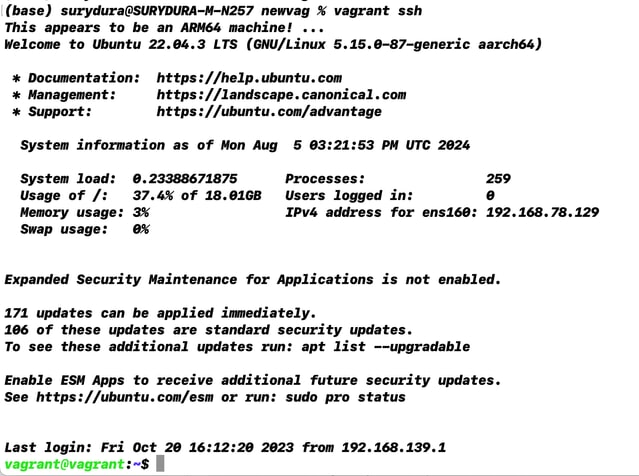
Stap 2. SSH in de zwerfmachine:
vagrant ssh
Stap 3. Bouw de applicatie:
cd /vagrant/iox-multiarch-nginx-nyancat-sample/
chmod +x build
sh ./build
Nadat het buildproces is voltooid, hebt u nu twee IOx-toepassingen klaar voor implementatie ("iox-amd64-nginx-nyancat-sample.tar.gz" voor amd64 en "iox-arm64-nginx-nyancat-sample.tar.gz" voor doelplatforms):

De IOx-toepassing implementeren
Stap 1. Toegang tot de IR1101 via de webinterface:
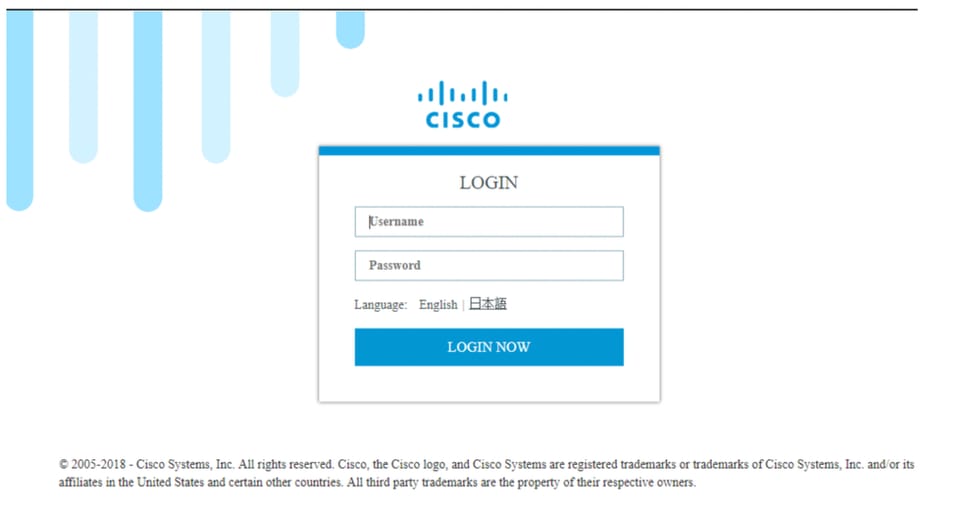
Stap 2. Gebruik het privilege 15-account:
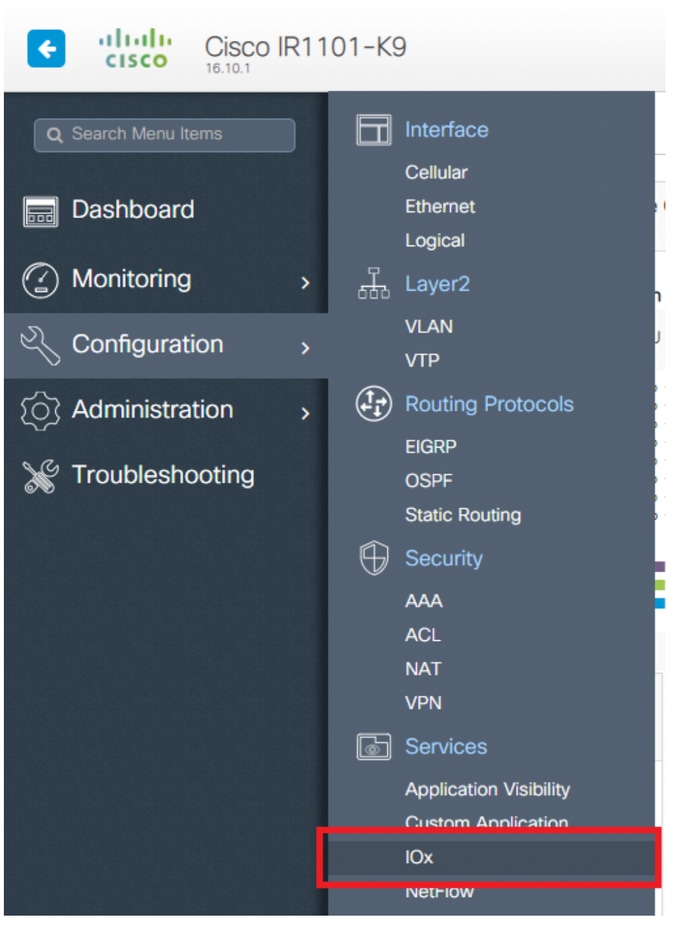
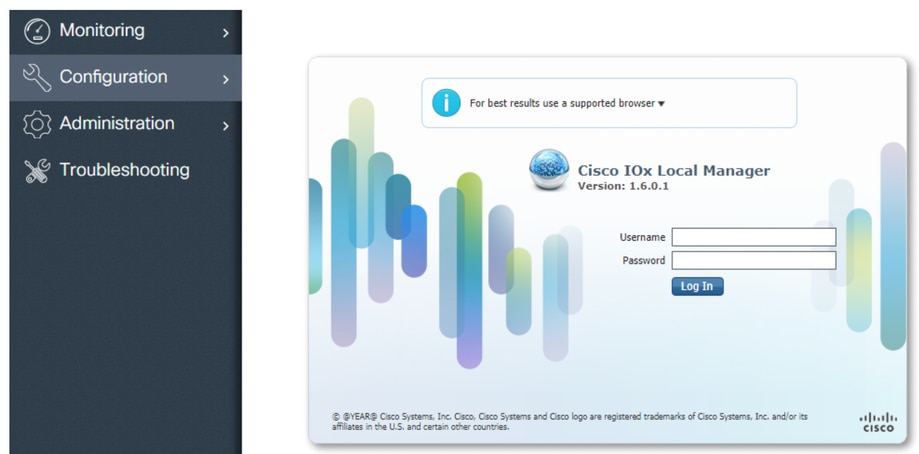
Stap 3. Gebruik in de aanmelding van IOx Local Manager dezelfde account om door te gaan zoals weergegeven in de afbeelding:
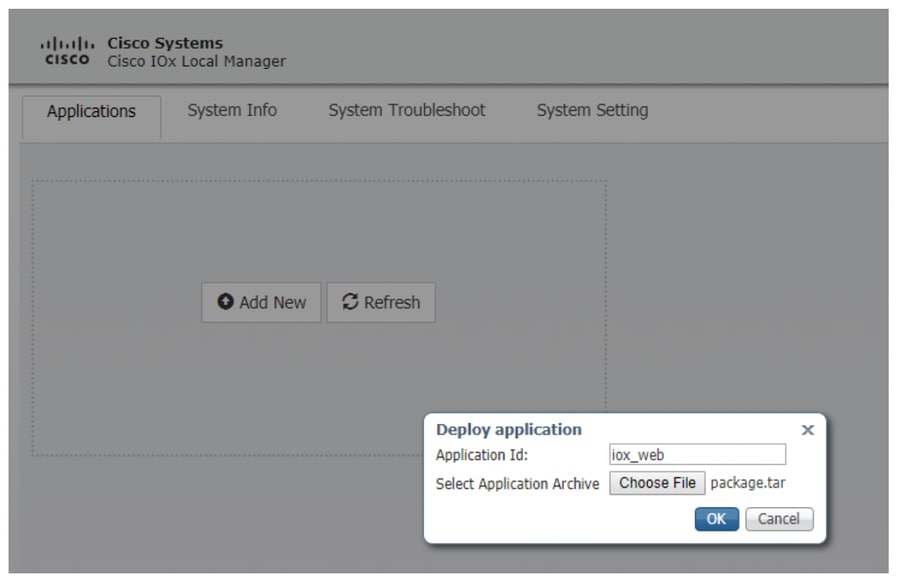
Stap 4. Klik op Nieuw toevoegen, selecteer een naam voor de IOx-toepassing en kies het package.tar dat is gebouwd in stap 3 van de sectie Procedure voor het instellen van een bouwomgeving met behulp van een zwerver, zoals weergegeven in de afbeelding:
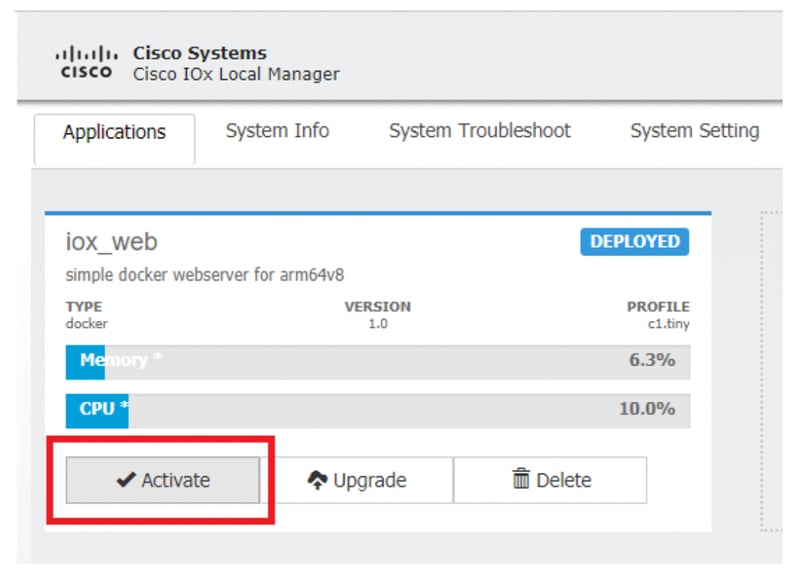
Stap 5. Zodra het pakket is geüpload, activeert u het zoals weergegeven in de afbeelding:
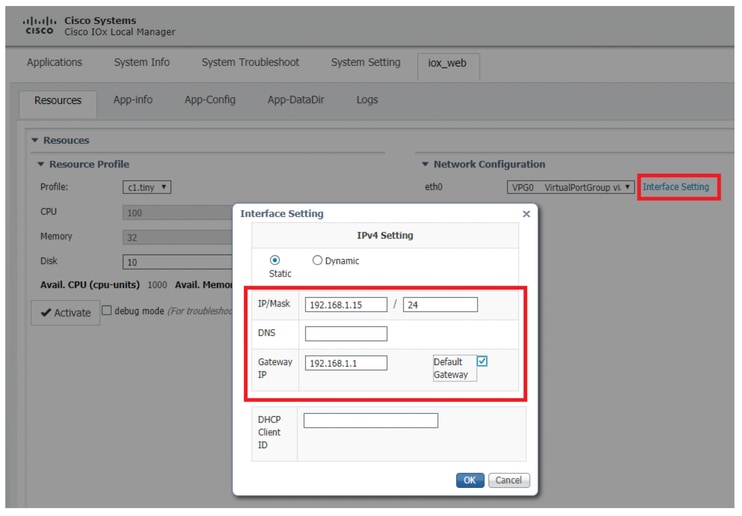
Stap 6. Open op het tabblad Bronnen de interface-instelling om het vaste IP-adres op te geven dat u aan de app wilt toewijzen, zoals weergegeven in de afbeelding:
Stap 7. Klik op OK en vervolgens op Activeren. Zodra de actie is voltooid, navigeert u terug naar de hoofdpagina van Local Manager (Toepassingen knop in het bovenste menu) en start u de toepassing zoals weergegeven in de afbeelding:
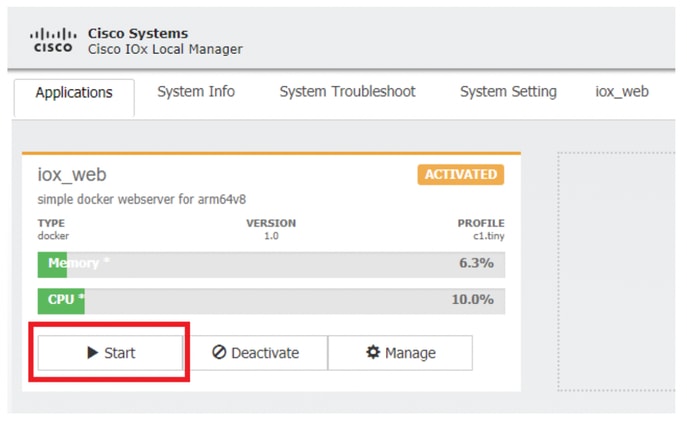
Nadat u deze stappen hebt doorlopen, is uw toepassing klaar om te worden uitgevoerd.
Problemen oplossen
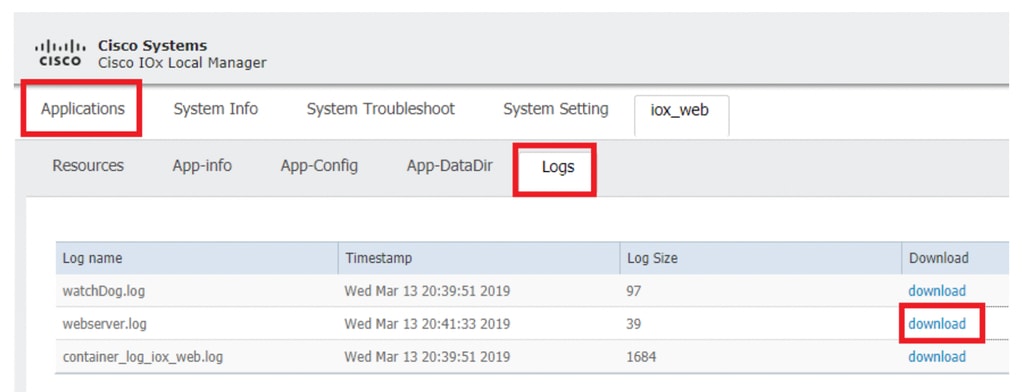
Om problemen met uw configuratie op te lossen, controleert u het logbestand dat u maakt in het Python-script met behulp van een lokaal beheer. Navigeer naar Toepassingen, klik op Beheren in de iox_web-toepassing en selecteer vervolgens het tabblad Logs zoals weergegeven in de afbeelding:
 Feedback