Introduction
Ce document décrit comment ajouter un accès HTTP (HyperText Transfer Protocol) à un pare-feu FTD (Firepower Thread Defense) lorsque le port de gestion tombe en panne.
Conditions préalables
Exigences
Cisco vous recommande de prendre connaissance des rubriques suivantes :
- Accès console au périphérique
Composants utilisés
Les informations contenues dans ce document sont basées sur les versions de matériel et de logiciel suivantes :
- Cisco Firepower 1120 Thread Defense version 7.4.2
The information in this document was created from the devices in a specific lab environment. All of the devices used in this document started with a cleared (default) configuration. Si votre réseau est en ligne, assurez-vous de bien comprendre l’incidence possible des commandes.
Configurer
Configurations
Étape 1. À partir de la session de console du périphérique, connectez-vous à l’interface de ligne de commande FTD SHell (CLISH) :
Cisco Firepower Extensible Operating System (FX-OS) Software
TAC support: http://www.cisco.com/tac
Copyright (c) 2009-2019, Cisco Systems, Inc. All rights reserved.

The copyrights to certain works contained in this software are
owned by other third parties and used and distributed under
license.

Certain components of this software are licensed under the "GNU General Public
License, version 3" provided with ABSOLUTELY NO WARRANTY under the terms of
"GNU General Public License, Version 3", available here:
http://www.gnu.org/licenses/gpl.html. See User Manual (''Licensing'') for
details.

Certain components of this software are licensed under the "GNU General Public
License, version 2" provided with ABSOLUTELY NO WARRANTY under the terms of
"GNU General Public License, version 2", available here:
http://www.gnu.org/licenses/old-licenses/gpl-2.0.html. See User Manual
(''Licensing'') for details.

Certain components of this software are licensed under the "GNU LESSER GENERAL
PUBLIC LICENSE, version 3" provided with ABSOLUTELY NO WARRANTY under the terms
of "GNU LESSER GENERAL PUBLIC LICENSE" Version 3", available here:
http://www.gnu.org/licenses/lgpl.html. See User Manual (''Licensing'') for
details.

Certain components of this software are licensed under the "GNU Lesser General
Public License, version 2.1" provided with ABSOLUTELY NO WARRANTY under the
terms of "GNU Lesser General Public License, version 2", available here:
http://www.gnu.org/licenses/old-licenses/lgpl-2.1.html. See User Manual
(''Licensing'') for details.

Certain components of this software are licensed under the "GNU Library General
Public License, version 2" provided with ABSOLUTELY NO WARRANTY under the terms
of "GNU Library General Public License, version 2", available here:
http://www.gnu.org/licenses/old-licenses/lgpl-2.0.html. See User Manual
(''Licensing'') for details.

KSEC-FPR1140-1# connect ftd
Étape 2. À partir de FTD CLISH, accédez au shell Linux via la commande expert et passez aux privilèges d’administrateur :
>
> expert
admin@KSEC-FPR1140-1:/$ sudo su
Password:
root@KSEC-FPR1140-1:/#
Étape 3 : envoi des entrées de commande HTTP à la configuration Lina à l’aide de l’outil LinaConfigTool et création d’une route statique pour envoyer le trafic du serveur Web s’exécutant côté Linux vers l’interface nlp_int_tap côté Lina :
root@KSEC-FPR1140-1:/# LinaConfigTool "http 192.168.1.0 255.255.255.0 inside"
root@KSEC-FPR1140-1:/#
root@KSEC-FPR1140-1:/# ip route add 192.168.1.0/24 via 169.254.1.1
root@KSEC-FPR1140-1:/#
root@KSEC-FPR1140-1:/#
Étape 4. Retournez à l’instruction FTD CLISH et vérifiez que la règle NAT (Network Address Translation) est automatiquement créée :
root@KSEC-FPR1140-1:/#
root@KSEC-FPR1140-1:/#
root@KSEC-FPR1140-1:/# exit
exit
admin@KSEC-FPR1140-1:/$ exit
logout
> show nat detail
Manual NAT Policies Implicit (Section 0)
1 (nlp_int_tap) to (inside) source static nlp_server__http_192.168.1.0_intf4 interface  destination static 0_192.168.1.0_3 0_192.168.1.0_3 service tcp https https
    translate_hits = 0, untranslate_hits = 0
    Source - Origin: 169.254.1.3/32, Translated: 10.10.105.87/24
    Destination - Origin: 192.168.1.0/24, Translated: 192.168.1.0/24
    Service - Protocol: tcp Real: https Mapped: https
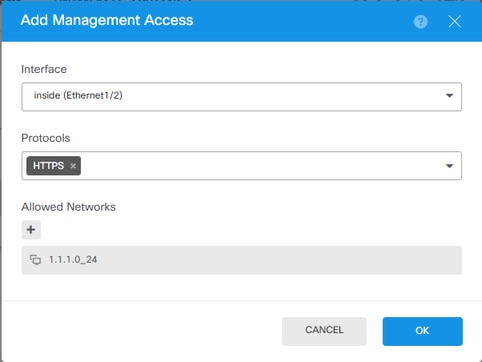
Étape 5. Accédez à l'interface utilisateur FDM sur l'interface de données et créez l'accès de gestion sur l'interface de données à partir de l'interface utilisateur pour maintenir les modifications permanentes :

Vérifier
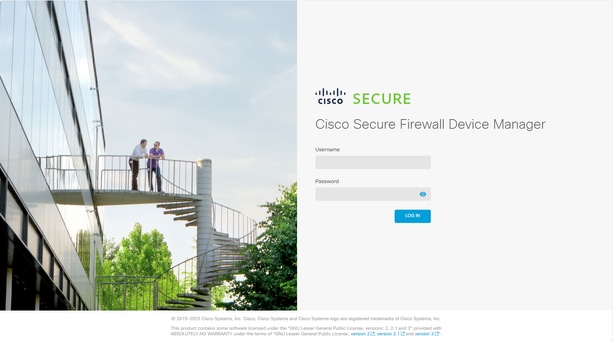
Ouvrez un navigateur et essayez d'atteindre FDM à l'aide de l'adresse IP de l'interface de données.
Dépannage
Effectuez une capture de paquets et vérifiez que :
- Le trafic atteint l'interface de données.
- Le trafic est transféré vers l'interface nlp_int_tap.
 Commentaires