- Home
- /
- Article

 In this article
About Cisco Business Rules Engine
The Cisco© Business Rules Engine (BRE) provides a means to upload customer specific data. The data can be retrieved at runtime to be used for routing decisions or information to be displayed to the agent.
For example, a tenant who wants to route calls to a specific group of agents based on the ANI dialed could simply upload a list of ANIs. If the ANI of the incoming call is on that list, it is routed to the group of agents specified. If the ANI is not on the list, it is routed straight through to the general queue.
A typical BRE implementation involves these major components:
-
Business Rules Engine utility provides an interface for creating domains and rule sets. The BRE requires an incoming decision request to be associated with a domain. The domain contains a set of rules. Each rule is assigned a priority. The BRE tries to match the domain’s highest priority rule with the decision request based on the conditions in the rules.
-
Flow Designer is a drag-and-drop UI used to define flows that orchestrate and automate the components of the Webex Contact Center. You can create a flow that invokes the BRE.
-
BRE DataSync configuration utility provides an interface for defining the Data Sync instances to import data into the BRE database. After a Data Sync instance is defined, the tenant can upload a .csv file. The uploaded .csv data is converted into records in the BRE database.
Creating a Set of Rules
The Business Rule Engine utility is invoked by the flow when a new voice request is
presented to the ACD. This section explains how rules can be set up so that the BRE
utility can assist the ACD to route the incoming request.
The BRE requires an incoming decision request to be associated with a domain and a set of rules. The BRE tries to match the highest priority rule with the decision request based on conditions in the rules.
Be sure to create a ruleset to cover all cases. For example, you should create rules for both Match Found and Match Not Found conditions. Or you could set up rules for multiple conditions. For example, ANI Match or ANI No Match, then Gold or Silver. In this case, you must create a rule for each possibility. For example:
-
ANI Match and Gold
-
ANI Match and Silver
-
ANI No Match and Gold
-
ANI No Match and Silver
To create a set of rules:
| 1 |
Log in to the Cisco Webex Contact Center Management Portal. |
| 2 |
Click the path Cisco Webex Contact Center Management Portal > Business Rules to launch the Business Rules Engine utility. BRE leverages Common Identity and a Single Sign‐On interaction. If the tenants have already logged in to Cisco Webex Contact Center Management Portal, they will automatically gain access to the BRE utility for their organization. |
| 3 |
Create an attribute to associate with your organization: |
| 4 |
Select Contexts, to display the Contexts page. |
| 5 |
To create rules, select the Contexts page. 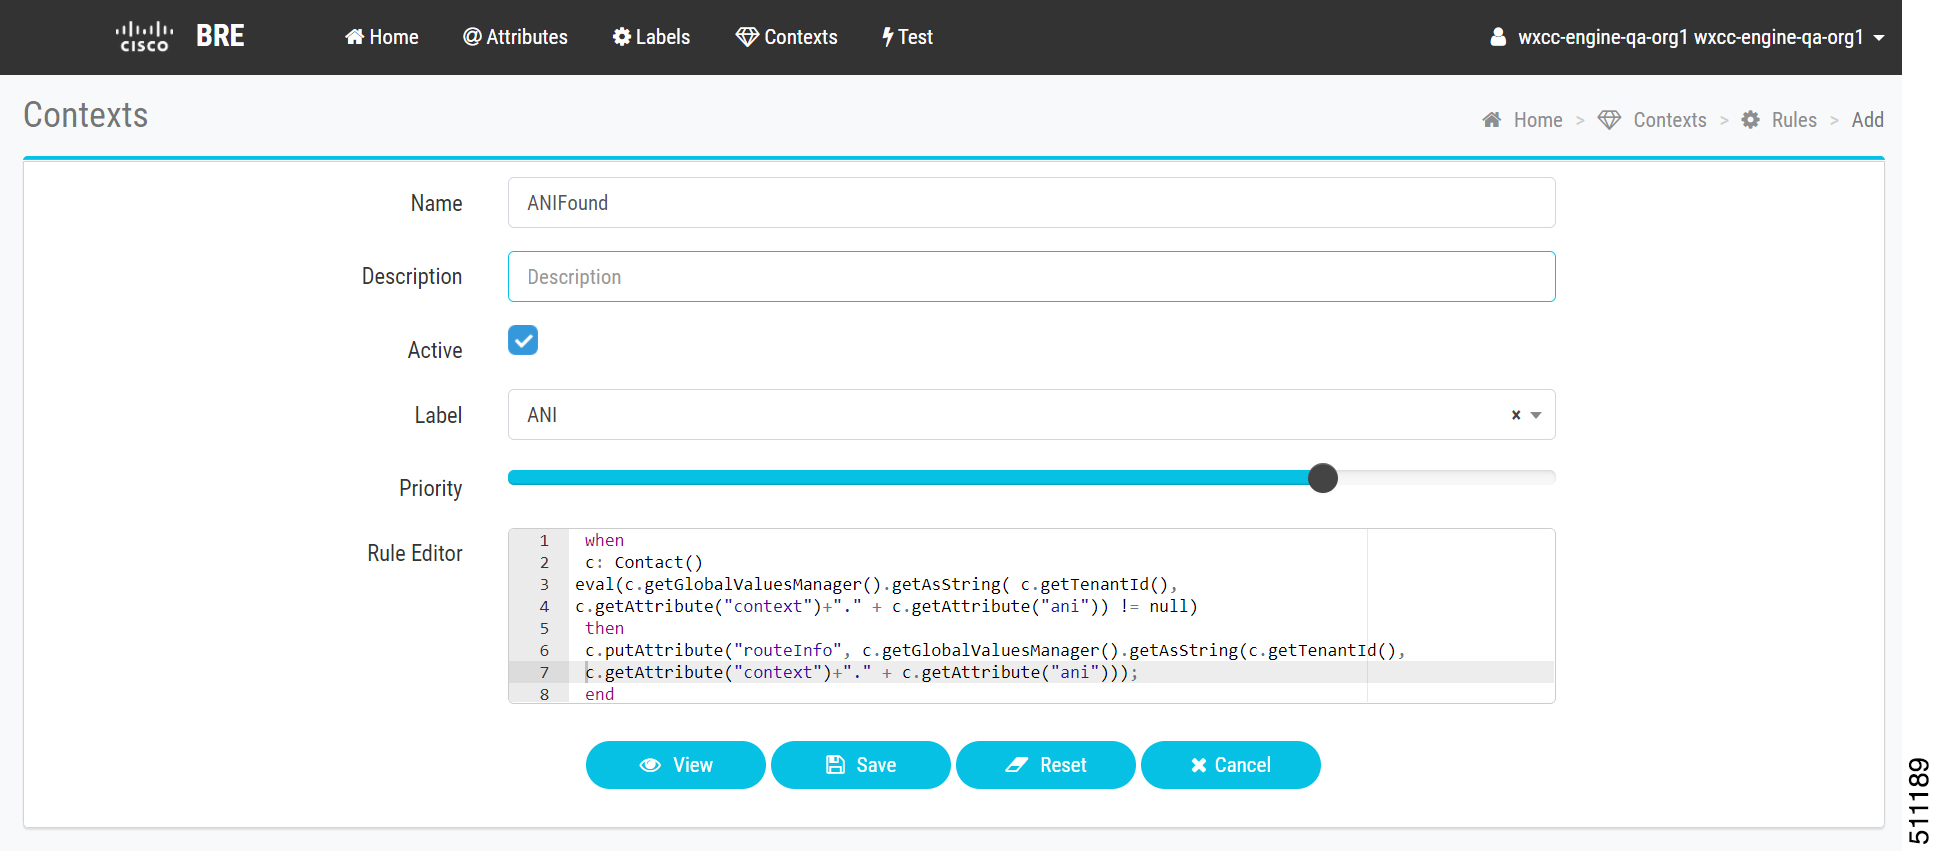 The following example code returns the value NotFound for the attribute routeInfo, if a number the caller dialed from (ANI) did not match an ANI on the list the tenants uploaded to the BRE database. 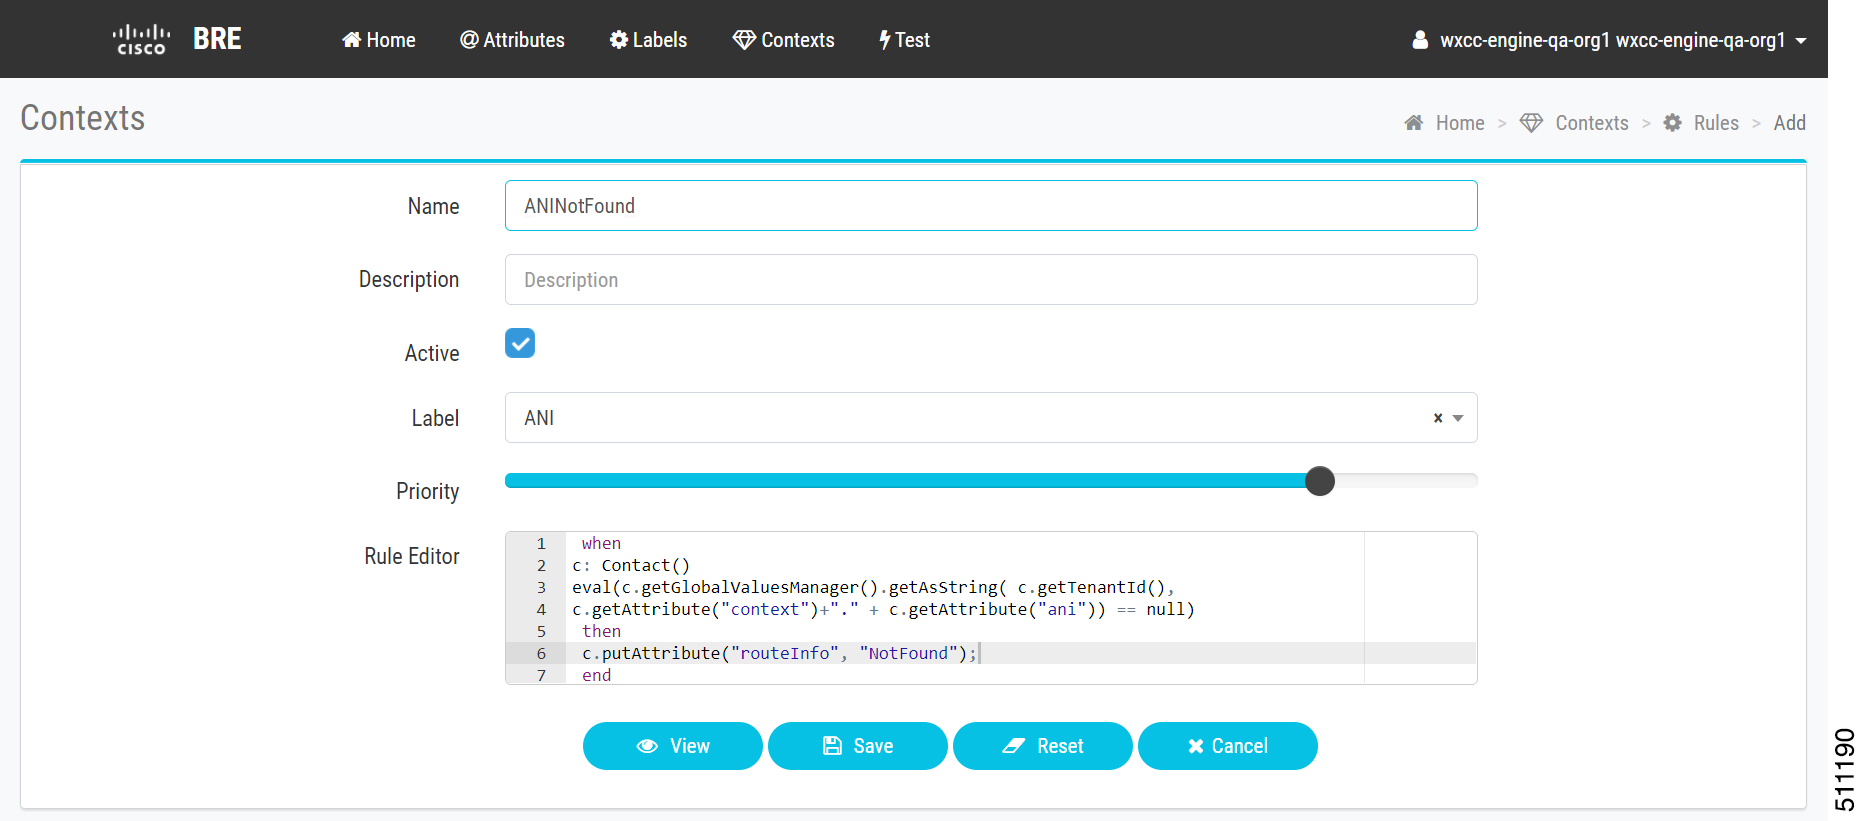
|
Configure a BRE DataSync Instance
The BRE DataSync accesses a database to make routing decisions. You must periodically update the database with the appropriate information. This section describes how the BRE DataSync utility can be configured to update the BRE repository.
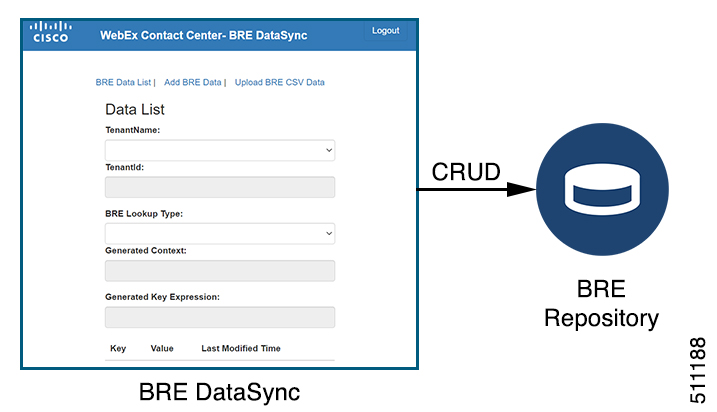
The tenant administrator must create a BRE DataSync instance for every data set that the Rules Engine will be consulting during its decision-making process. The administrator can create the data set or upload a CSV file. The data is converted into records in the BRE repository.
Agents do not have access to the BRE DataSync utility. |
Before you begin
Contact Cisco Customer Service Account Manager to get access to the BRE DataSync account.
| 1 |
As an administrator, log in to the BRE DataSync utility. The BRE DataSync utility URL is: https://rules.cjp.cisco.com/datasync/index.html. The region specific BRE DataSync URLs are: https://rules.wxcc-eu1.cisco.com/datasync/index.html https://rules.wxcc-eu2.cisco.com/datasync/index.html |
| 2 |
Select BRE Data List to view all the information that is related to the tenant organization. |
| 3 |
(Optional) Select Add BRE Data to add data to the BRE repository. |
| 4 |
Select Upload BRE CSV Data to upload the CSV file.
|

Creating a Flow with BRE Request Activity
You can create flows using the Flow Designer interface available in the Webex Contact Center Management Portal. Create a flow with the BRE Request activity in the Webex Contact Center Flow Designer.
For more information about configuring the flow, see the BRE Request section in the Cisco Webex Contact Center Setup and Administration Guide.


