PDF(9.8 MB) View with Adobe Reader on a variety of devices
Updated:July 14, 2020
Bias-Free Language
The documentation set for this product strives to use bias-free language. For the purposes of this documentation set, bias-free is defined as language that does not imply discrimination based on age, disability, gender, racial identity, ethnic identity, sexual orientation, socioeconomic status, and intersectionality. Exceptions may be present in the documentation due to language that is hardcoded in the user interfaces of the product software, language used based on RFP documentation, or language that is used by a referenced third-party product. Learn more about how Cisco is using Inclusive Language.
Backup and Restore Operations
Note
The documentation set for this product strives to use bias-free language. For
purposes of this documentation set, bias-free is defined as language that does not
imply discrimination based on age, disability, gender, racial identity, ethnic
identity, sexual orientation, socioeconomic status, and intersectionality.
Exceptions may be present in the documentation due to language that is hardcoded in
the user interfaces of the product software, language used based on RFP
documentation, or language that is used by a referenced third-party product.
Restore Cisco vManage
This article describes how to restore the vManage NMS in case the server on which the vManage NMS virtual machine (VM) is
running fails. This article provides procedures for restoring a vManage NMS using two different VMware interfaces, vSphere
Client and vSphere Web Client.
Caution
When you restore vManage, any vManage certificates are reset to their original state. Any changes to the certificates are
lost as a result of restoring vManage; and you would have to reconfigure any certificates that you had customized earlier.
The vManage NMS database is the repository for the overlay network device configurations, events, alarms, and monitoring information.
The vManage NMS database is stored on a separate virtual hard disk on the vManage NMS server; specifically, it is stored on
hard disk 2. Hard disk 1 contains the Viptela operating system software.
We recommend that you set up periodic crash-consistent backups of the vManage NMS database. (In a crash-consistent backup,
all the VM's data are captured at exactly the same time.) Then, if the vManage NMS server fails, you simply create a new vManage
NMS instance and attach the vManage NMS database backup to that instance.
The procedures in this article each encompass both of the following scenarios:
If you have a backup of the vManage NMS database, you create a new vManage NMS and attach the disk that contains your backup
database.
If you do not have a backup of the vManage database, you create a new vManage NMS and create a new virtual hard disk for the
database.
Restore vManage NMS Using vSphere Client
Create a vManage VM instance. See Launch vSphere Client and Create a vManage VM Instance, in Create a vManage VM Instance
.
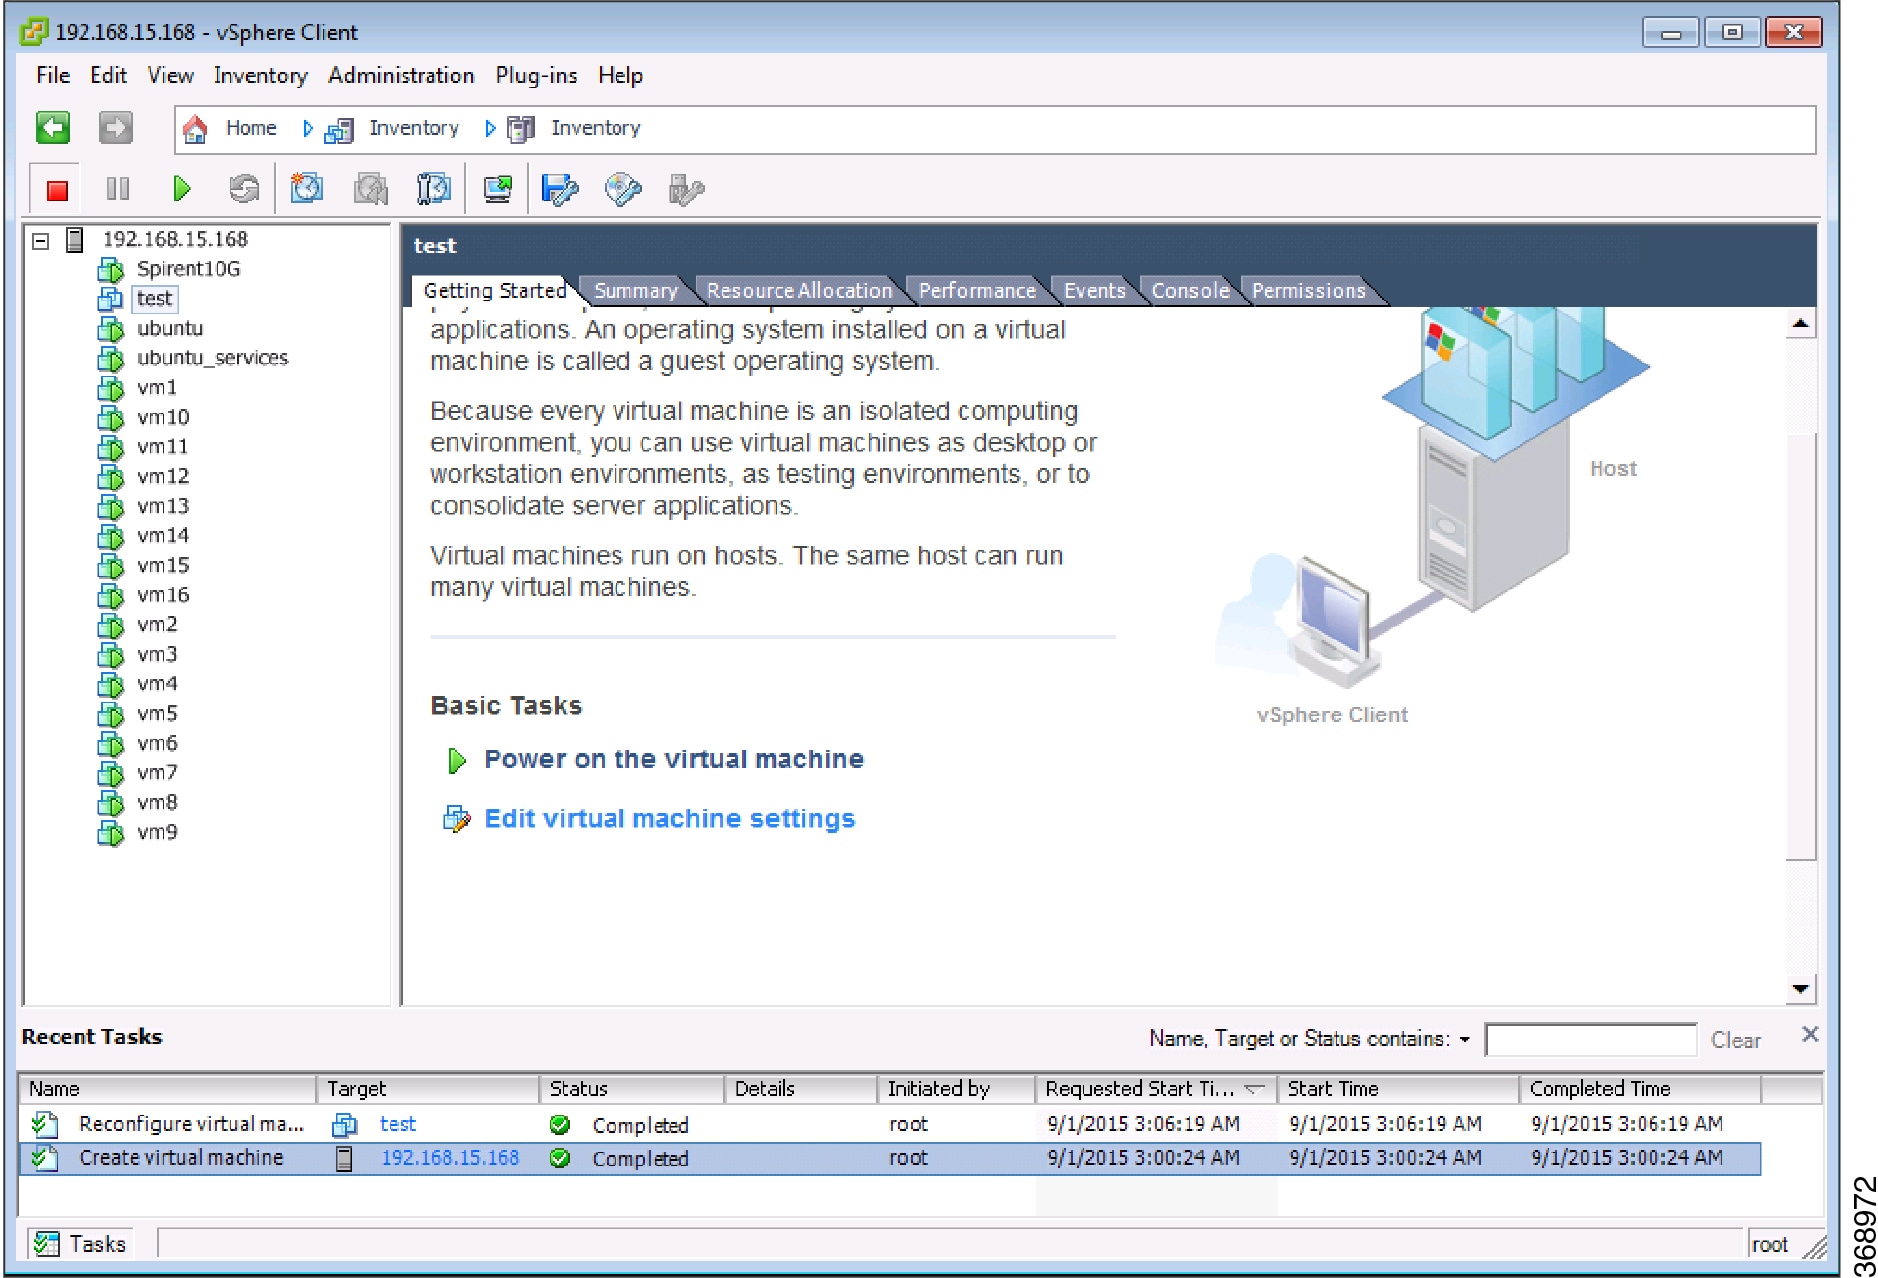
In the left navigation bar of the vSphere Client screen, select the vManage VM instance you just created, and click Edit virtual
machine settings.
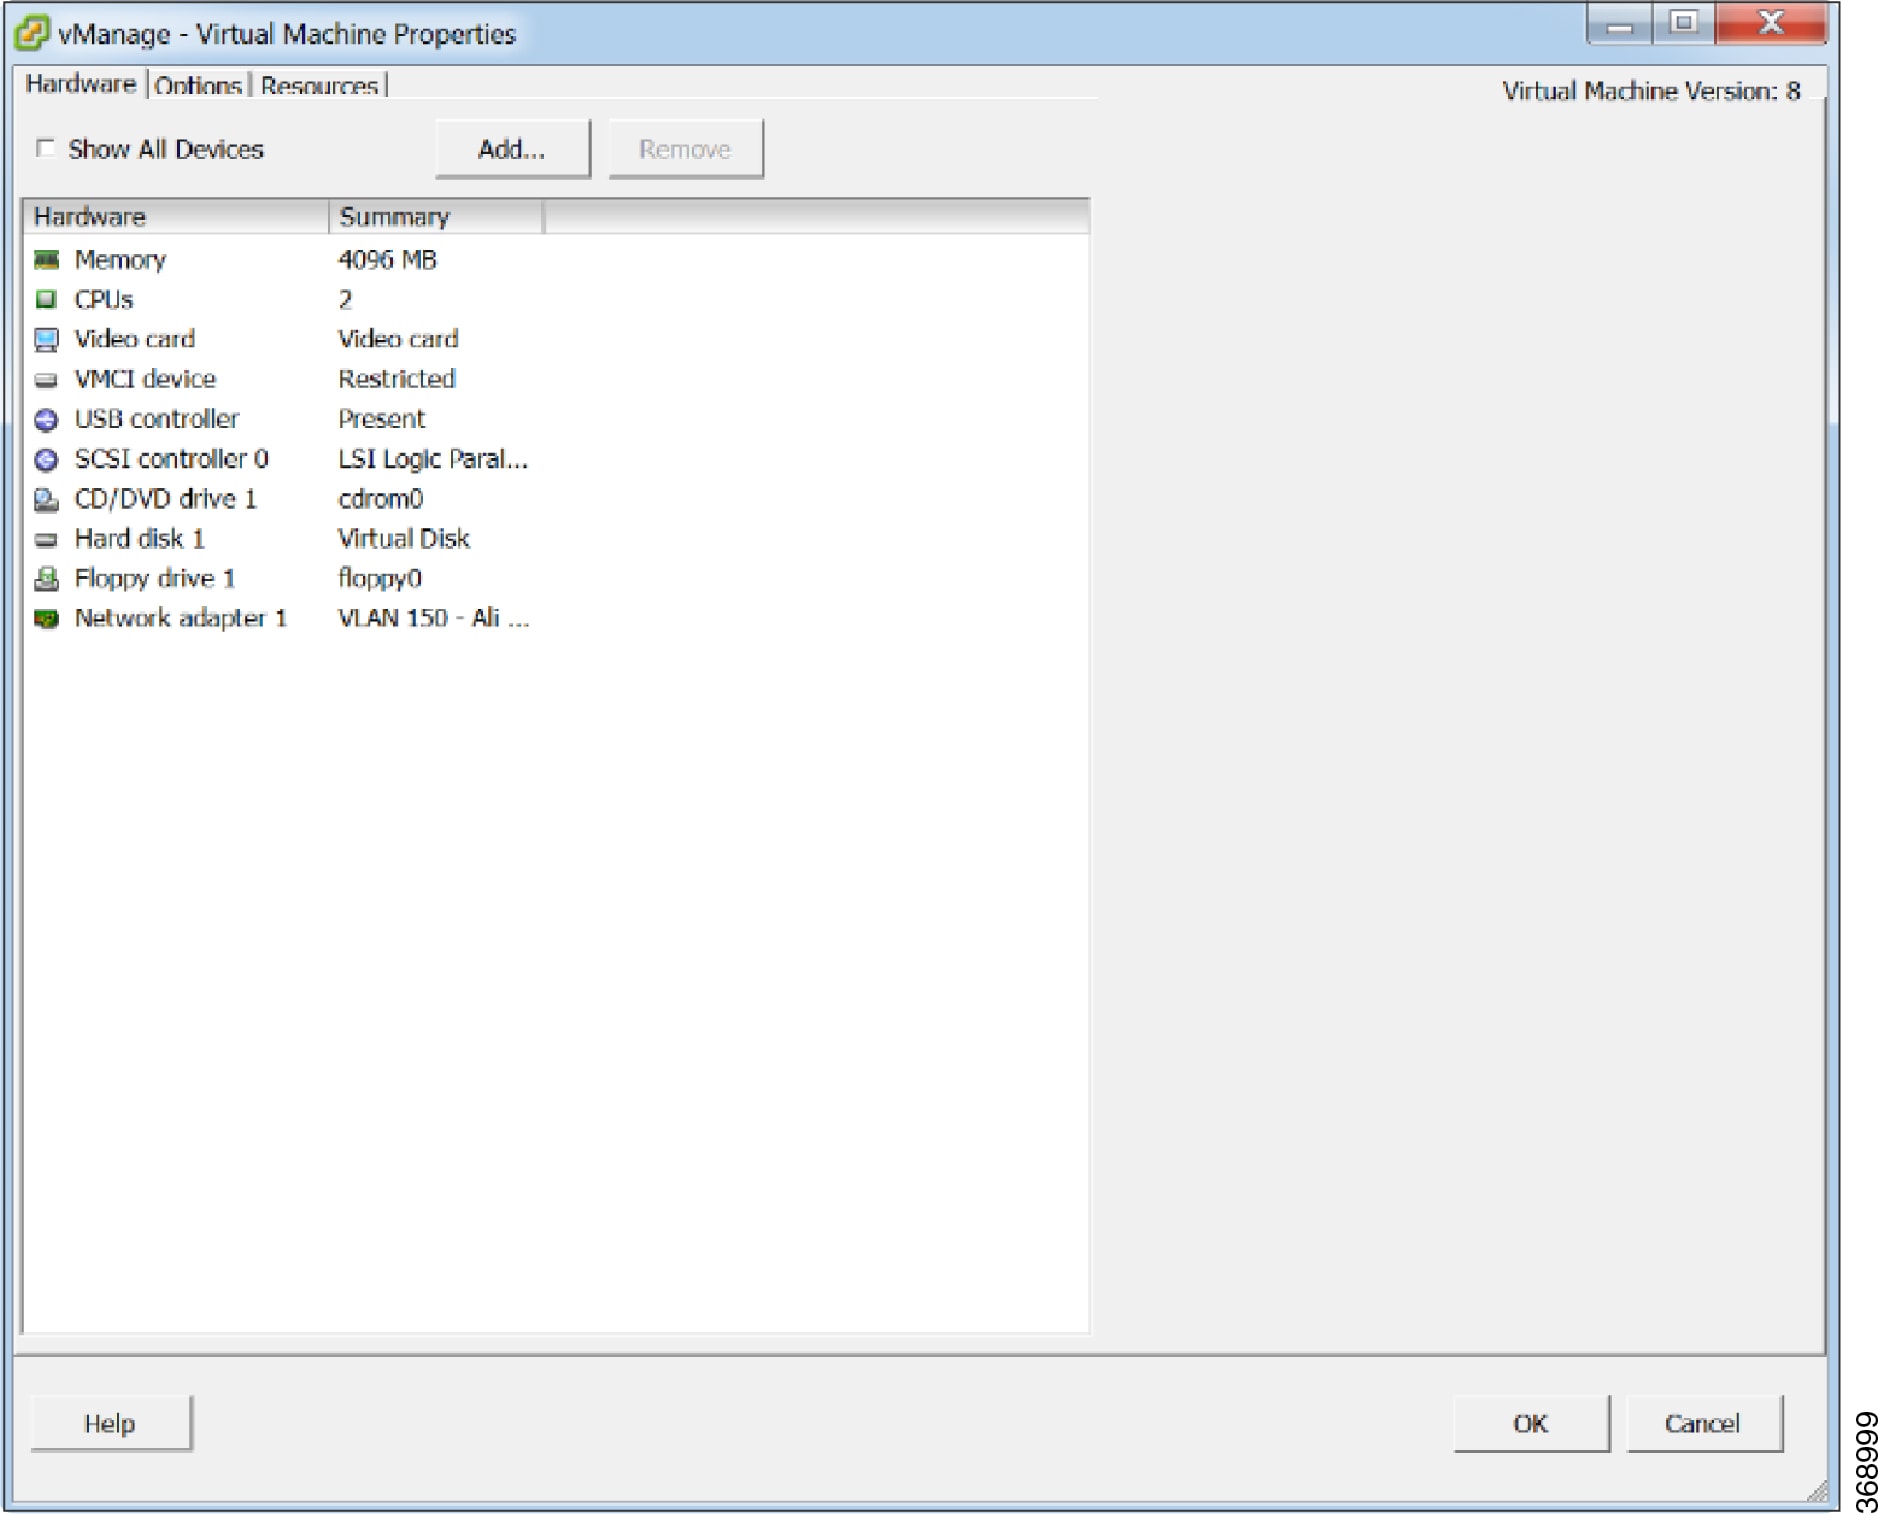
The vManage - Virtual Machine Properties screen is displayed.
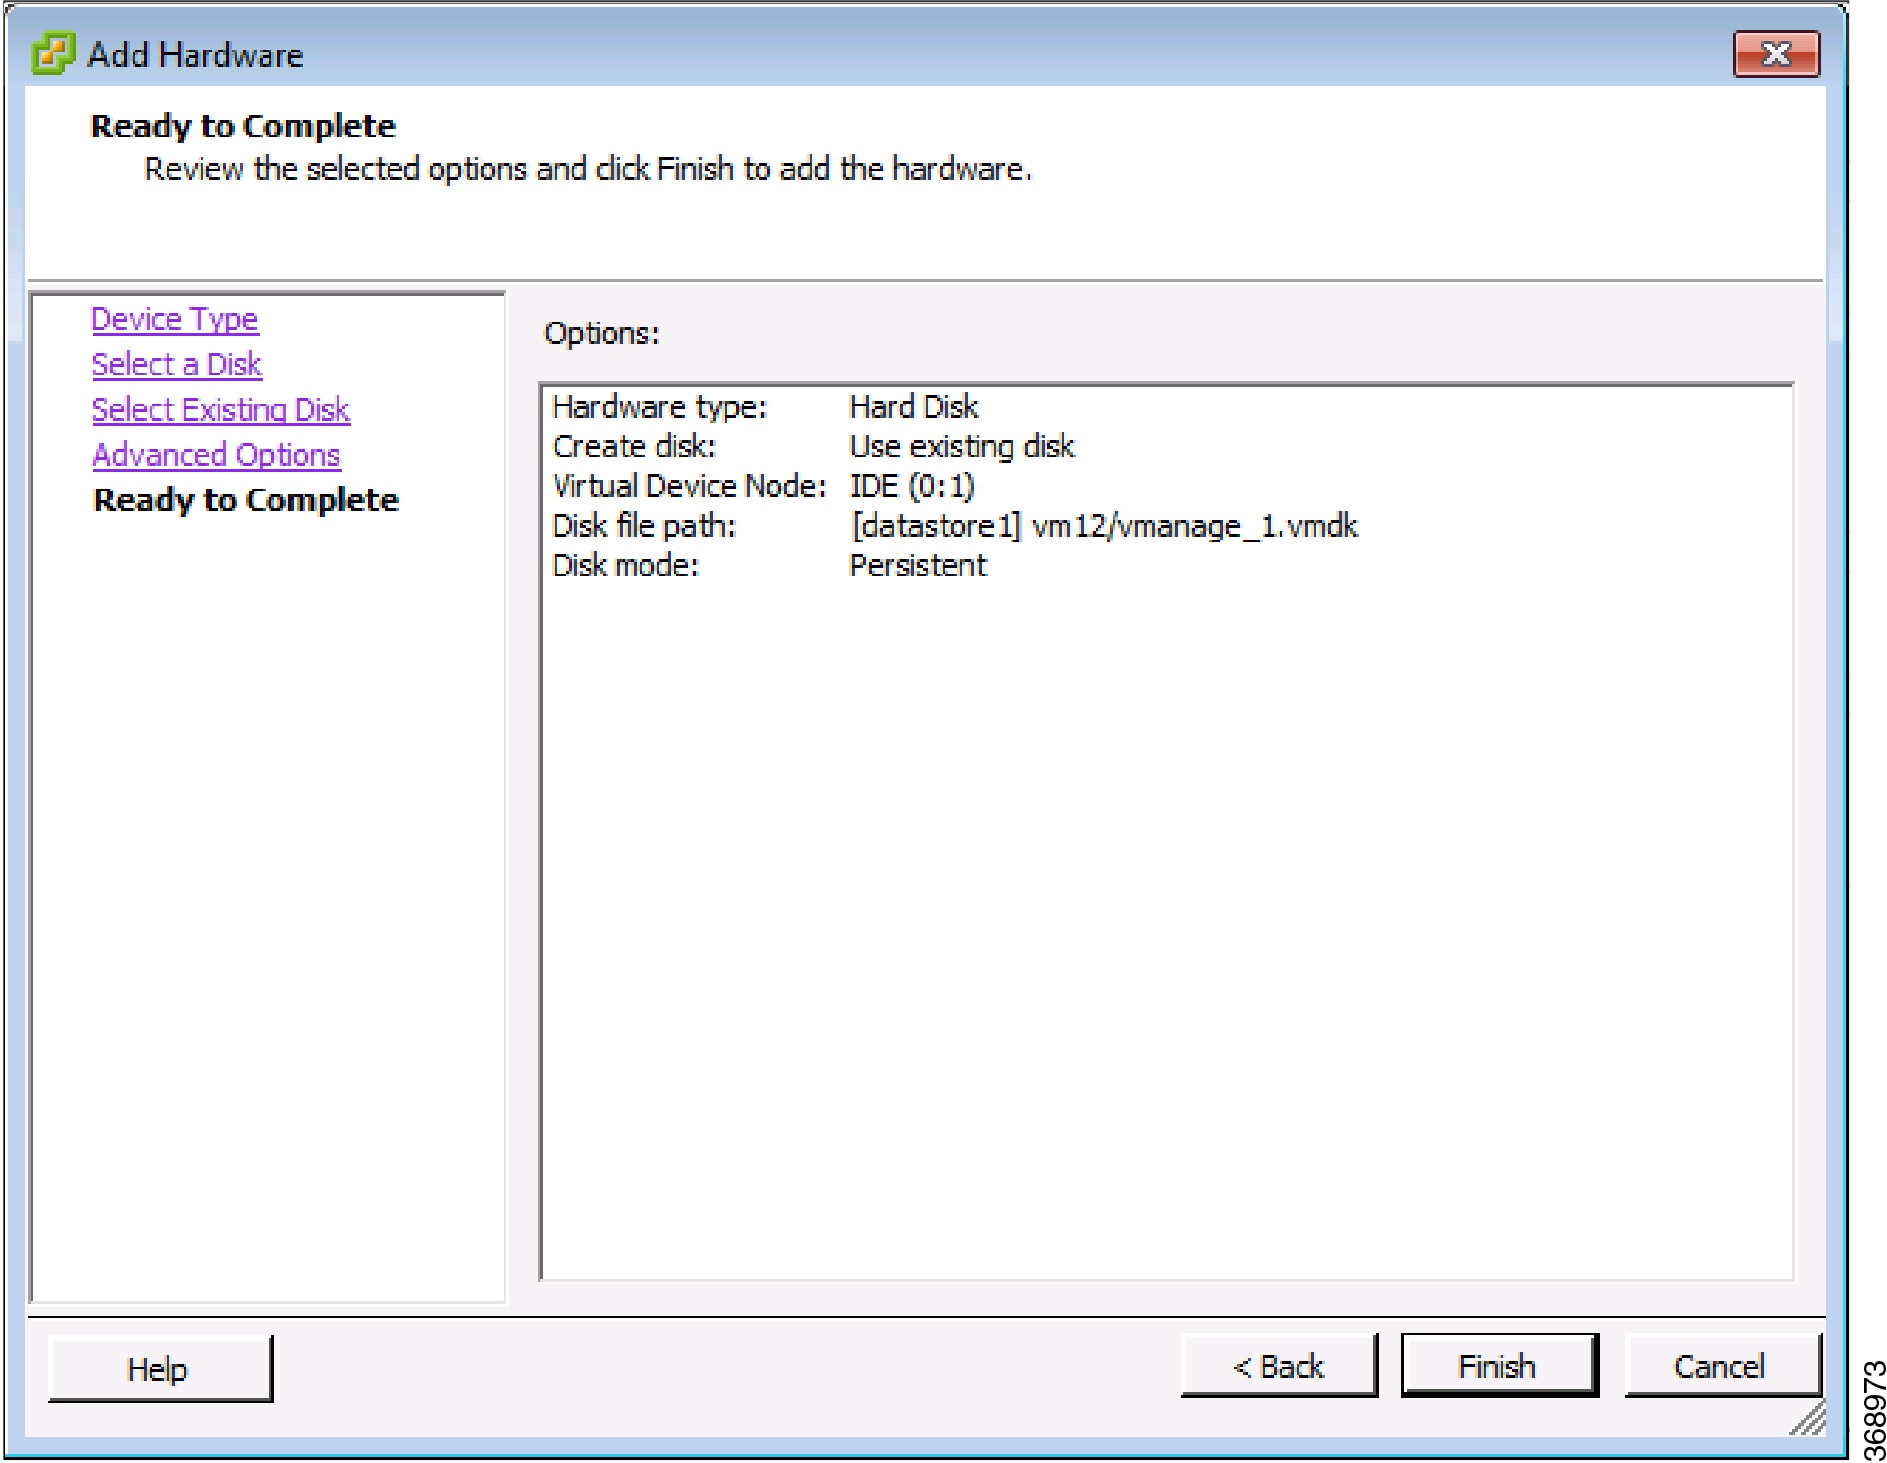
Click Add to add a new virtual disk, and click OK.
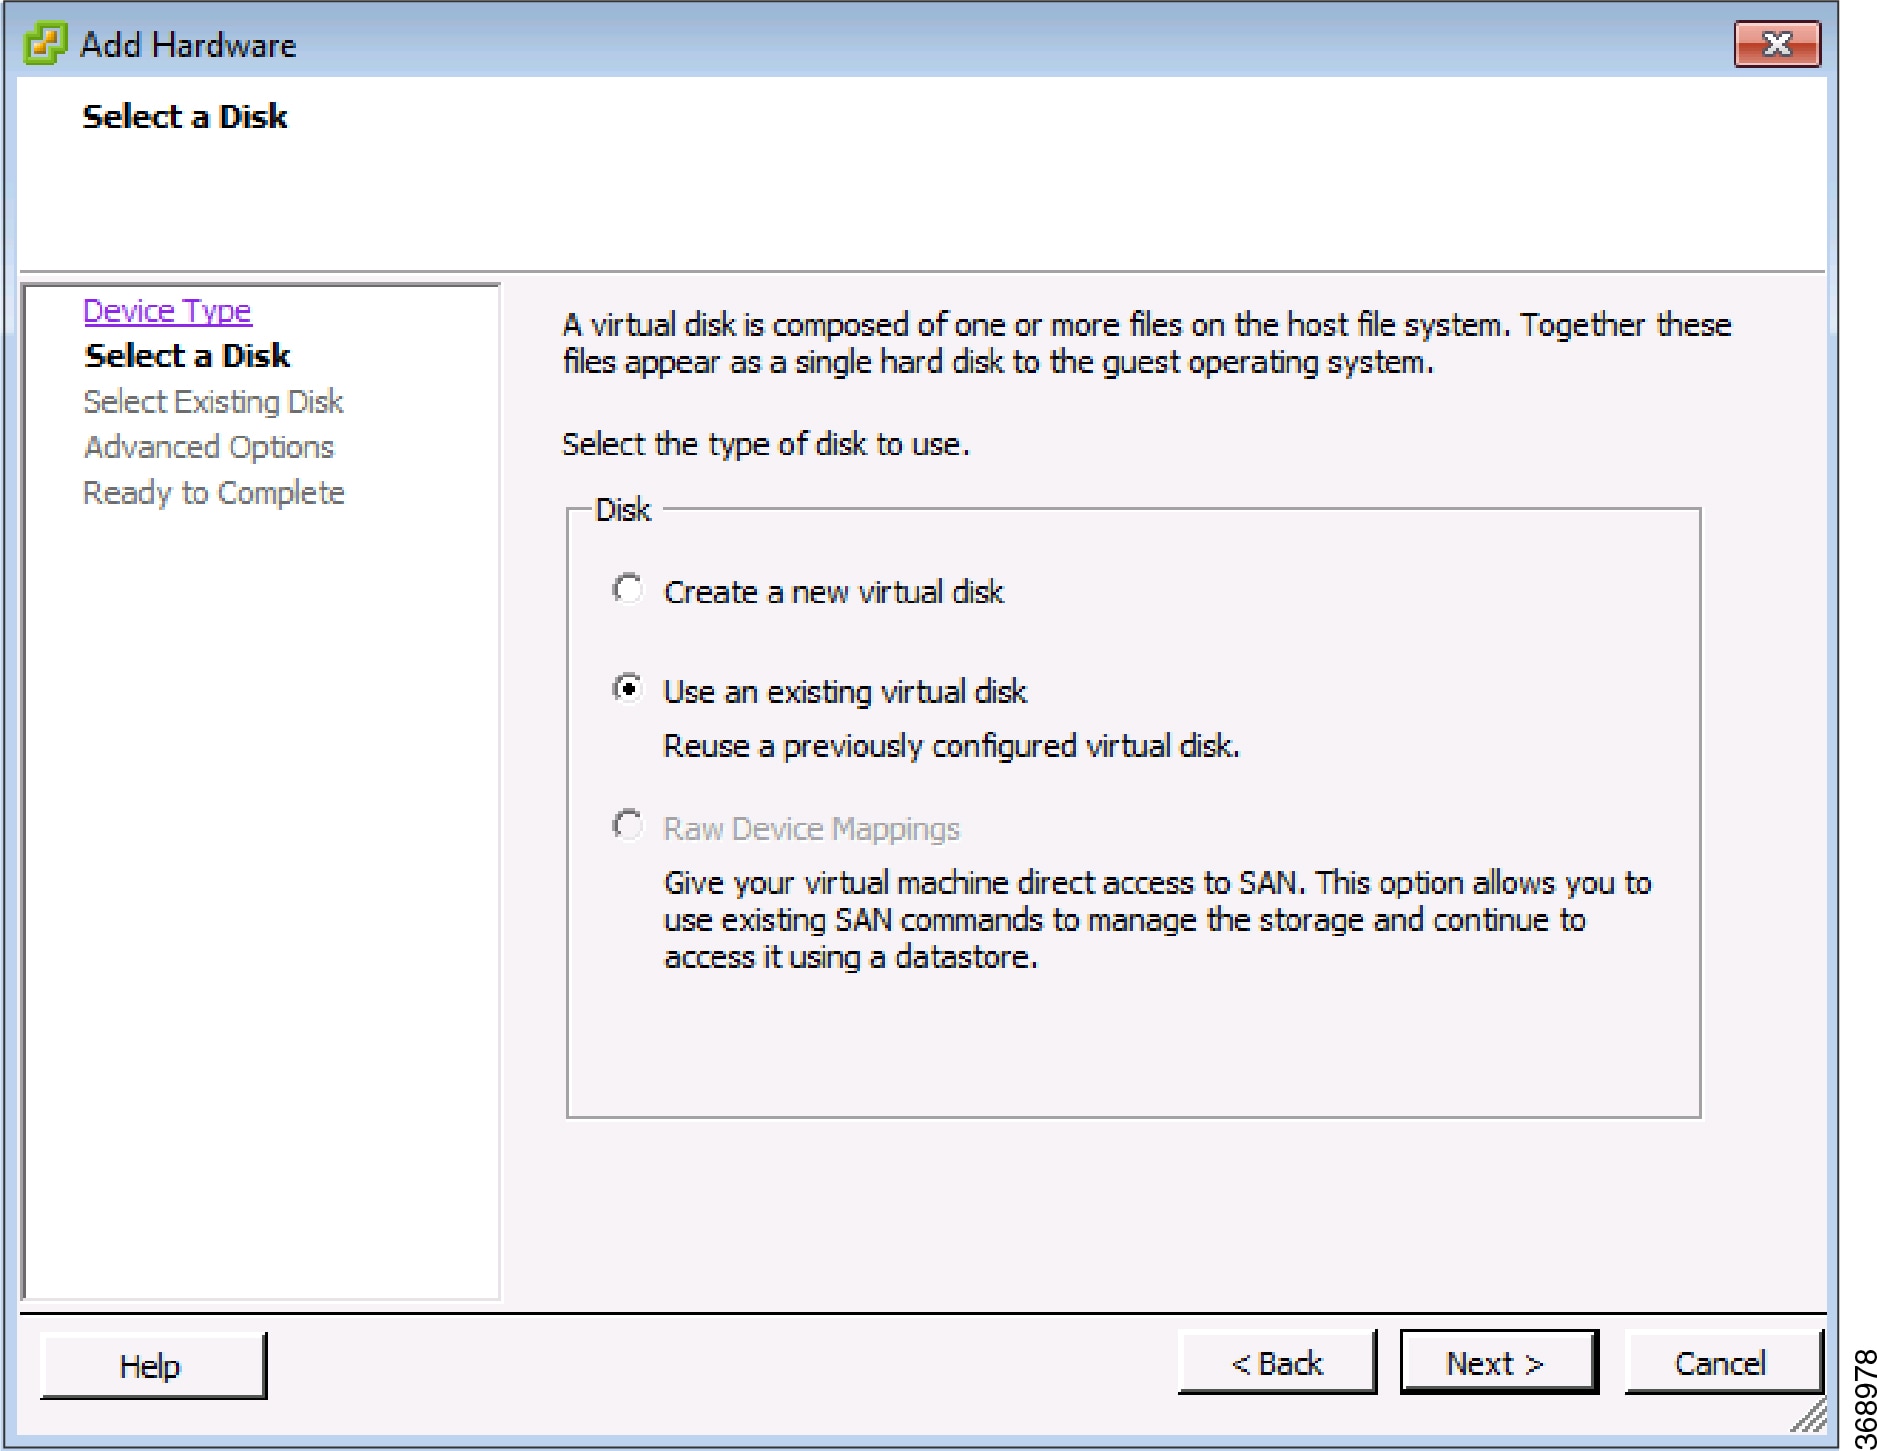
The Add Hardware window opens with the Select a Disk screen displayed. If you have a backup of the vManage NMS database, complete
Step 4. If you do not have a backup database, skip to Step 5.
If you have a backup of the vManage NMS database, complete the following steps:
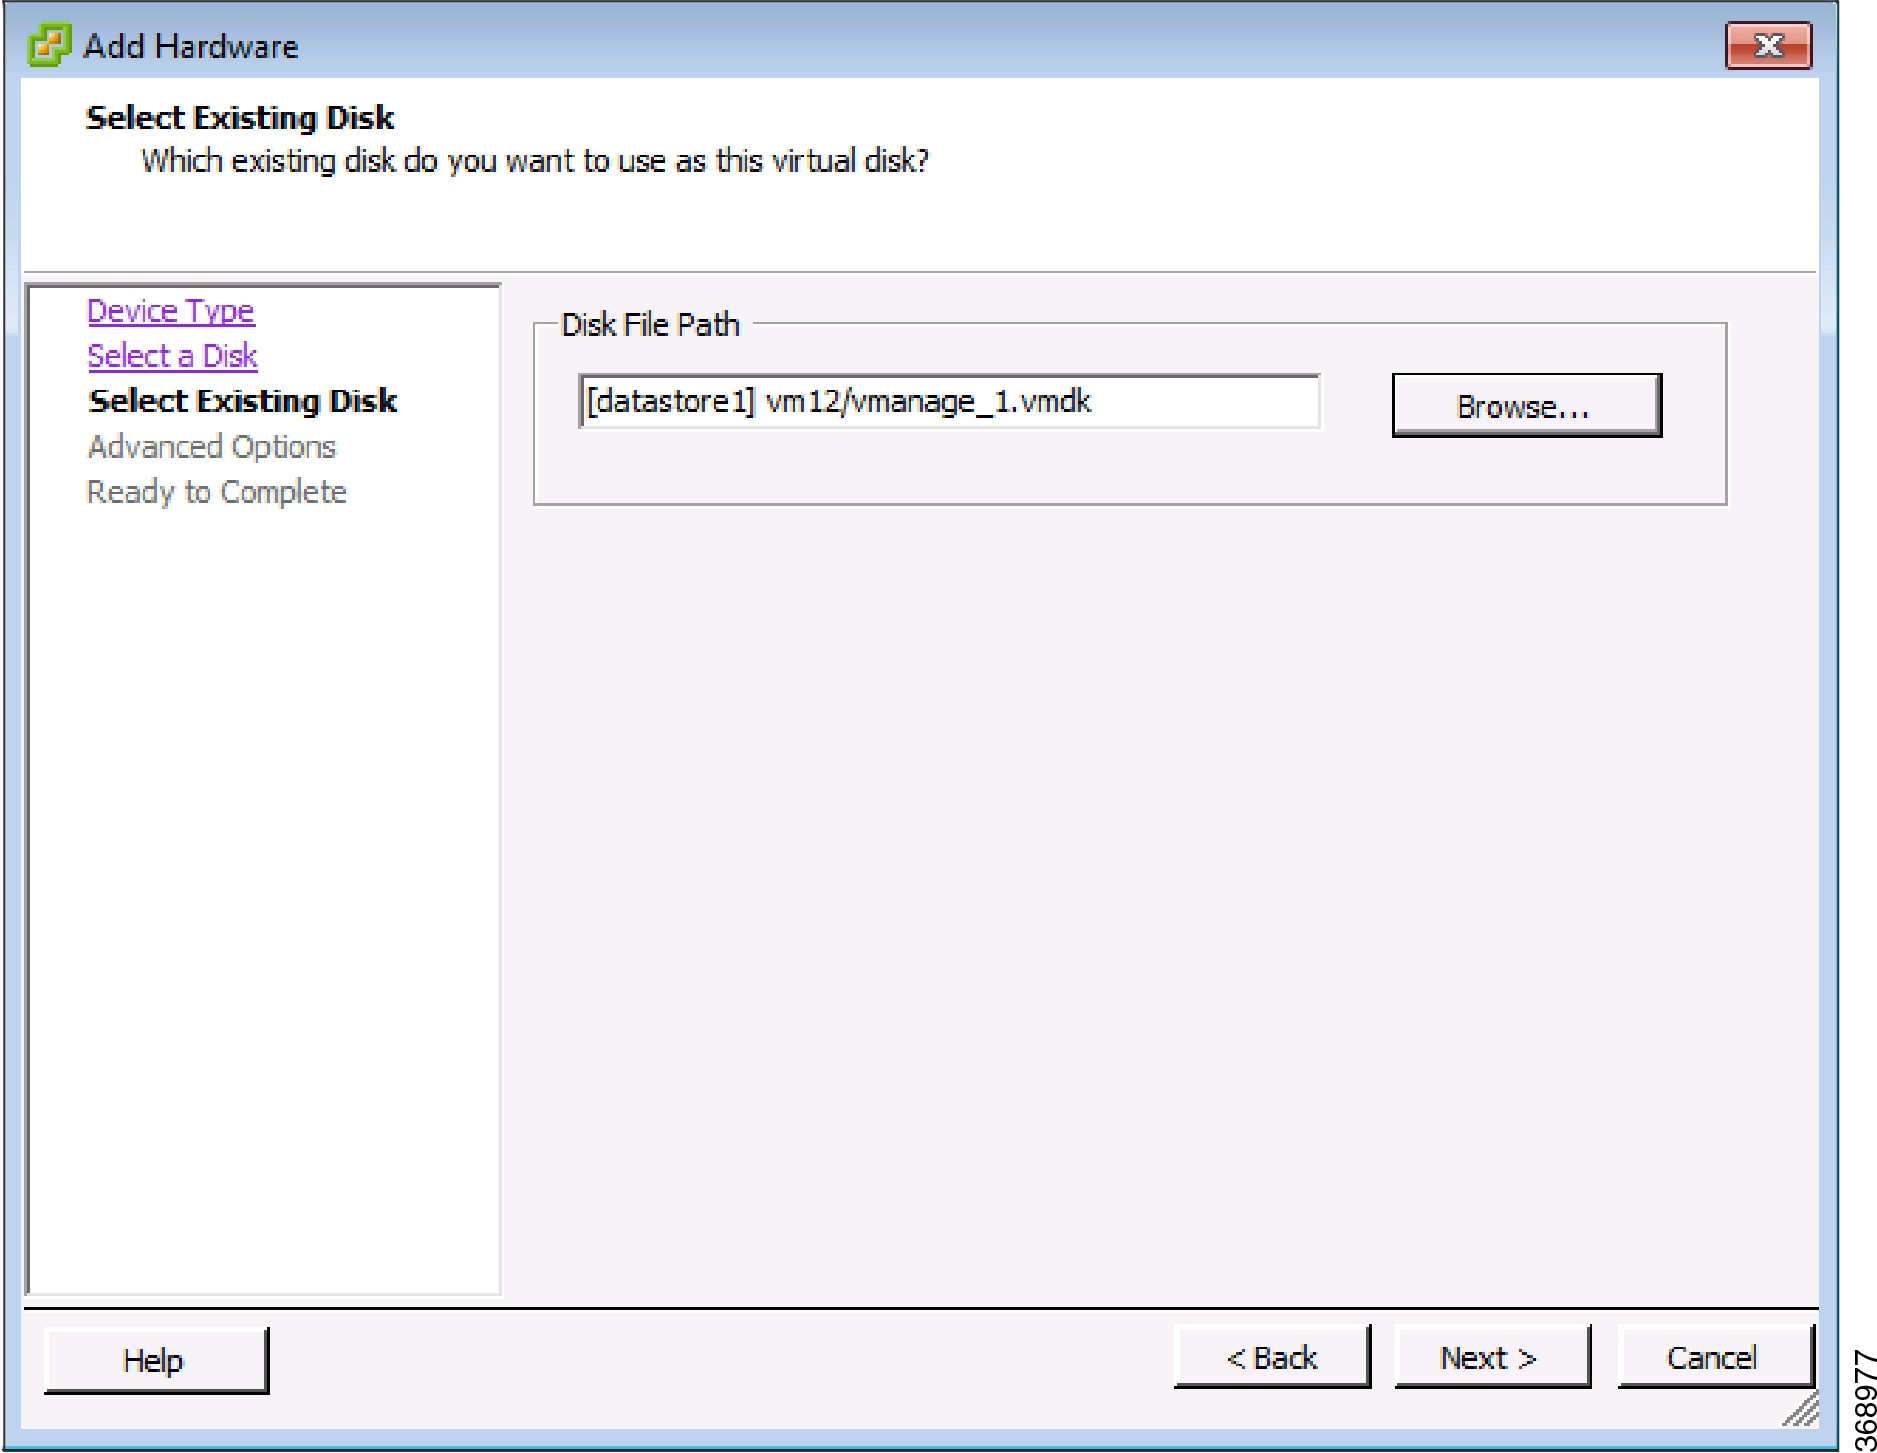
In the Select a disk screen, select Use an existing virtual disk, and click Next.
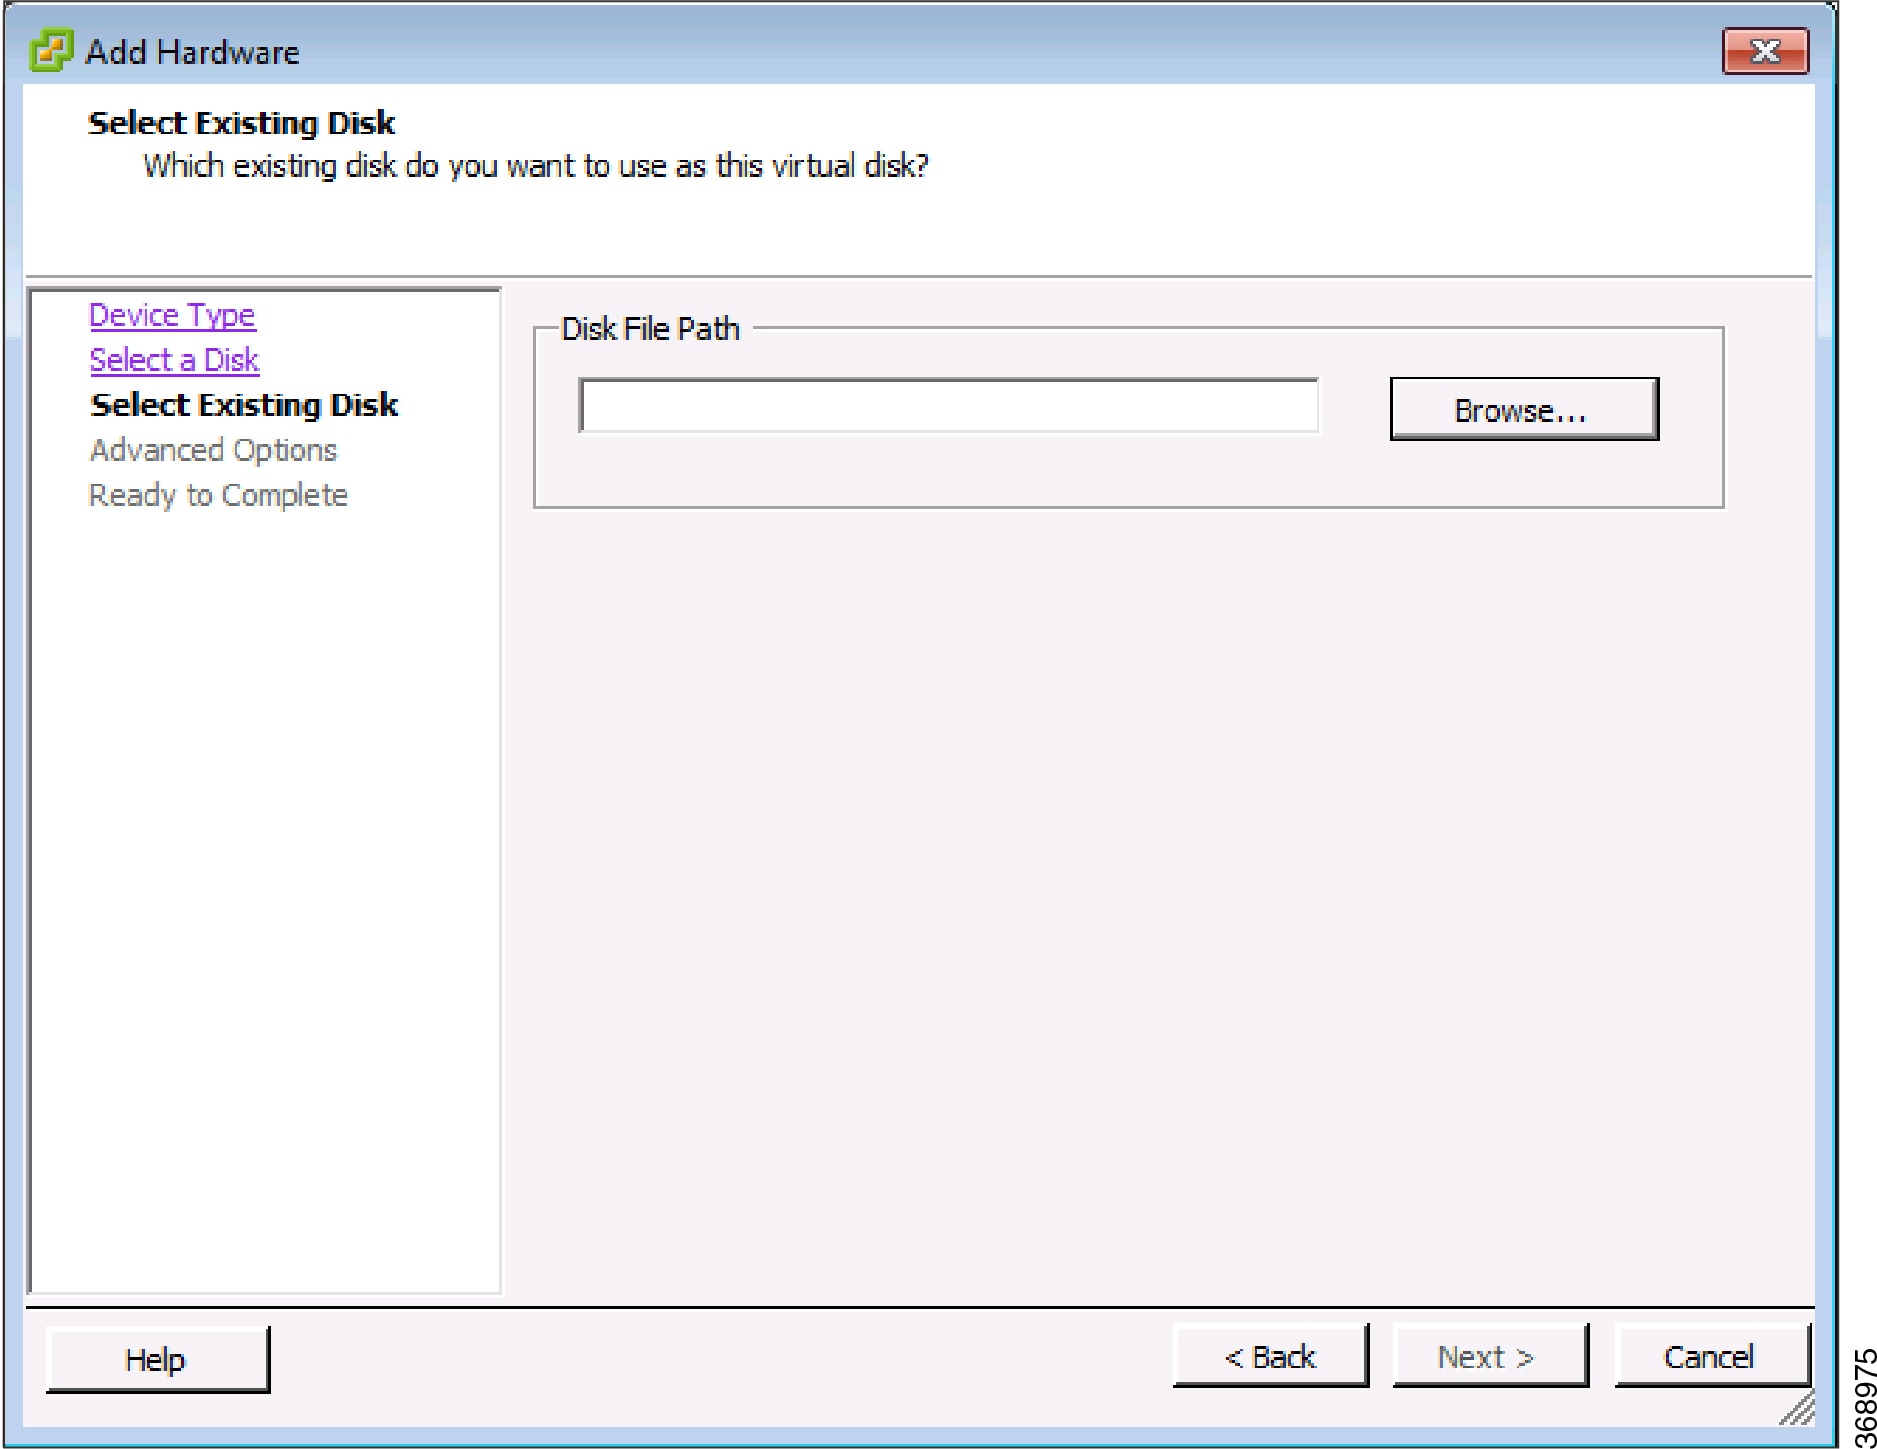
The Select Existing Disk screen is displayed.
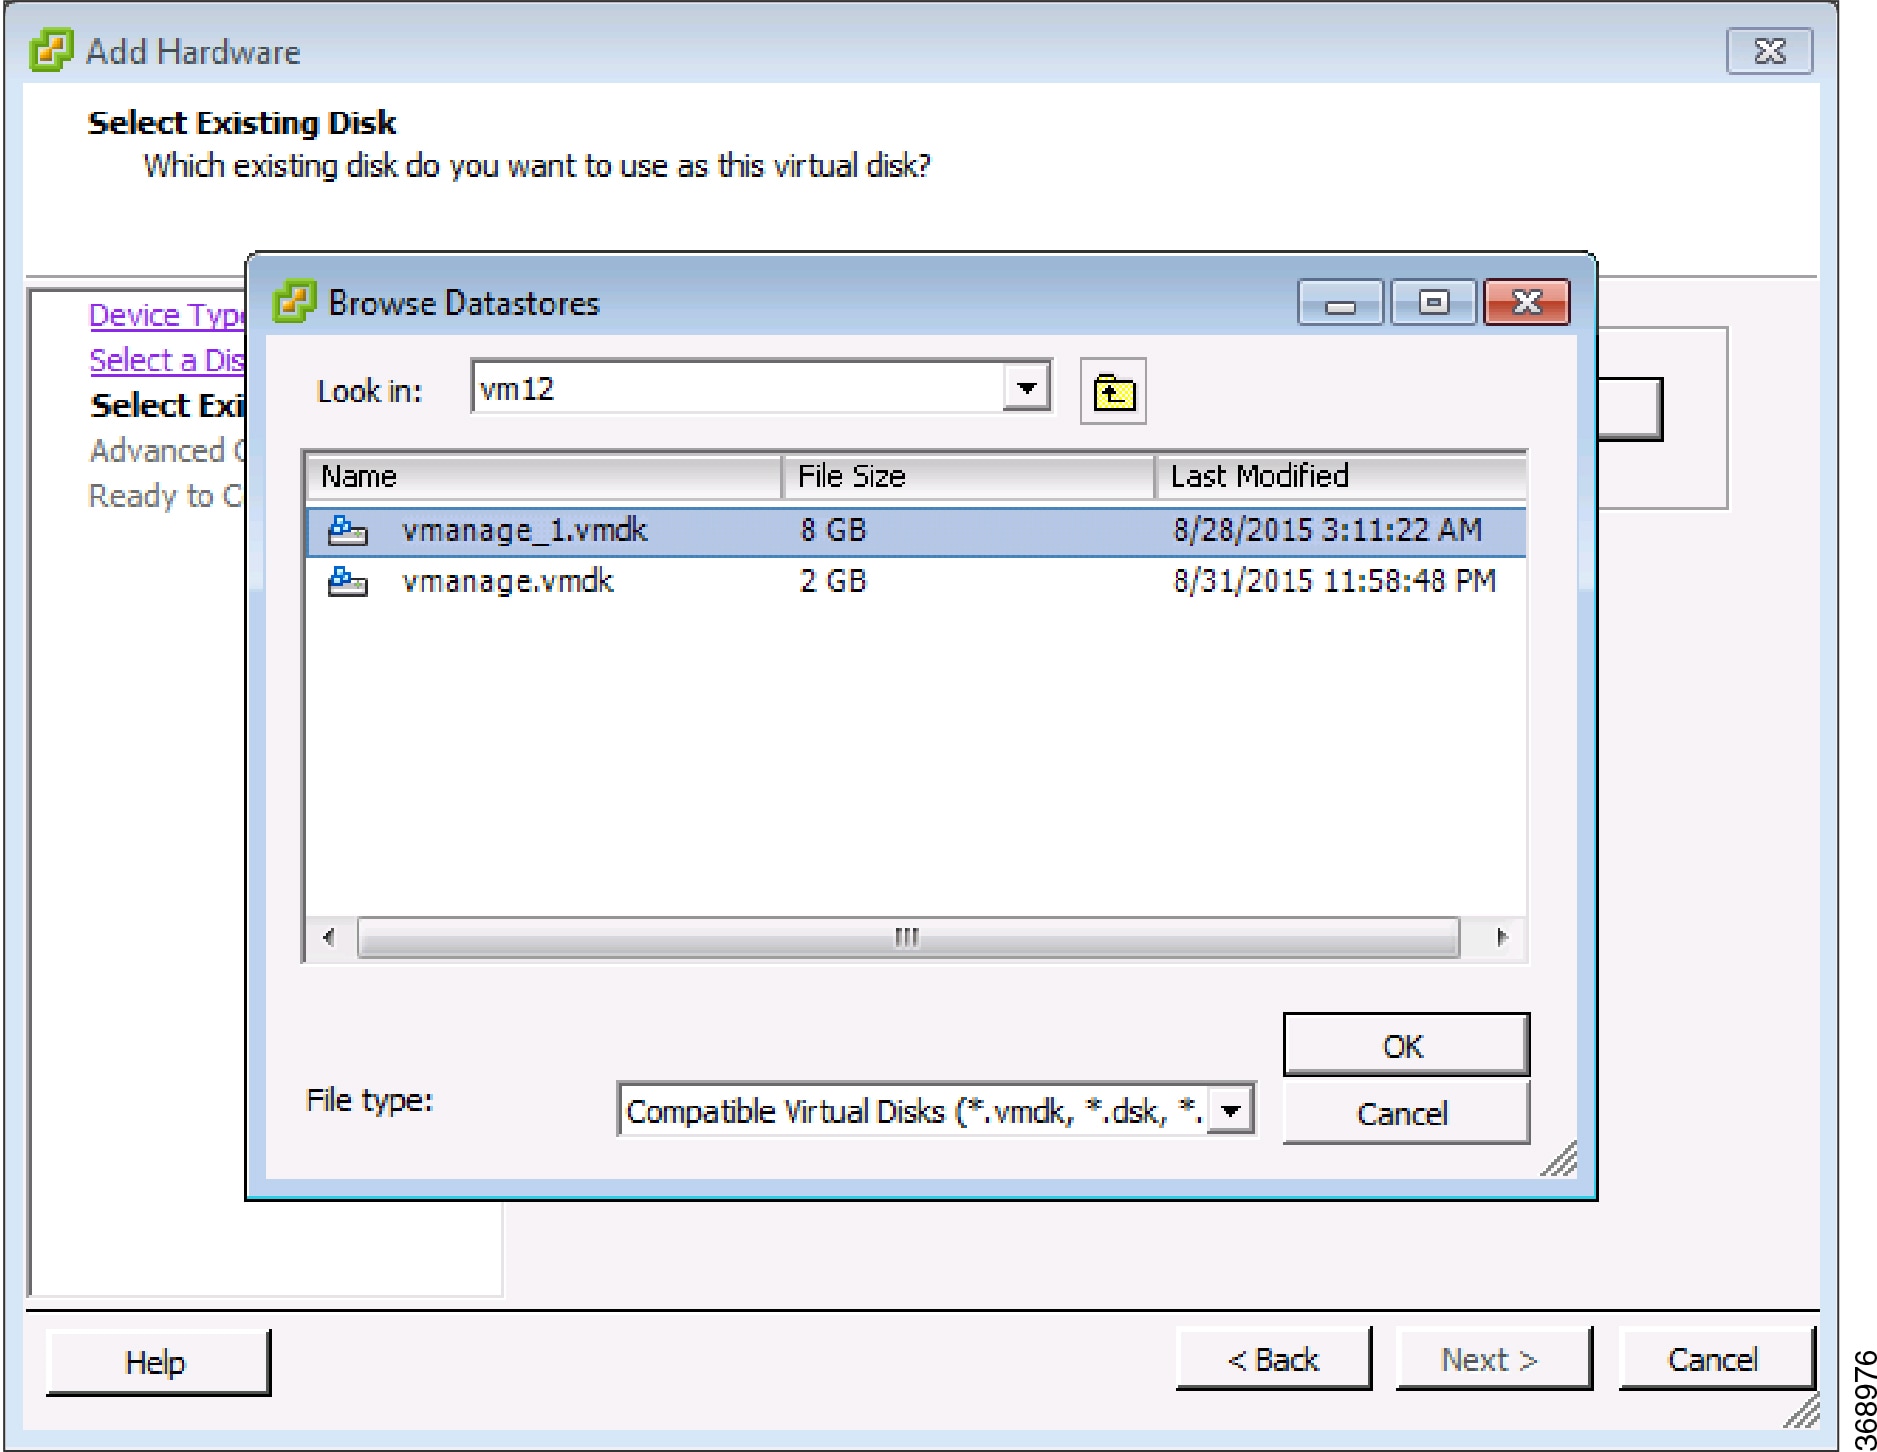
Click Browse.
The Browse Datastores window opens and displays the datastores on the server
Navigate to the location of your backup database, and click OK.
In the Select Existing Disk screen, click Next.
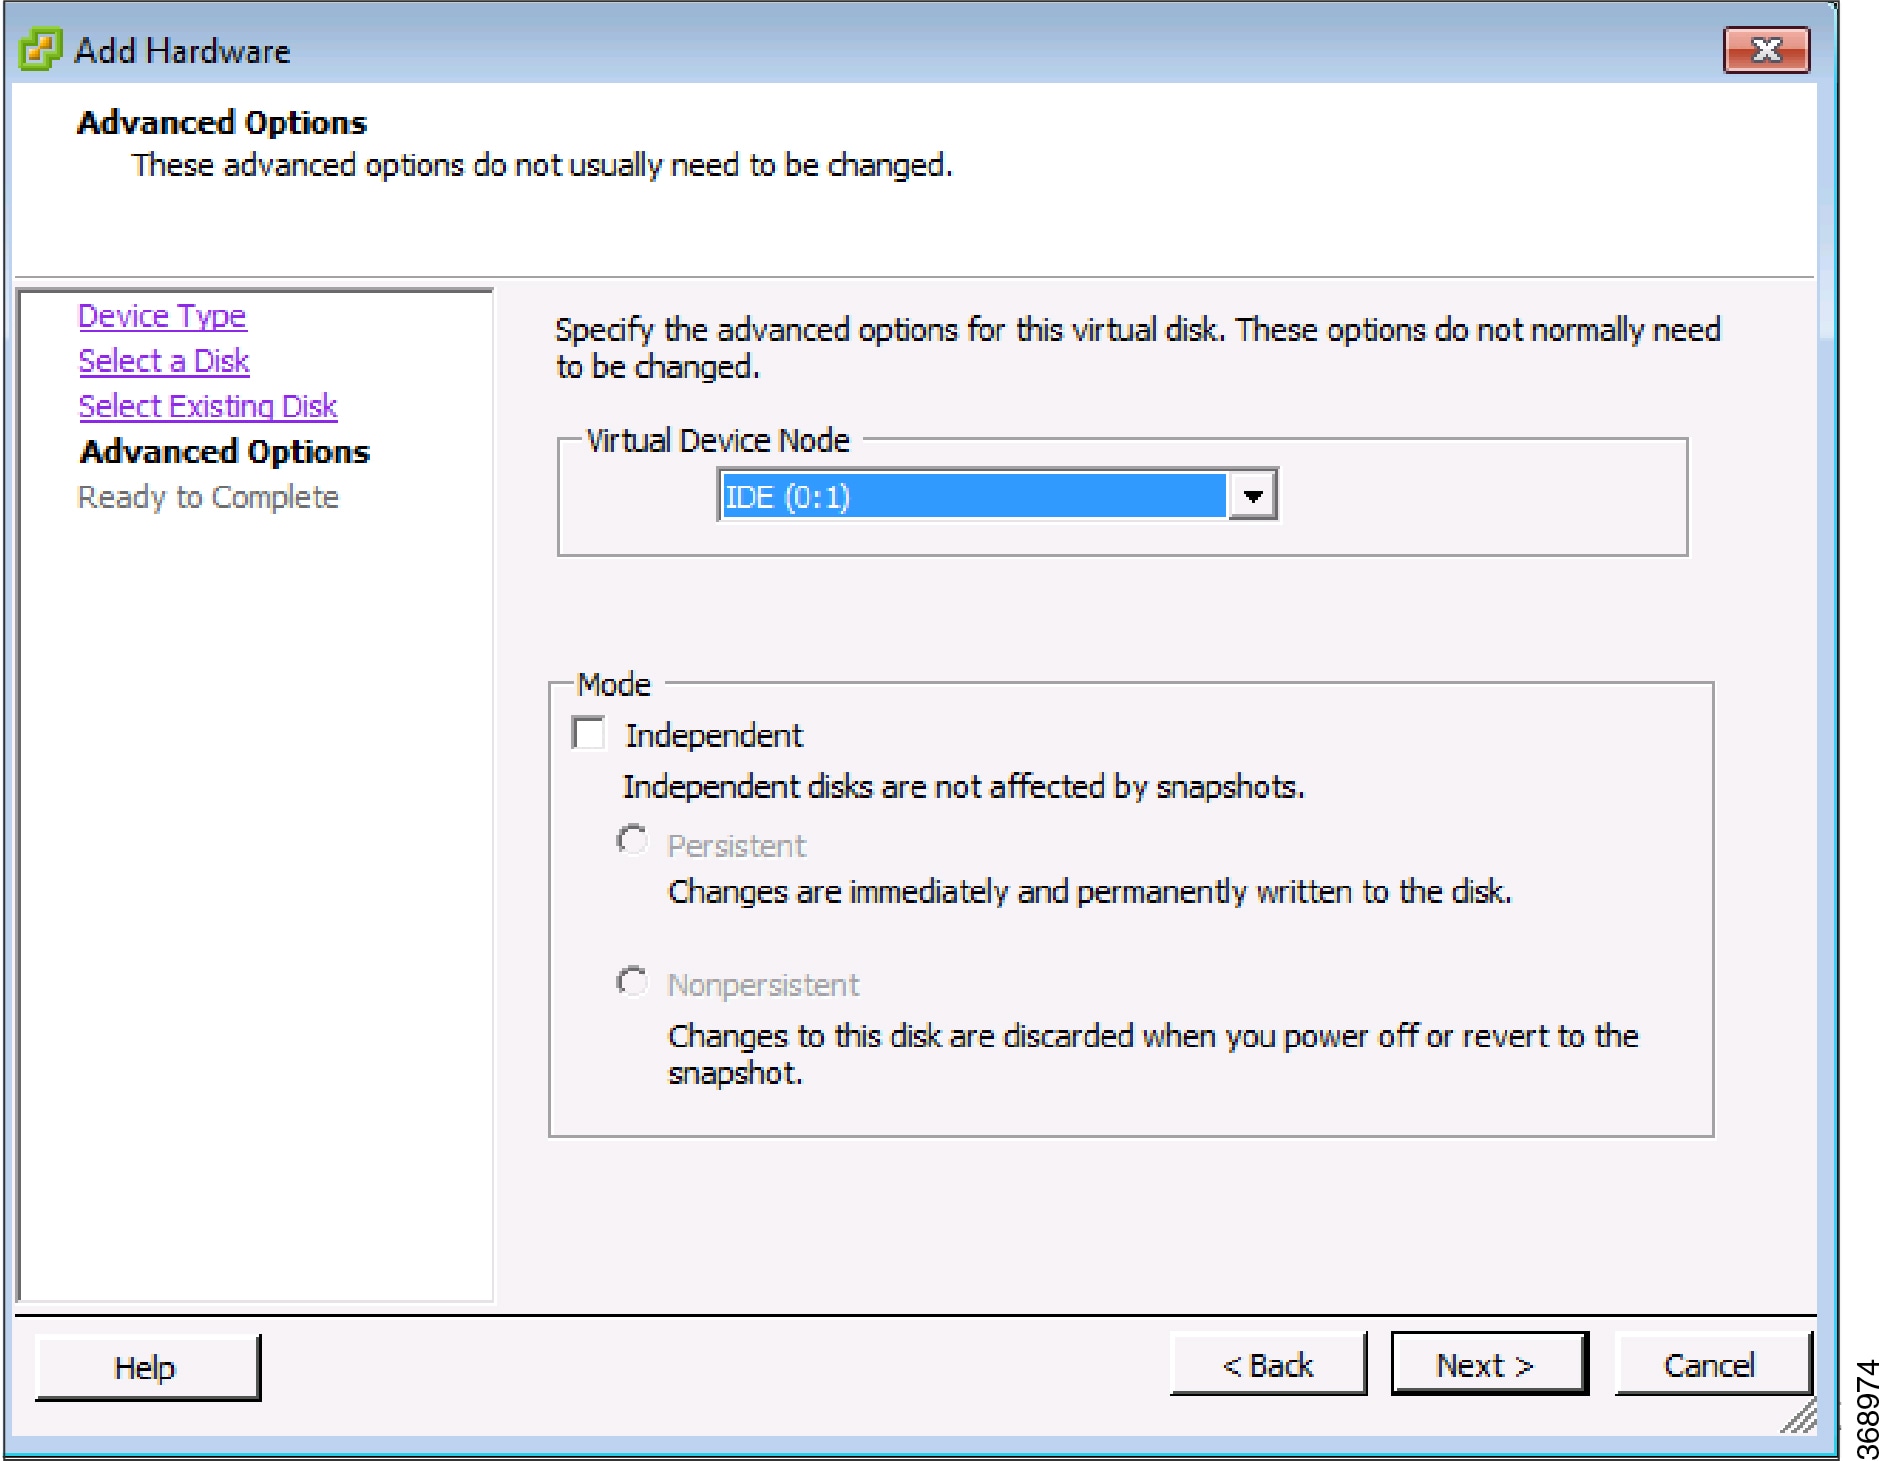
The Advanced Options screen is displayed. Skip Step 5 and proceed to Step 6.
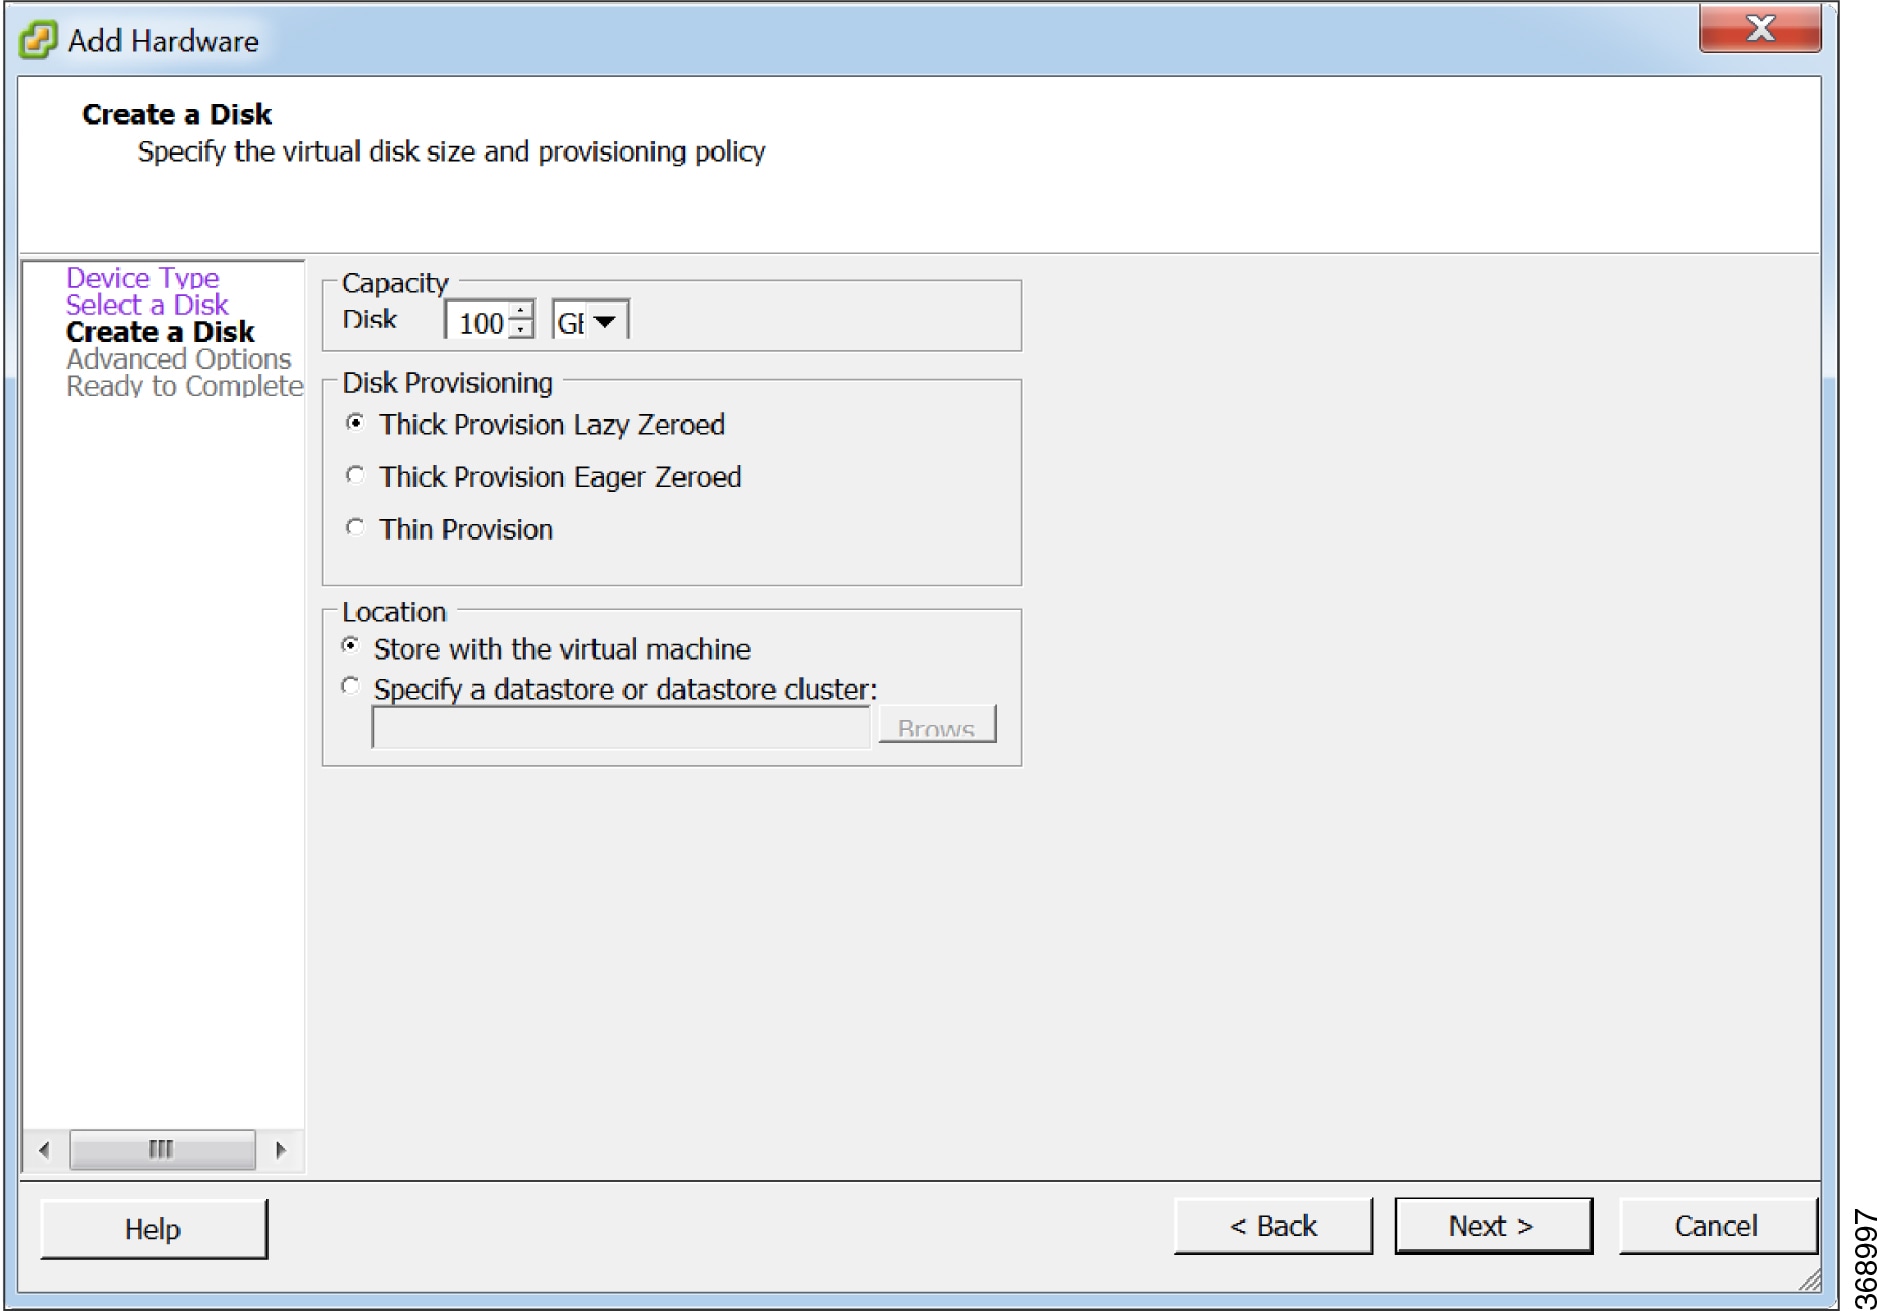
If you do not have an existing vManage NMS database, you must create a new virtual disk for the vManage database:
In the Select a Disk screen, select Create a new virtual disk and click Next.
The Create a Disk screen is displayed.
Enter a disk capacity for the vManage database of 100 GB, and click Next.
The Advanced Options screen is displayed.
In the Advanced Options screen, select IDE for the virtual device node, and click Next.
The Ready to Complete screen is displayed.
Click Finish.
The data volume is added to the vManage NMS.
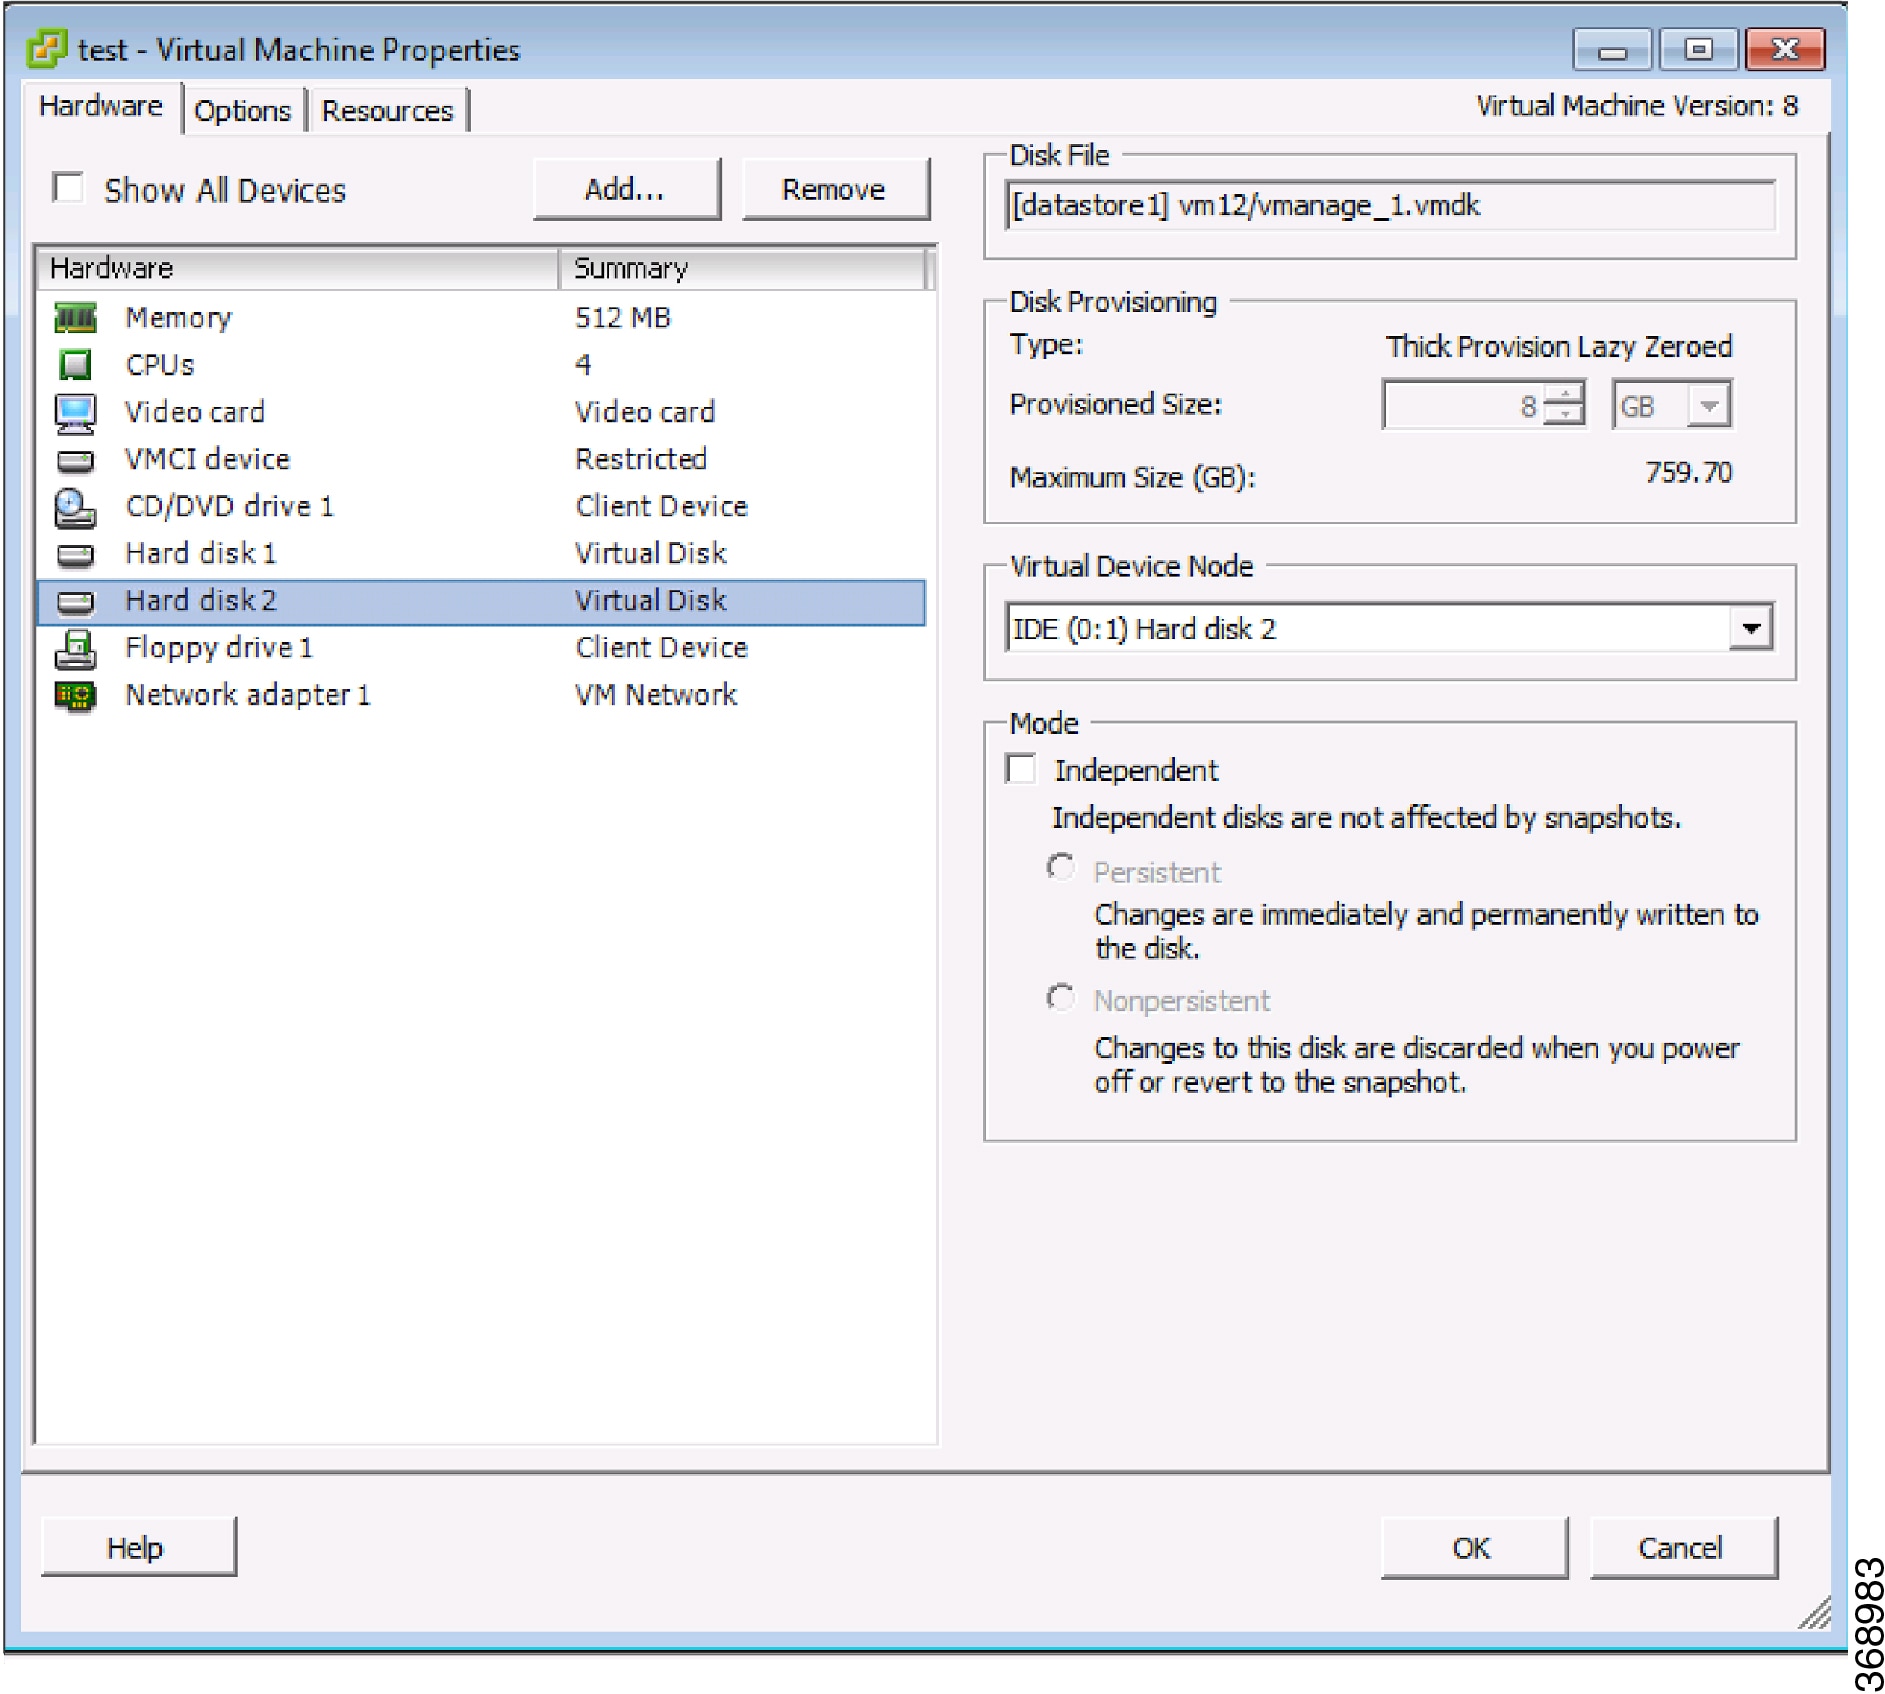
To verify that the new disk has been created, in the vManage Virtual Machine Properties screen, select the Hardware tab. Hard
disk 2—the virtual disk that stores the vManage database—is shown in the hardware list.
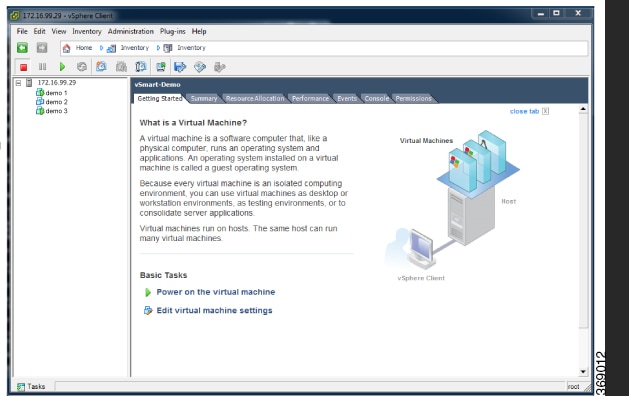
In the left navigation bar of the vSphere Client, select the vManage VM instance you just created, and click Power on the
virtual machine.
The vManage virtual machine is powered on.
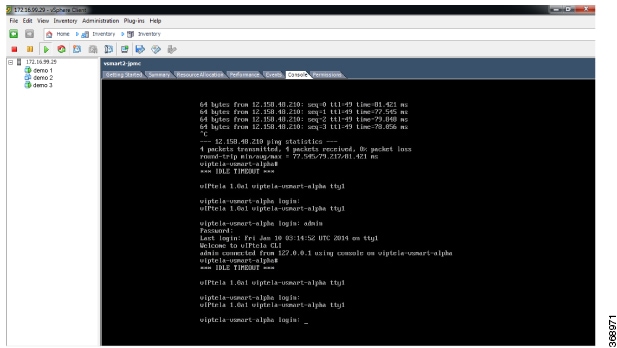
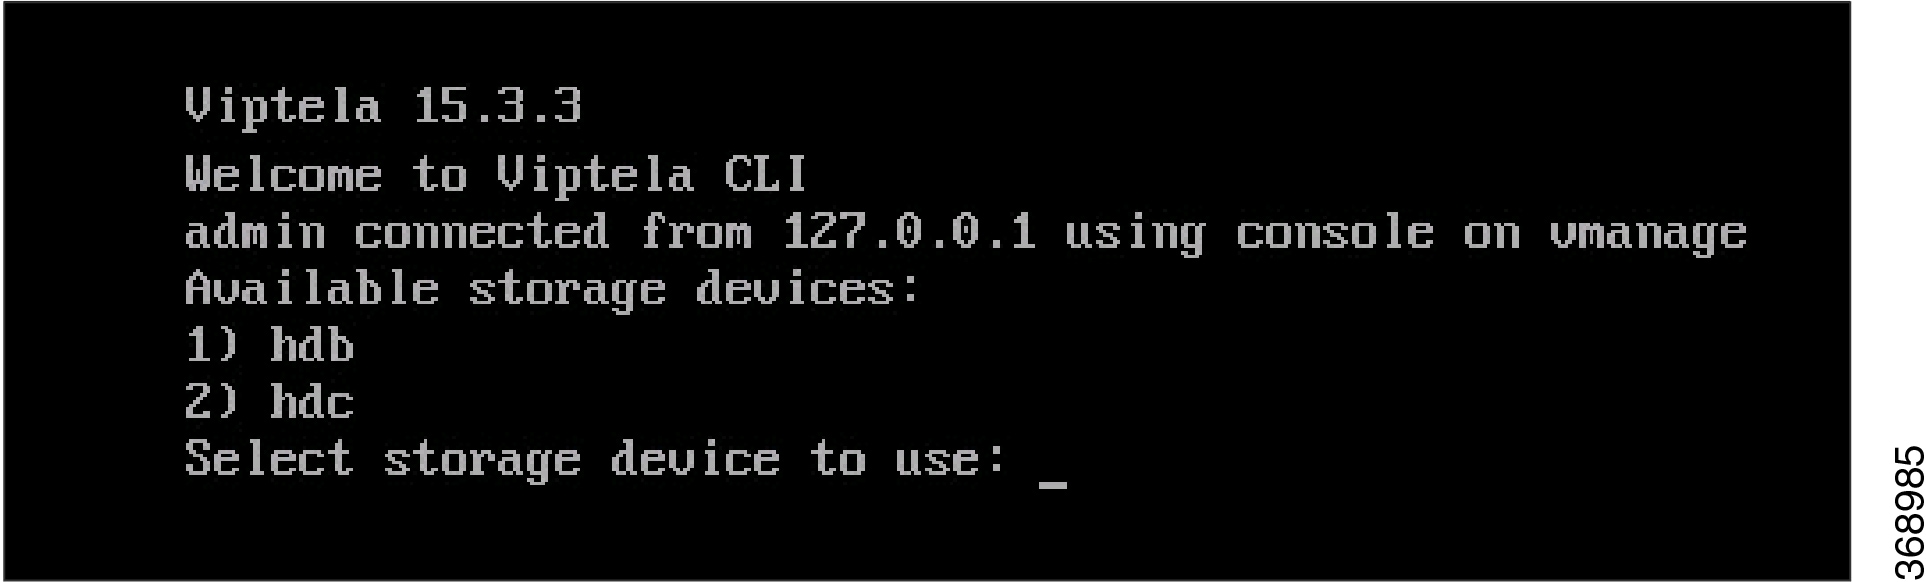
Select the Console tab to connect to the vManage console. The vManage console is displayed.
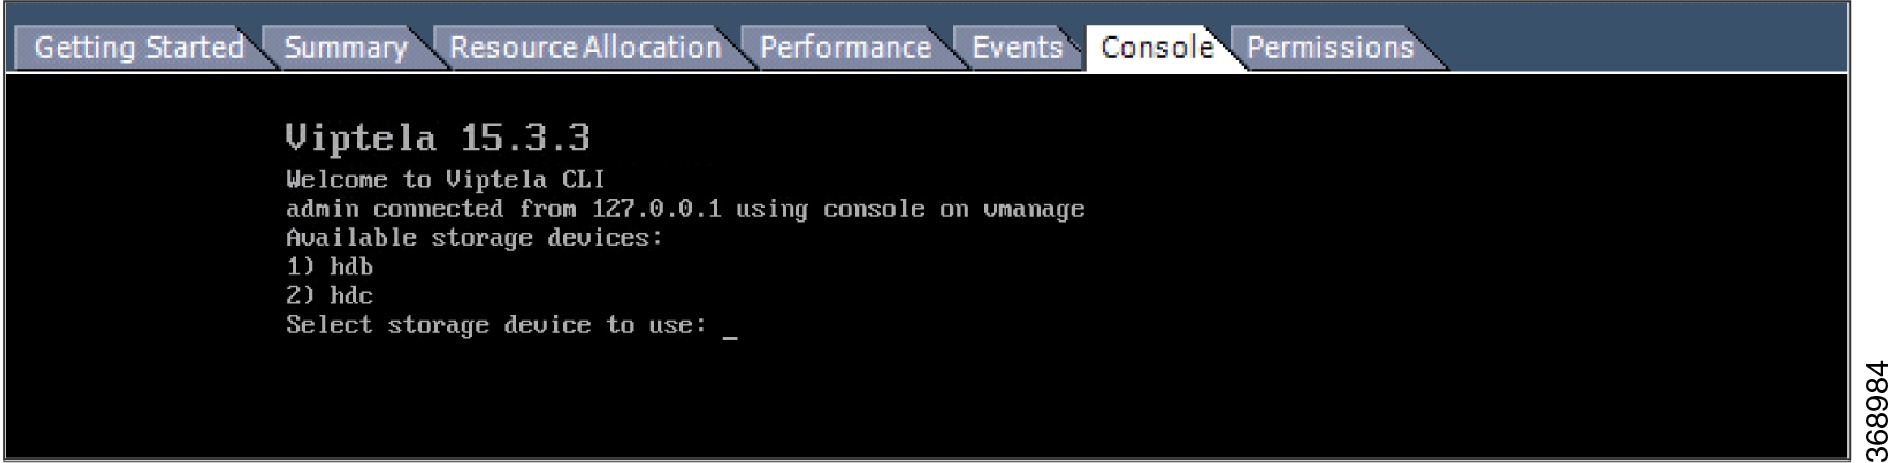
At the vManage login prompt, log in with the default username, which is admin, and the default password, which is admin. The system prompts you to select the storage device to use.
Select the appropriate storage device.
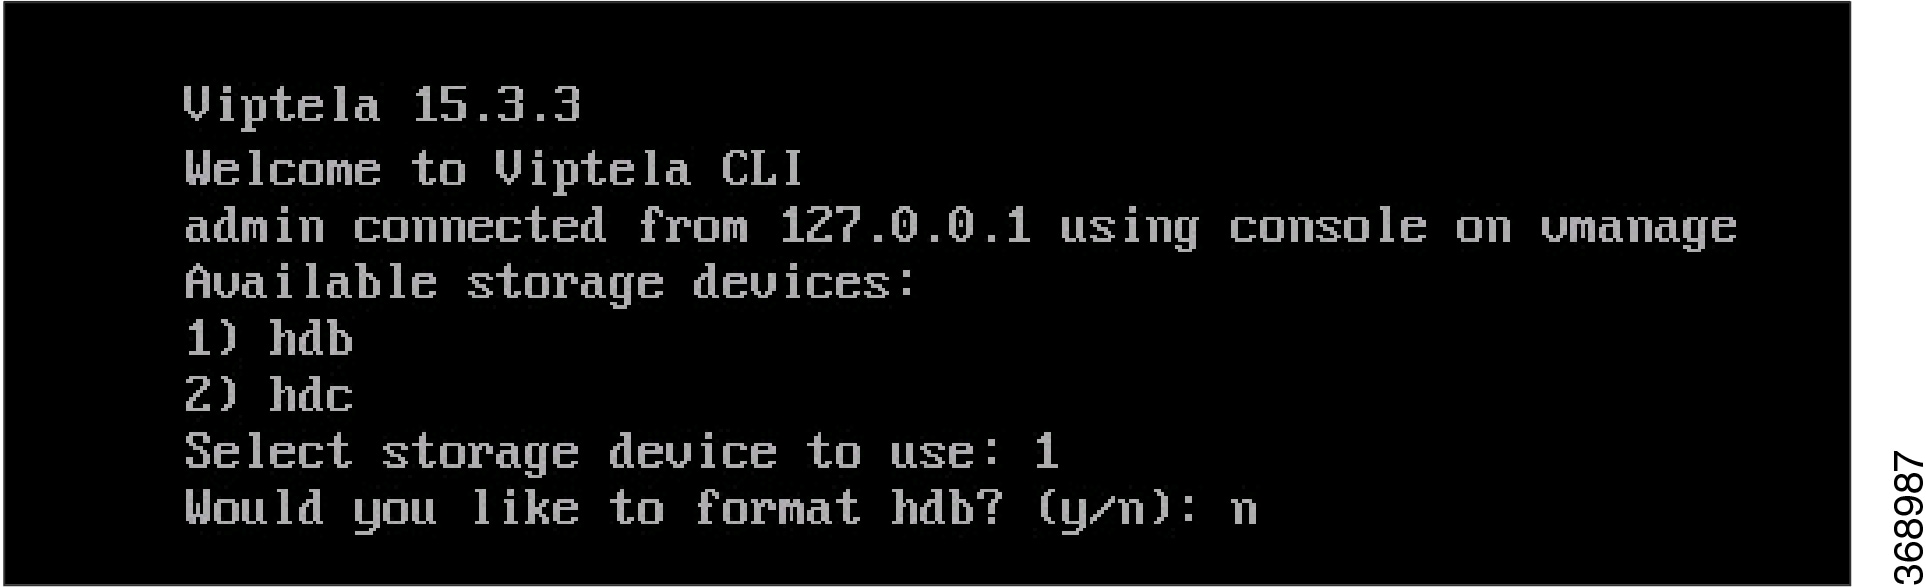
In response to the question
Would you like to format x?
:
If you attached an existing disk with a backup of the vManage database, type n.
If you created a new virtual disk for the vManage database, type y.
Configure the vManage NMS. See vManage NMS Initial Configuration .
Generate a certificate for the new vManage NMS. See Generate vManage Certificate .
Add the serial number of the new vManage NMS to all the vBond orchestrators in the overlay network, as described later in
this article.
Restore vManage NMS Using vSphere Web Client
Create a vManage VM instance. See Launch vSphere Client and Create a vManage VM Instance, in Create a vManage VM Instance
.
Log in to the vSphere Web Client.
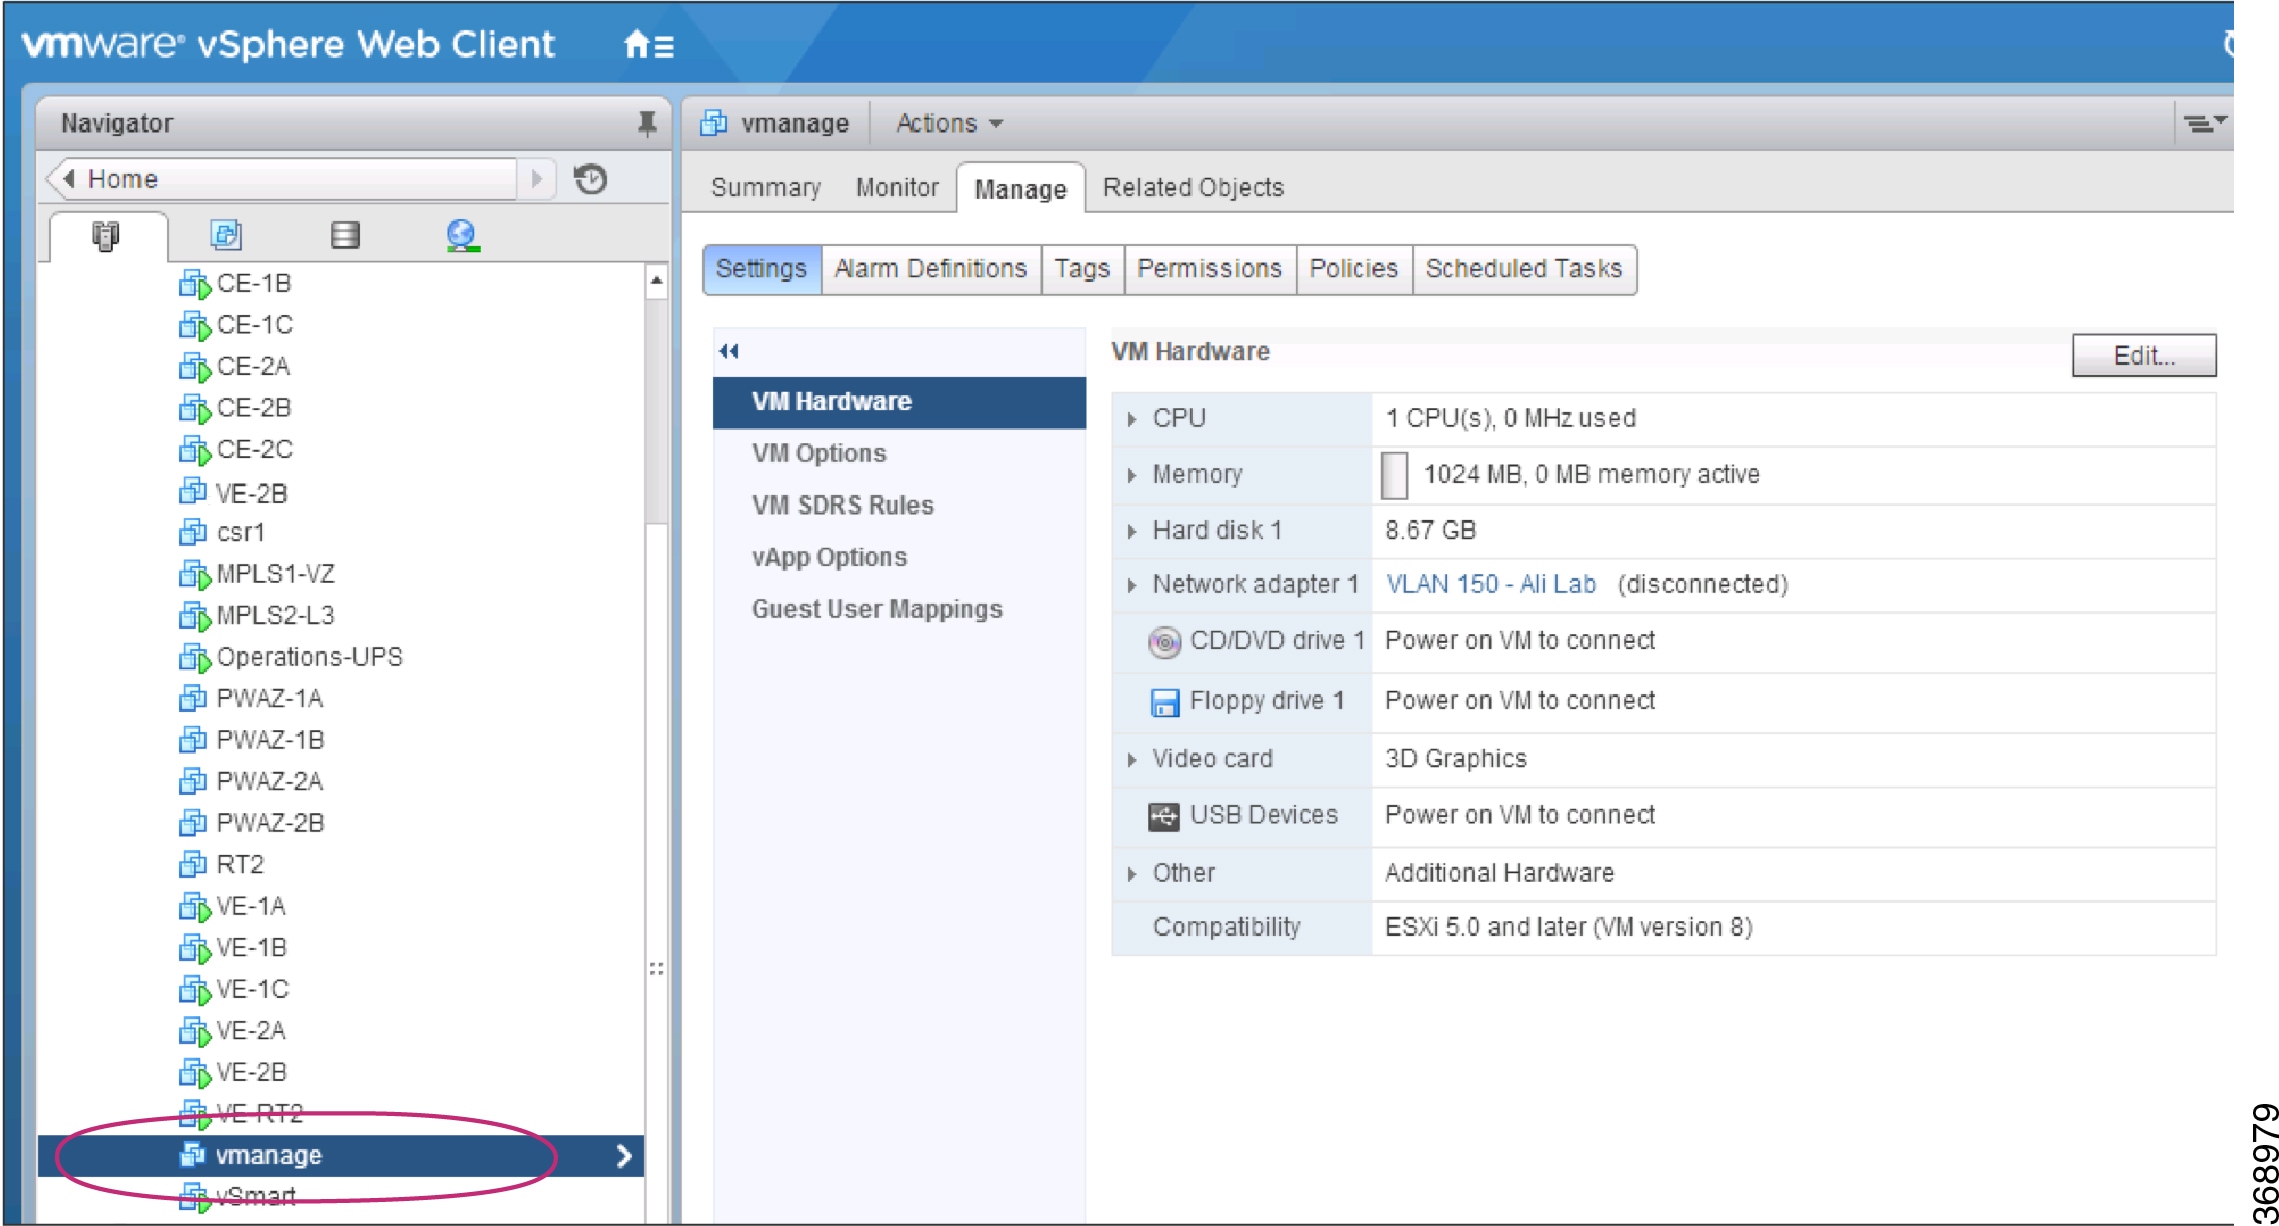
Select the VM instance for your vManage NMS.
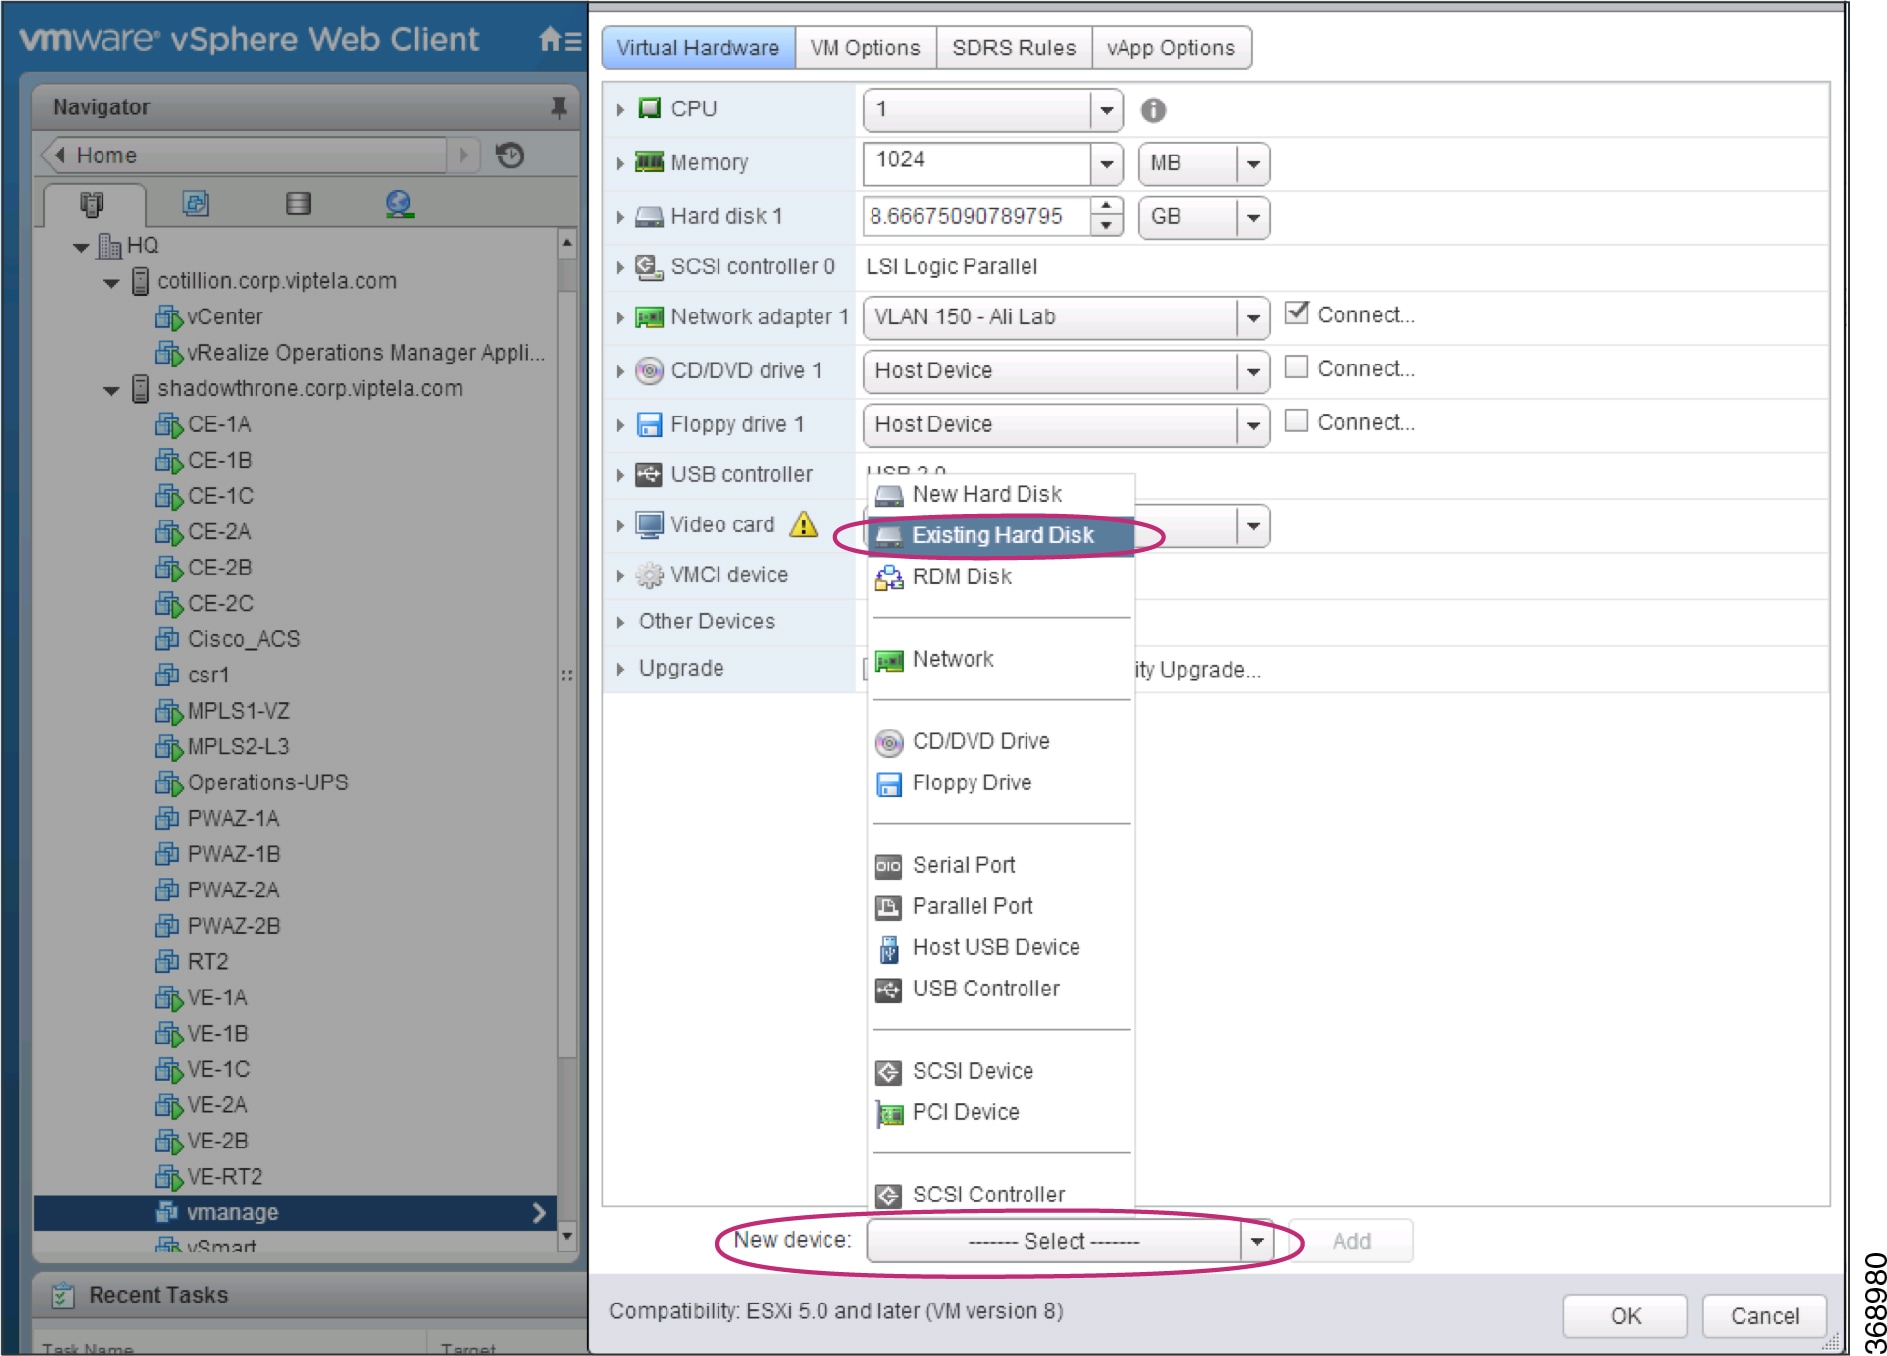
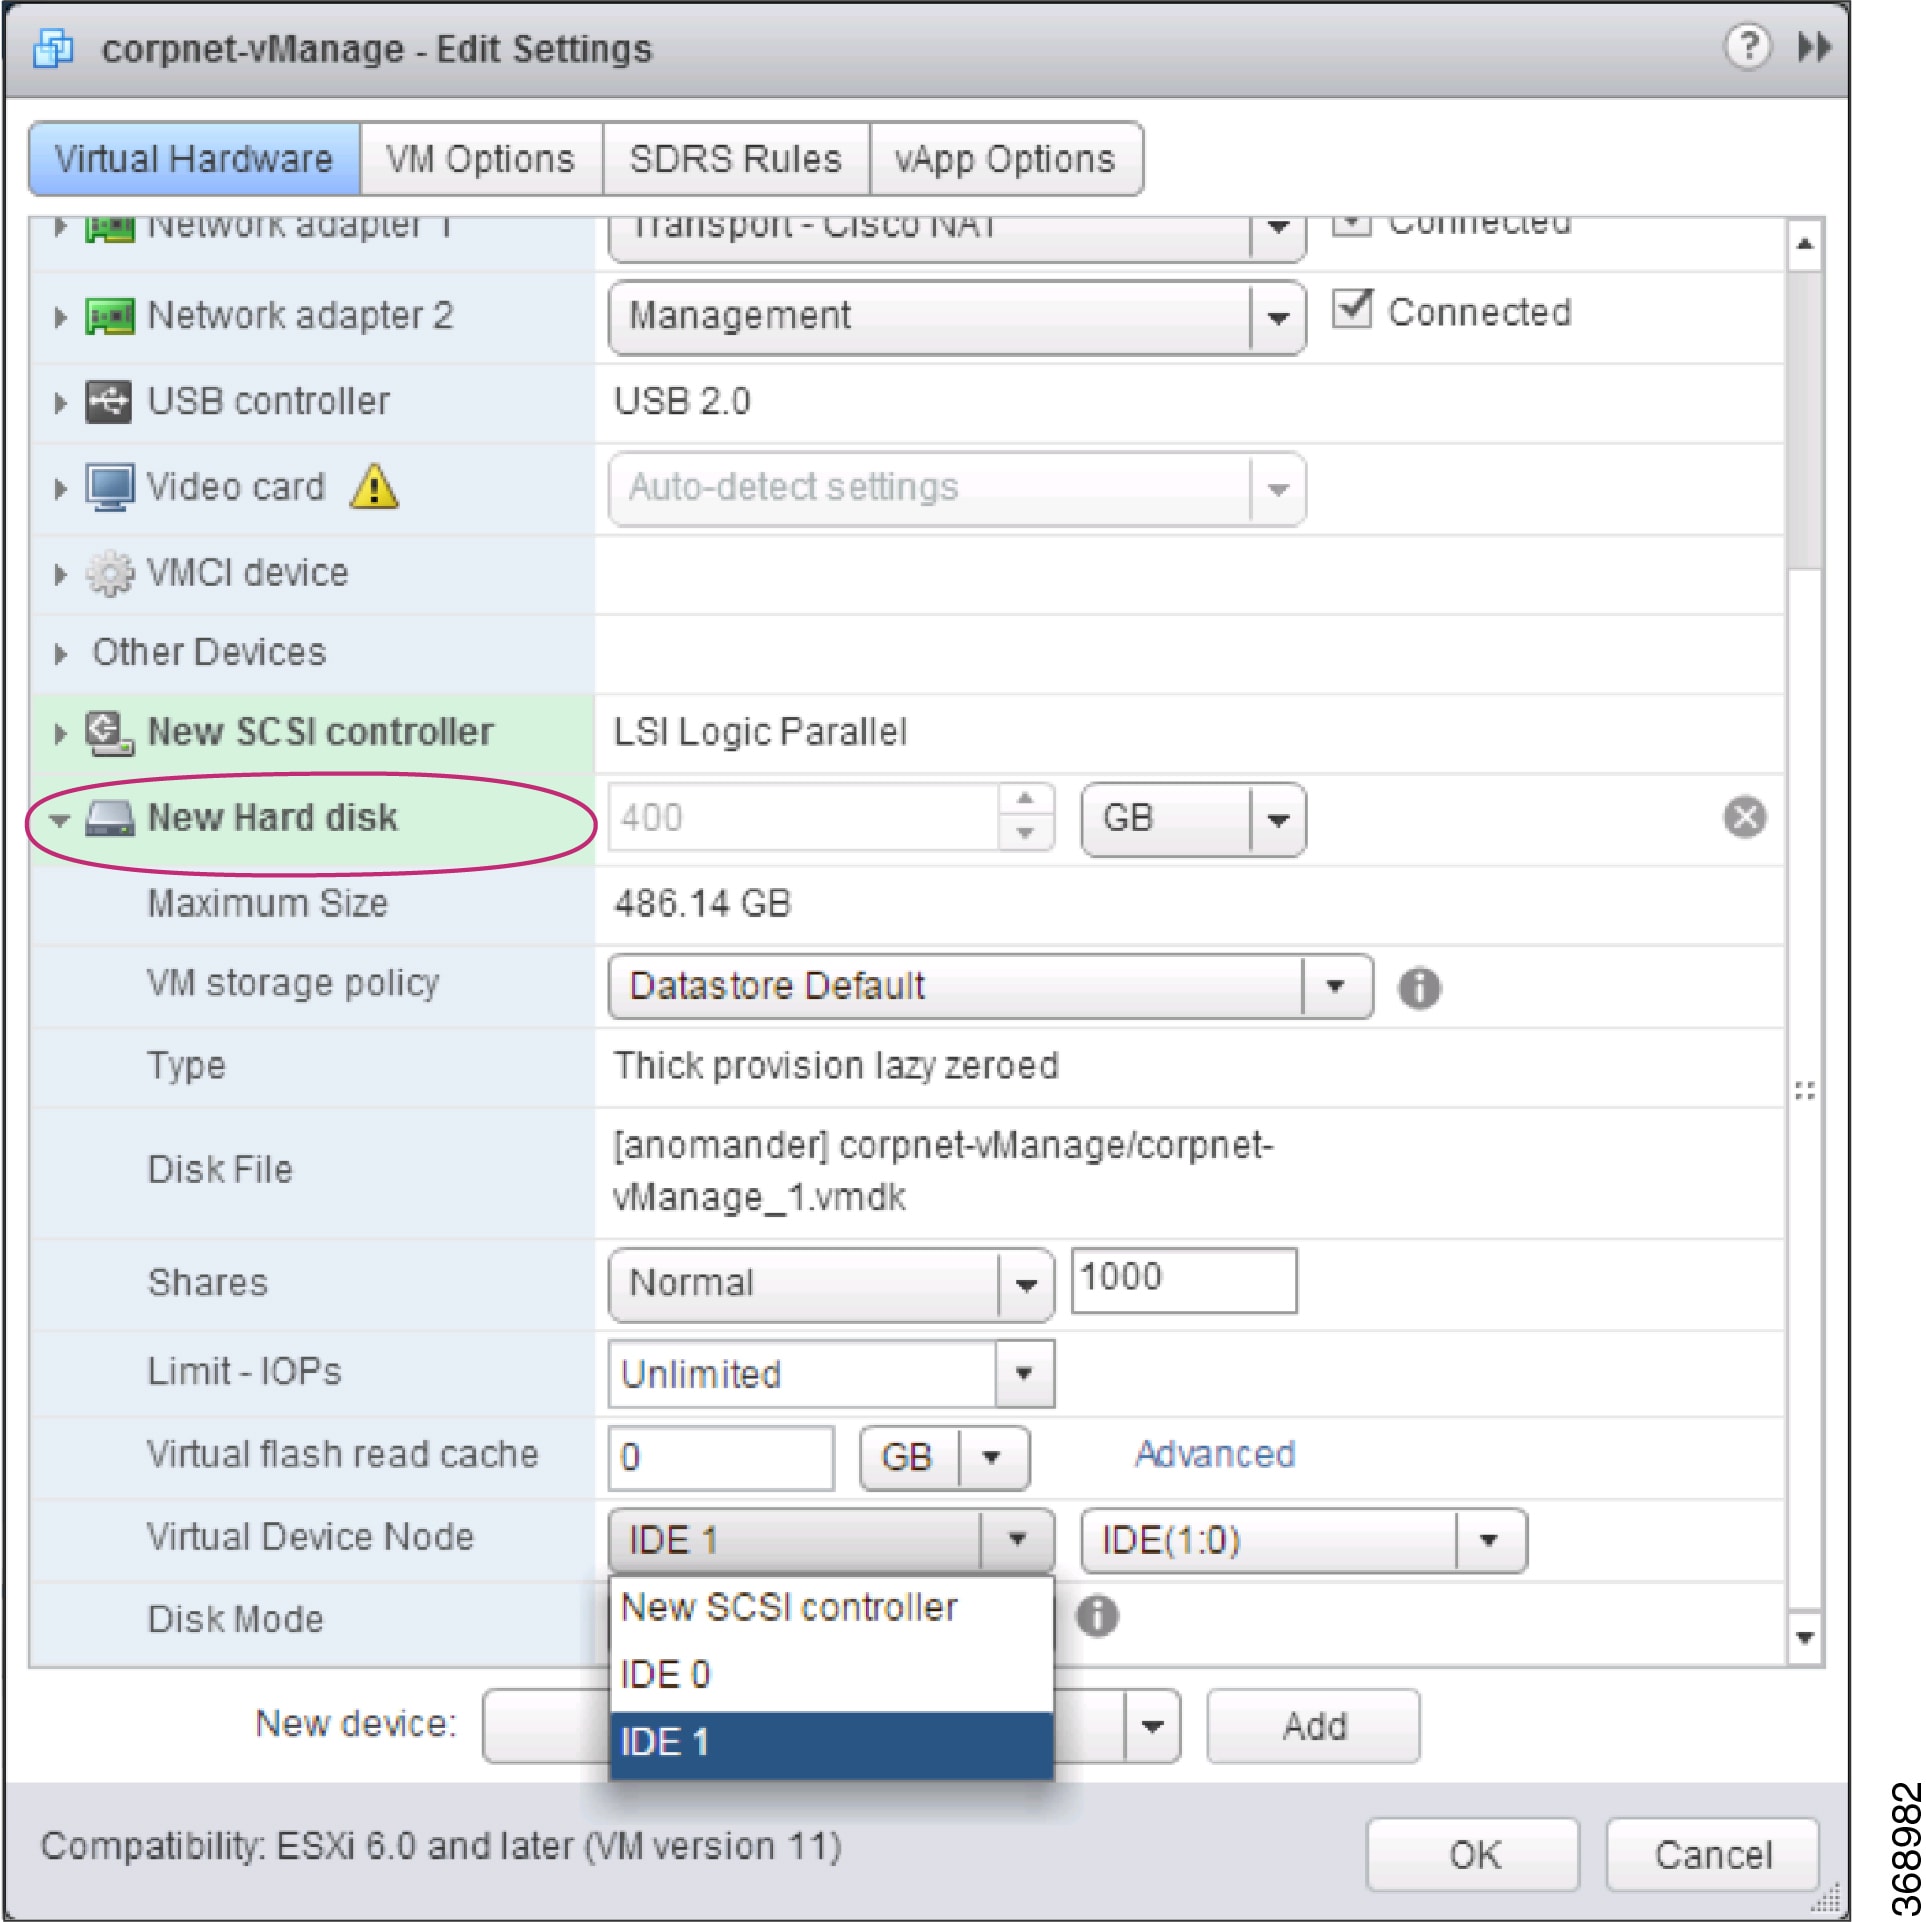
Click the Manage tab, and click Edit. The Edit Settings screen is displayed with the Virtual Hardware tab selected.
If you have a backup of the vManage NMS database, attach it to the new vManage VM. If you do not have a backup database, skip
to step 6 and create a new virtual disk for the database.
In the New device field at the bottom of the screen, click Select. A pop-up menu opens.
From the pop-up menu, select Existing Hard Disk. The Select File window is displayed.
In the Select File window, under Datastores, navigate to and select the appropriate .vmdk file, and click OK.
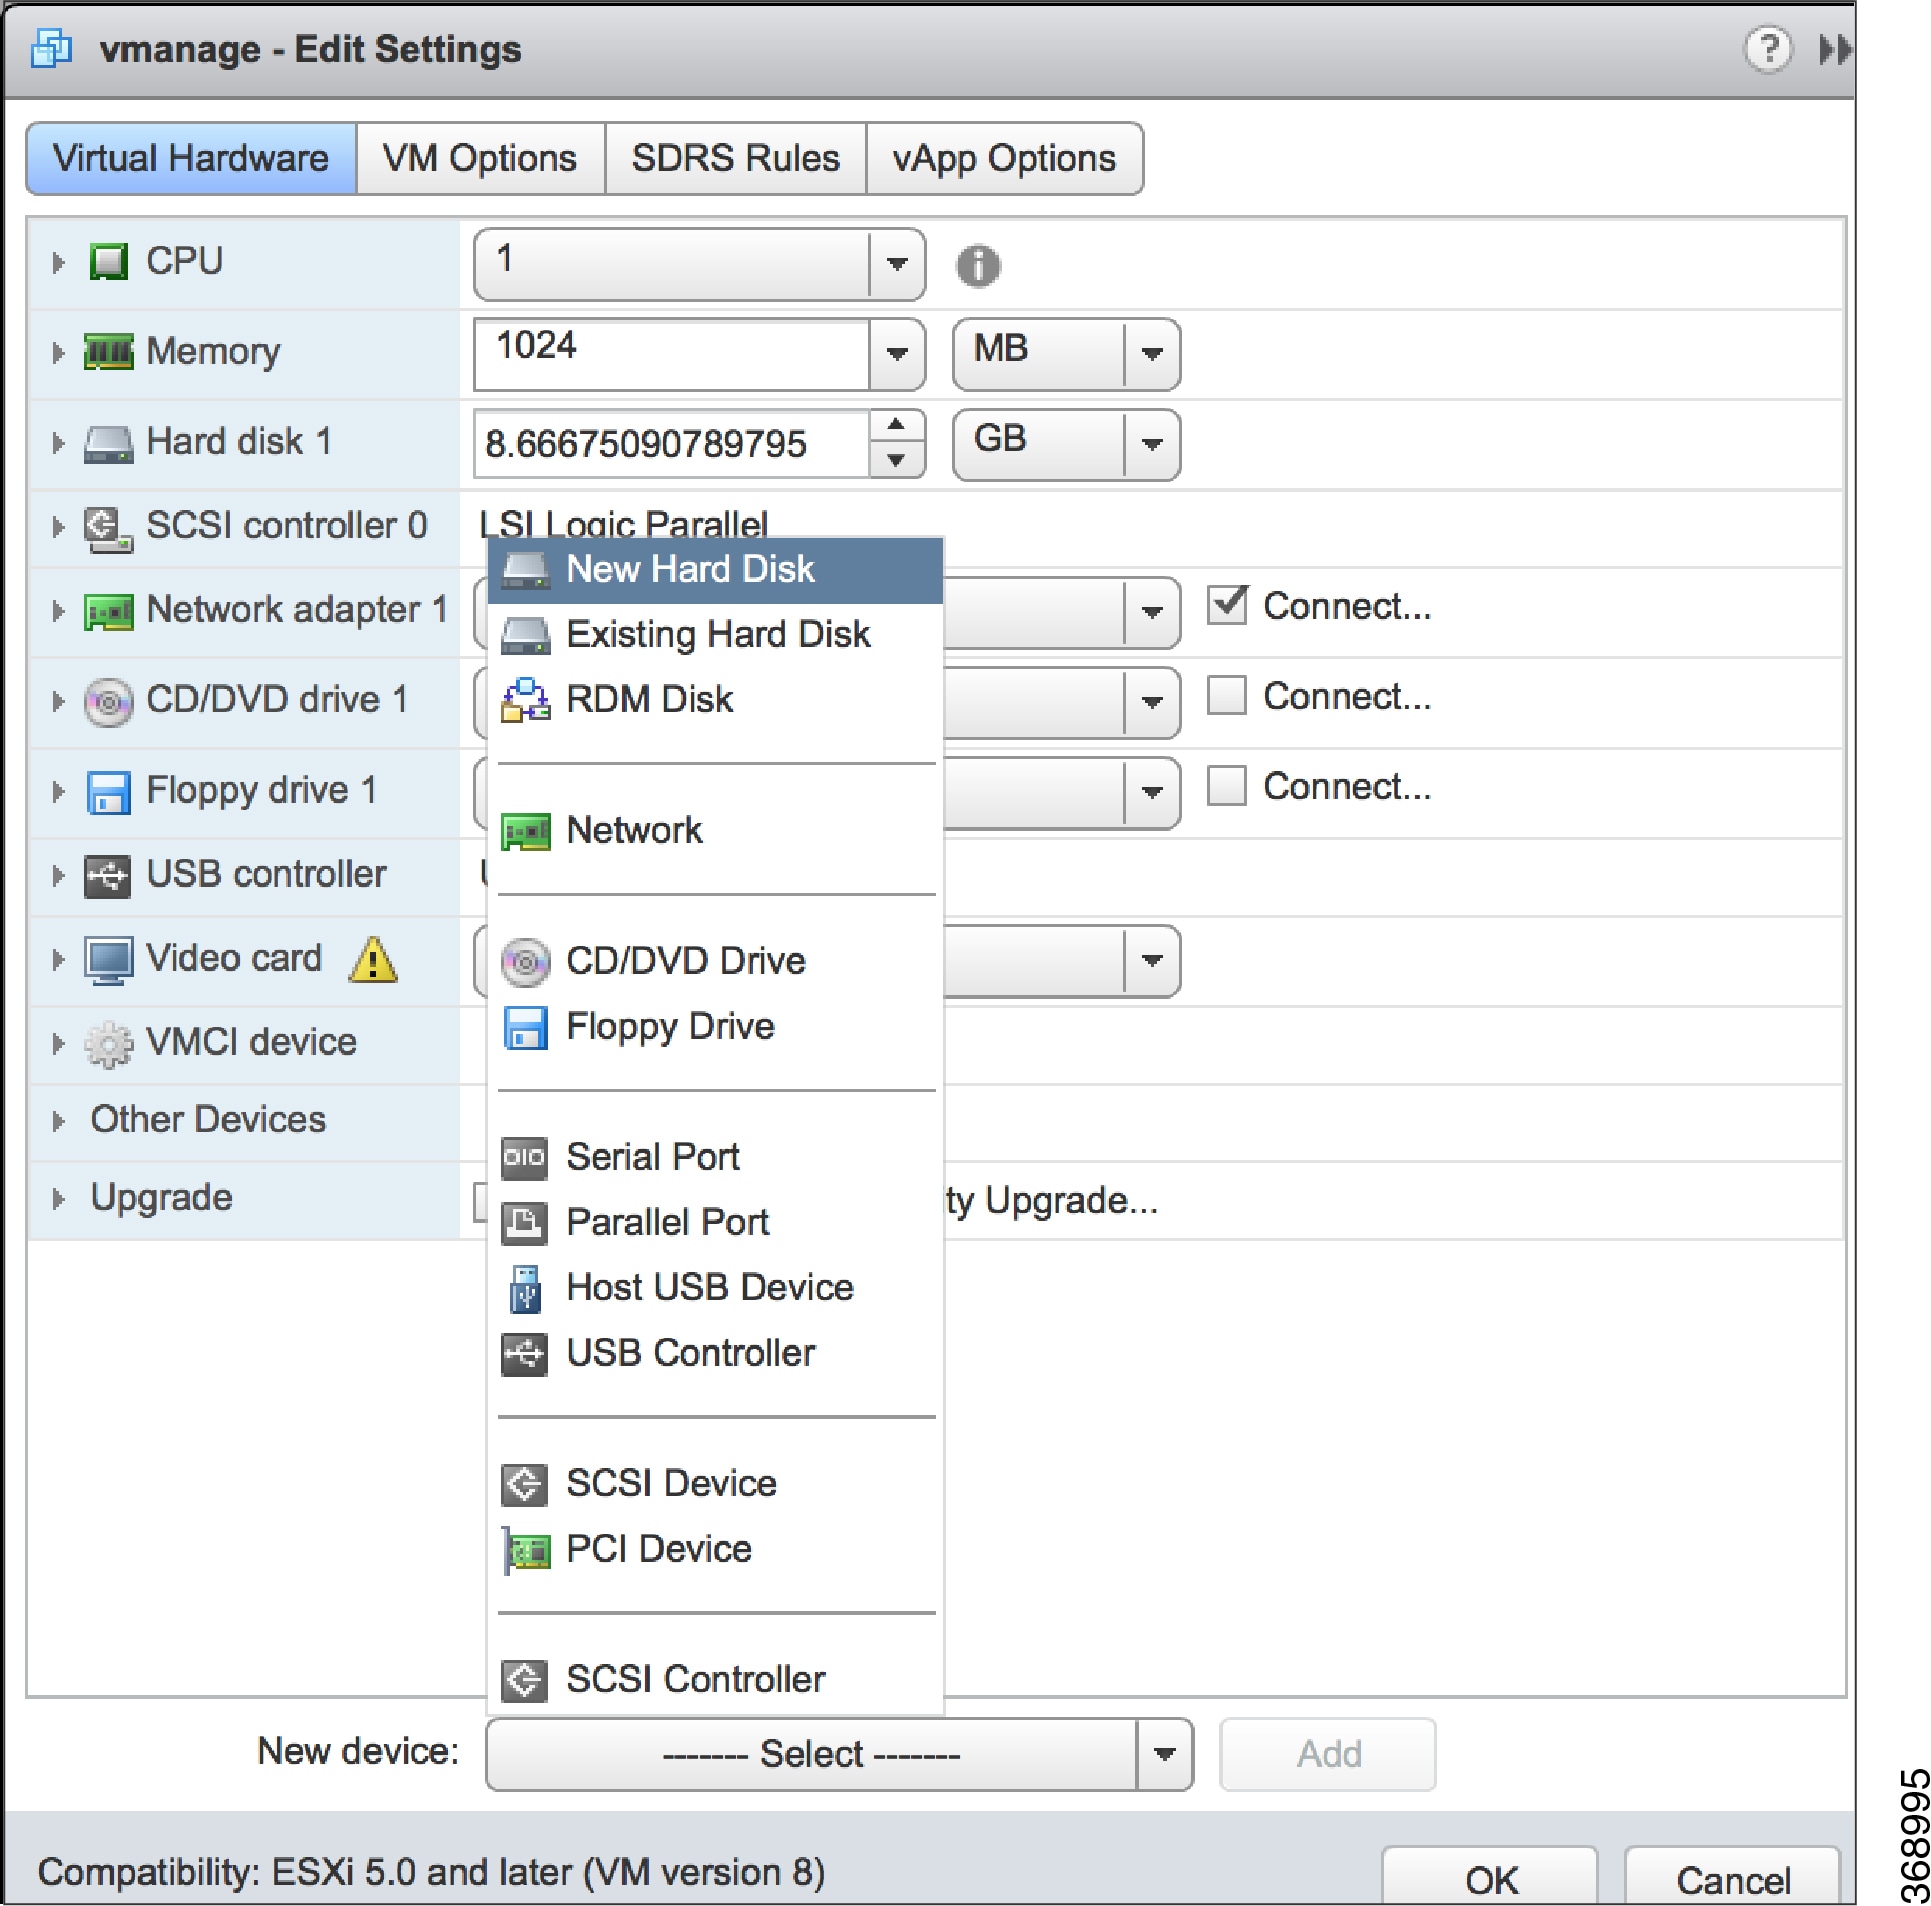
If you do not have an existing vManage NMS database, create a new virtual disk for the vManage NMS database:
In the New device field at the bottom of the screen, click Select. A pop-up menu opens.
From the pop-up menu, select New Hard Disk.
In the New Hard Disk field, enter a size for the new virtual disk of 100 GB.
Click OK.
From the New Hard Disk section, under Virtual Device Node, select IDE 1, and click OK.
From the vSphere Web Client Navigator, select the datacenter that is hosting the VM and then select Open Console from the
menu. The vManage console is displayed.
At the vManage login prompt, log in with the default username, which is admin, and the default password, which is admin. The system prompts you to select the storage device to use.
Select the appropriate storage device:
In response to the question
Would you like to format x?
:
If you attached an existing disk with a backup of the vManage database, type n.
If you created a new virtual disk for the vManage database, type yto reformat the disk.
Configure the vManage NMS. See vManage NMS Initial Configuration .
Generate a certificate for the new vManage NMS. See Generate vManage Certificate .
Add the serial number of the new vManage NMS to all the vBond orchestrators in the overlay network, as described below.
Add vManage NMS Serial Number to vBond Orchestrators
When you generate a certificate for a new vManage NMS with a new database, the serial number from the certificate is automatically
sent to the vBond orchestrators. However, when you create a new vManage NMS and attach an existing database, you must manually
send the new serial number to each vBond orchestrator to overwrite the serial number of the previous vManage NMS.
If you have the management IP address for the vBond orchestrator, you can use vManage NMS to send the serial number to each
vBond orchestrator. Otherwise, you must use the CLI.
If you have the management IP address for the vBond orchestrator:
In vManage NMS, select the Configuration ► Devices screen.
From the Devices title bar, select Controllers.
Select the vBond orchestrator.
Click the More Actions icon to the right of the row and select Edit.
Enter the management IP address, username, and password for the vBond orchestrator.
Click Save.
Select the Configuration ► Certificates screen.
From the Certificates title bar, select Controllers.
Click Send to vBond to send the new vManage NMS certificate to the vBond orchestrator.
If you do not have the management IP address for the vBond orchestrator:
Find the serial number for the new vManage NMS:
In vManage NMS, select the Configuration ► Certificates screen.
From the Certificates title bar, select Controllers.
Select the vManage NMS and make a note of the serial number that is displayed in the Certificate Serial column.
Select the Tools ► SSH Terminal screen.
Select the vBond orchestrator.
Enter the username and password for the vBond orchestrator and click Login.
Enter the following command to send the certificate serial number for the new vManage NMS to the vBond orchestrator, where
number is the serial number that you noted in Step 1:


 Feedback