Installing Cisco Container Platform
Installing Cisco Container Platform is a three-step process:
-
The Cisco Container Platform tenant base VM contains the container image and the files that are necessary to create the tenant Kubernetes clusters that are used for configuring monitoring, logging, container network interfaces (CNI), and persistent volumes.
-
The Installer VM contains the VM image and the files for installing other components such as Kubernetes and the Cisco Container Platform application.
-
Deploying Cisco Container Platform
The Cisco Container Platform Control Plane is set up using an installer UI. After the installer VM is switched on, the URL of the installer appears on the vCenter Web console.
Importing Cisco Container Platform Tenant Base VM
Before you begin
-
Ensure that you have configured the storage and networking requirements. For more information, see Storage Requirements and Network Requirements.
-
Ensure that vSphere has an Enterprise Plus license, which supports DRS and vSphere HA.
Procedure
| Step 1 |
Log in to the VMware vSphere Web Client as an administrator. |
||
| Step 2 |
In the Navigation pane, right-click the cluster on which you want to deploy Cisco Container Platform, and then choose Deploy OVF Template. |
||
| Step 3 |
In the Select template screen, perform these steps: |
||
| Step 4 |
In the Select name and location screen, perform these steps: |
||
| Step 5 |
In the Select a resource screen, choose a cluster where you want to run the Cisco Container Platform tenant base VM, and then click Next. |
||
| Step 6 |
In the Review details screen, verify the Cisco Container Platform tenant base VM details, and then click Next. 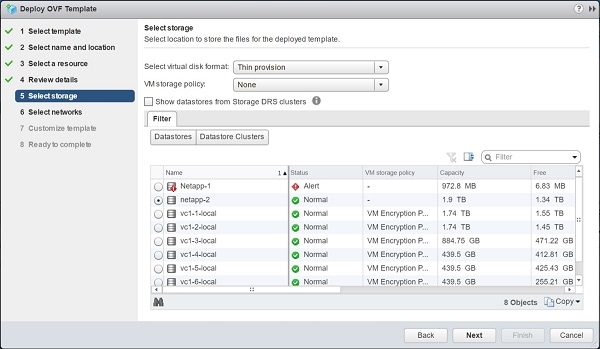 |
||
| Step 7 |
In the Select storage screen, perform these steps:
 |
||
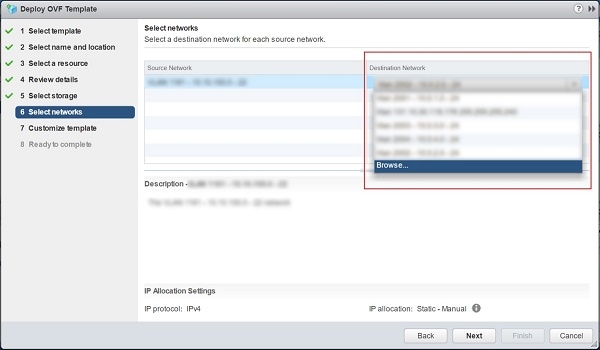
| Step 8 |
In the Select networks screen, perform these steps:
|
||
| Step 9 |
In the Customize template screen, click Next. |
||
| Step 10 |
In the Ready to complete screen, verify the Cisco Container Platform tenant base VM settings, and then click Finish.
|
Deploying Installer VM
Before you begin
 Note |
This deployment is for new installations of Cisco Container Platform. For upgrades, see Upgrading Cisco Container Platform. |
Ensure that you have imported the latest Cisco Container Platform tenant base VM to the vCenter instance. For more information, see Importing Cisco Container Platform Tenant Base VM.
Procedure
| Step 1 |
Log in to the VMware vSphere Web Client as an administrator. |
| Step 2 |
In the Navigation pane, right-click the cluster on which you want to deploy Cisco Container Platform, and then choose Deploy OVF Template. |
| Step 3 |
In the Select template screen, perform these steps: |
| Step 4 |
In the Select name and location screen, perform these steps:
|
| Step 5 |
In the Select a resource screen, choose the cluster where you want to run the installer VM, and then click Next. |
| Step 6 |
In the Review details screen, verify the template details, and then click Next. |
| Step 7 |
In the Select storage screen, perform these steps:
|
| Step 8 |
In the Select networks screen, perform these steps: The Customize template screen appears. 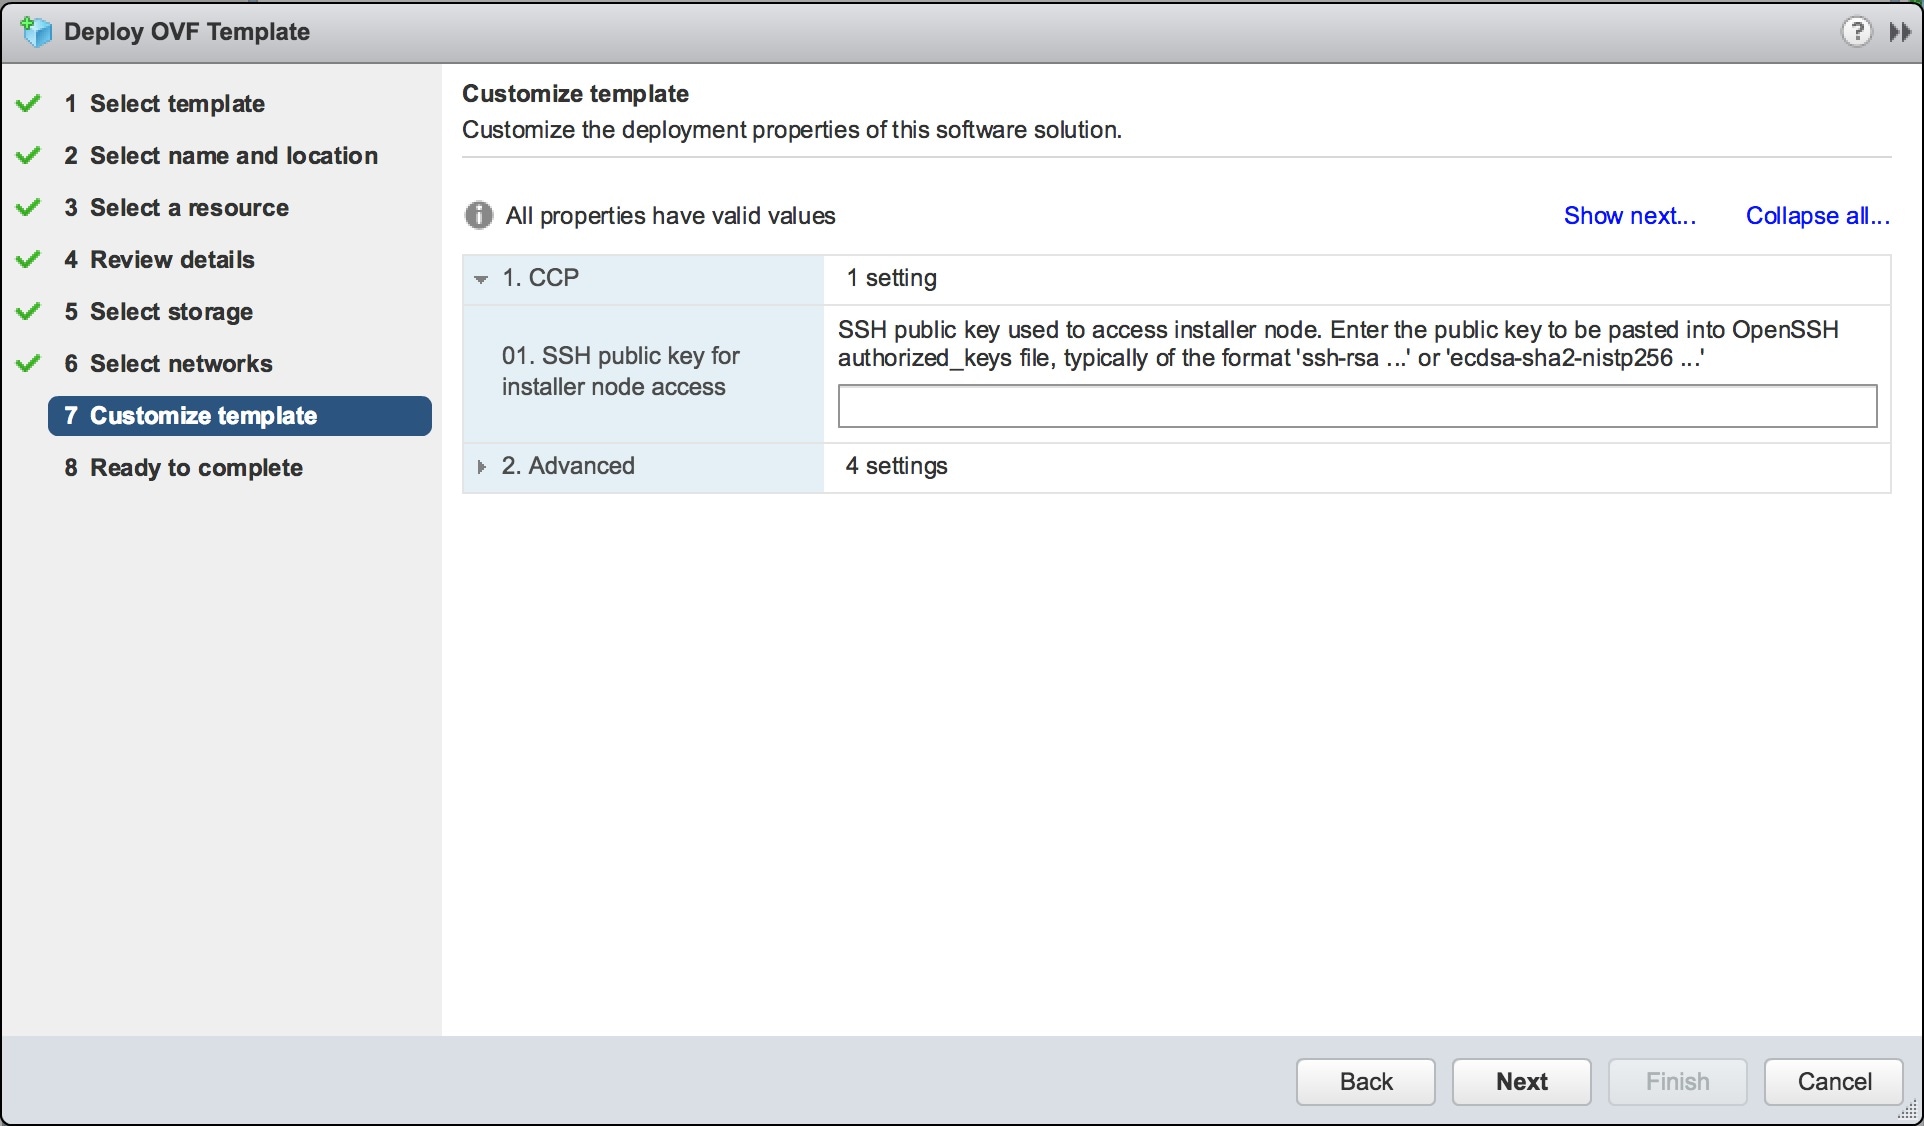 |
| Step 9 |
In the Customize template screen, enter the following optional parameters to customize the deployment properties: |
| Step 10 |
In the Ready to complete screen, verify the installer VM deployment settings, and then click Finish. |
| Step 11 |
Click the Power on button to switch on the VM. 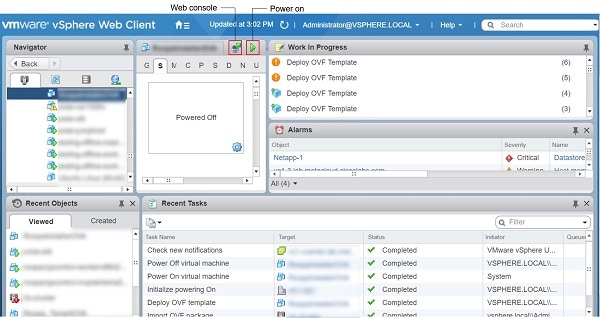 |
Deploying Cisco Container Platform
The Cisco Container Platform Control Plane is set up using an installer UI. After the installer VM is switched on, the URL of the installer appears on the vCenter Web console.
Procedure
| Step 1 |
Obtain the URL from the vCenter Web console and use a browser to open the installer UI. 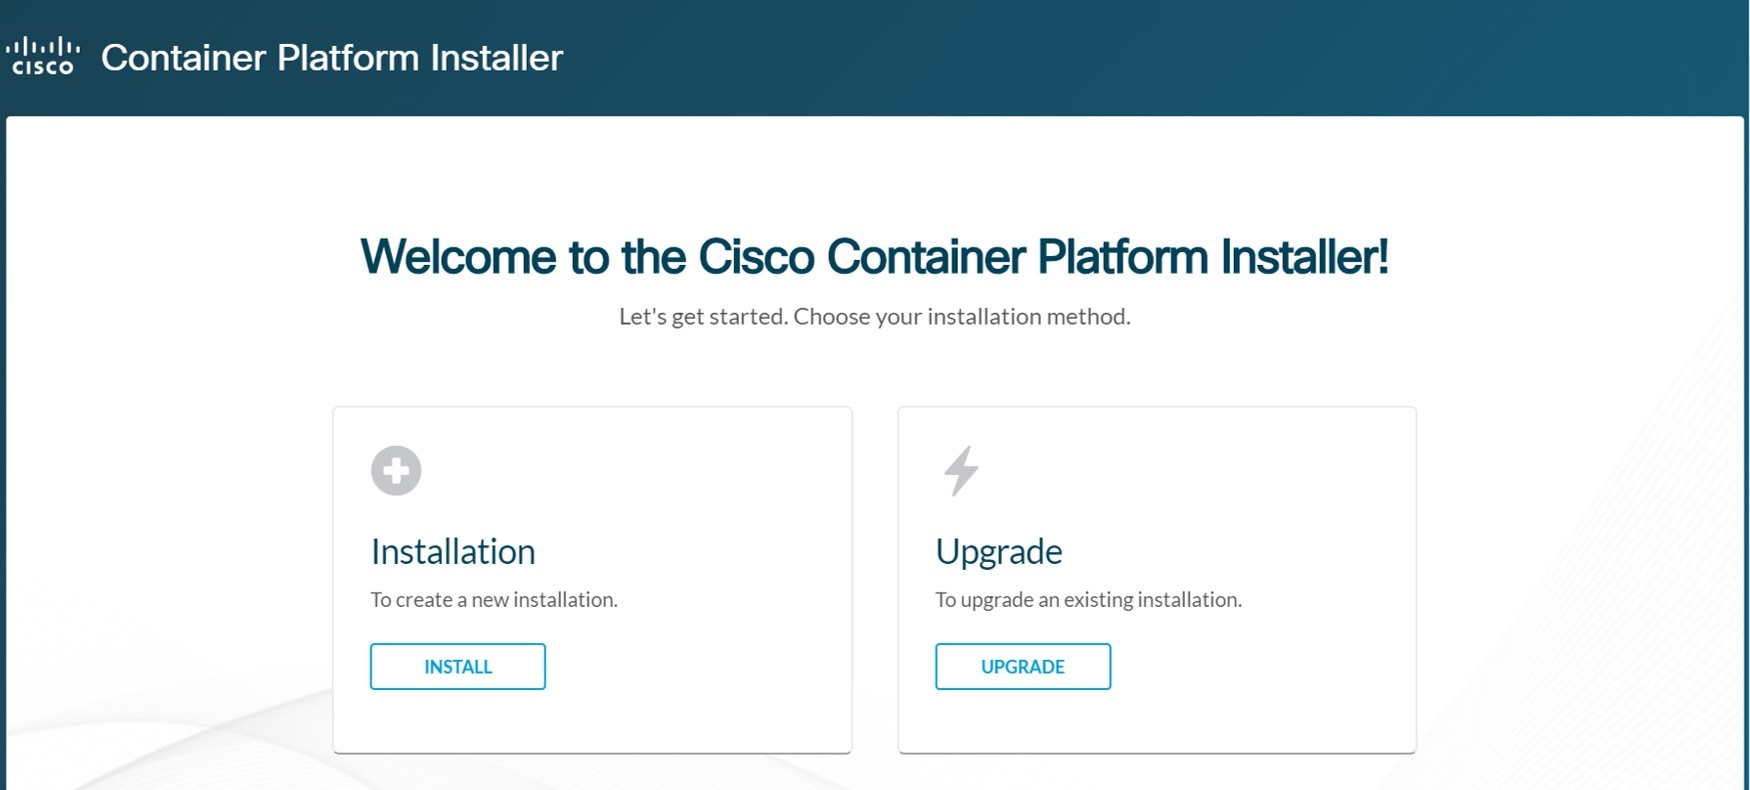 |
||
| Step 2 |
Click Install. The Connect your Cloud screen appears. 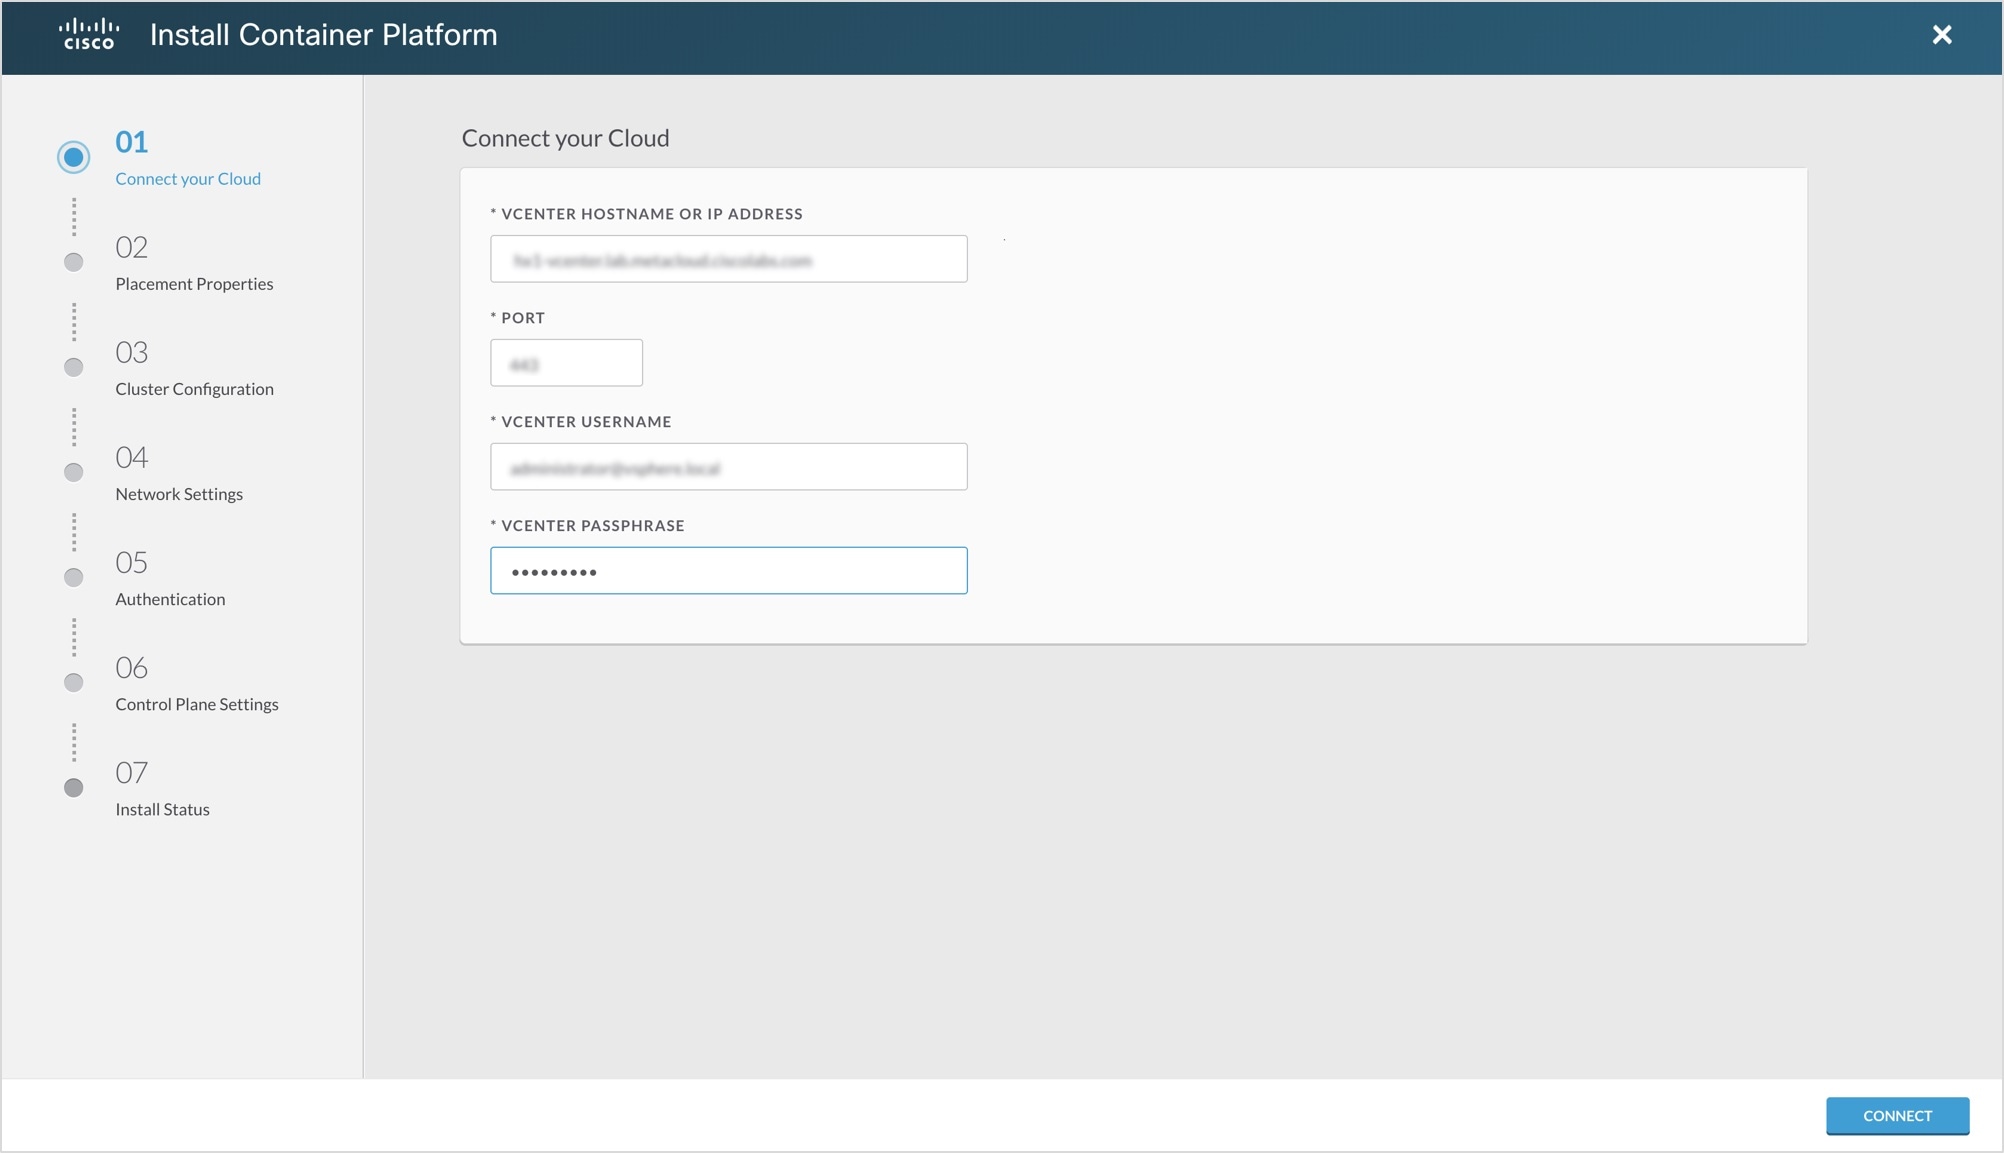 |
||
| Step 3 |
In the Connect your Cloud screen, enter the following information:
|
||
| Step 4 |
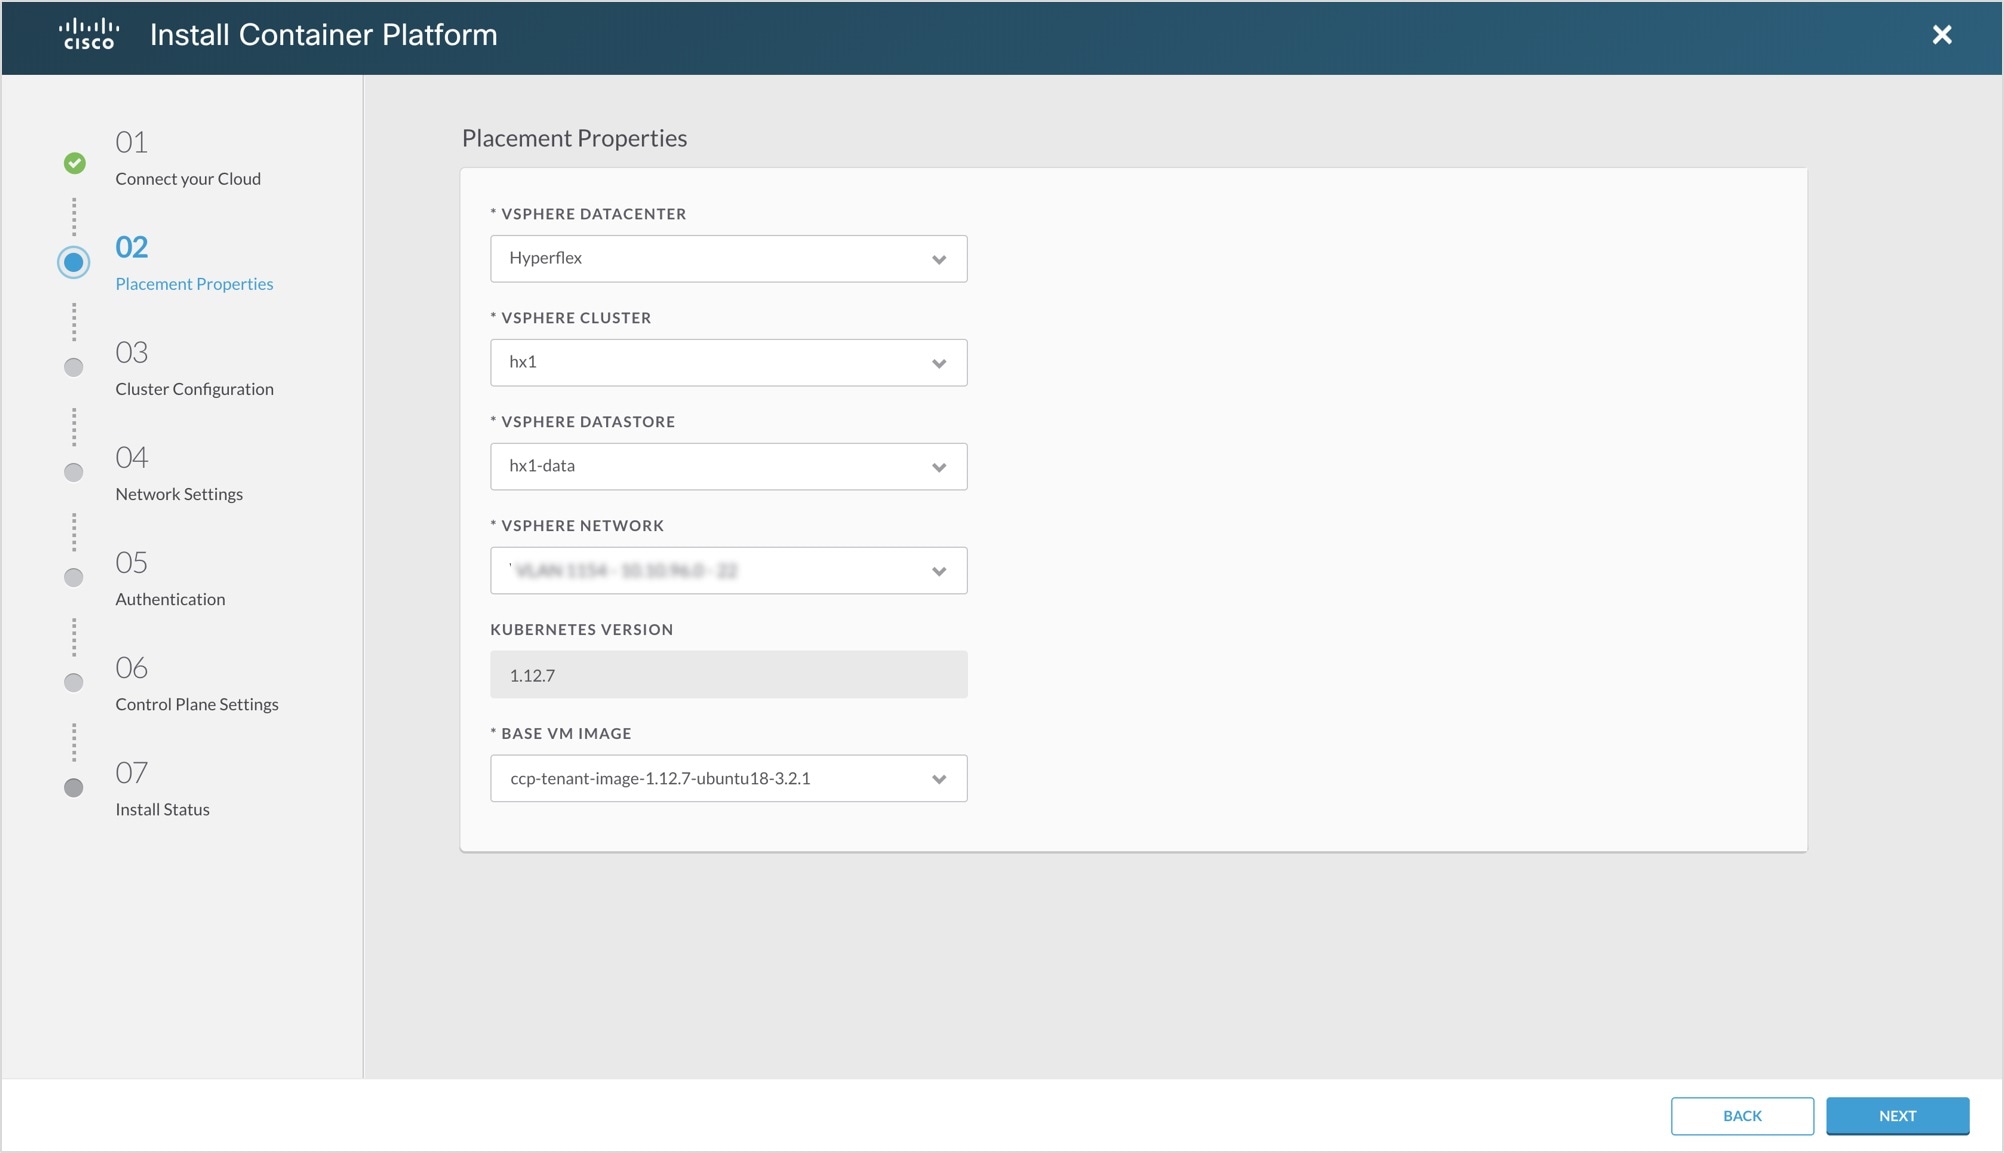
In the Placement Properties screen, enter the following information:
The Network Settings screen appears. 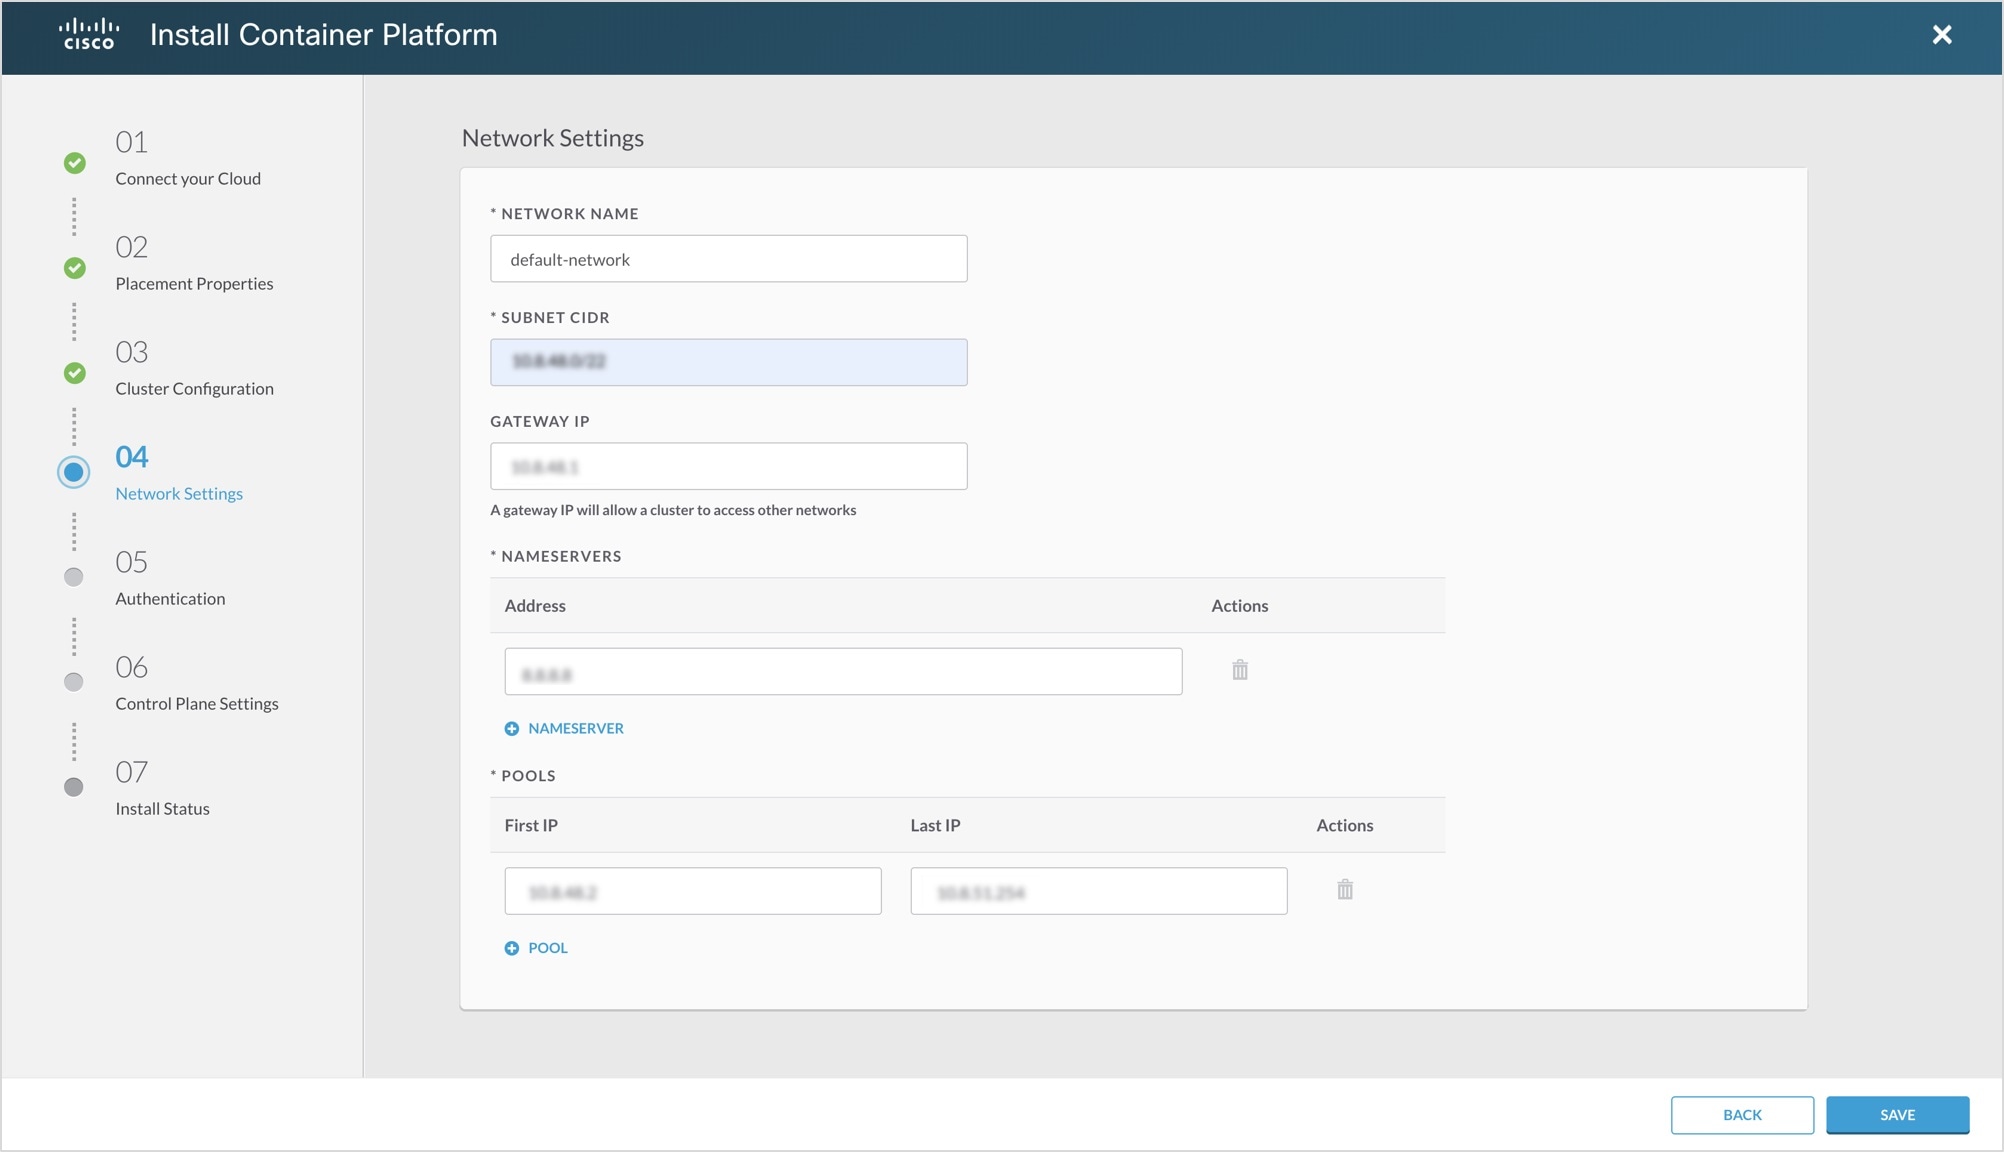 |
||
| Step 5 |
In the Network Settings screen, enter the following information:
The Cluster Configuration screen appears. 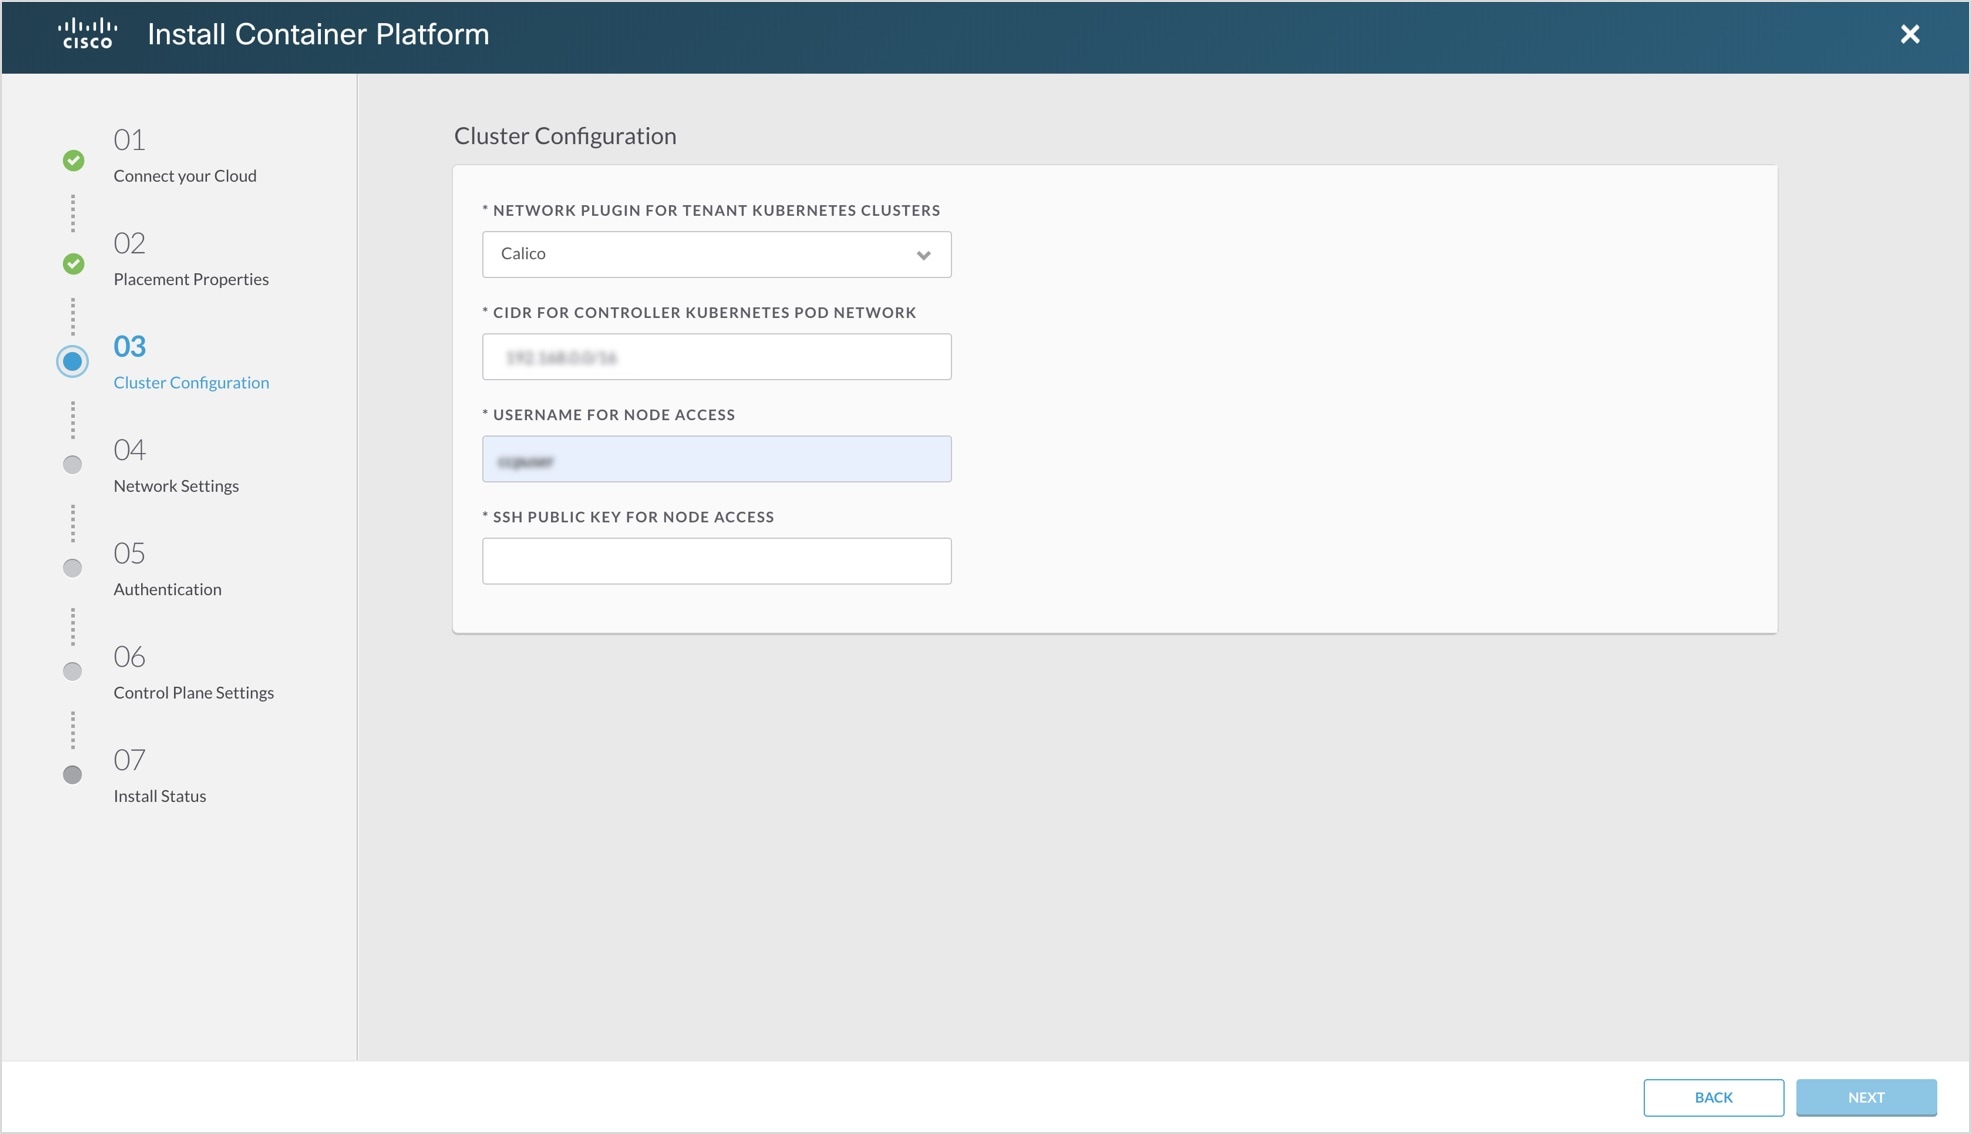 |
||
| Step 6 |
In the Cluster Configuration screen, enter the following information:
|
||
| Step 7 |
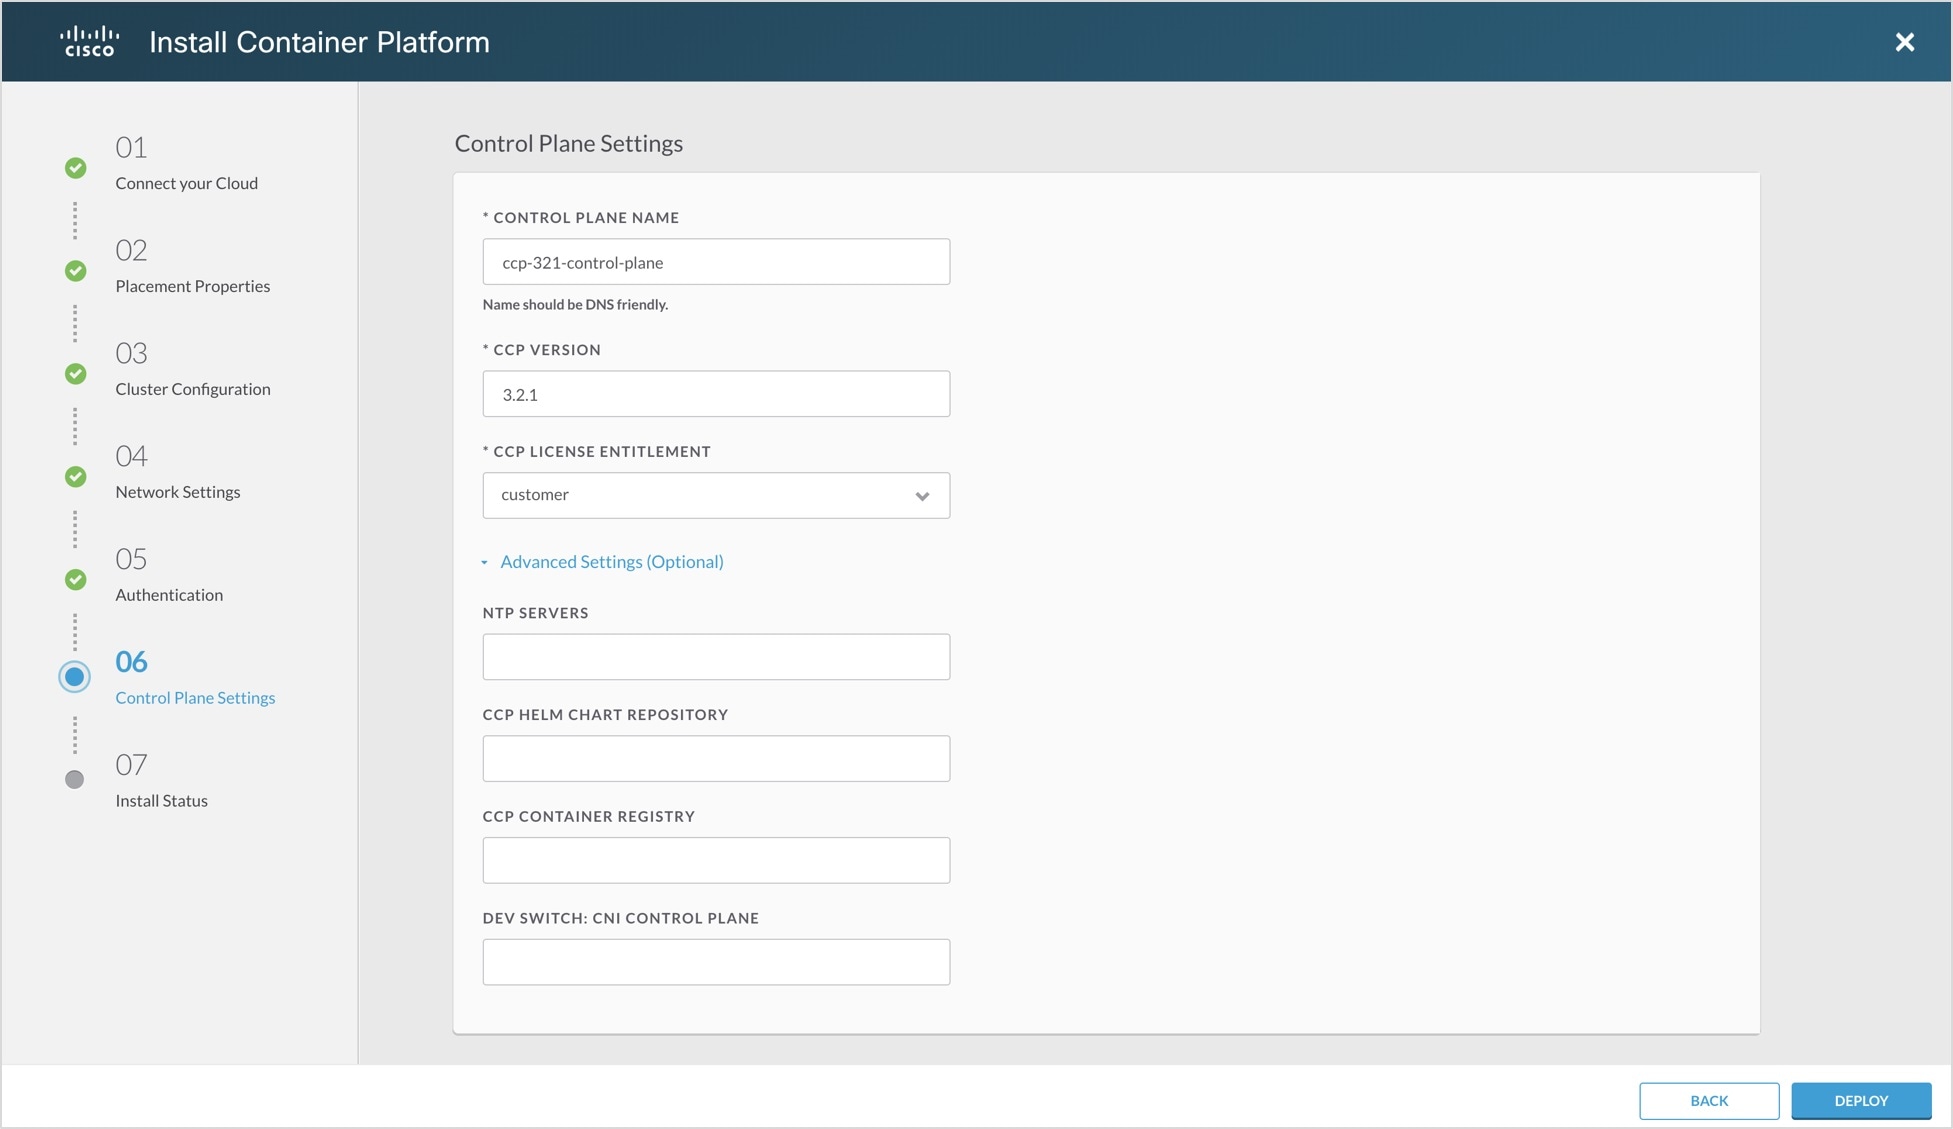
In the Control Plane Settings screen, enter the following information:
|
 Feedback