
Overview
The following sections describe the brownfield import use case scenario which will allow you to import existing NDFC fabric configurations, including fabrics that are part of a Multi-Site Domain (MSD), and to stretch those configurations across multiple greenfield or brownfield fabrics from a single location using Nexus Dashboard Orchestrator. The same use case is demonstrated in the Cisco NDFC VRF and Network Configuration using Nexus Dashboard Orchestrator video demo.
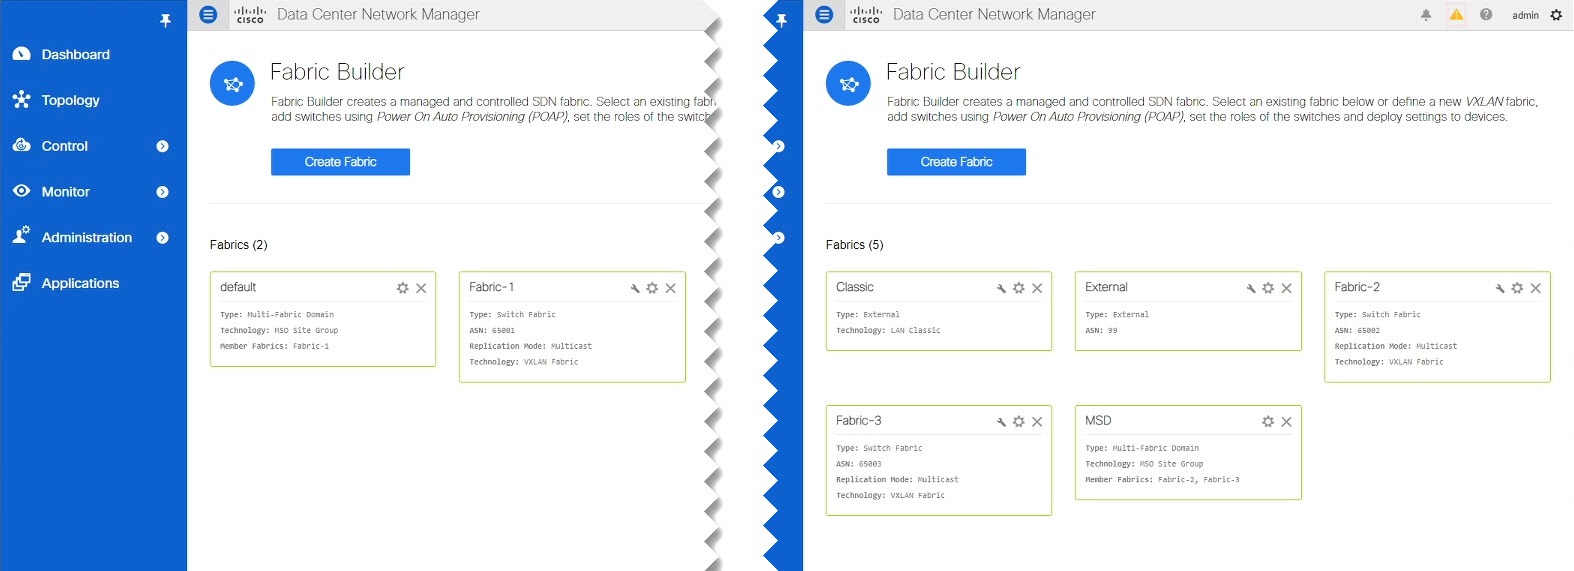
The examples in this chapter will use two different NDFC controllers where Fabric-1 from the first NDFC is a single fabric, while Fabric-2 and Fabric-3 are part of an MSD and are managed by the second NDFC:
The following sections will detail how to import existing configuration, then stretch it from one fabric to another managed by different NDFCs, as well as how to deploy brand new VRFs and networks.
Prerequisites
Before you can import and manage VRFs and networks from the existing NDFC fabrics in your environment, you must have the following:
-
Nexus Dashboard cluster deployed and the Nexus Dashboard Orchestrator service installed, as described in Cisco Nexus Dashboard Deployment Guide and Cisco Nexus Dashboard Orchestrator Deployment Guide.
-
Existing NDFC fabrics on-boarded in the Nexus Dashboard and enabled for management in the Nexus Dashboard Orchestrator GUI, as described in Adding and Deleting Sites.
-
Have the inter-site infrastructure configured and deployed, as described in Configuring Infra for Cisco NDFC Sites.
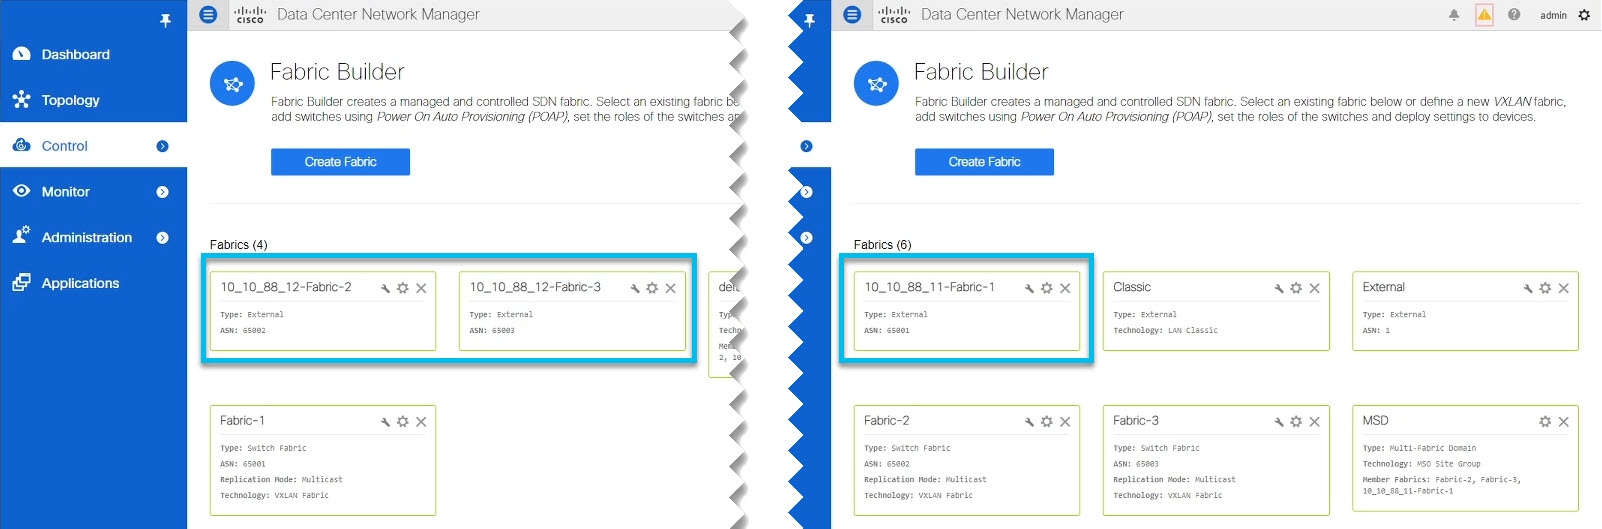
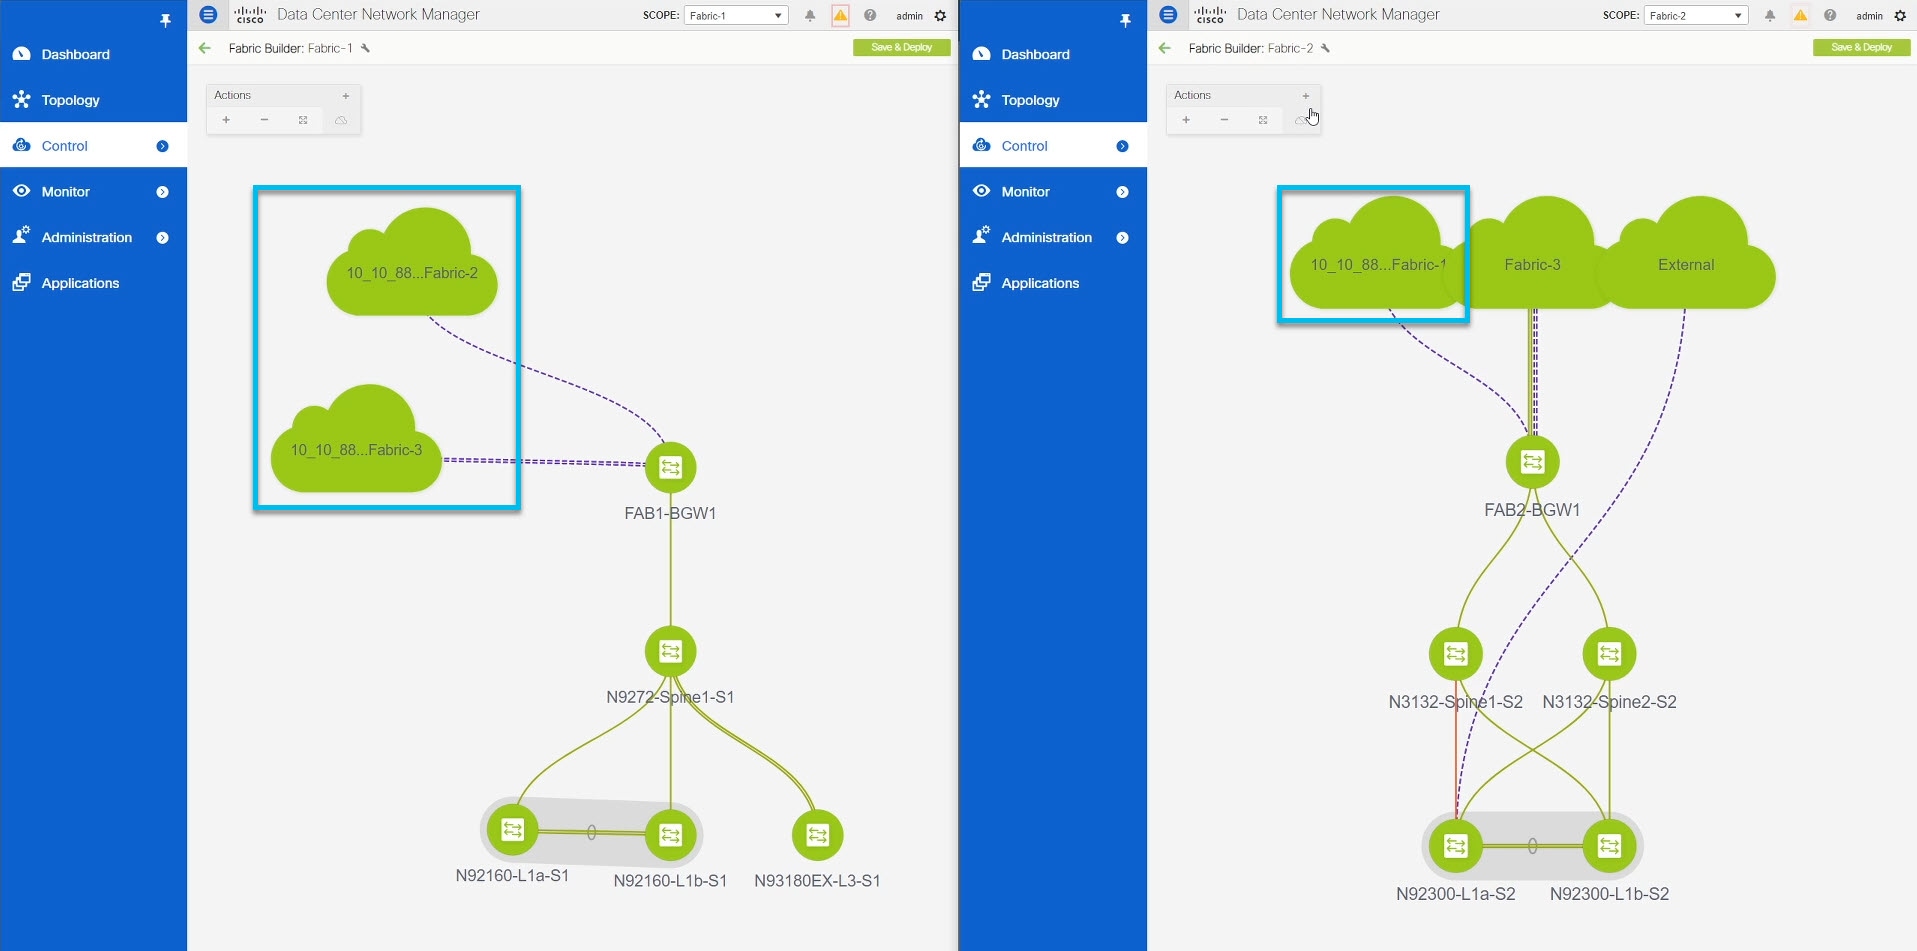
Expanding on the example fabrics show in the "Overview" section above, after you configure the Infra settings for all fabrics, you will see the inter-site connectivity deployed to each NDFC:
Create Schema and Templates for Importing Configuration
-
You must have reviewed and completed the prerequisites described in Prerequisites.
This section describes how to create a schema and template where you will import existing and then create new configurations.
-
Log in to your Nexus Dashboard Orchestrator GUI.
-
Create a new schema.
-
From the left navigation pane, choose Application Management > Schemas.
-
On the Schemas page, click Add Schema.
-
In the schema creation dialog, provide the Name and optional description for the schema.
By default, the new schema is empty, so you need to add one or more templates.
-
-
Create a template.
We recommend creating two separate templates: one for the VRFs and one for Networks. The following two steps will describe how to create a tempalte.
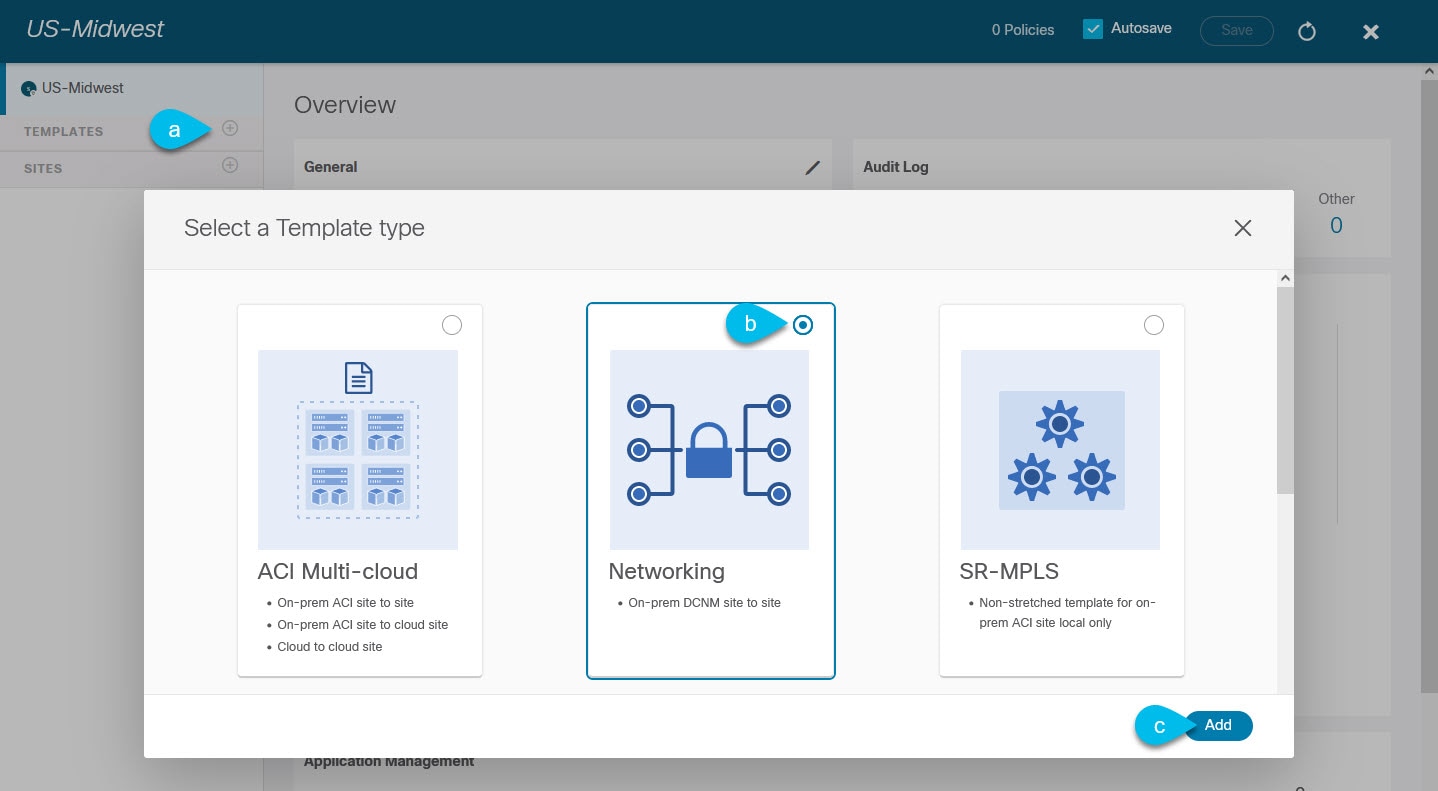 Figure 4. Template Type
-
In the left sidebar under Templates, click the + sign to add a new template.
-
In the Select a Template type window, choose Networking for the template type.
-
Click Add to create the template.
-
-
Provide the name and the tenant for the template.
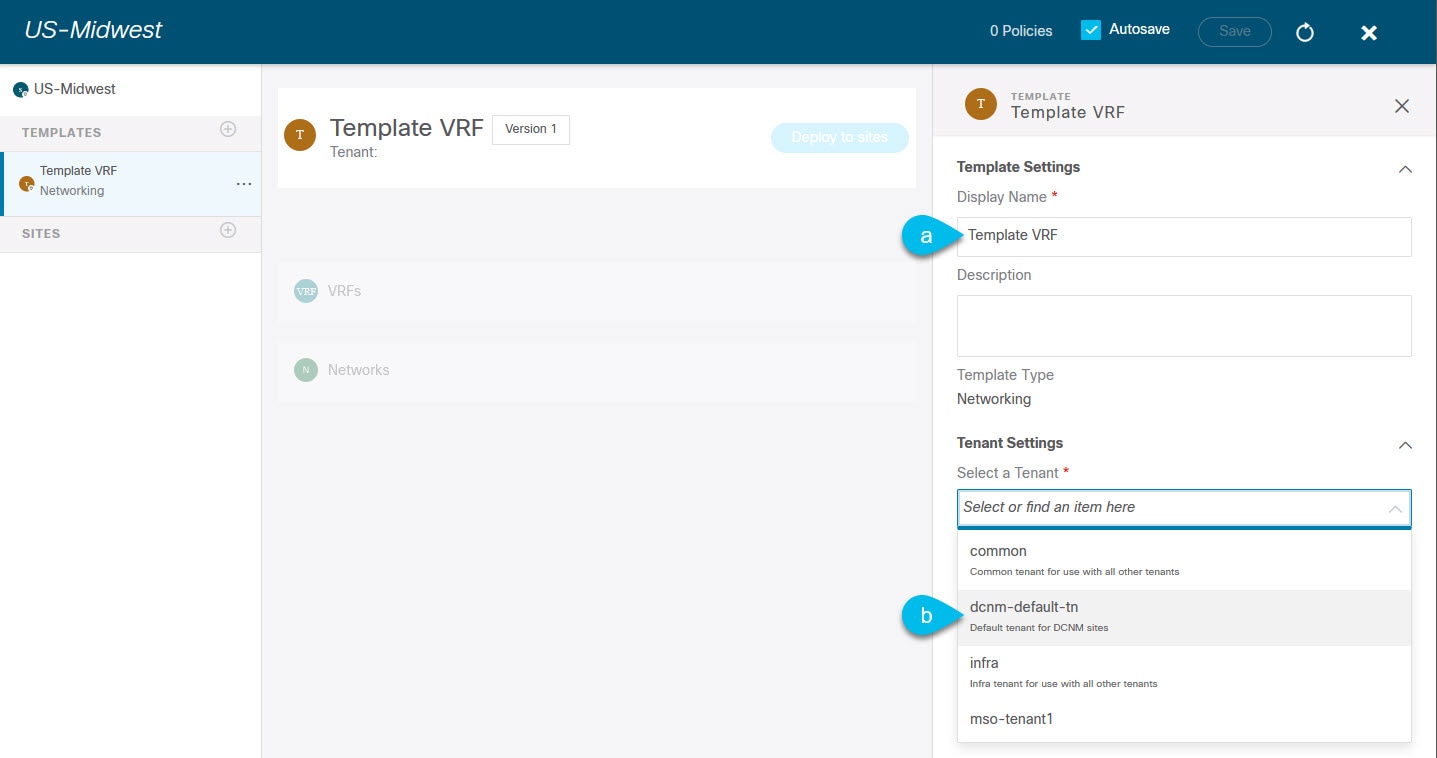 Figure 5. Template Settings
-
In the right sidebar, specify the Display Name for the template.
-
From the Select a Tenant dropdown, select the
dcnm-default-tntenant.This tenant is created in NDO by default specifically for defining objects and configurations for NDFC sites
-
-
Repeat the pervious two steps to create a second template.
In this release, we recommend creating separate templates for VRFs and Networks within each schema and then deploying the VRF templates first, followed by the templates that contain Networks. This way any VRFs required by the networks will be already created when you push Network configuration to the sites.
Similarly, when undeploying multiple networks and VRFs, we recommend undeploying the Networks template first, followed by the VRF templates. This will ensure that when VRFs are undeployed, there will be no conflicts with any existing Networks still using them.
-
In the top right corner of the schema view, click Save to save the schema and template.
You must save the schema and template you created before you can import configuration.
Importing Schema Elements From NDFC Sites
-
You must have associated the template with the existing fabrics as described in the previous section.
This section describes how to import configuration from existing fabrics.
-
In the main pane click the Import button and select the Site from which you want to import.
You can import from one fabric at a time, so you will repeat tese steps for each fabric.
-
In the Import from <site-name> window that opens, select one or more VRFs.
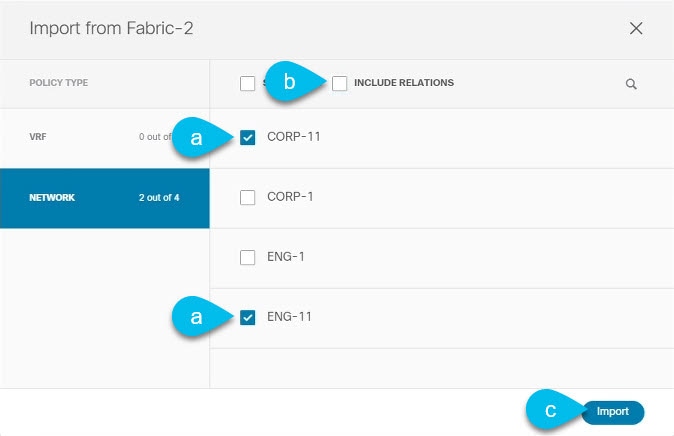 Figure 6. Import
-
In the import screen, you can select all or some of the existing objects.
In the example above, we import
ENG-11andCORP-11networks fromFabric-2which is part of the MSD.
The names of the objects imported into the Nexus Dashboard Orchestrator must be unique across all sites. Importing different objects with duplicate names will cause a schema validation error and the import to fail. If you want to import objects that have the same name, you must first rename them.
-
Ensure that the Include Relations box is unchecked.
You will import the VRFs separately into the second template.
-
Click Import to import the objects.
-
-
Repeat the steps to import Networks from other fabrics.
If you select the template under the site from which you imported (
Fabric-2in this example), the networks will have switch and port configuration already created as they were imported from that site. However, if you select the template under a different fabric (Fabric-3), where the same networks also exist, the switch configuration will be empty.To get the interface configuration for the networks we imported, we import the same networks again from the other fabric.
-
Select the second template and repeat previous two steps to import all required VRFs.
As best practice, you will use one of the templates to import the VRF configuration from your sites and the other template to import the Network configuration.
Deploying Template and Making Changes
You must have the configuration imported as described in the previous section.
This section describes how to deploy the imported configuration to the site where it doesn’t yet exist.
-
In the left sidebar, select the template you want to deploy.
Following the same example, you can use the NDFC UI to verify that the networks and VRFs you have imported from
Fabric-2andFabric-3do not yet exist inFabric-1.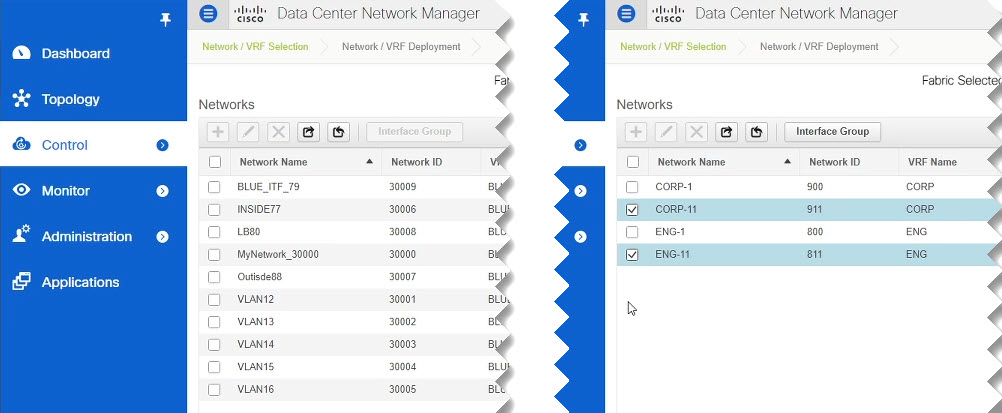 Figure 7. Deplay Template
 -
In the top right of the template edit view, click Deploy to sites.
The Deploy to Sites window opens that shows the summary of the objects to be deployed.
-
Click Deploy to deploy the template.
Since this is the first time you are deploying this template, the Deploy to Sites summary will show the configuration difference that will be deployed to sites.
It may take a few minutes for the configuration to get deployed. After you see a confirmation message in the NDO GUI, you can verify that the configuration was deployed using the NDFC UI:
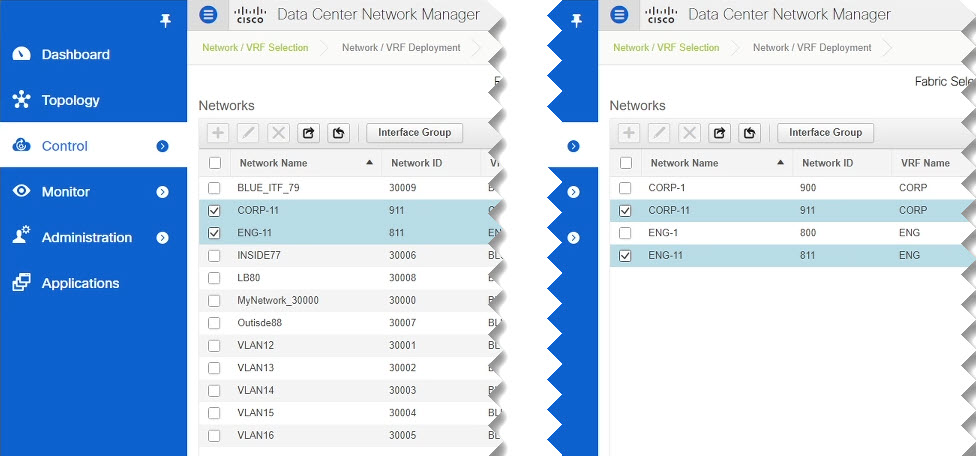 Figure 8. Deploy to Sites
 -
Assign switch ports to the new network.
We have verified that the network you imported from
Fabric-2andFabric-3was deployed toFabric-1, we need to assign one or more switch ports to it forFabric-1.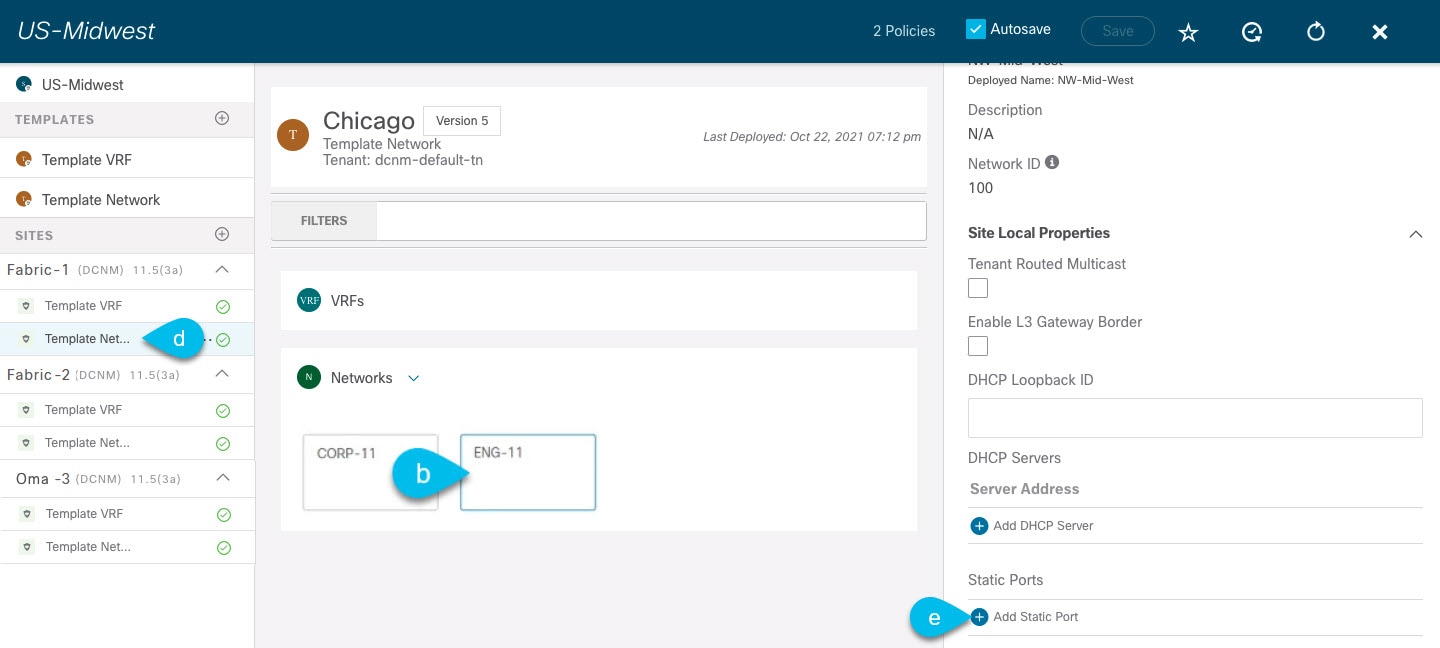 Figure 9. Deploy
-
Select the template under
Fabric-1. -
Select the Network we deployed.
-
In the right sidebar, click Add Static Ports.
In the Add Static Port window that opens, select the switch and the port to which you want to assign the network’s VLAN. Then click Save.
-
-
Save and redeploy the template with the new configuration changes.
You can once again verify the change by navigating back to the NDFC GUI and refreshing the Networks page. The status of the network will go from
NAtoIn ProgresstoDeployed.
First Published: 2024-03-11
Last Modified: 2024-03-11
Americas Headquarters
Cisco Systems, Inc.
170 West Tasman Drive
San Jose, CA 95134-1706
USA
http://www.cisco.com
Tel: 408 526-4000
800 553-NETS (6387)
Fax: 408 527-0883