Secure Boot
The Cisco Integrated Management Controller (Cisco IMC) and BIOS firmware contains the Unified Extensible Firmware Interface (UEFI) secure boot certificates in a hierarchy as defined by the UEFI specification. This hierarchy is immutable once it is loaded on the system. The root of trust begins from the firmware because of immutability. The following hierarchy contains Cisco-specific certificates; the certificate private keys are maintained securely offline in the Cisco software image management engine.
PK → KEK → DB
The root of trust is in the firmware, which hosts the platform key (PK), the key exchange key (KEK), and the key database (DB). The PK validates the certificates in the KEK; the KEK validates the certificates in the DB. The DB contains the end entity certificate, which is used to verify the signatures of all boot programs. The PK, KEK, and DB are referred to as auth variables in UEFI secure boot terms.
During the Cisco DNA Center UCS system boot, the firmware validates itself and then activates the UEFI key hierarchy for the Cisco DNA Center platform based on the product ID (PID). After secure boot is activated, the system can only boot software that is signed by the UEFI secure boot Cisco DNA Center certificate. If you try to boot a CD-ROM, USB flash drive, or hard disk without the correct Cisco DNA Center signature, the boot operation fails. After secure boot is enabled, it cannot be disabled in the Cisco IMC and BIOS.
To verify that the image boots with the correct signature, see Verify the Extensible Firmware Interface Image Signature.
Hardware and Software Requirements
The following table lists the hardware and software requirements for secure boot and Cisco DNA Center. Confirm that the Cisco DNA Center ISO that you are using is enabled with secure boot.
Cisco DNA Center images are signed using the SHA-256 hash algorithm. The signature scheme is PKCS7, signed with the RSA-2048 key.
| Secure Boot Requirement | Description |
|---|---|
|
Hardware |
|
|
Appliance |
DN2-HW-APL DN2-HW-APL-L DN2-HW-APL-XL |
|
Firmware |
|
|
UCS firmware |
4.0(4h) |
|
Firmware for C220 (DN2-HW-APL, DN2-HW-APL-L) |
https://software.cisco.com/download/home/286318809/type/283850974/release/4.0(4h) |
|
Firmware for C480 (DN2-HW-APL-XL) |
https://software.cisco.com/download/home/286318818/type/283850974/release/4.0(4h) |
|
BIOS |
|
|
BIOS for C220 (DN2-HW-APL, DN2-HW-APL-L) |
|
|
BIOS for C480 (DN2-HW-APL-XL) |
|
Installation Workflow
The workflow to install and enable secure boot for Cisco DNA Center involves the following steps:
-
Install and activate the Cisco IMC firmware.
-
Install and activate the BIOS.
-
Change the settings in the Cisco IMC and BIOS, and install secure boot-enabled Cisco DNA Center.
Install the Cisco IMC Firmware
Install the Cisco IMC Firmware Through the Browser
Before you begin
Procedure
| Step 1 |
In the Cisco IMC GUI, click the Navigation pane and choose Admin. |
| Step 2 |
From the Admin drop-down list, choose Firmware Management. The Firmware Management dialog box appears. 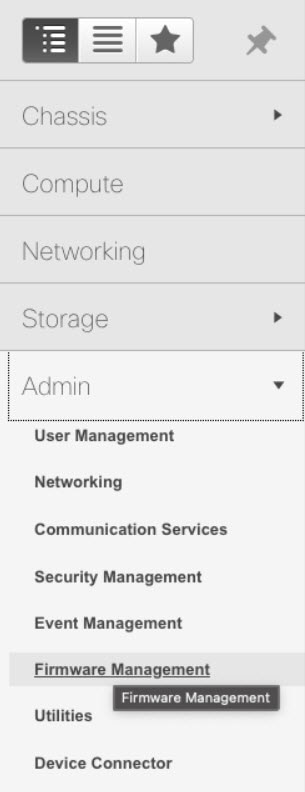
|
| Step 3 |
In the Firmware Management dialog box, check the BMC check box and click Update. 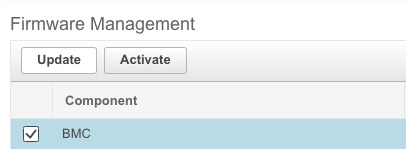
|
| Step 4 |
In the Update Firmware dialog box, click Install BMC Firmware through Browser Client, and then click Browse. 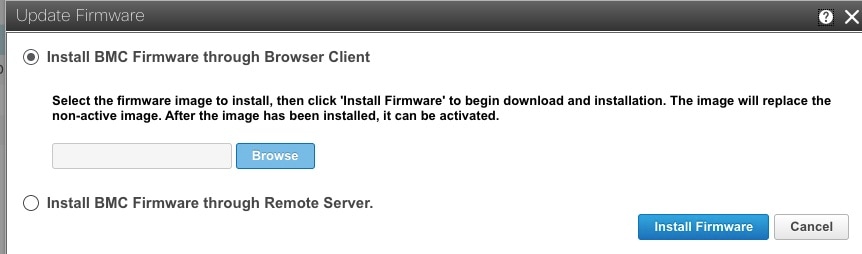
|
| Step 5 |
In the Choose File dialog box, navigate to the .bin file that you want to install. 
|
| Step 6 |
In the Update Firmware dialog box, click Install Firmware. |
Activate the Installed Cisco IMC Firmware
Before you begin
Install the Cisco IMC firmware on the server.
Procedure
| Step 1 |
In the Cisco IMC GUI, click the Navigation pane and choose Admin. |
||
| Step 2 |
From the Admin drop-down list, choose Firmware Management. The Firmware Management dialog box appears. |
||
| Step 3 |
In the Firmware Management dialog box, check the BMC check box and click Activate. |
||
| Step 4 |
In the Activate Firmware dialog box, select the firmware image to activate, and then click Activate Firmware. 
|
Install the BIOS
Install the Cisco IMC BIOS Through the Browser
Before you begin
Procedure
| Step 1 |
In the Cisco IMC GUI, click the Navigation pane and choose Admin. |
| Step 2 |
From the Admin drop-down list, choose Firmware Management. The Firmware Management dialog box appears.
|
| Step 3 |
In the Firmware Management dialog box, check the BIOS check box and click Update. 
|
| Step 4 |
In the Update Firmware dialog box, click Install BIOS Firmware through Browser Client, and click Browse. 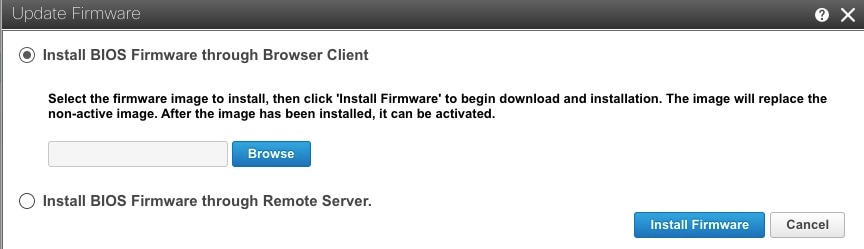
|
| Step 5 |
In the Choose File dialog box, navigate to the .cap file that you want to install. |
| Step 6 |
In the Update Firmware dialog box, click Install Firmware. |
Activate the Installed BIOS Firmware
Before you begin
Install the Cisco IMC firmware on the server.
Procedure
| Step 1 |
In the Cisco IMC GUI, click the Navigation pane and choose Admin. |
| Step 2 |
From the Admin drop-down list, choose Firmware Management. The Firmware Management dialog box appears. |
| Step 3 |
In the Firmware Management dialog box, check the BIOS check box and click Activate.
|
| Step 4 |
In the Activate Firmware dialog box, select the firmware image to activate, and then click Activate Firmware. 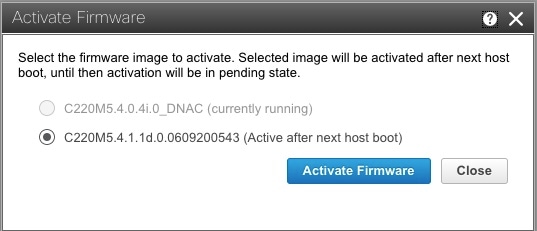
|
Change the Cisco IMC and BIOS Settings and Install Cisco DNA Center
-
Enable the UEFI secure boot mode.
-
Configure the boot order.
-
Install Cisco DNA Center.
Enable the UEFI Secure Boot Mode
Before you begin
Log in to the Cisco IMC GUI as a user with admin privileges.
Procedure
| Step 1 |
In the Cisco IMC GUI, click the Navigation pane and choose to view the BIOS tab. |
||
| Step 2 |
In the BIOS tab, click the Configure Boot Order tab. |
||
| Step 3 |
Check the UEFI Secure Boot check box, and click Save Changes. 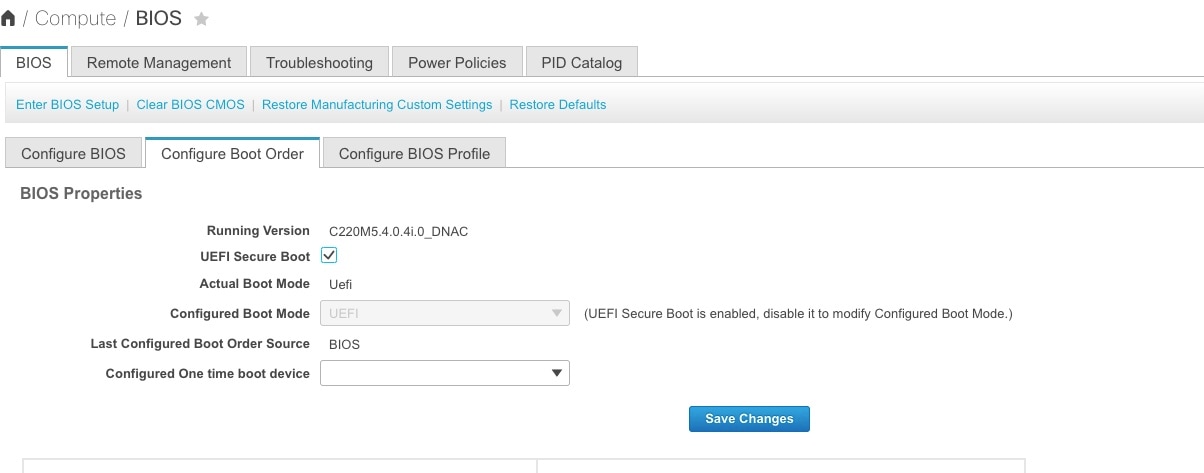
|
Configure the Boot Order
Configure the first EFI boot order option to the Hard Disk Drive (HDD). The second boot order option can be either the Cisco IMC Mapped DVD, KVM Mapped DVD, or USB flash drive (which is based on your mode of installation).
Before you begin
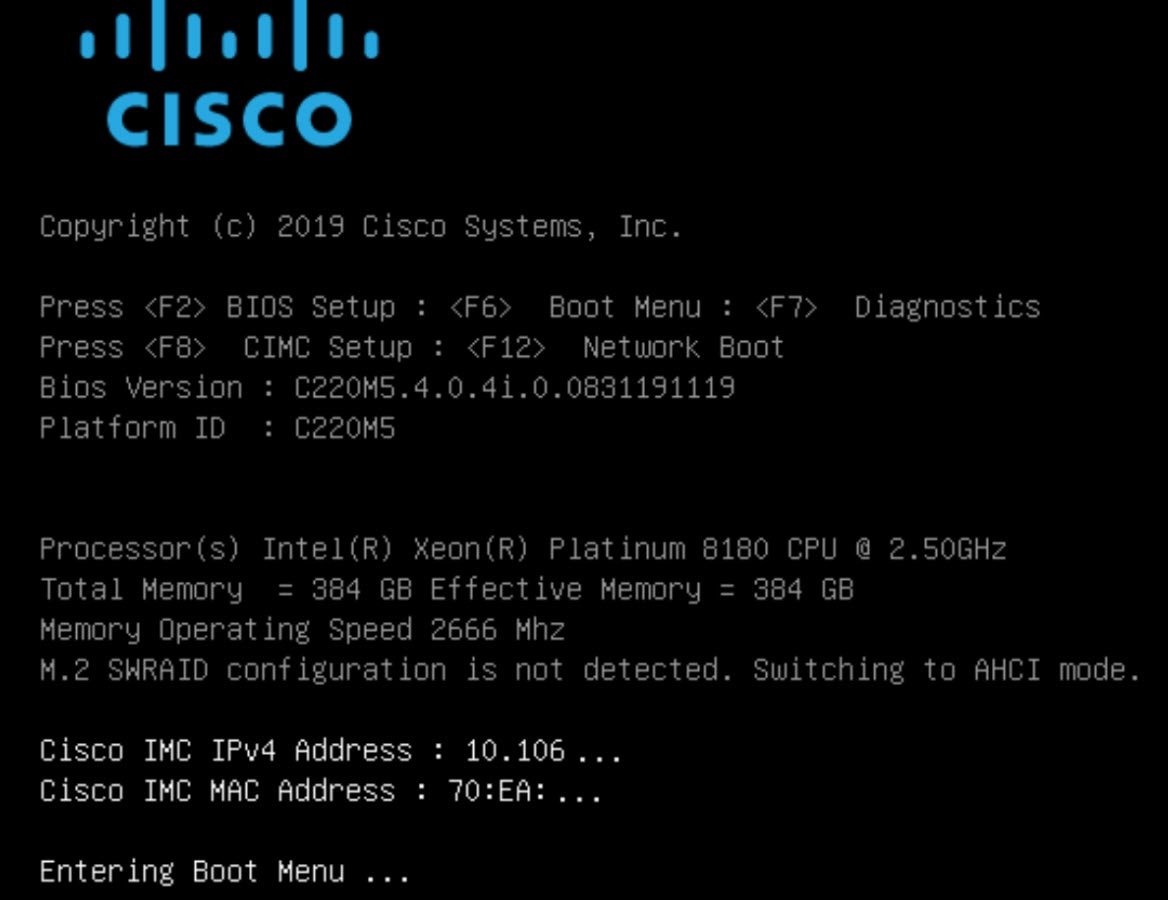
Restart the machine, and while BIOS is loading, press F2 to enter the BIOS setup.
Procedure
| Step 1 |
In the Navigation pane, click the Boot Options tab. |
||
| Step 2 |
From the Boot Options tab, scroll down to the Boot Option Priorities area. |
||
| Step 3 |
In the Boot Option Priorities area, set the Boot Option #1 field to UEFI OS.
|
||
| Step 4 |
Set the Boot Option #2 field to Cisco IMC Mapped DVD (Tested), USB flash drive (Not Tested), or KVM Mapped DVD (Not Tested). 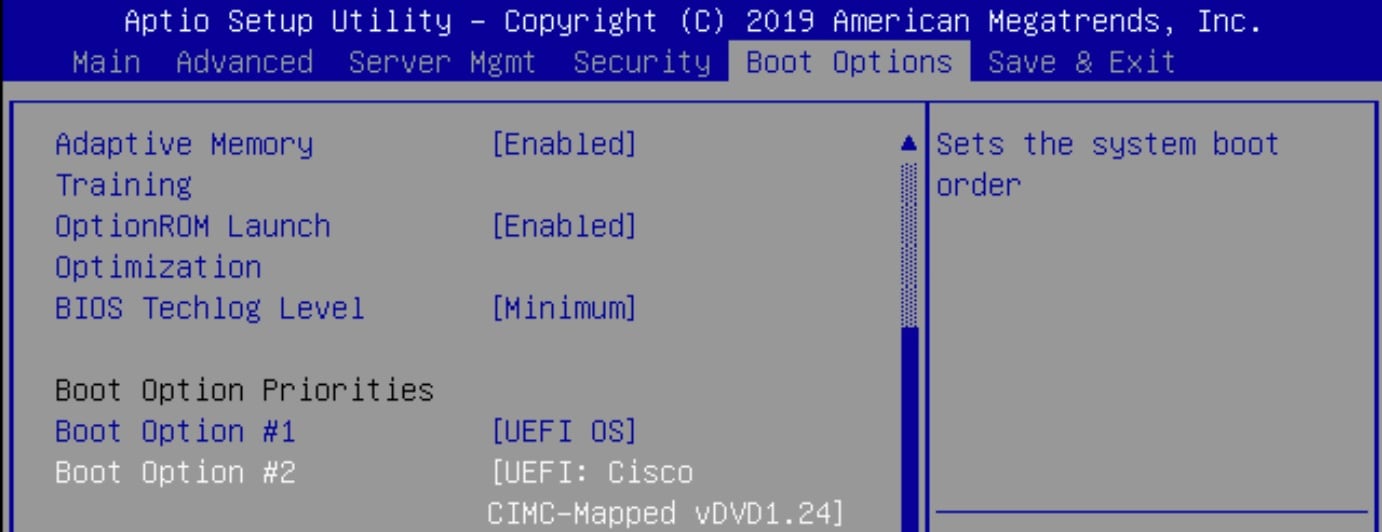
The preceding example screenshot shows that Boot Option #2 is set to Cisco IMC Mapped DVD.
|
||
| Step 5 |
Press F10 and save the configuration. 
|
Install Cisco DNA Center
Before you begin
The secure boot-enabled Cisco DNA Center ISO must be available in the USB flash drive. Also, the ISO must either be connected to the Cisco DNA Center machine, or mapped via the Cisco IMC Mapped DVD option (recommended) or KVM Mapped DVD option (not recommended).
Procedure
| Step 1 |
Restart the machine, and while the BIOS is loading, press F6 to enter the Boot Selection.
|
||
| Step 2 |
Choose the ISO boot drive from the Cisco IMC Mapped DVD (Tested), USB flash drive (Not Tested), or KVM Mapped DVD (Not Tested). 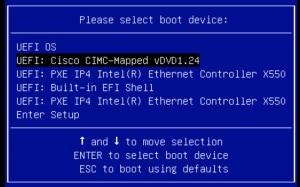
The preceding example screenshot shows the chosen ISO boot drive as Cisco IMC Mapped DVD (Tested). |
||
| Step 3 |
Choose the Maglev Installer mode, which is the default in the System Boot menu, to proceed with the installation. 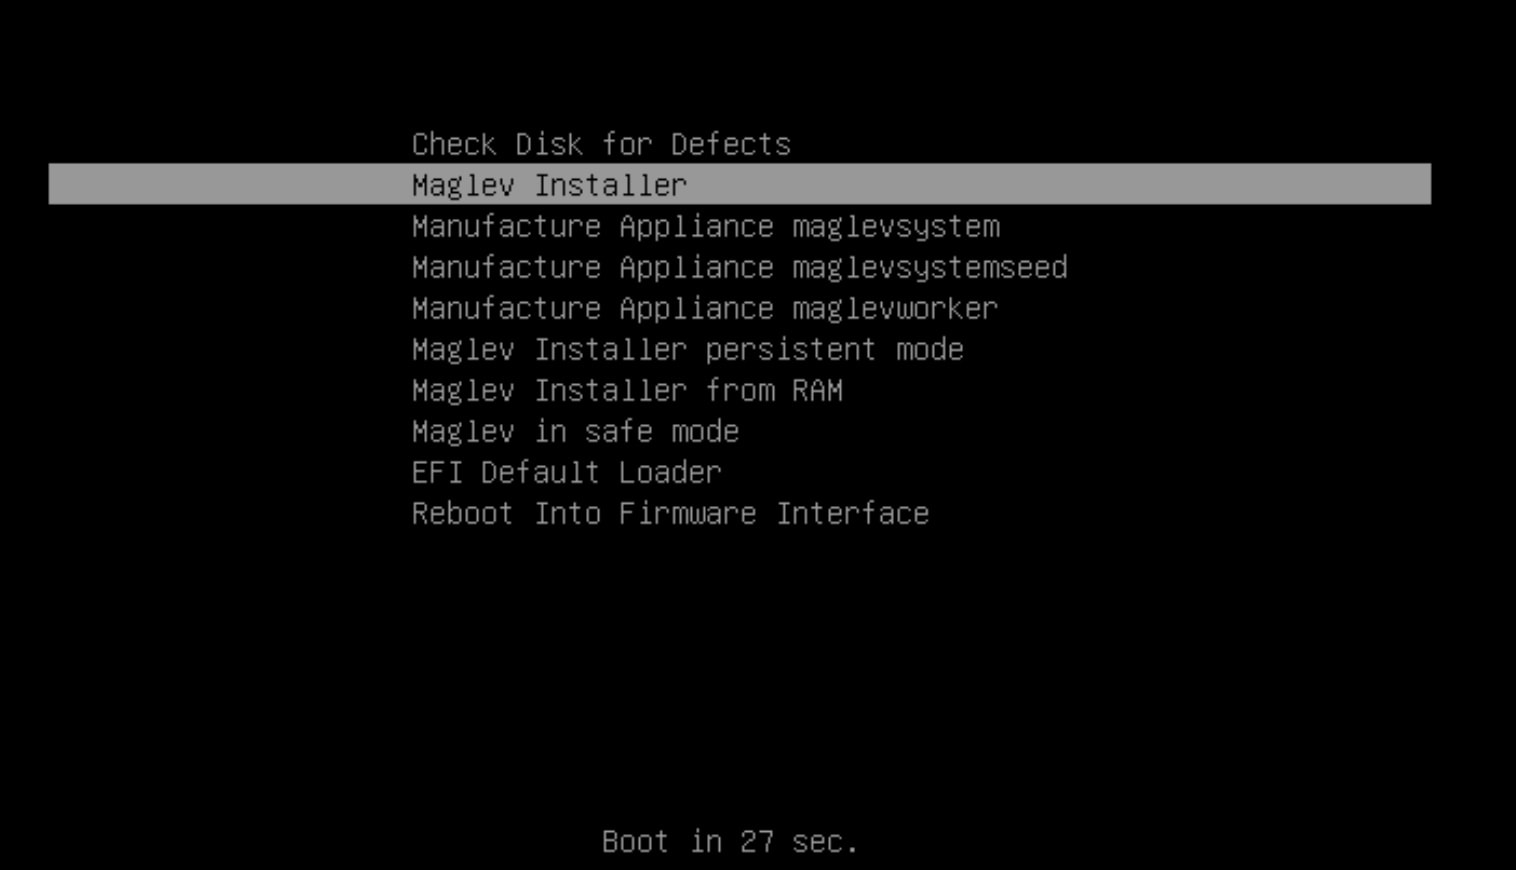
|
||
| Step 4 |
The Maglev Configuration wizard follows the same procedure as in a regular Cisco DNA Center installation. For more information about the Maglev Configuration wizard, see the Cisco DNA Center Installation Guide. 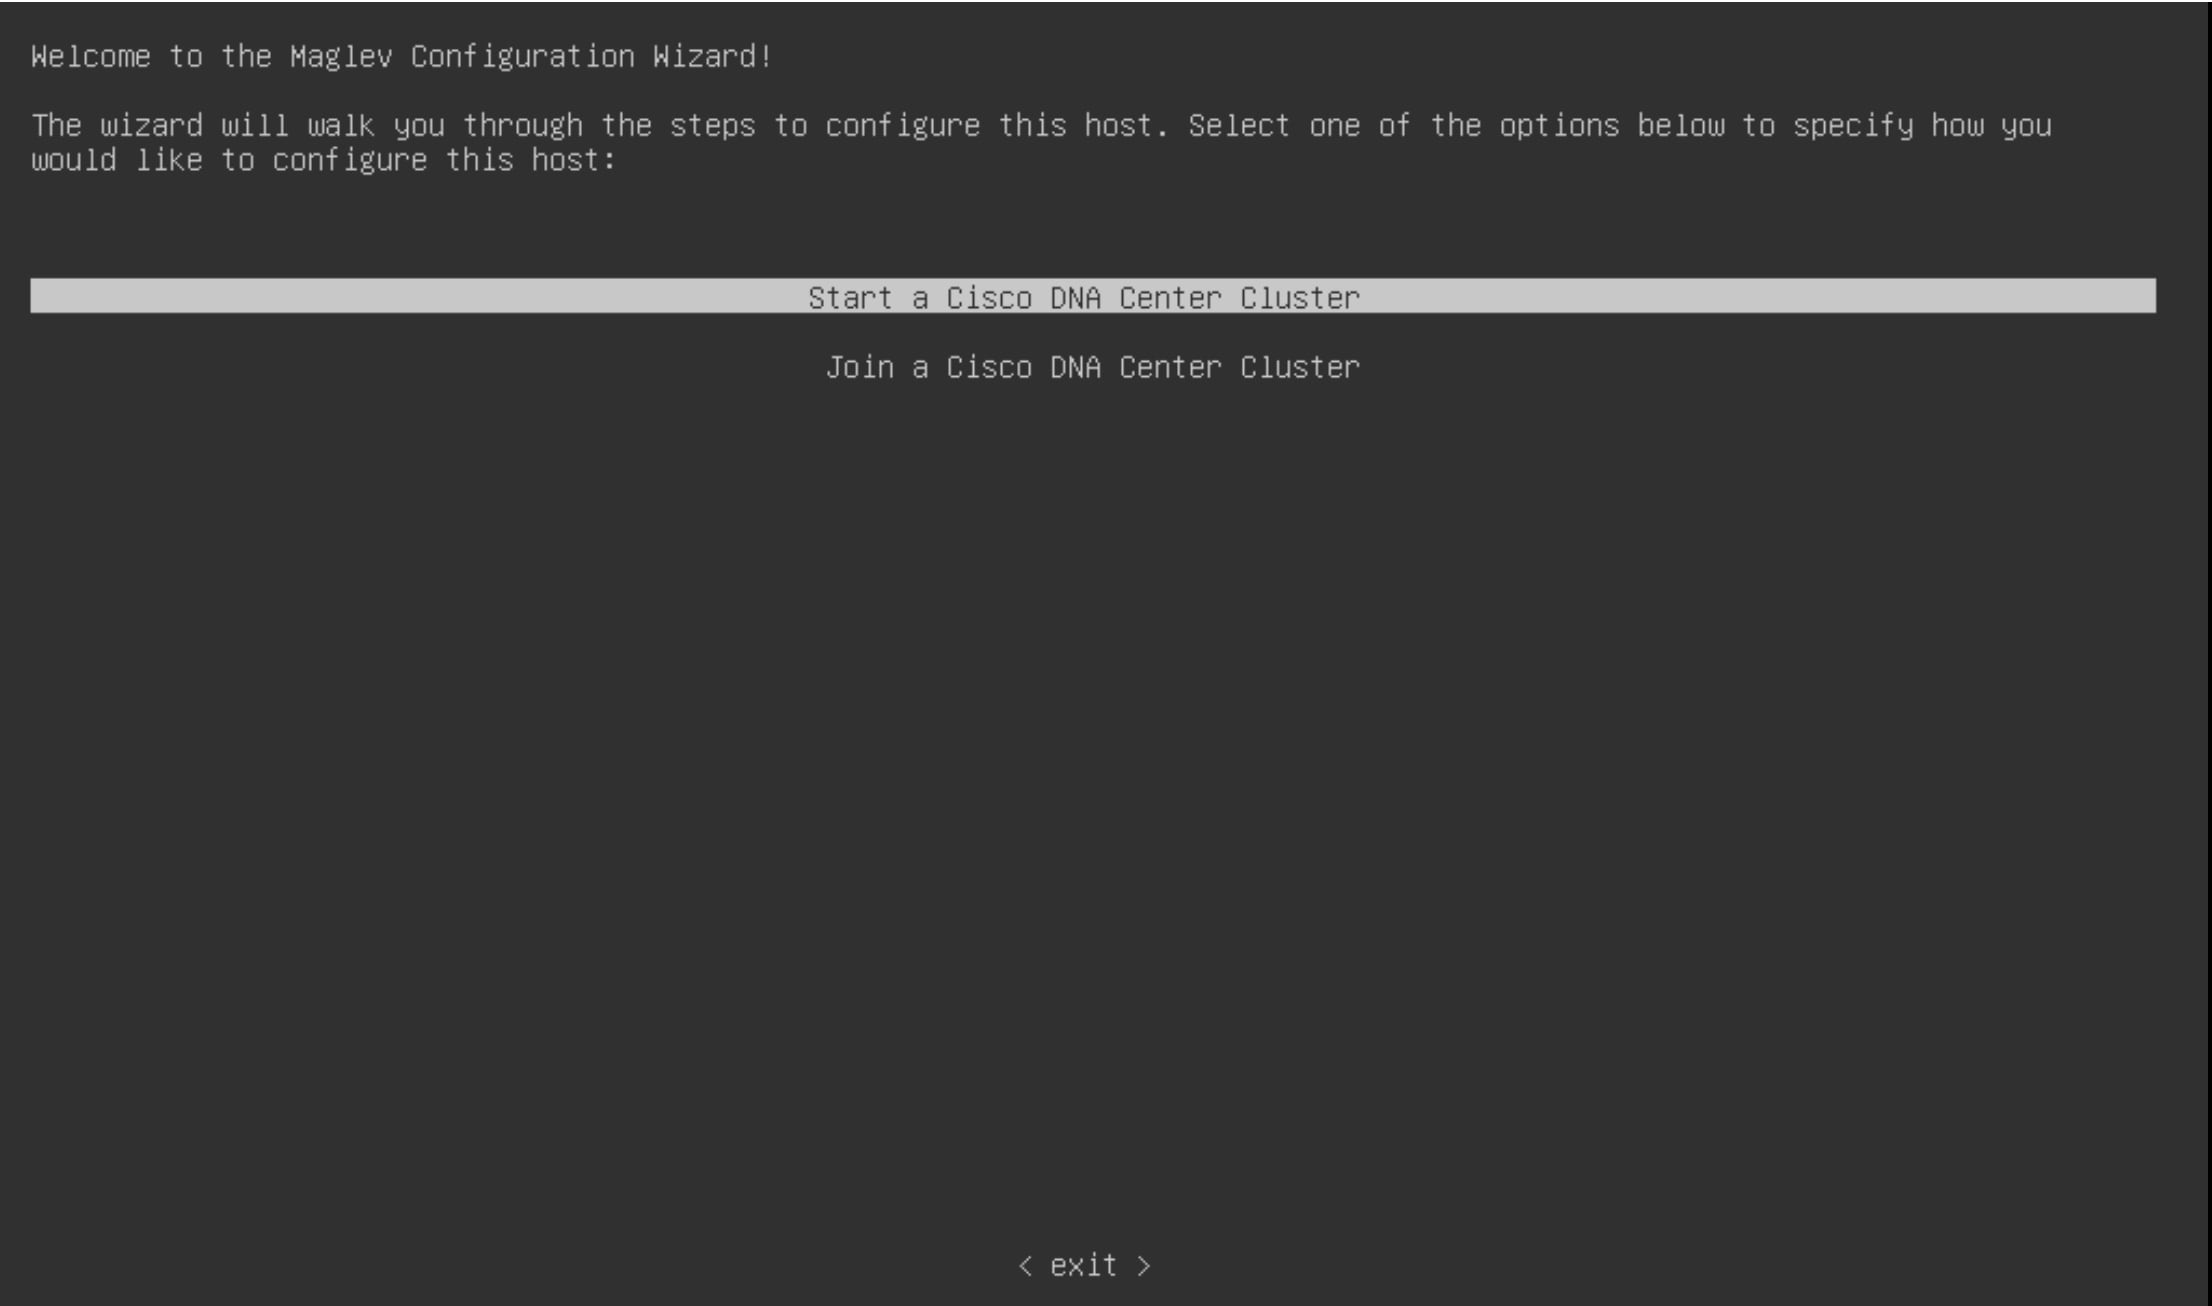
|
Verify That the ISO Image Supports EFI Boot
Procedure
| Step 1 |
Enter the following commands to verify that the ISO image supports EFI boot: |
| Step 2 |
In the output for the parted command, locate the EFI boot partition. For example: |
Considerations When Burning an ISO to a USB Flash Drive
Because secure boot recognizes only VFAT/FAT16 partitions, the USB flash drive must be VFAT formatted. Use an ISO writing tool, such as Etcher (https://www.balena.io/etcher/), to flash the ISO to the USB flash drive. Confirm that the ISO is secure UEFI bootable; see Verify That the ISO Image Supports EFI Boot.
Burning an ISO to a new USB flash drive involves the following steps:
-
Download the secure boot-enabled ISO from cisco.com.
-
The USB flash drive must be at least 64 GB. (The ISO itself is at least 33 GB.)
-
Format the USB flash drive with "MS-DOS (FAT)" using the Mac "Disk Utility."
-
Use Etcher to burn the secure boot-enabled ISO to the USB flash drive. See "Prepare the Appliance for Configuration" in the Cisco DNA Center Installation Guide.
-
The Cisco DNA Center appliance detects the ISO on the USB flash drive, whose Cisco IMC is enabled with secure boot.

Verify the Disk UEFI Secure Boot
After installation, the fat16 partition contains the esp flag, as follows:
$ sudo parted /dev/sda print

Disk /dev/sda: 215GB

Sector size (logical/physical): 512B/512B

Partition Table: gpt

Disk Flags:

Number  Start   End     Size    File system  Name     Flags

1      1049kB  2097kB  1049kB               primary  bios_grub

2      2097kB  51.2GB  51.2GB  ext4         primary

3      51.2GB  51.5GB  251MB   fat16        primary  boot, esp

4      51.5GB  215GB   163GB   ext4         primary
The output of mount | grep efivars shows the efivarfs mounted.
Verify the Extensible Firmware Interface Image Signature
Cisco DNA Center images are signed using the SHA-256 hash algorithm. The signature scheme is PKCS7, signed with the RSA-2048 key.
Procedure
| Step 1 |
After the system boots in secure boot, enter the following commands:
A disk that is booted by secure boot contains the following sample EFI boot images:
|
| Step 2 |
To verify the EFI image signature, enter the following commands:
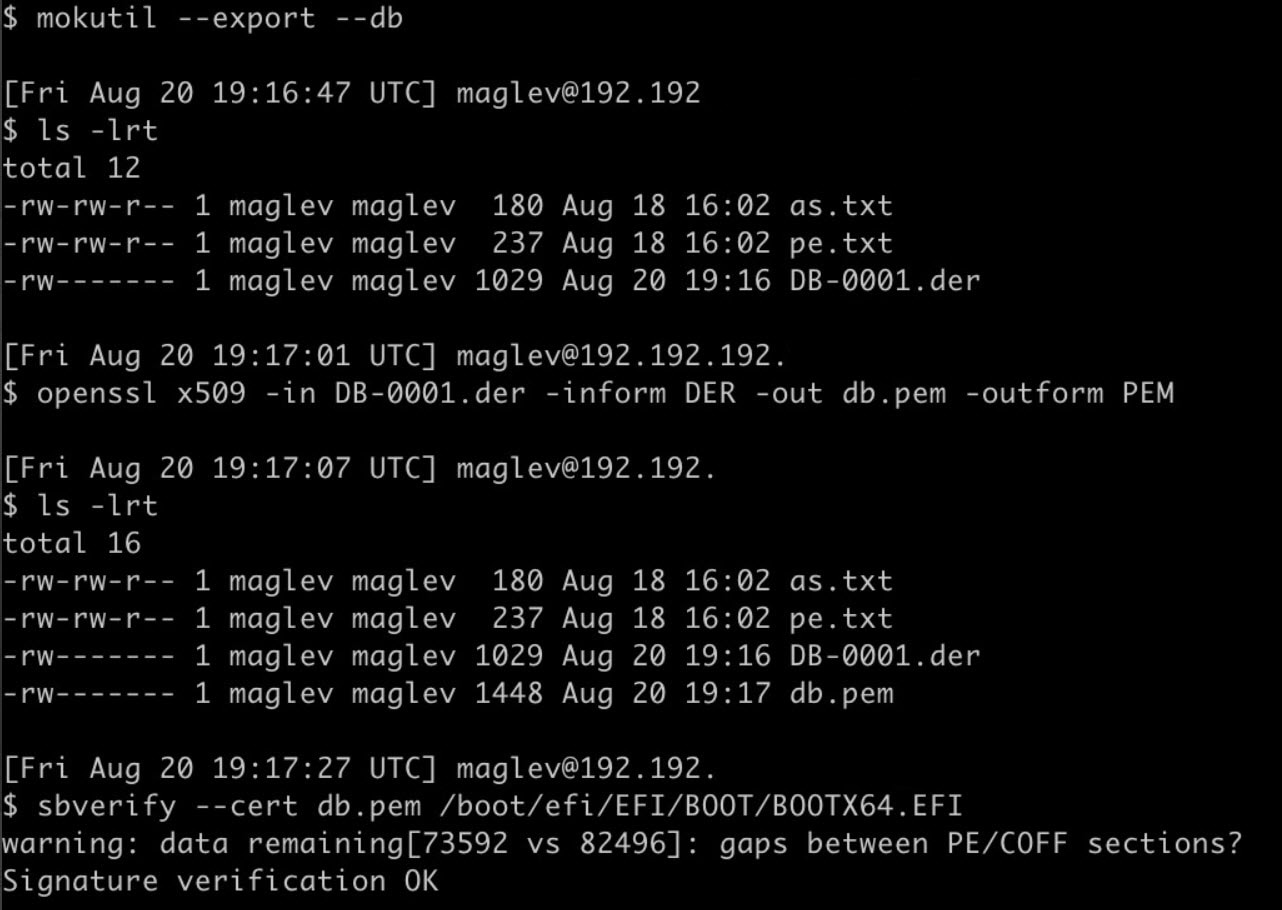
|
 Feedback