Cisco Prime Infrastructure to Cisco DNA Center Migration
This guide explains how to migrate network devices, maps, locations, CLI configurations, and templates from Cisco Prime Infrastructure to Cisco DNA Center.
Migration Overview
Cisco Prime Infrastructure has been a key management platform and solution of choice for campuses across industries. However, if you want to use intent-based networking, consider migrating from Cisco Prime Infrastructure to Cisco DNA Center to drive tangible IT and business results. Cisco DNA Center is a network management system, foundational controller, and analytics platform at the heart of the intent-based network. Beyond device management and configuration, Cisco DNA Center provides the following software solutions:
-
A management platform for all your network requirements
-
A Software-Defined Network (SDN) controller for automation of virtual devices and services
-
An Assurance engine to guarantee improved network experience for all users
The Cisco DNA Center software resides on the Cisco DNA Center appliance and controls the Cisco fabric and nonfabric devices. Cisco DNA Center provides the following capabilities:
-
Design: Design your network using physical maps and logical topologies for quick visual reference.
-
Policy: Define user and device profiles that facilitate highly secure access and network segmentation based on business needs.
-
Provision: Use policy-based automation to deliver services to the network based on business priority and simplify device deployment.
-
Assurance: Combine deep insights with rich context to deliver a consistent experience and proactively optimize your network.
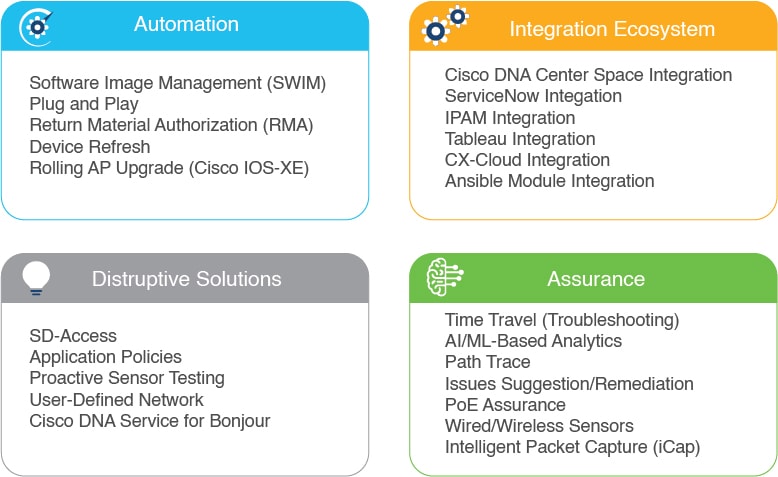
Cisco DNA Center allows you to automatically provision and virtualize devices through Cisco Network Functions Virtualization (NFV), and lower security risks through segmentation and Encrypted Traffic Analysis (ETA). Cisco DNA Center Assurance collects streaming telemetry from devices around the network to ensure alignment of network operation with the business intent. Cisco DNA Center Assurance optimizes network performance, enforces network policies, and reduces the time spent on troubleshooting tasks. Cisco DNA Center platform provides 360 degree extensibility with a broad ecosystem of partners and independent software vendors. The 360 degree extensibility allows you to make your network agile and fully in-tune with your business priorities. Cisco DNA Center is a centralized network management system that provides all the capabilities in a single platform.
Migration Workflow
The migration from Cisco Prime Infrastructure to Cisco DNA Center involves the following high-level tasks:
-
Understanding Cisco DNA Center: Learn about the capabilities of Cisco DNA Center, its parity with Cisco Prime Infrastructure, and differentiated use cases compared to Cisco Prime Infrastructure.
-
Assess compatibility between Cisco Prime Infrastructure and Cisco DNA Center: Run the Cisco Prime Infrastructure Cisco DNA Center Assessment and Readiness Tool (PDART). Cisco PDART provides the following information:
-
Comprehensive summary of Cisco Prime Infrastructure usage
-
Cisco DNA Center compatibility of network devices, use cases, network scale, and other relevant details
-
-
Prepare for data migration: Follow the recommendations from the Cisco PDART report. If required, upgrade Cisco Prime Infrastructure, optimize network hierarchy, and onboard the Cisco DNA Center appliance.
-
Initiate data migration: Use the Cisco DNA Center Coexistence data migration tool available in Cisco Prime Infrastructure. Cisco DNA Center Coexistence securely ports your network from Cisco Prime Infrastructure to Cisco DNA Center.
-
Complete data migration: Verify that the necessary network elements, sites, maps, templates, and credentials are migrated from Cisco Prime Infrastructure to Cisco DNA Center.
-
Adopt Cisco DNA Center: Cisco DNA Center offers superior automation, greater visibility, and AI-driven analytics that keeps your network healthy and reduces operational expenditure.
Prerequisites for Migration
Review the following prerequisites before migrating from Cisco Prime Infrastructure to Cisco DNA Center:
-
You must have Root or Super User access privileges in Cisco Prime Infrastructure.
-
You must have Cisco DNA Center access credentials.
-
You should be migrating from Cisco Prime Infrastructure 3.5 or later, which is compatible with the Cisco DNA Center releases listed in Supported Devices.
Assess Migration Readiness
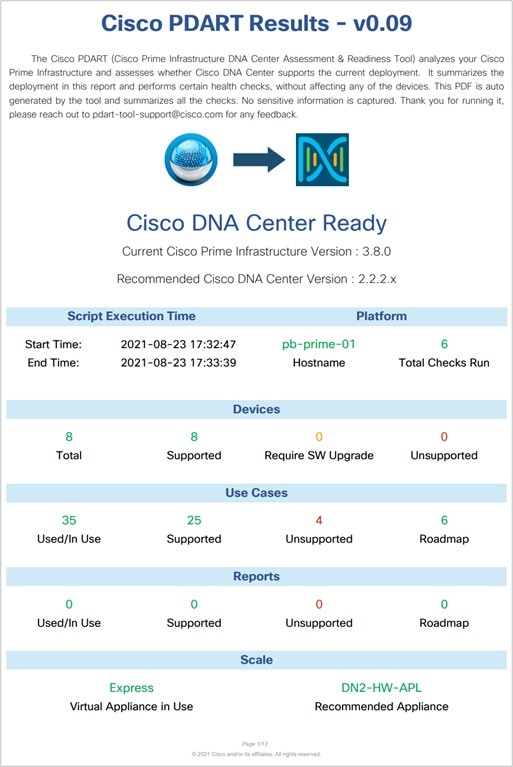
Cisco PDART analyzes the Cisco Prime Infrastructure deployment and assesses whether Cisco DNA Center supports the current deployment. Cisco PDART provides the following details:
-
Comprehensive summary of Cisco Prime Infrastructure usage
-
Cisco DNA Center compatibility of network devices, use cases, network scale, and other relevant details
Cisco PDART summarizes the deployment information in a PDF report and performs certain health checks without affecting any devices. Cisco PDART auto-generates the PDF with a summary of all the checks.
 Note |
Cisco PDART doesn't capture any sensitive information. |
You can run the Cisco PDART through the Cisco Prime Infrastructure GUI. The Cisco PDART executable file is a part of the Updated Bundle File (UBF) patch file. The following are the detailed steps.
Procedure
| Step 1 |
Identify your software version and download the corresponding UBF from Cisco.com. Log in using your CCO credentials to download the file. Download the file starting with DnacPreCheckASSESMENTUbf. The following table lists the Cisco Prime Infrastructure versions and the corresponding UBF download links on Cisco.com.
The following figure shows the download options for Cisco PDART UBF for Cisco Prime Infrastructure 3.8. 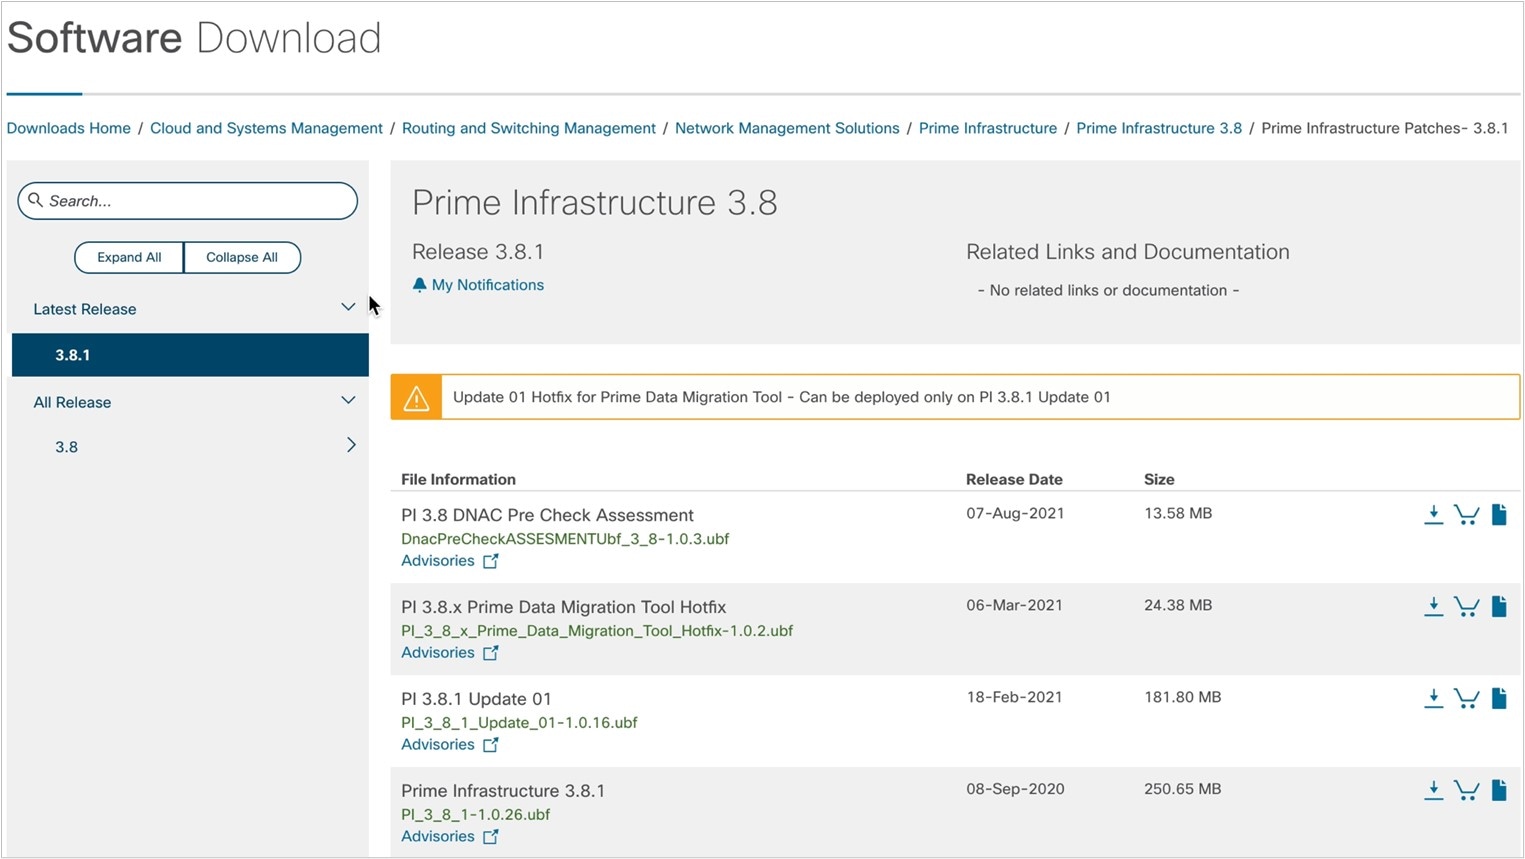 |
||||||||||||
| Step 2 |
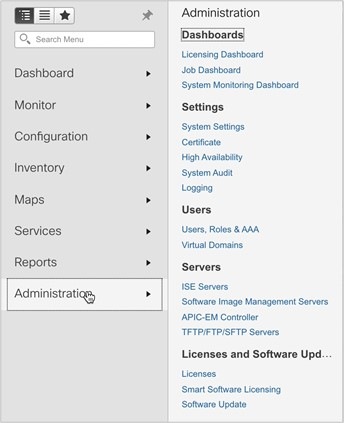
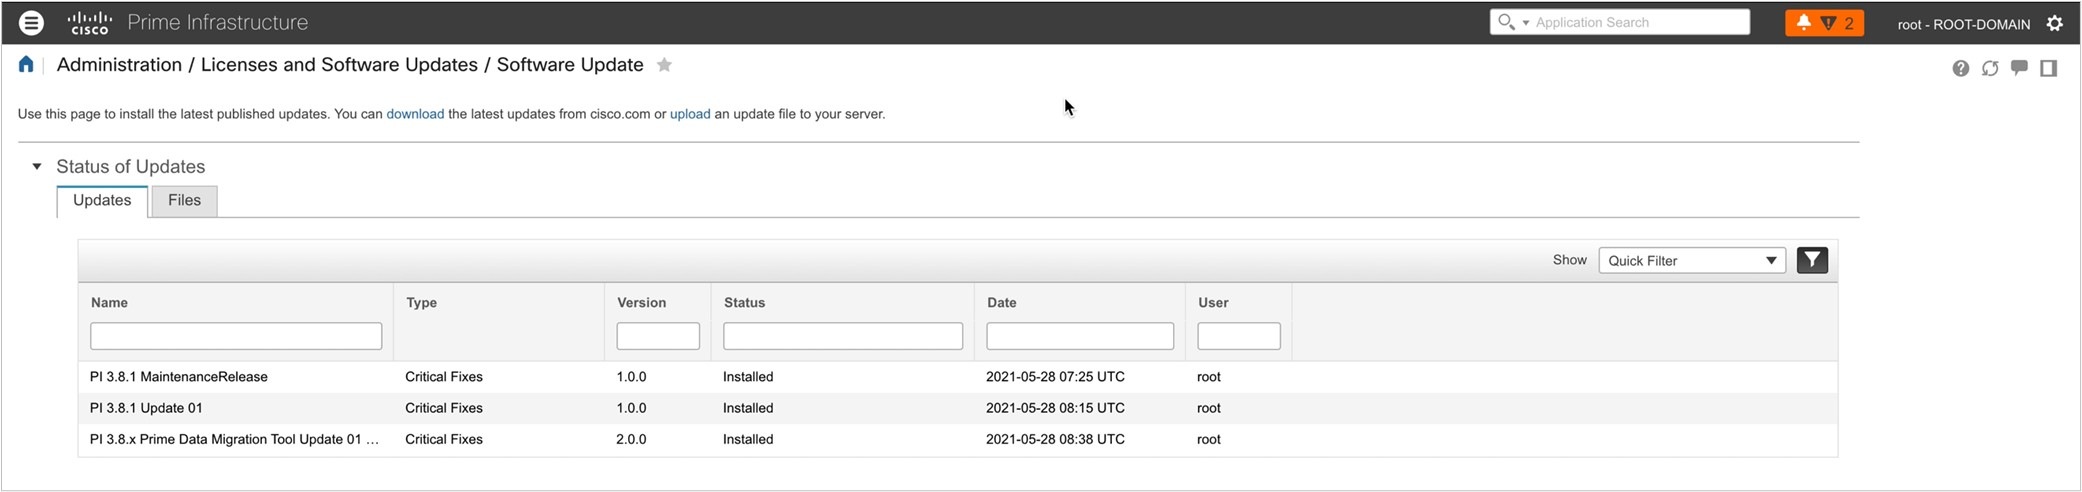
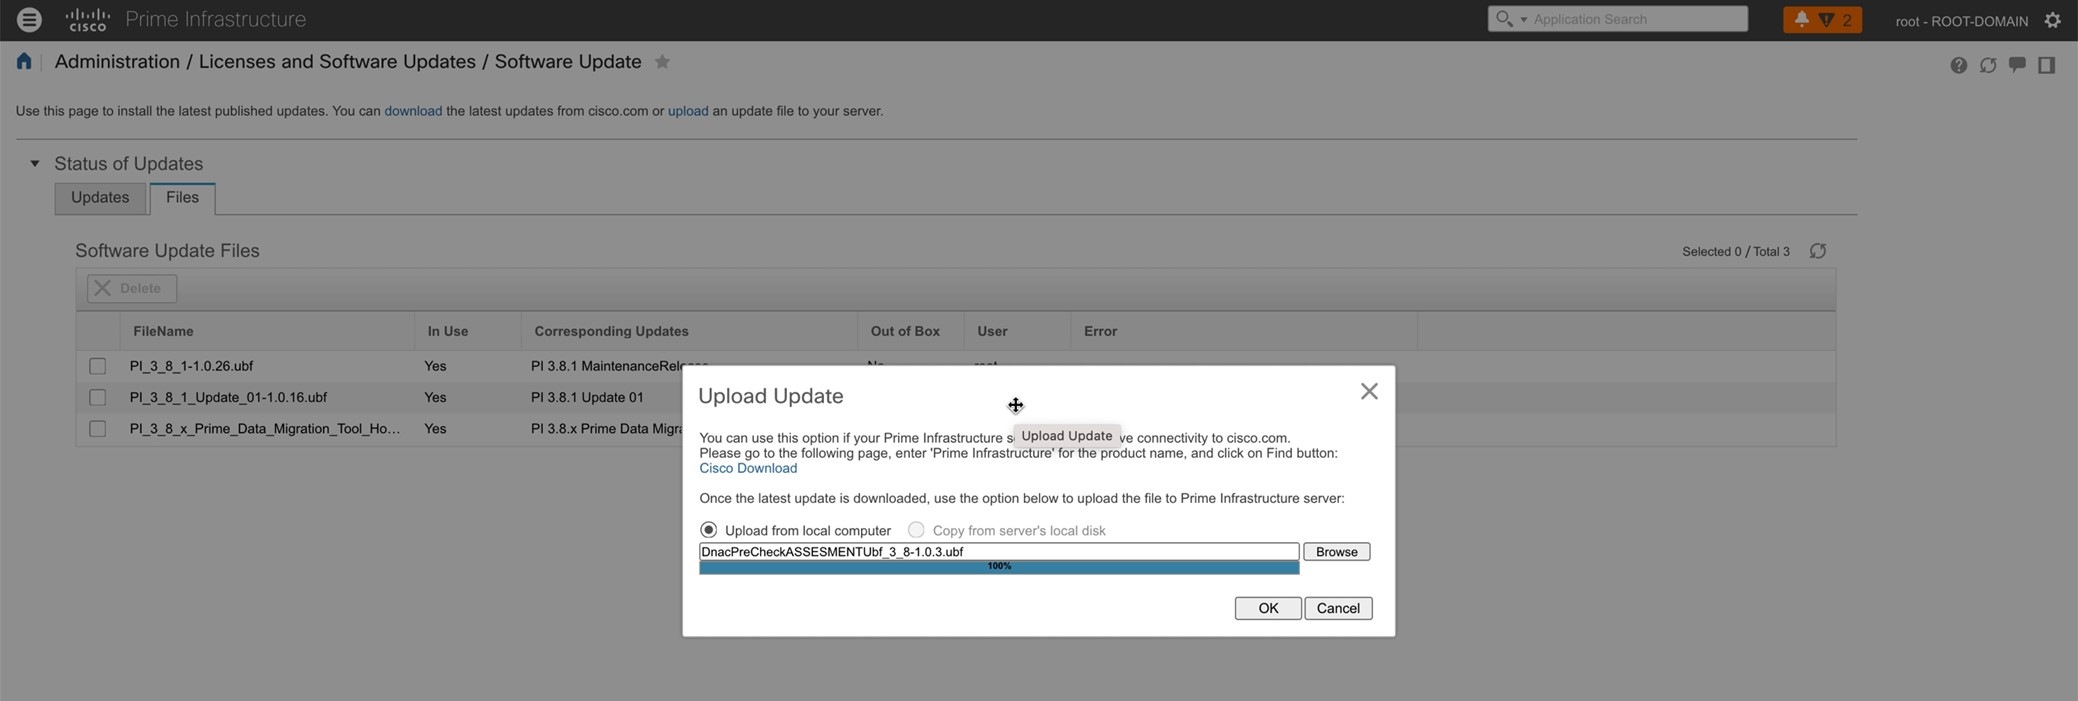
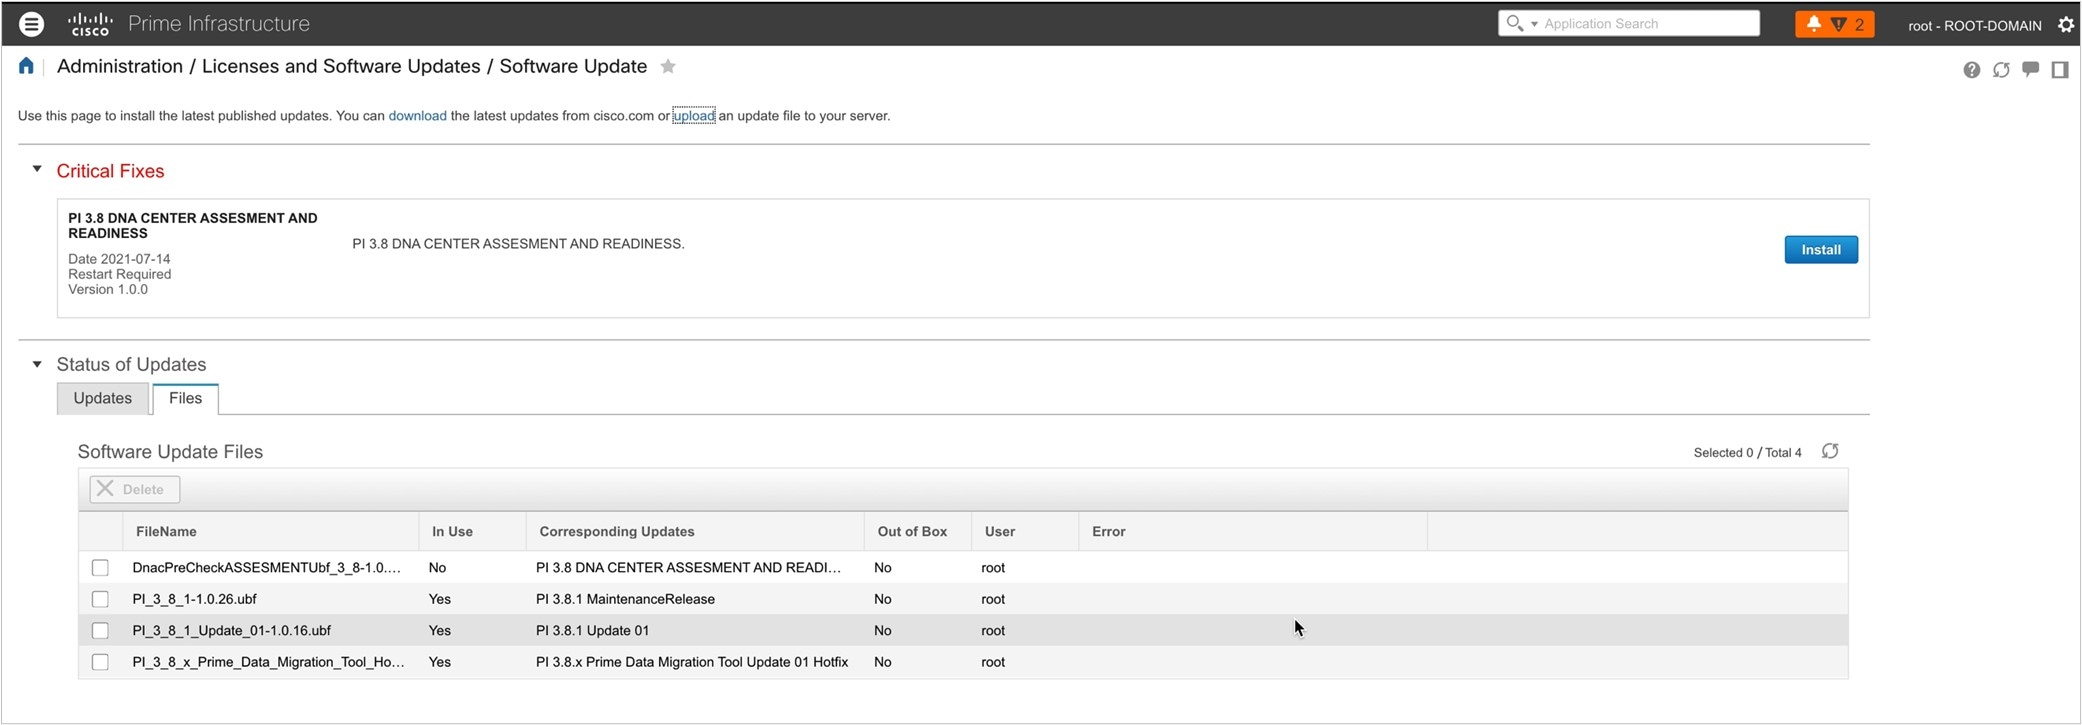
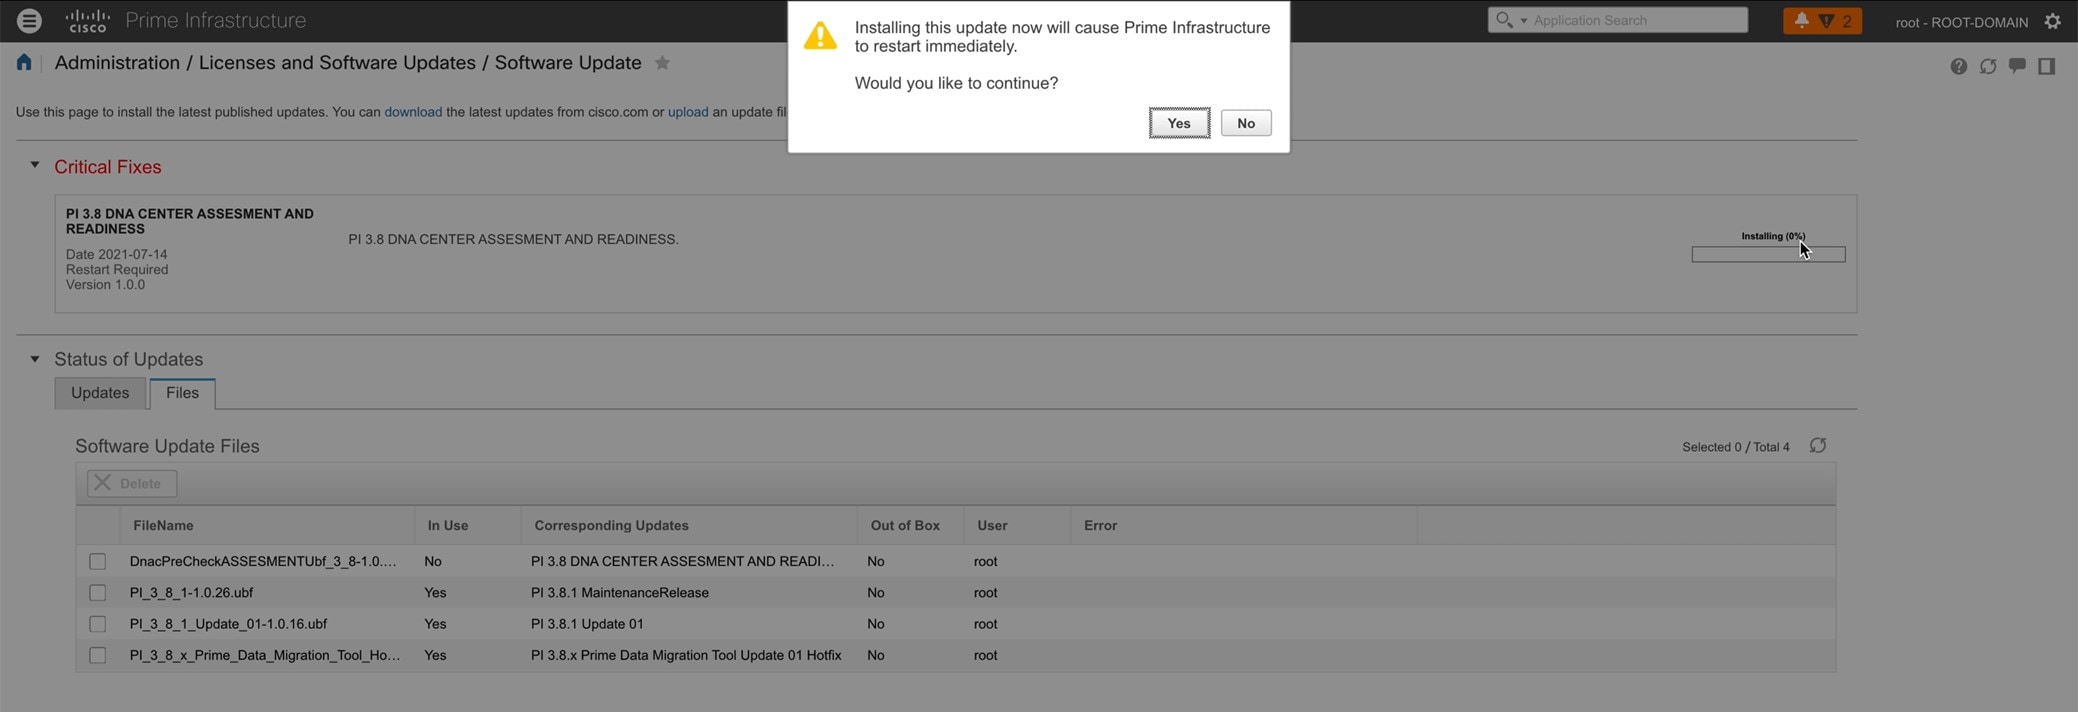
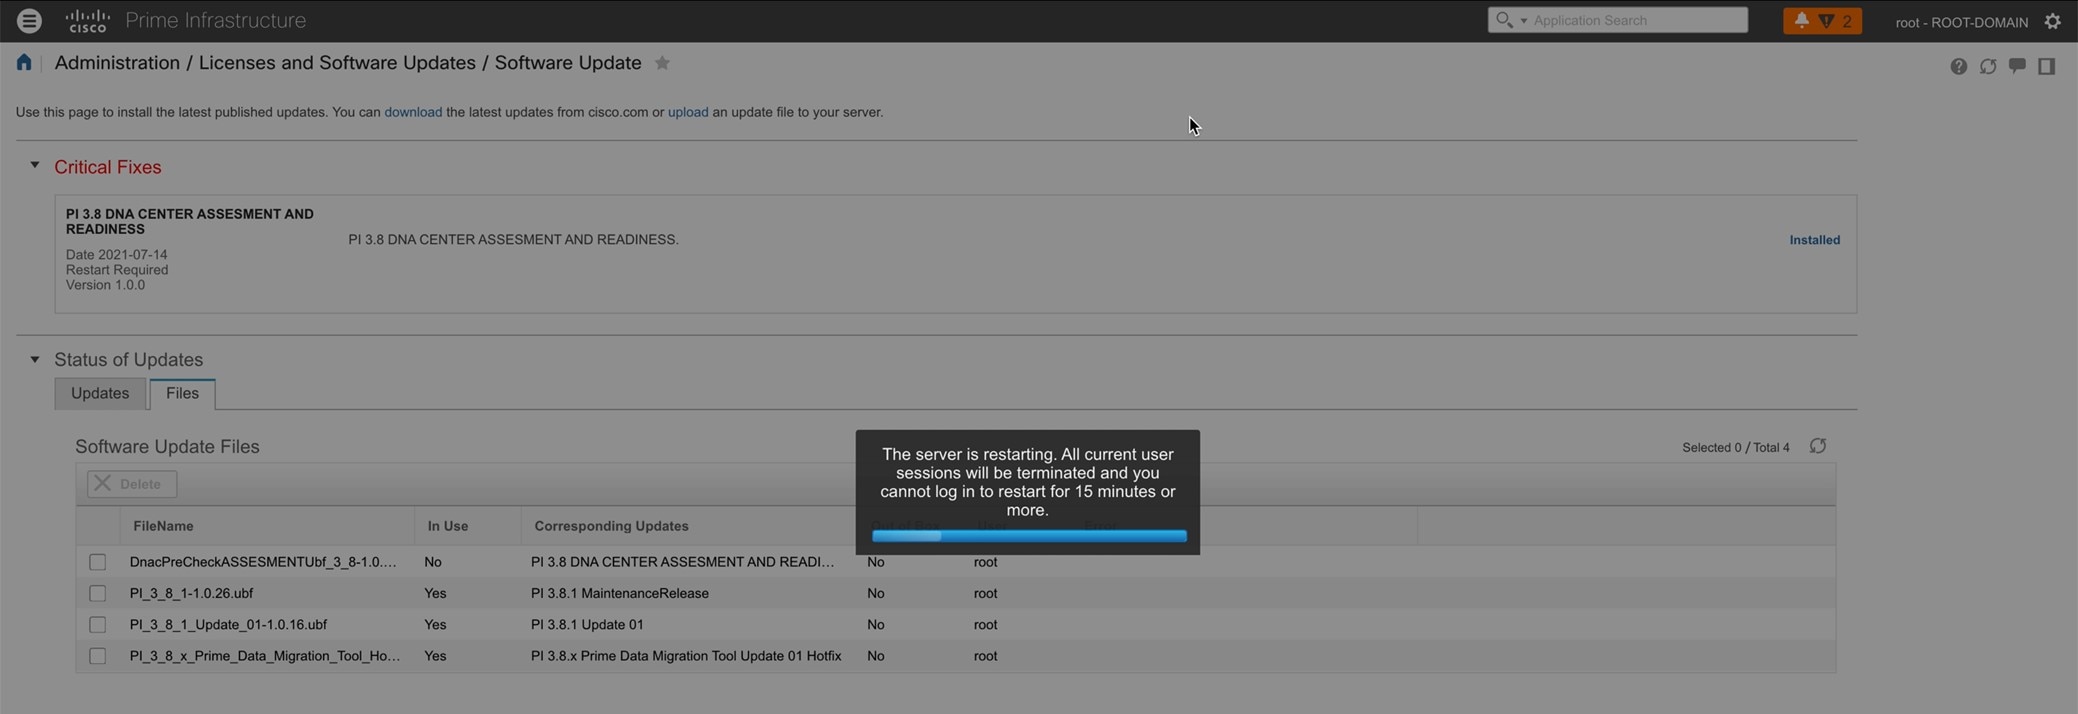
In the Cisco Prime Infrastructure GUI, upload the downloaded Cisco PDART UBF from your local computer, restart Cisco Prime Infrastructure, and install the UBF.
|
||||||||||||
| Step 3 |
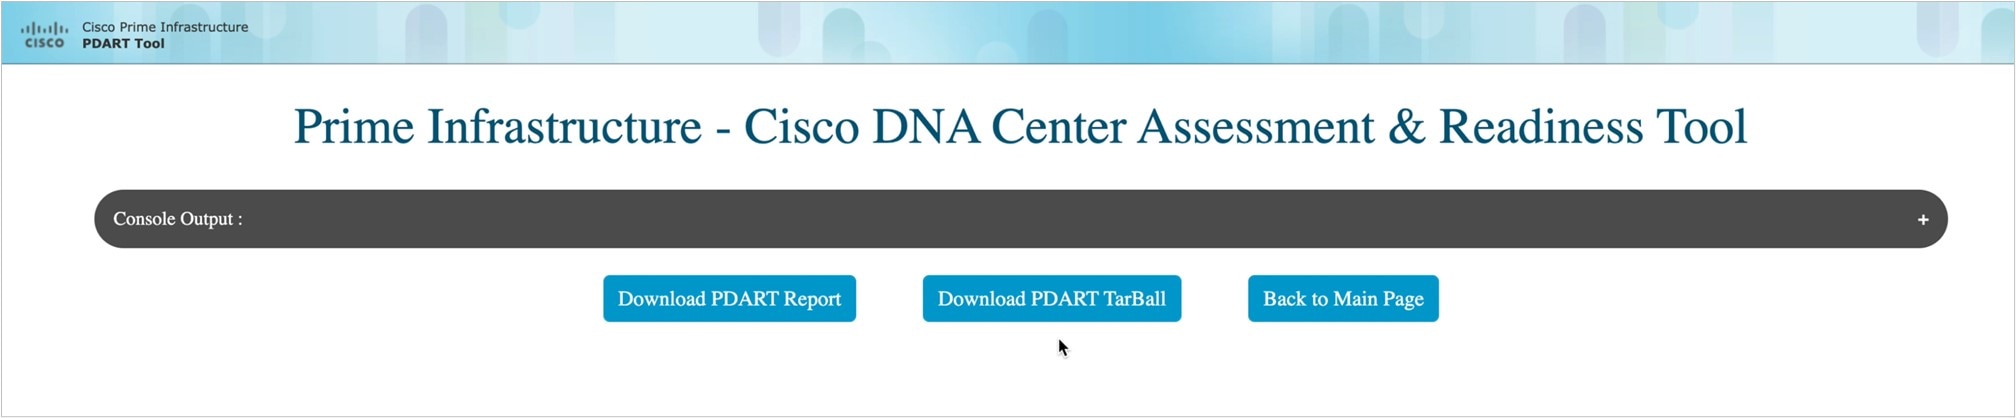
Go to the Cisco PDART URL and run the Cisco PDART.
|

Migrate from Cisco Prime Infrastructure to Cisco DNA Center
The Cisco DNA Center Coexistence tool in Cisco Prime Infrastructure helps you to migrate from Cisco Prime Infrastructure to Cisco DNA Center. The Cisco DNA Center Coexistence tool enables you to easily and securely port the following from Cisco Prime Infrastructure to Cisco DNA Center:
-
Network devices
-
Locations
-
Maps
-
Templates
-
Device configurations
Procedure
| Step 1 |
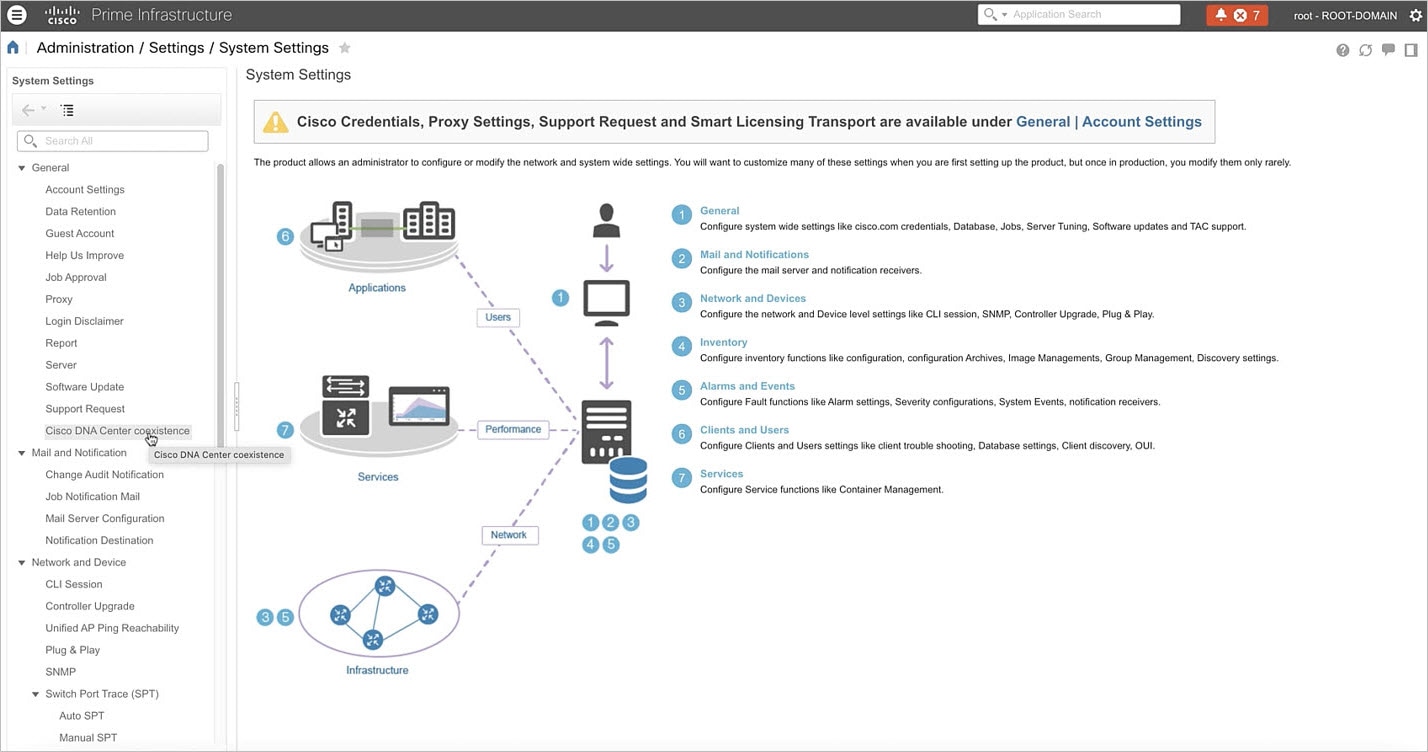
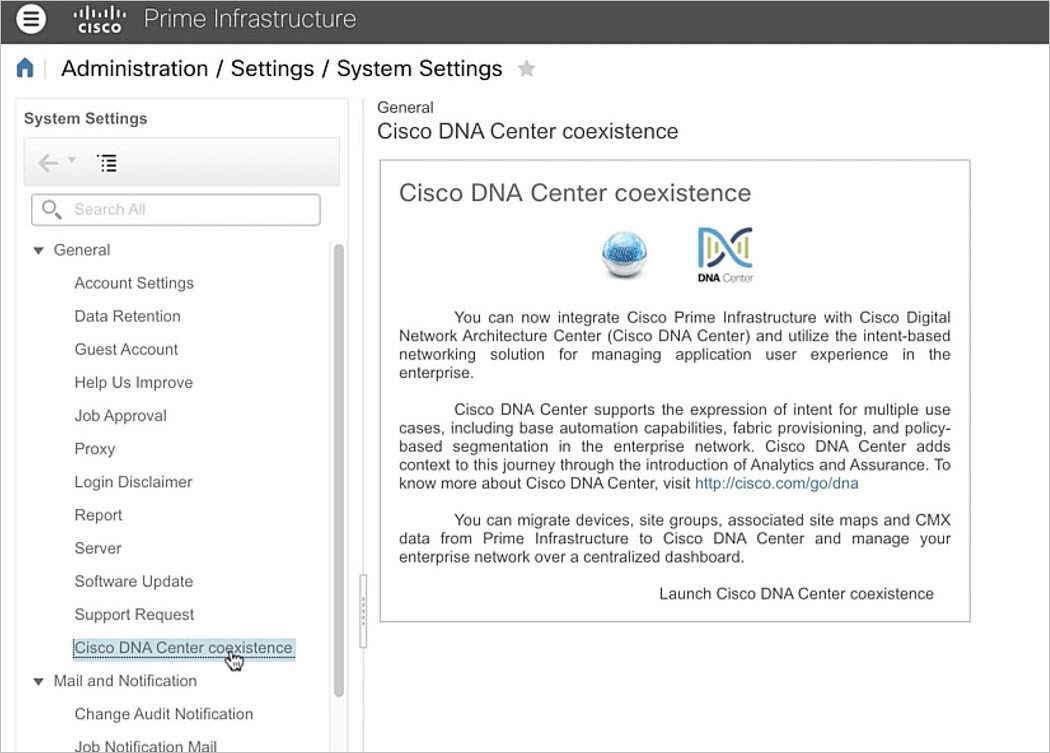
Start the Cisco DNA Center Coexistence tool workflow for migration. For Cisco Prime Infrastructure 3.9.1, click the menu icon ( 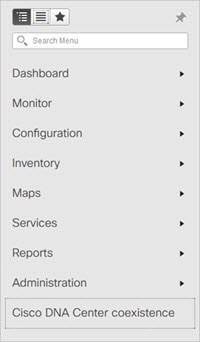
For other versions of Cisco Prime Infrastructure, do the following:
|
||||
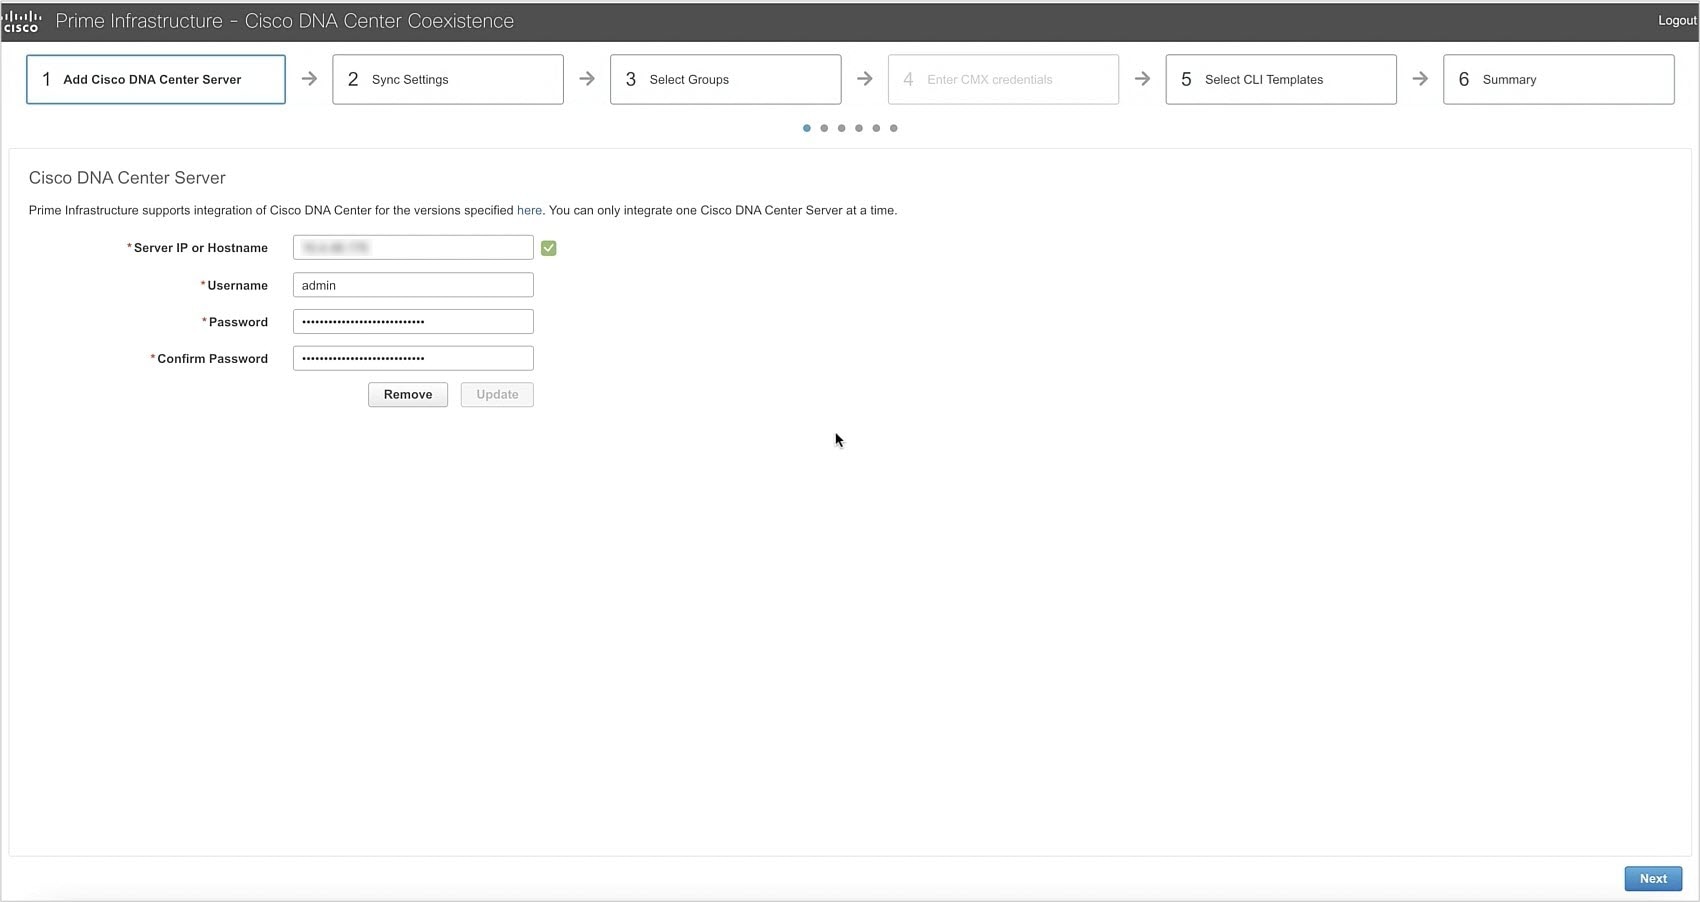
| Step 2 |
Add the Cisco DNA Center server to Cisco Prime Infrastructure.
|
||||
| Step 3 |
Synchronize the settings from Cisco Prime Infrastructure to Cisco DNA Center.
|
||||
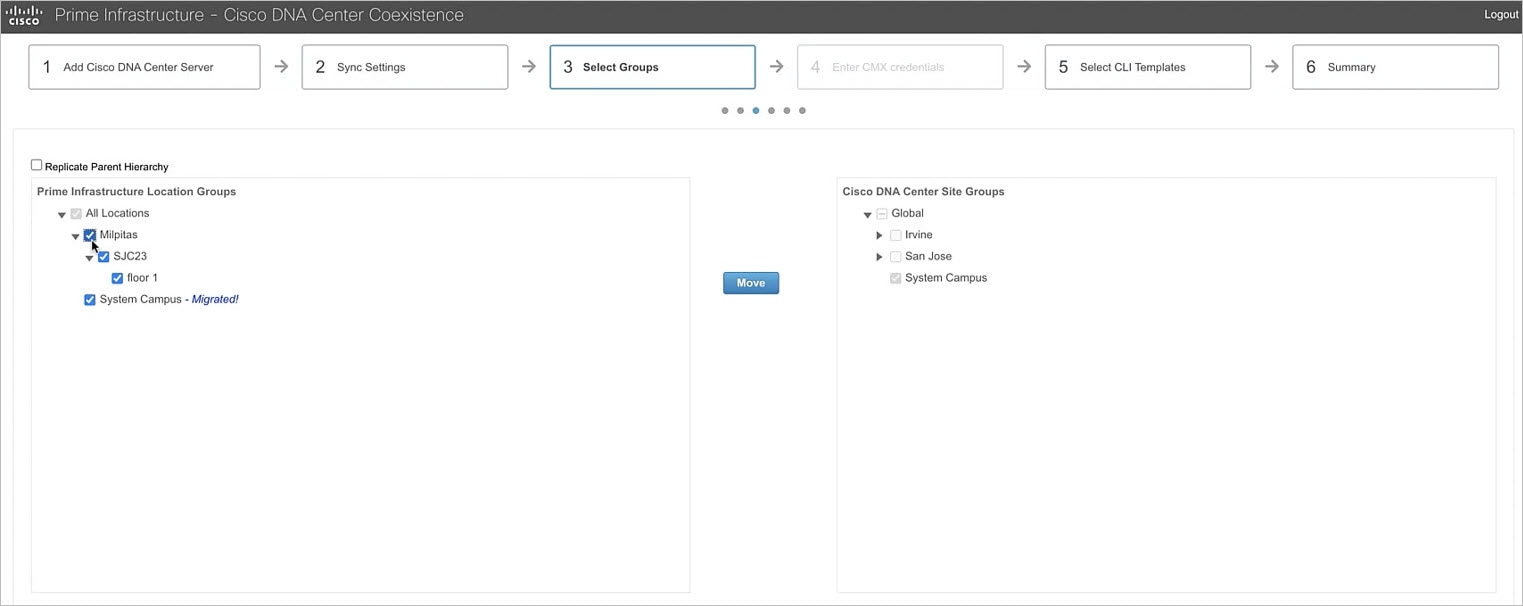
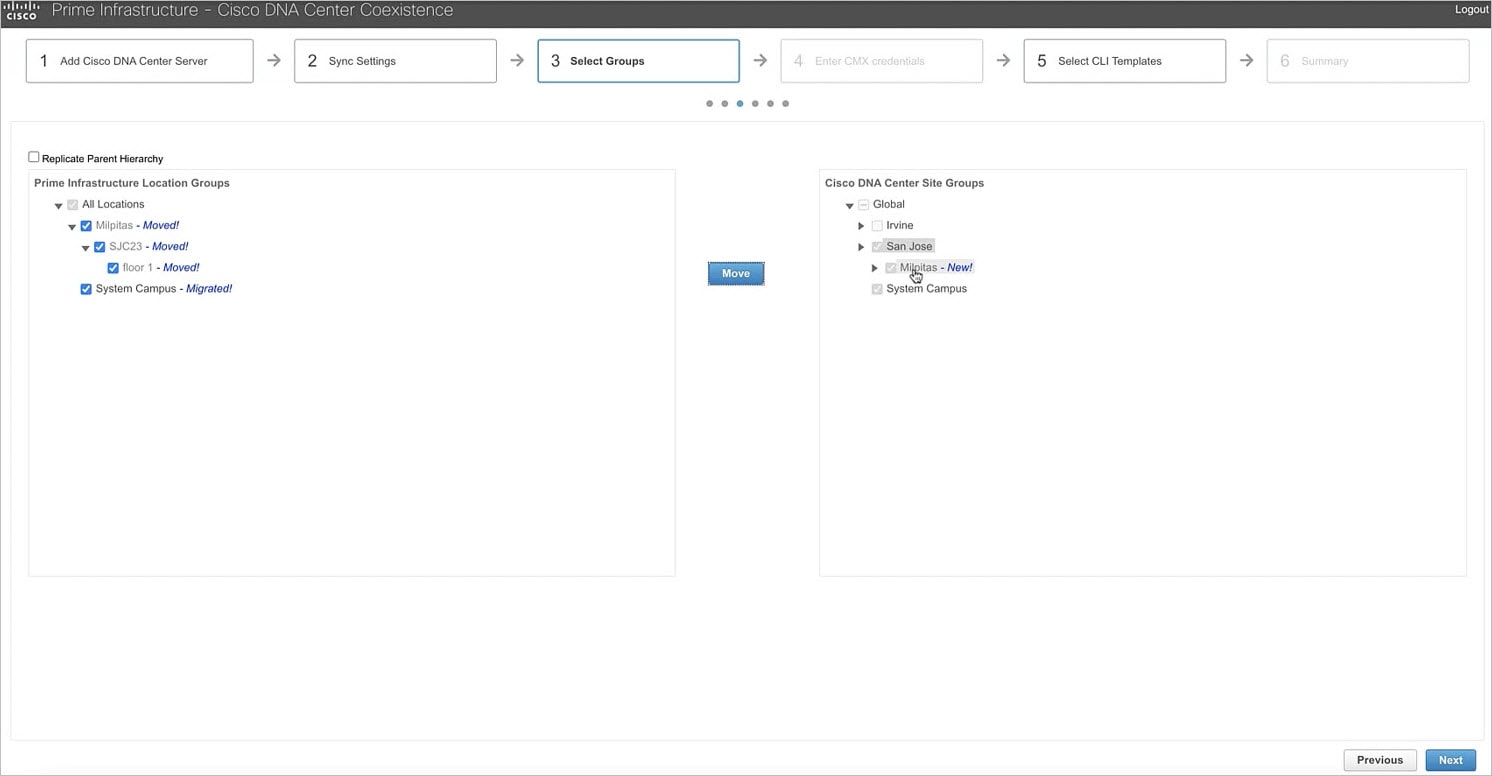
| Step 4 |
Select the site groups to migrate from Cisco Prime Infrastructure to Cisco DNA Center.
|
||||
| Step 5 |
In the Enter CMX credentials window, enter the Cisco CMX credentials.
You can view the list of associated Cisco CMX for the selected groups with the following details:
If the SSH user name and SSH password aren’t available for a Cisco CMX, update this information for the respective Cisco CMX. If the associated Cisco CMX isn’t available, click Next.
|
||||
| Step 6 |
Migrate the user-defined CLI templates. If you checked the Migrate User Defined CLI Templates check box in the Sync Settings window earlier, the Select CLI Templates window opens after the Enter CMX credentials window. 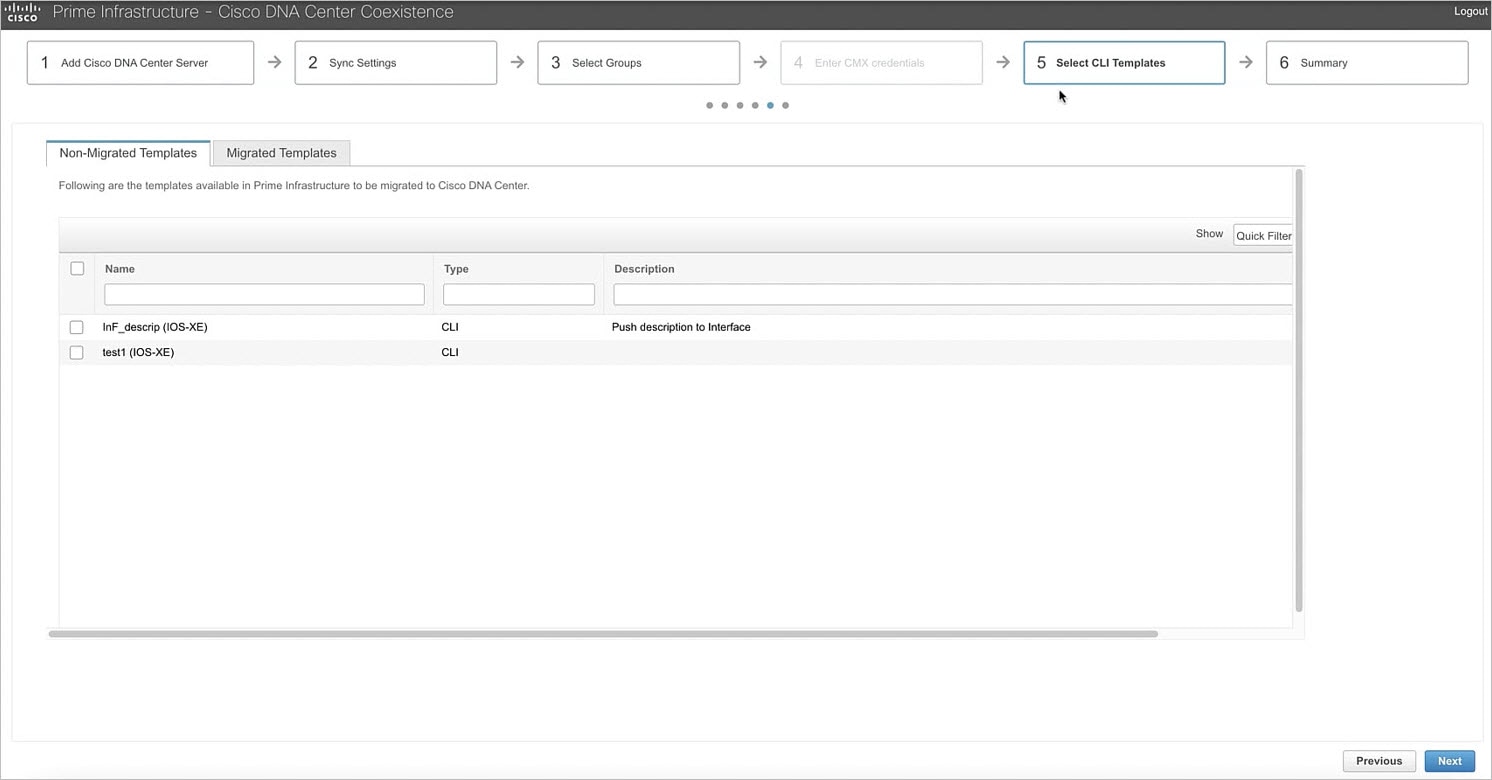
|
||||
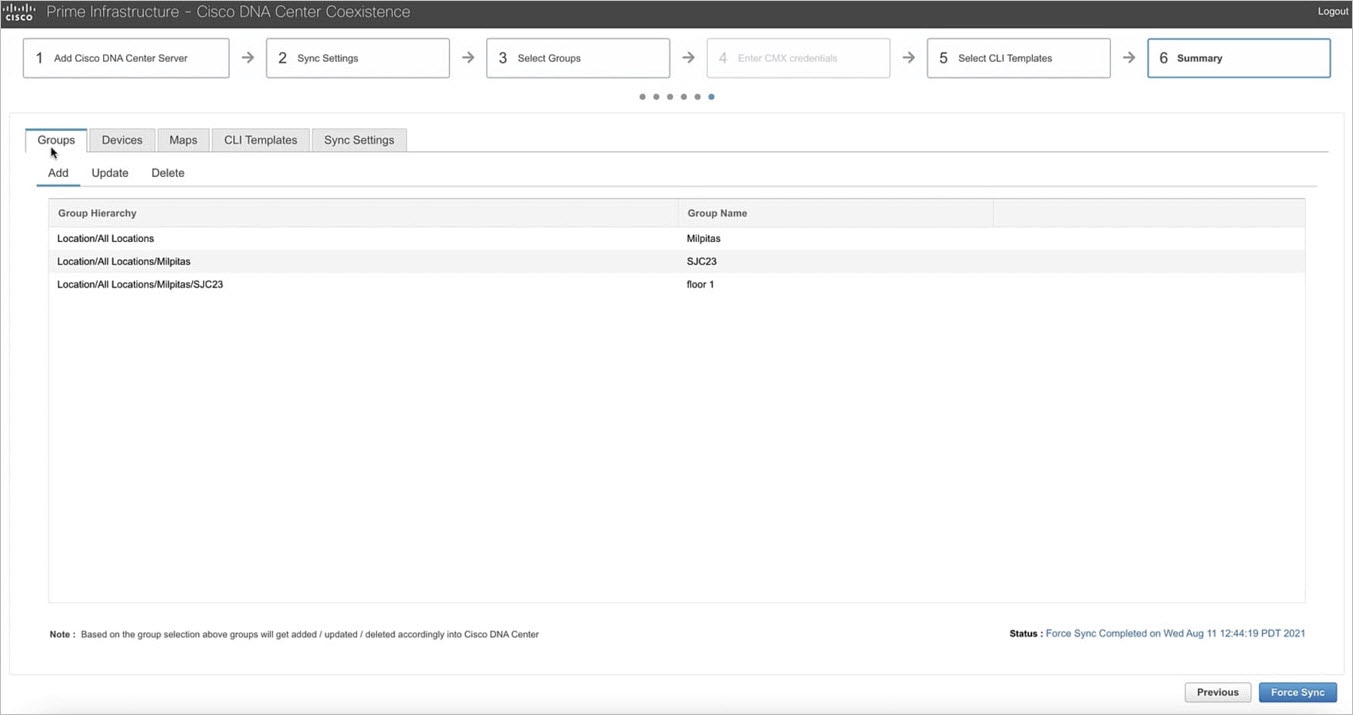
| Step 7 |
View the migration summary.
|

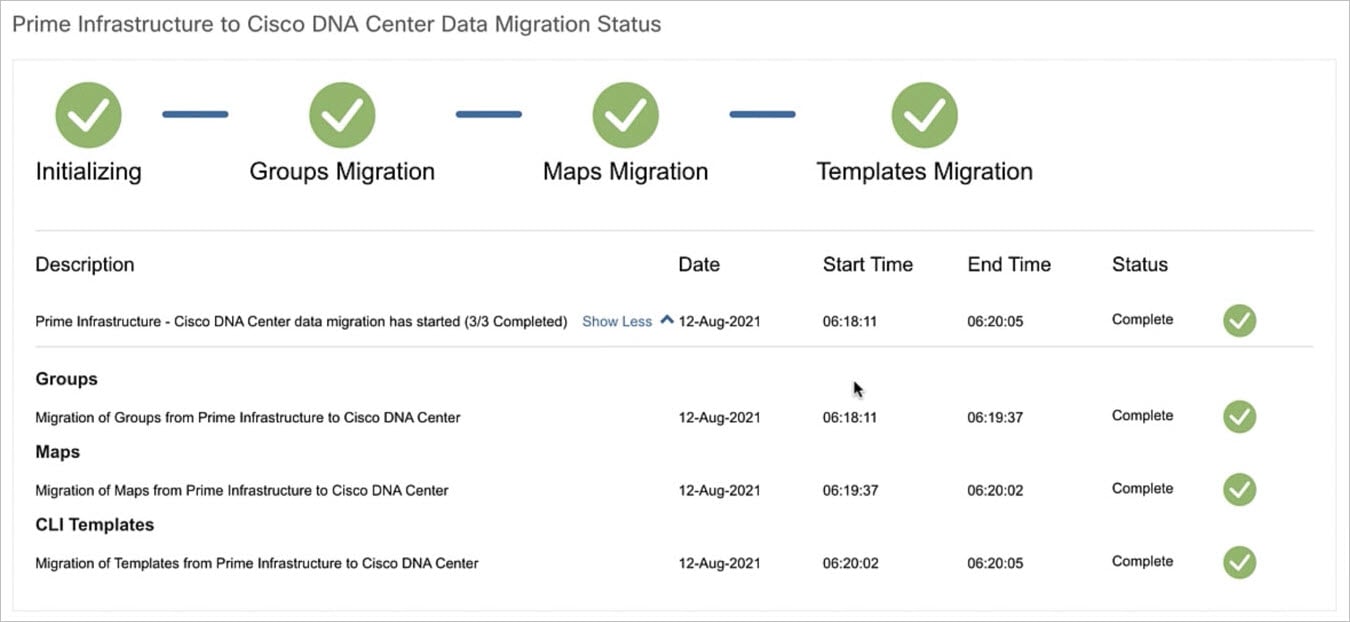
Verify the Migration
After successful migration from Cisco Prime Infrastructure, log in to Cisco DNA Center and verify if the sites, devices, and templates are migrated correctly.
Procedure
| Step 1 |
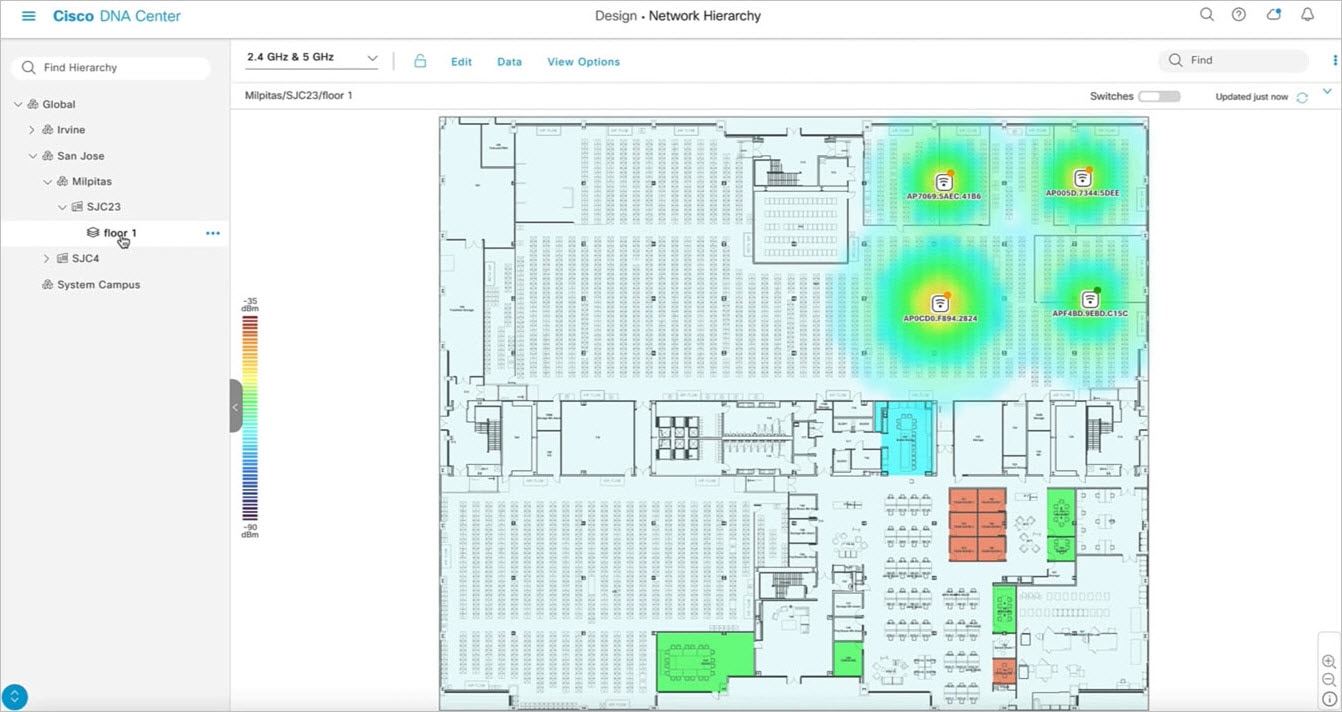
Verify the sites, location, and maps.
|
| Step 2 |
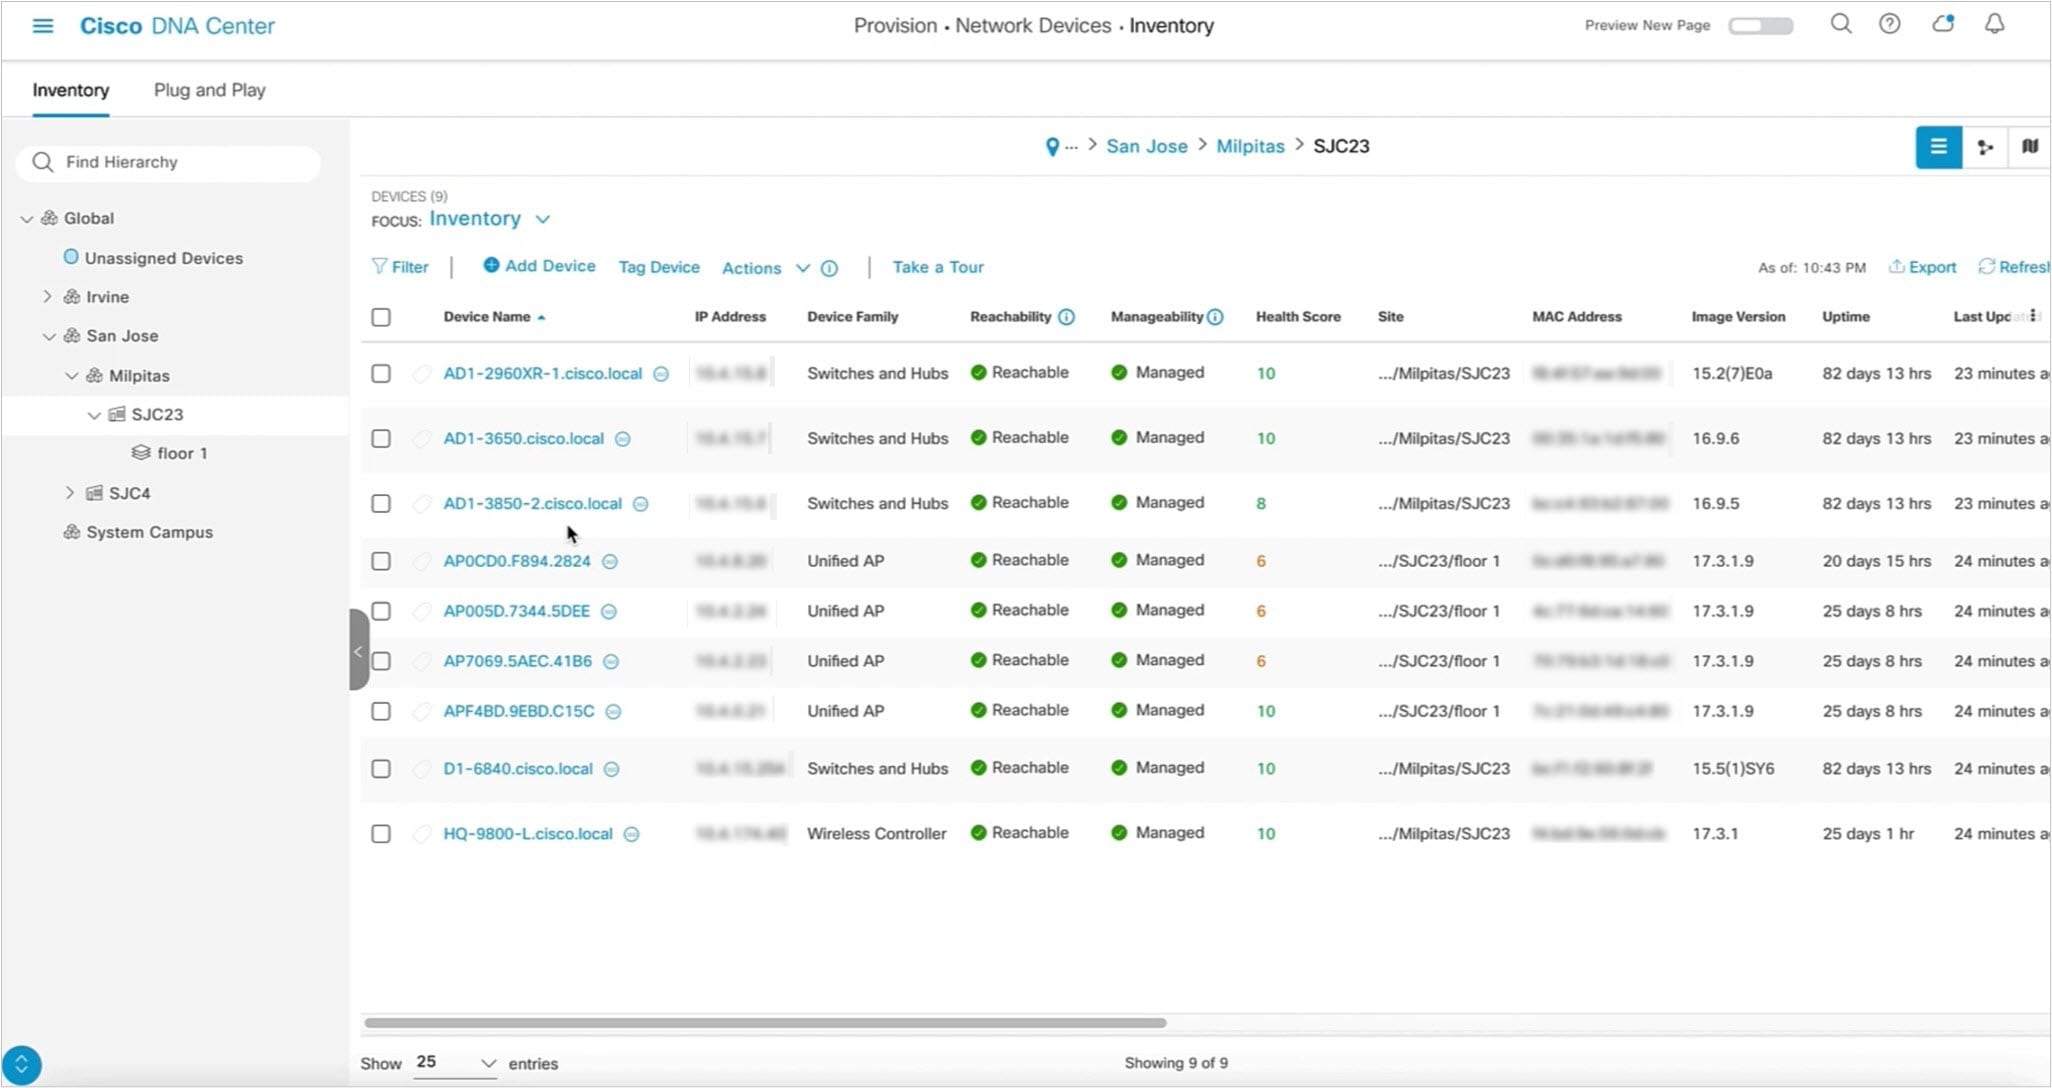
Verify the network devices.
|
| Step 3 |
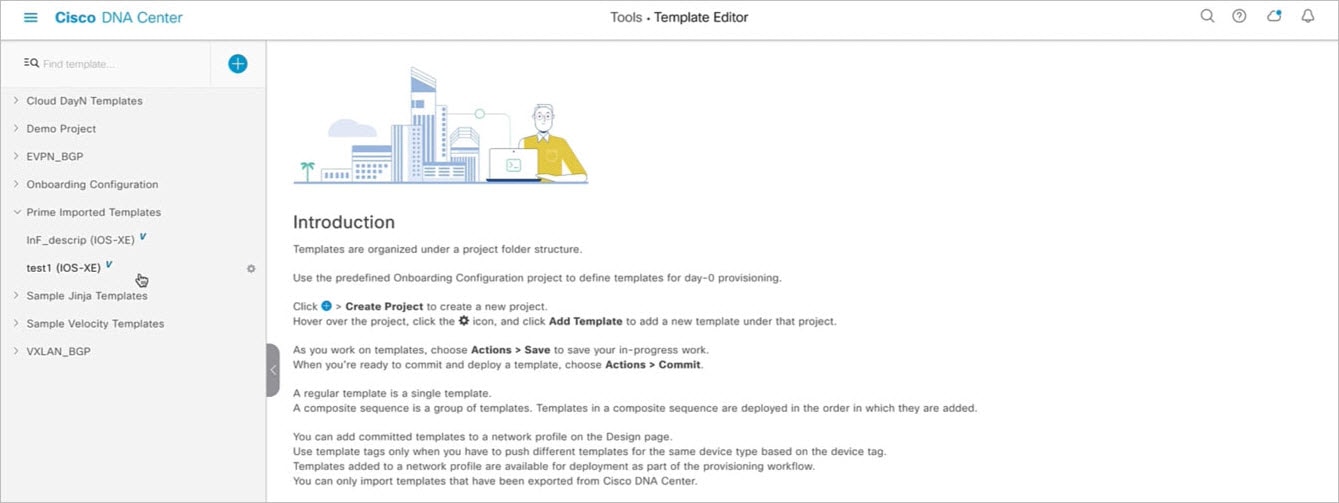
Verify the CLI templates.
|
Communications, Services, and Additional Information
-
To receive timely, relevant information from Cisco, sign up at Cisco Profile Manager.
-
To get the business impact you’re looking for with the technologies that matter, visit Cisco Services.
-
To submit a service request, visit Cisco Support.
-
To discover and browse secure, validated enterprise-class apps, products, solutions, and services, visit Cisco DevNet.
-
To obtain general networking, training, and certification titles, visit Cisco Press.
-
To find warranty information for a specific product or product family, access Cisco Warranty Finder.
Cisco Bug Search Tool
Cisco Bug Search Tool (BST) is a gateway to the Cisco bug-tracking system, which maintains a comprehensive list of defects and vulnerabilities in Cisco products and software. The BST provides you with detailed defect information about your products and software.
Documentation Feedback
To provide feedback about Cisco technical documentation, use the feedback form available in the right pane of every online document.
 Feedback