Configure Single Point Setup on a WAP571 or WAP571E
Available Languages
Objective
Single Point Setup (SPS) is a simple, multi-device management technology that allows you to deploy and manage a group of access points that support the feature. This setup offers the convenience of configuring clustered access points from a single point instead of configuring them individually. It also allows you to manage the access points locally or remotely.
This article will guide you on how to configure Single Point Setup on your access point.
Applicable Devices
- WAP500 Series — WAP571, WAP571E
Software Version
- 1.0.0.15 — WAP571, WAP571E
Configure Single Point Setup
Before Configuring Single Point Setup
-
Plan your Single Point Setup Cluster. Ensure that the access points to be clustered are compatible with each other. For example, WAP551 can only be configured with another WAP551 or WAP561. The WAP571E can only cluster with another WAP571E.
-
Ensure that the access points to be clustered have the latest firmware.
-
Set up the access points that will be clustered on the same IP subnet.
-
Verify that the access points are interconnected and accessible across the network.
-
Ensure that Single Point Setup is enabled on the access points.
-
Verify that the access points have the same Single Point Setup name.
Configure Single Point Setup
Step 1. Log in to the web-based utility of the access point that needs to be configured.
Step 2. Click Single Point Setup > Access Points.
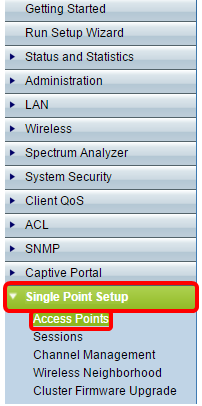
Note: Single Point Setup is disabled on the WAP by default. You can only edit the Single Point Setup settings when the feature is disabled.
Step 3. (Optional) Specify the location of the access point in the Location field.
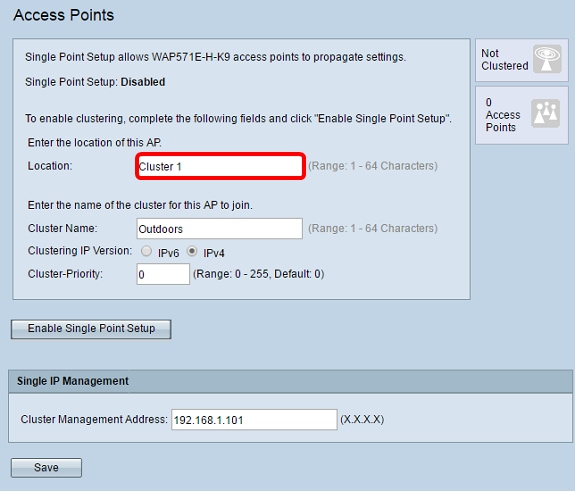
Note: Icons on the right side of the page indicate whether Single Point Setup is enabled and, if it is, the number of WAPs that are currently joined in the cluster.
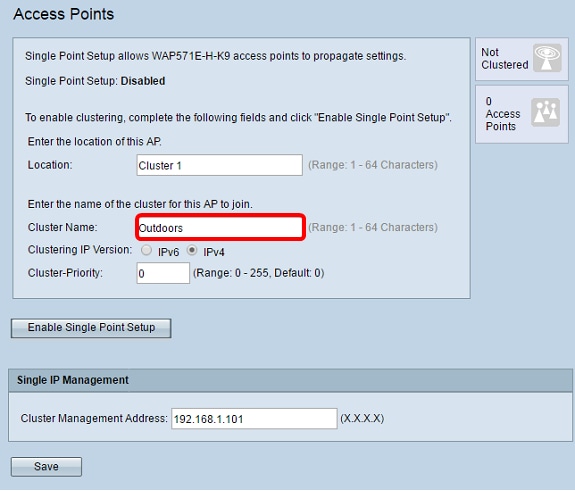
Step 4. Enter the cluster name in the Cluster Name field.
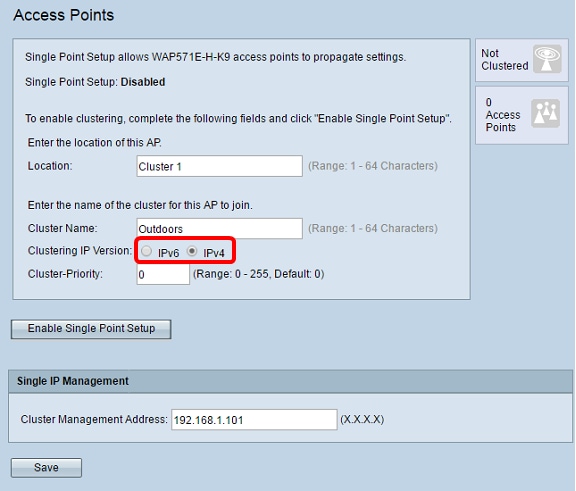
Step 5. Choose the IP version by clicking the appropriate option under Clustering IP Version.
Step 6. Click Enable Single Point Setup.
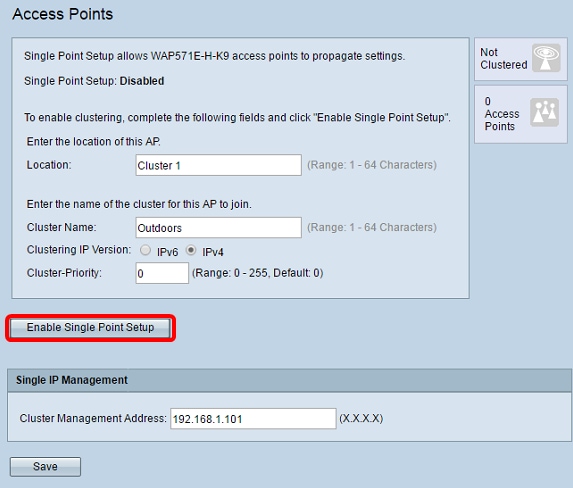
The WAP begins searching for other WAPs in the subnet that are configured with the same cluster name and IP version. While searching for other cluster members, the status indicates that the configuration is being applied.
Step 7. Refresh the page until you see the new configuration. The Access Points page now shows a table displaying the Locations, MAC addresses, and IP addresses of the access points detected currently in the cluster.
Step 8. Specify the Cluster Management Address. You can access this address to configure the devices in the cluster.
Step 9. Click Save.
Step 10. Repeat steps 1-6 on the additional WAP that you want to join to the Single Point Setup. If your additional WAPs are configured with the same cluster settings, the WAP joins the cluster and the information on the new member will appear in the table. Make sure you refresh the Access Points page when you are finished to see the most updated configuration. Alternatively, you can run the setup wizard on the additional WAPs.
Note: All WAPs in a Single Point Setup cluster will now share the same device configurations. Changes to device settings on any WAP in the cluster will be propagated to the members.
Step 11. (Optional) If you no longer want your WAP to share configurations with other devices in the cluster, simply remove it from the cluster by clicking Disable Single Point Setup.
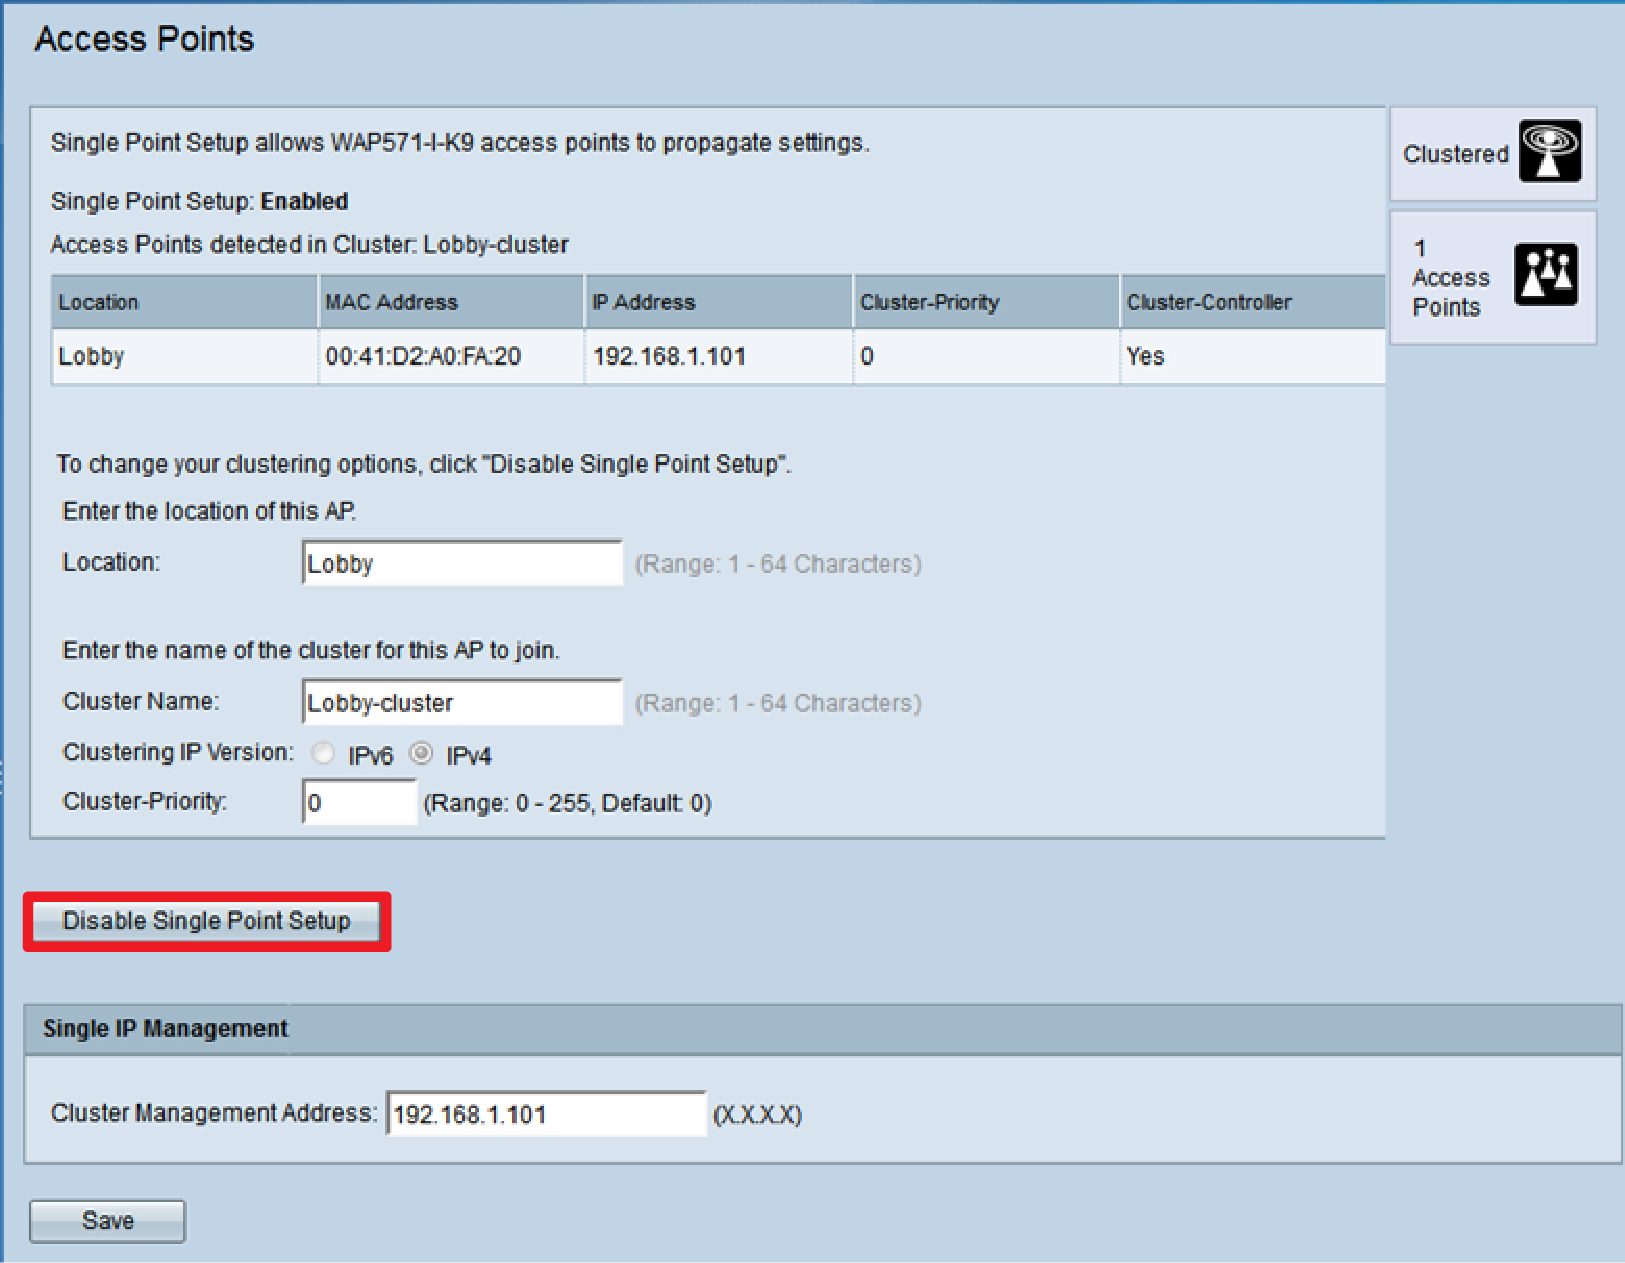
You should now have successfully configured Single Point Setup on your wireless access point.
 Feedback