Association of Wireless Scheduler Profiles on WAP551 and WAP561 Access Points
Available Languages
Objective
A Virtual Access Point (VAP) is the wireless equivalent of a Virtual LAN (VLAN) which segments the wireless LAN and simulates multiple access points in one physical device. The wireless scheduler helps to schedule a time interval for a VAP or radio to be operational, which helps to save power and increase security. You can associate up to 16 profiles to different VAPs or radio interfaces, but each interface is allowed only one profile. Each profile can have a certain number of time rules that control the uptime of the associated VAP or WLAN.
This article explains how to configure scheduler association settings on the WAP551 and WAP561 access points.
Note: To configure a wireless scheduler profile or rule, refer to the article, Configuration of Wireless Scheduler Profiles on WAP551 and WAP561 Access Points.
Applicable Devices
• WAP551
• WAP561
Software Version
• v1.0.4.2
Associate Scheduler Profile
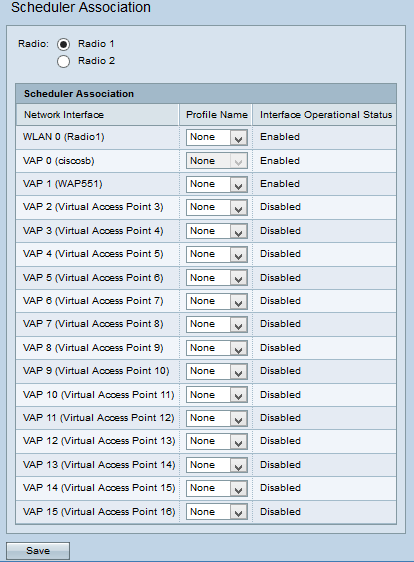
Step 1. Log in to the web configuration utility and choose Wireless > Scheduler Association. The Scheduler Association page opens:

Step 2. Click the radio button for the radio you wish to configure in the Radio field.
Note: Step 2 is only available for the WAP561 access point as the WAP551 only has one radio.
Step 3. Choose the profile to be associated with an interface from the Profile Name drop-down list that is adjacent to the interface. By default, no profile is associated to any radio or VAP.

Step 4. Click Save to save your changes.
Note: Only one Scheduler profile is allowed to be associated with the WLAN interface or each VAP. Multiple VAPs can work with the same scheduler profile.
Revision History
| Revision | Publish Date | Comments |
|---|---|---|
1.0 |
11-Dec-2018 |
Initial Release |
 Feedback