Smartport Type Settings on Sx500 Series Stackable Switches
Available Languages
Objective
A Smartport is an interface to which user-defined or built-in macros could be applied. Macros help to quickly configure the switch to support communication requirements and utilize various features of the network devices. Network access and QoS requirements depend on the device to which the interface is connected (IP phone, printer, router, or access point). The Smarport feature allows you to save and share common configurations. A macro is a script of CLI commands.
This article explains how to edit the smartport type settings and view the macro source on Sx500 Series Stackable Switches.
Note: Macros can be defined with the CLI of the switch.
Applicable Devices
• Sx500 Series Stackable Switches
Software Version
• 1.3.0.62
Smartport Type Settings
Step 1. Log in to web configuration utility and choose Smartport > Smartport Type Settings. The Smartport Type Settings page opens:
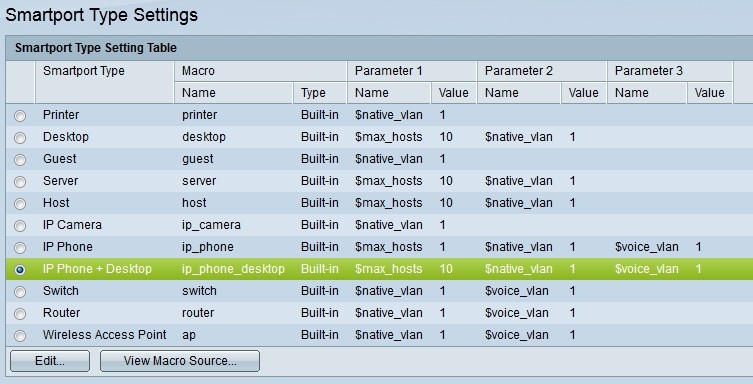
Step 2. (Optional) To view a smartport macro of a particular smartport type, click the radio button next to the Smartport Type field and then click View Macro Source.
Step 3. To edit the parameters of a macro or assign a user-defined macro click the radio button next to the smartport type and then click Edit. The Edit Smartport Type Settings window appears.
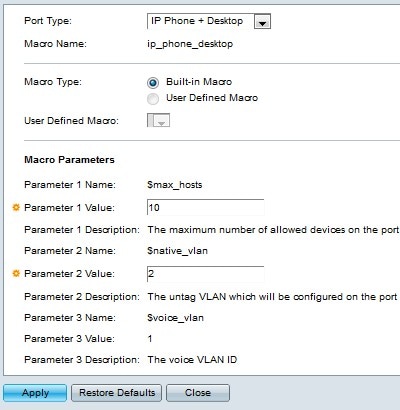
Step 4. (Optional) Choose a port type from the Port type drop-down list to edit the configuration of the desired port type.
Note: The Macro Name field displays the macro name configured to the smartport type.
Step 5. Click the radio button of the desired Smartport macro type.
• Built-in Macro — Default built in macro.
• User Defined Macro — Macro created by user from the CLI.
Step 6. If User Defined Macro is chosen, choose the name of the macro from the User Defined Macro drop-down list.
Step 7. In the Macro Parameters field, you can edit at most two sets of parameters of the macro. The third parameter is for the default voice VLAN. The parameters available are:
• Parameter Name — Displays the name of the parameter.
• Parameter Value — Displays the value set for the parameter. To edit this value, enter the new value for this parameter in the Parameter Value field.
• Parameter Description — Displays the description of this parameter.
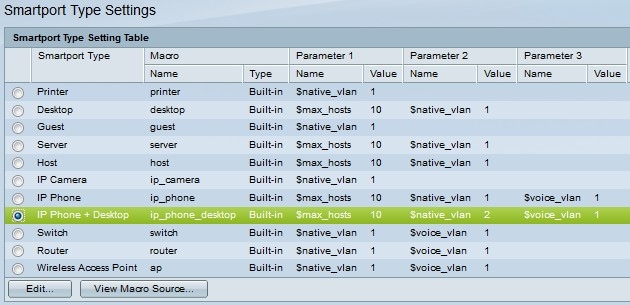
Step 8. Click Apply.
Revision History
| Revision | Publish Date | Comments |
|---|---|---|
1.0 |
13-Dec-2018 |
Initial Release |
 Feedback