DHCP Snooping Binding Database Configuration on Sx500 Series Stackable Switches
Available Languages
Objective
Dynamic Host Configuration Protocol (DHCP) assigns IP addresses to hosts and also maintains a database of all the devices that are connected in the network. DHCP snooping acts like a firewall between untrusted hosts and trusted DHCP servers. The DHCP snooping binding database contains information about trusted hosts with leased IP addresses. You can add an IP address to the snooping database if you think it is trusted or safe. Also, you can query a database for an entry that has already been added and edit its parameters if the server has been updated. IP source guard uses DHCP Snooping which uses a DHCP binding database that is used to keep track of the information about the untrusted hosts with leased IP address that are associated with a VLAN having DHCP Snooping enabled. The binding database is also used to validate the requests from untrusted hosts.
The database does not contain entries for hosts associated with trusted interfaces. If too many entries are attempted by the switch then the DHCP Snooping Binding Database maintains these added entries in inactive status. The entries which are deleted due to the expiration of their lease times can be replaced by these inactive entries which are made active. This article explains the steps for the configuration of a DHCP Snooping Binding Database on the SX500 Series Stackable Switches.
This article explains how to add a DHCP snooping database entry and query the same on Sx500 Series Stackable Switches.
Applicable Devices
• Sx500 Series Stackable Switches
Software Version
• 1.3.0.62
DHCP Snooping Entry Configuration
Step 1. Log in to the web configuration utility and choose IP Configuration > DHCP Snooping Relay> DHCP Snooping Binding Database. The DHCP Binding Database page opens:
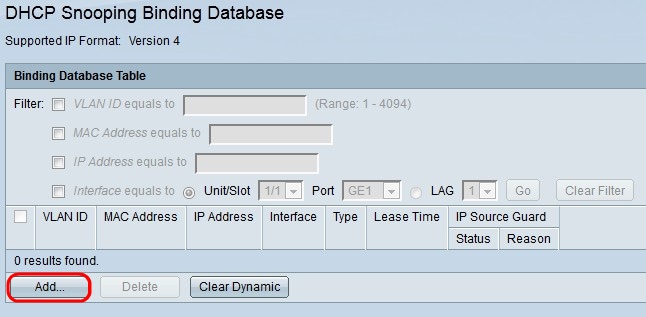
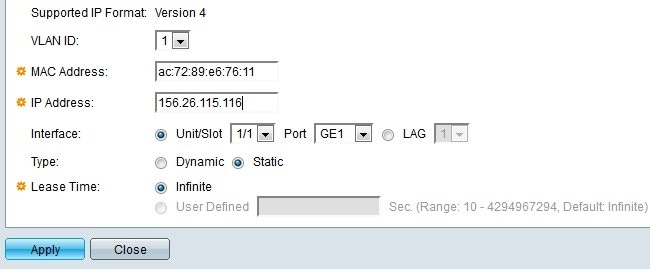
Step 2. Click Add. The Add DHCP Snooping Entry window appears.
Note: The supported IP format is displayed in the Supported IP Format field. This IP format agrees with the IP version of the device.
Step 3. In the VLAN ID field, choose the appropriate value of the device that need to be added to the database from the VLAN ID drop-down list. A VLAN is a group of hosts which are not necessarily physically attached but still communicate as if they are in the same broadcast domain.
Step 4. In the MAC Address field, enter the MAC address of the device in the MAC Address field to be added to the database. The MAC address is a unique identifier assigned to network interfaces on the device.
Step 5. In the IP Address field, enter the IP address of the device to be added to the database. The IP address is a number assigned to the devices in a network.
Step 6. In the Interface field, click the radio button that corresponds to the interface that you would like to be associated with the entry.
• Unit/Slot — Choose the unit in the stack (1 for standalone models) and slot number (either 1 or 2). Unit represents the position of the switch in the stack and slot number 1 identifies SG500 or SG500x devices while slot number 2 identifies SF500 devices.
– Port — Choose the port that you would like to configure from the drop-down list.
• LAG — Choose the Link Aggregation Group (LAG) logical port channel from the drop-down list. A LAG is a bundle of many physical ports that form a single logical channel.
Step 7. In the Type field, click the Dynamic radio button if the IP address that you entered in Step 5 is dynamic or click the Static radio button if the IP address is static.
Step 8. In the Lease Time field, enter the amount of time the leased IP address remains valid. Click Infinite if you want the IP address to remain valid forever or click User Defined if you wish to enter a value. The range is from 10 to 4294967294 seconds. The default value is Infinite.
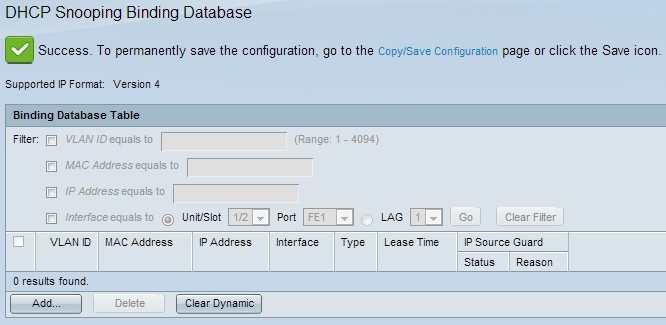
Step 9. Click Apply. The DHCP Entry is added.
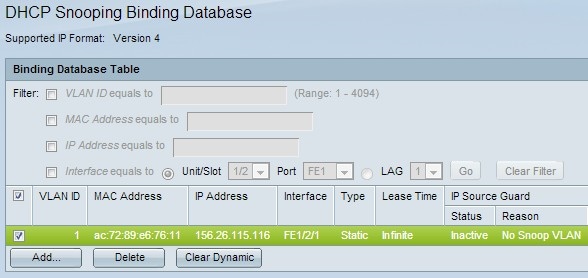
Step 10. (Optional) Check the check box for the appropriate entry and click Delete to delete the entry from the Binding Database Table.
Query DHCP Snooping Database
Step 1. Log in to the web configuration utility and choose IP Configuration > DHCP > DHCP Binding Database. The DHCP Binding Database page opens:
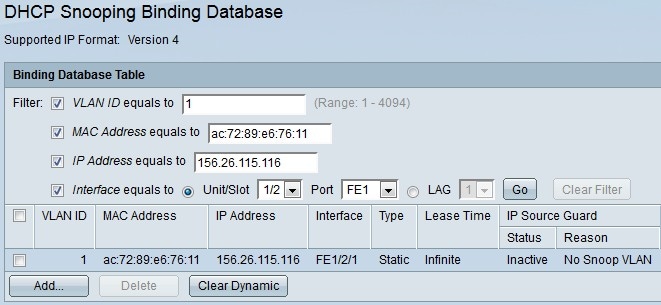
Step 2. You can query by MAC Address, IP Address, VLAN, or Interface. Check the desired entry check boxes and enter the values in the respective fields.
Step 3. Click Go to query. The query results appear.
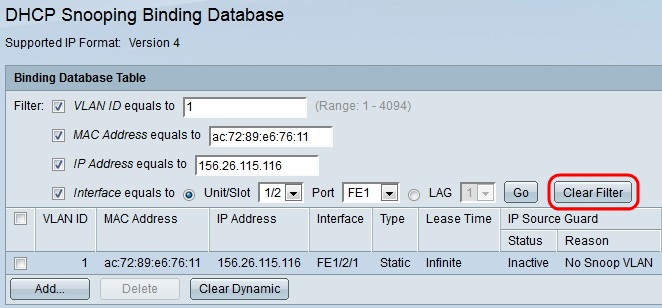
Step 4. (Optional) Click Clear Filter after the results are displayed to clear the results of the filter you just made.
Step 5. (Optional) Click Clear Dynamic if you wish to show only static IP addresses.
 Feedback