How to Manage Smart Network Application (SNA) Settings
Available Languages
Objective
The Smart Network Application (SNA) is a system that displays an overview of the network topology, including detailed monitoring information for devices and traffic for easier management. It allows you to view and modify configurations globally on all supported switches in the network.
You can save whatever changes you make in the SNA system itself without using services so that these settings will be made available to the next SNA session launched on the network. Also, the next time you access the network using any SNA-capable device connected to the same network, and from any browser, the saved settings will be available as well as long as you use the same account for the next login.
You can also export and import the settings to and from an external or local file for additional backup.
The objective of this article is to show you how to manage SNA settings, such as save, export, and import.
Applicable Devices
- Sx350 Series
- SG350X Series
- Sx550X Series
Note: Devices from the Sx250 Series can provide SNA information when they are connected to the network, but SNA cannot be launched from these devices.
Software Version
- 2.2.5.68
Save, Export, and Import Smart Network Application (SNA) Settings
Modify and Save SNA Settings
The following steps will show you how to modify and save the SNA settings. In this example, a description is going to be set to a specific backbone device in the SNA and then save the changes afterwards.
Step 1. Launch the SNA session to modify the SNA settings in the area that you prefer.
Step 2. Choose a device from the Topology map. The BASIC INFORMATION panel will appear on the right hand side.
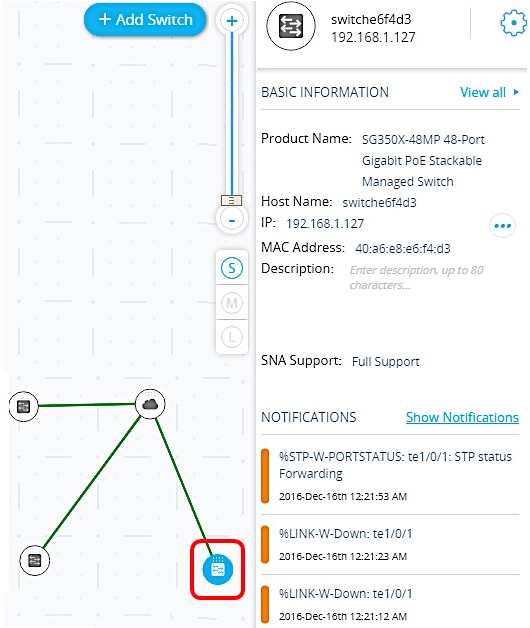
Step 3. In the Description field, enter any description for the device, and then click OK.
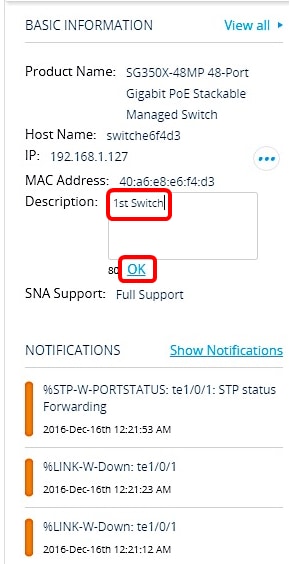
Note: In this example, 1stSwitch is used as the description.
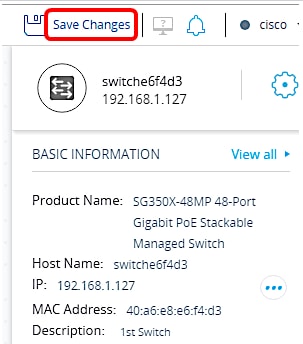
Step 4. Click Save Changes at the upper portion of the page.
When the setting has been successfully saved, the Save Changes button will now show All Changes Saved.
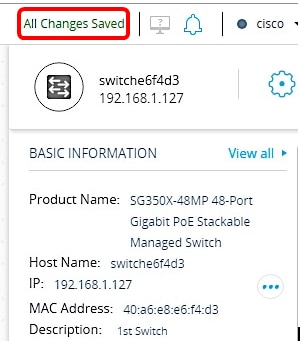
You should now have successfully saved the settings you made to SNA.
Export SNA Settings
Step 1. Launch the SNA session and click on the Options icon at the upper left portion.

Step 2. Choose Export SNA Settings on the menu display.
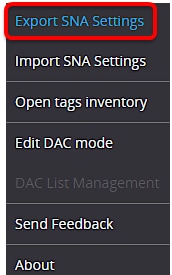
Step 3. In the Export File popup box, click Export.

The file will now be saved to your local Downloads folder.
Import SNA Settings
Note: Importing a file or accepting a newer file that was detected on the network overrides the current SNA settings.
Step 1. Launch the SNA session and click on the Options icon at the upper left portion.

Step 2. Choose Import SNA Settings on the menu display.
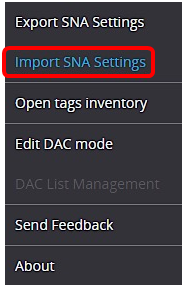
Step 3. In the Import File popup box, click on Browse.
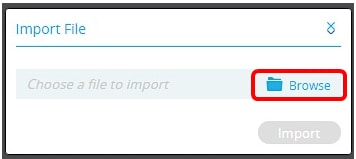
Step 4. Locate and click on the file that you have exported or saved earlier then click Open.

Step 5. Click Import in the Import File popup box.
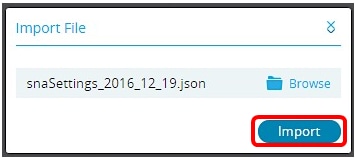
You should now have successfully imported the SNA settings.
Note: After the file is imported and the topology is updated to the new parameters, you are prompted to keep the new settings or revert back to the previous settings.

If you choose to keep the changes, the new settings are saved to all devices in the network. If you choose to revert to the previous settings, the topology returns to the previous settings.
 Feedback