Configure LAN DHCP Server Settings on the RV110W
Available Languages
Objectives
The RV110W acts as a DHCP server in the LAN by default. With DHCP enabled, the RV110W’s IP address serves as the gateway address to your LAN. The RV110W assigns IP addresses to PCs on the LAN from a pool of addresses. The RV110W tests each address before it is assigned to avoid duplicate addresses on the LAN.
The objective of this document is to show you how to configure the DHCP Server Settings on the RV110W.
Applicable Devices
- RV110W
LAN DHCP Server Settings
Step 1. In the web configuration utility choose Networking > LAN > LAN Configuration.

Step 2. Click one of the following radio buttons in the DHCP Server field.
- Enable — Allows the RV110W to act as a DHCP server.
- Disable — Disables DHCP on the RV110W.
- DHCP Relay — Makes the RV110W act as a relayer of IP addresses by a different DHCP server.
Step 3. When Enable is selected, enter the following information:
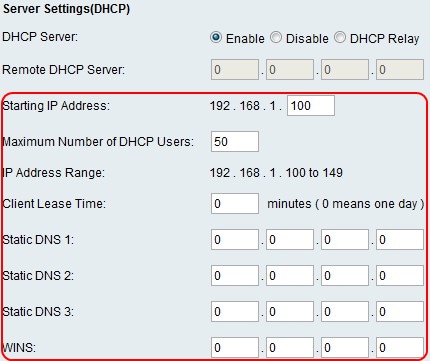
- Starting IP Address — Enter the first address in the IP address pool. Any new DHCP client joining the LAN is assigned an IP address in this range.
- Maximum Number of DHCP Users — Enter the maximum number of DHCP clients.
- IP Address Range — (Read Only) Displays the range of IP addresses available to the DHCP clients.
- Client Lease Time — Enter the duration (in hours) for which the IP addresses are leased.
- Static DNS 1 — Enter the IP address of the primary DNS server.
- Static DNS 2 — Enter the IP address of the secondary DNS server.
- Static DNS 3 — Enter the third DNS server.
- WINS — Enter the IP address of the primary Windows Internet Name Service (WINS) server.
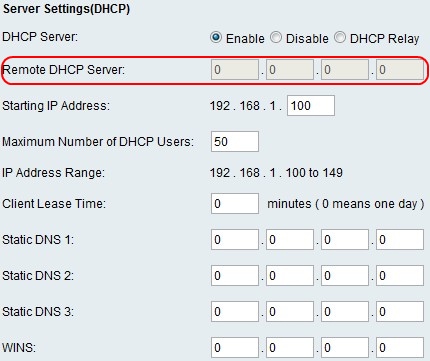
Step 4. When DCHP Relay is selected, enter the address of the relay gateway in the Remote DHCP Server field.
Step 5. Click Save.
 Feedback