Introduction
This document describes the process of how to configure Radius Authorization/Authentication access for Secure Firewall Chasiss Manager with ISE.
Prerequisites
Requirements
Cisco recommends having knowledge of the following topics:
- Secure Firewall Chassis Manager (FCM)
- Cisco Identity Services Engine (ISE)
- Radius Authentication
Components Used
- Cisco Firepower 4110 Security Appliance FXOS v2.12
- Cisco Identity Services Engine (ISE) v3.2 patch 4
The information in this document was created from the devices in a specific lab environment. All of the devices used in this document started with a cleared (default) configuration. If your network is live, ensure that you understand the potential impact of any command.
Configure
Configurations
Secure Firewall Chasiss Manager
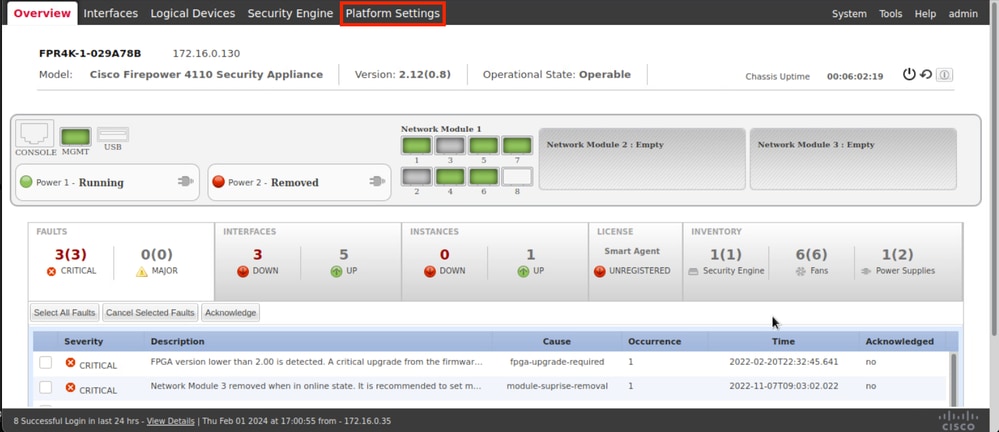
Step 1. Log into the Firepower Chassis Manager GUI.
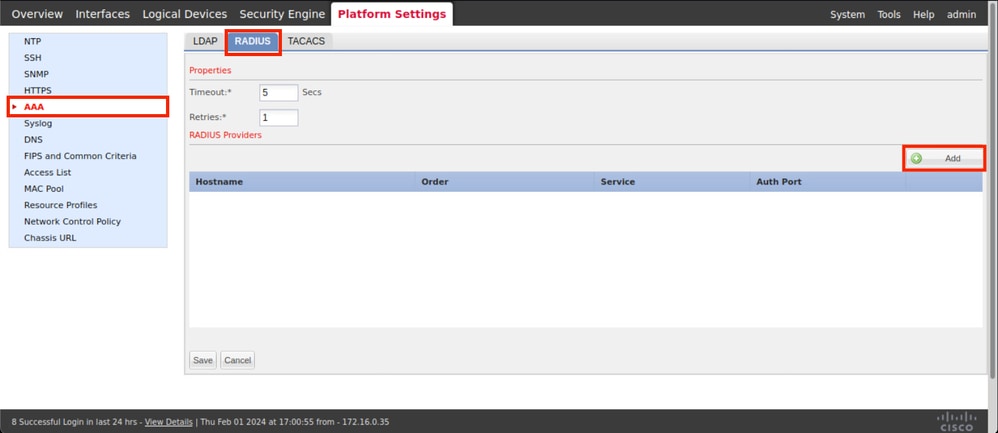
Step 2. Navigate to Platform Settings
Step 3. From the left menu click over AAA. Select Radius and Add a new RADIUS provider.
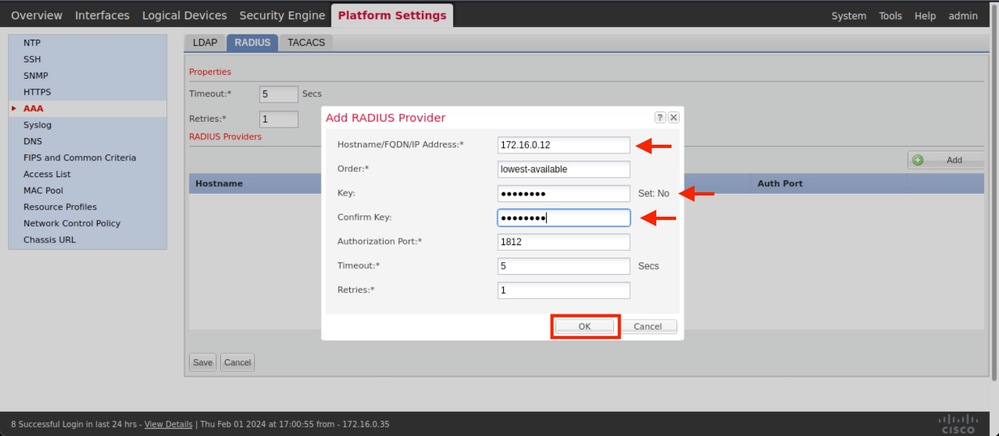
Step 4. Fill the prompt menu with the requested information of the Radius Provider. Click OK.
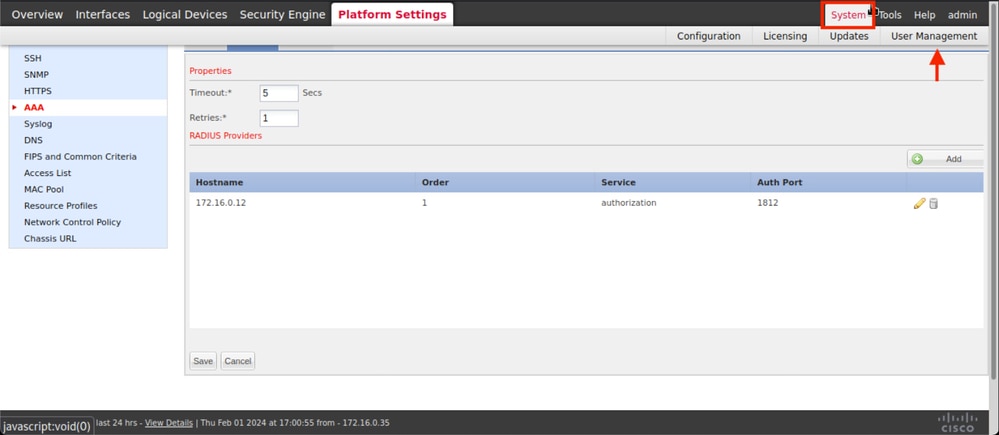
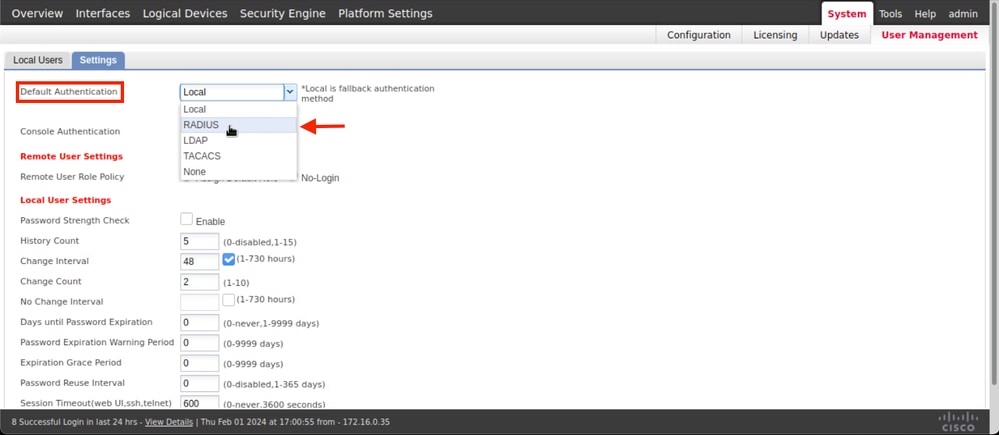
Step 5. Navigate to System > User Management
Step 6. Click on Settings tab and set Default Authentication from the drop down menu to Radius, then, scroll down and Save the configuration.

Note: FCM configuration has finish at this point.
Identity Service Engine
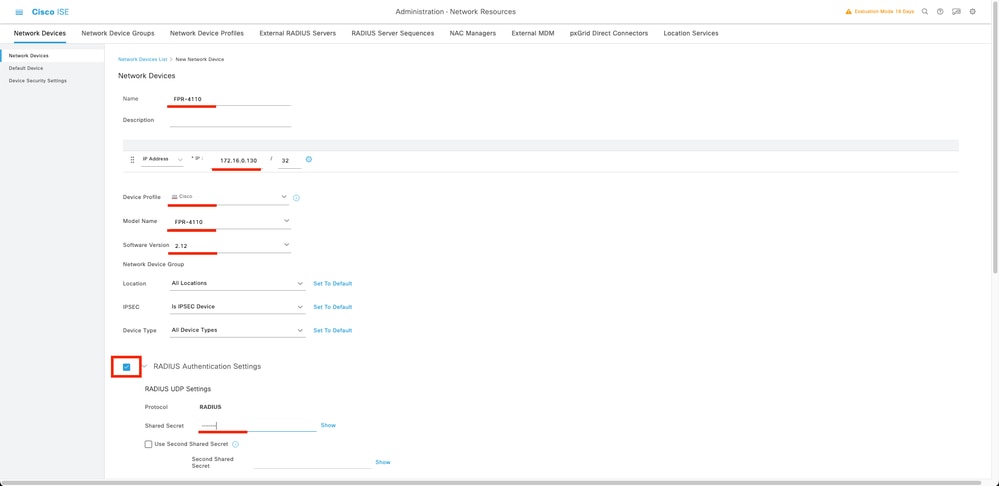
Step 1. Add a new Network Device.
Navigate to the burger icon ≡ located in the upper left corner > Administration > Network Resources > Network Devices > +Add.

Step 2. Fill the paramaters requested about the new Network Devices information.
2.1 Check the RADIUS checkbox
2.2 Configure the same Shared Secret key as in the FCM Radius Configuration.
2.1 Scroll down and click Submit.
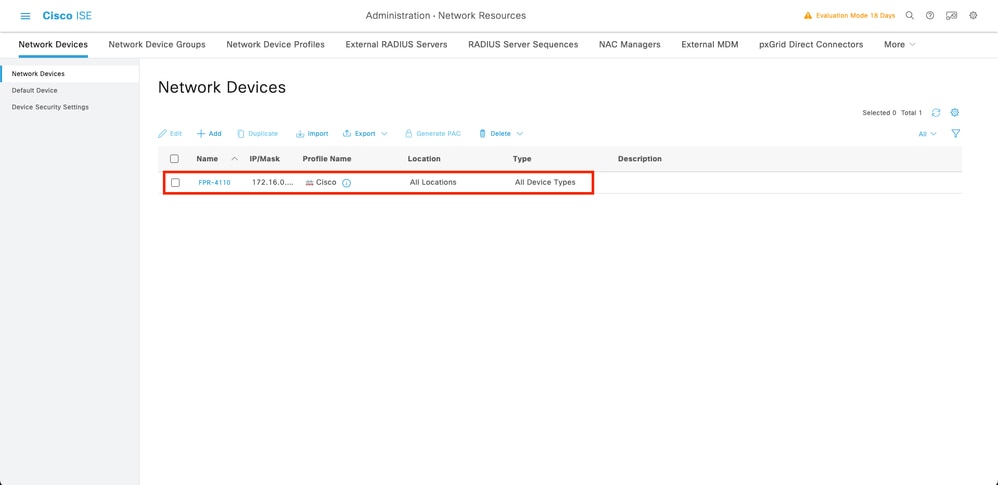
Step 3. Validate the new device is shown under Network Devices.
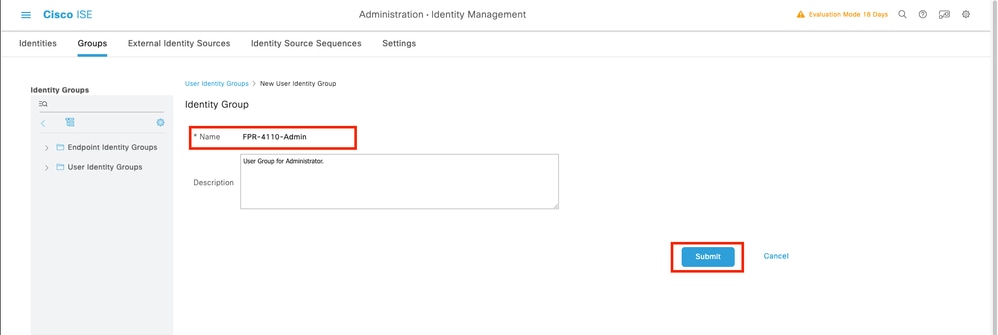
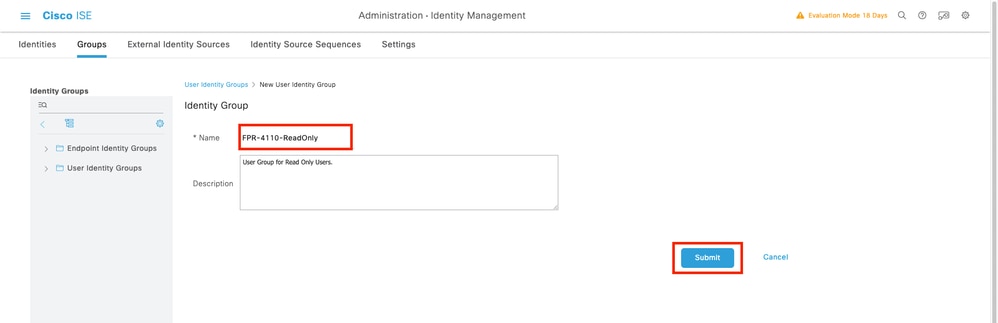
Step 4. Create the required User Identity Groups. Navigate to the burger icon ≡ located in the upper left corner > Administration > Identity Management > Groups > User Identity Groups > + Add

Step 5. Set a name for the Admin User Identity Group and click Submit in order to save the configuration.
5.1 Repeat the same process for ReadOnly users.
Step 6. Validate the new Users Groups are showing under User Identity Groups.

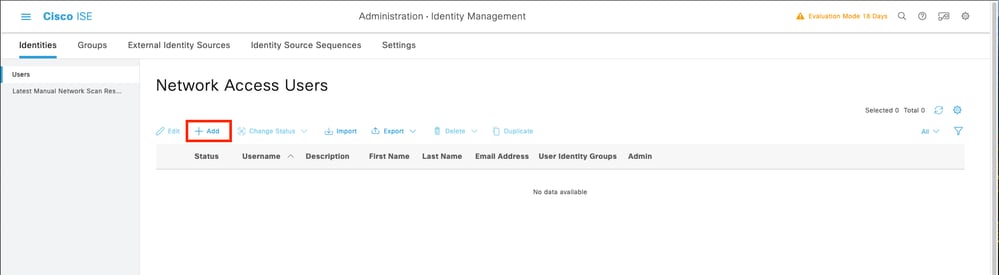
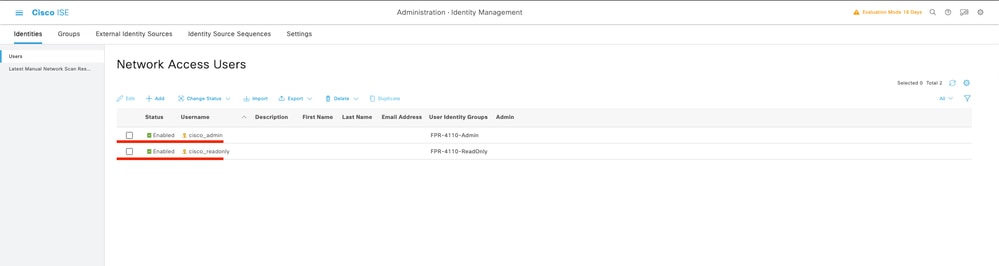
Step 7. Create the local users and add them to their correspondent group. Navigate to the burger icon ≡ > Administration > Identity Management > Identities > + Add.
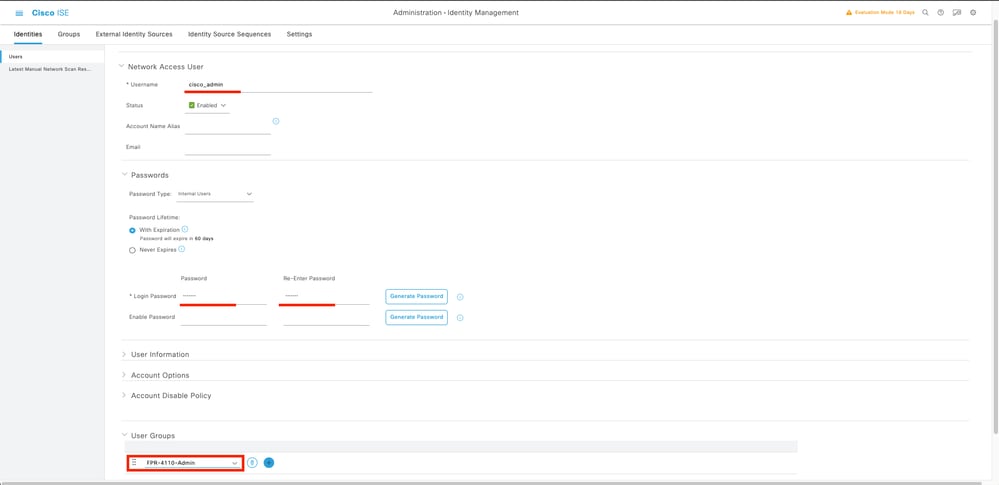
7.1 Add the user with Administrator rights. Set a name, password, and assign it to FPR-4110-Admin, scroll down and click Submit to save the changes.
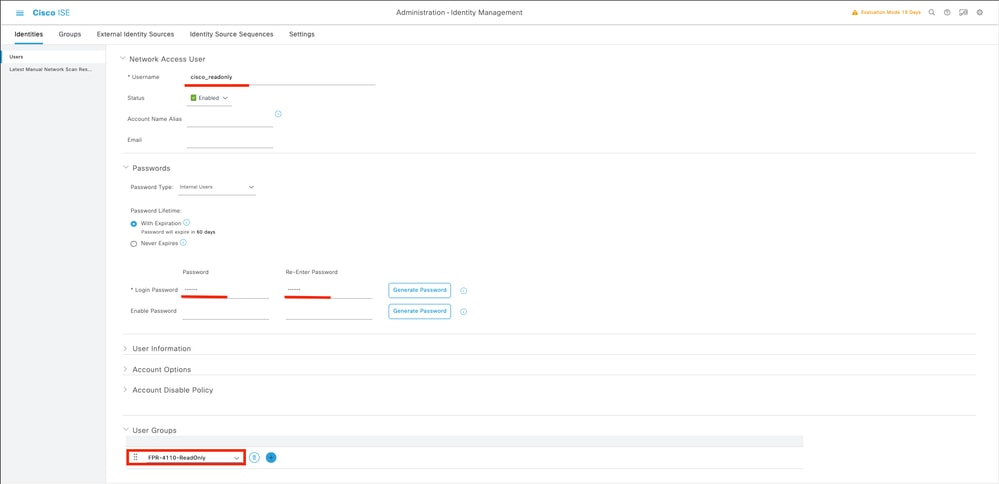
7.2 Add the user with ReadOnly rights. Set a name, password and assign it to FPR-4110-ReadOnly, scroll down and click Submit to save the changes.
7.3 Validate the users are under Network Access Users.
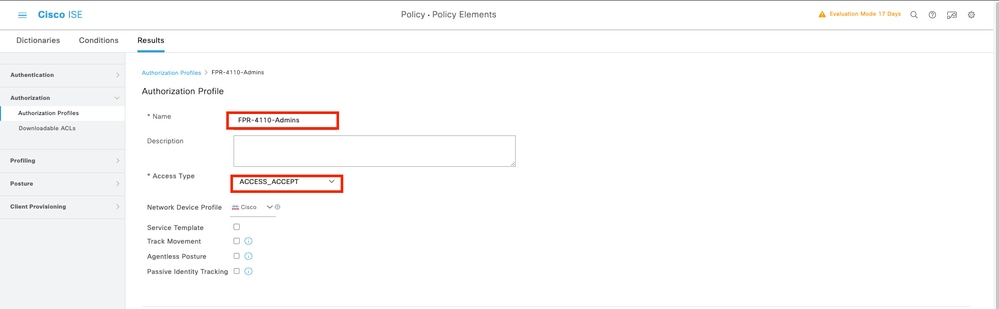
Step 8.Create the Authorization Profile for the Admin user.
The FXOS chassis includes the these User Roles:
- Administrator - Complete read-and-write access to the entire system. The default admin account is assigned this role by default and it cannot be changed.
- Read-Only - Read-only access to system configuration with no privileges to modify the system state.
- Operations - Read-and-write access to NTP configuration, Smart Call Home configuration for Smart Licensing, and system logs, including syslog servers and faults. Read access to the rest of the system.
- AAA - Read-and-write access to users, roles, and AAA configuration. Read access to the rest of the system
Attribuites for each role:
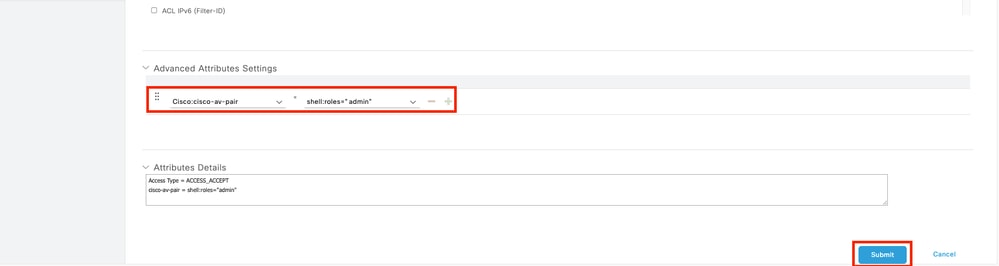
cisco-av-pair=shell:roles="admin"
cisco-av-pair=shell:roles="aaa"
cisco-av-pair=shell:roles="operations"
cisco-av-pair=shell:roles="read-only"
Note: This documentation only defines admin and read-only attributes.
Navigate to burger icon ≡ > Policy > Policy Elements > Results > Authorization > Authorization Profiles > +Add.
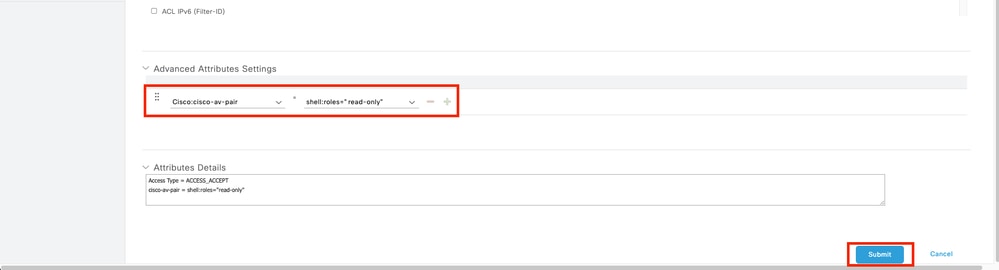
Define a name for the Authorization Profile, leave Access Type as ACCESS_ACCEPT and under Advanced Attributes Settings add cisco-av-pair=shell:roles="admin" with and click Submit.
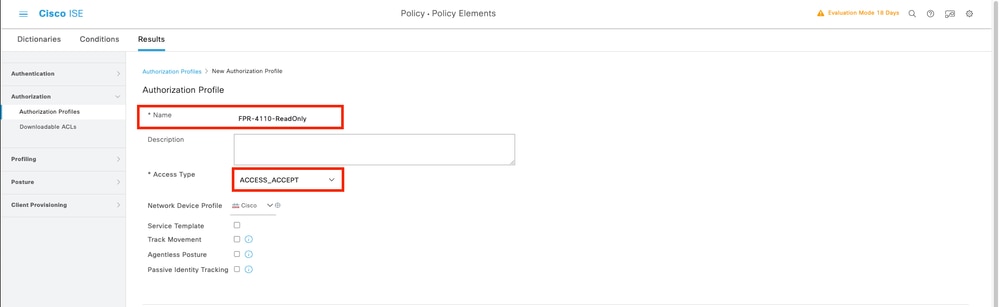
8.1 Repeat the previous step to create the Authorization Profile for the ReadOnly User. Create the Radius Class with the value read-onlyinstead Administrator this time.
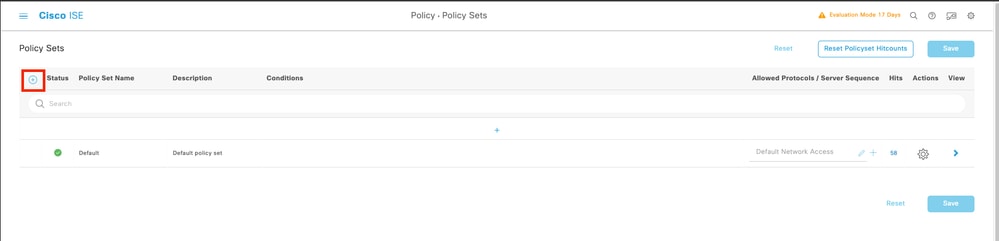
Step 9.Create a Policy Set matching the FMC IP address. This is to prevent other devices from granting access to the users.
Navigate to ≡ > Policy > Policy Sets >Add icon sign at the upper left corner.
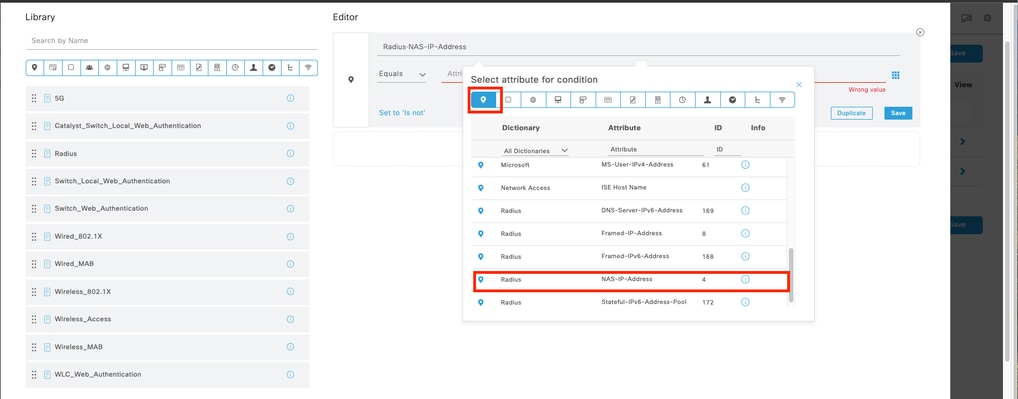
9.1 A new line is placed at the top of your Policy Sets. Click the Add icon to configure a new condition.

9.2 Add a top condition forRADIUS NAS-IP-Addressattribute matching the FCM IP address, then click Use.
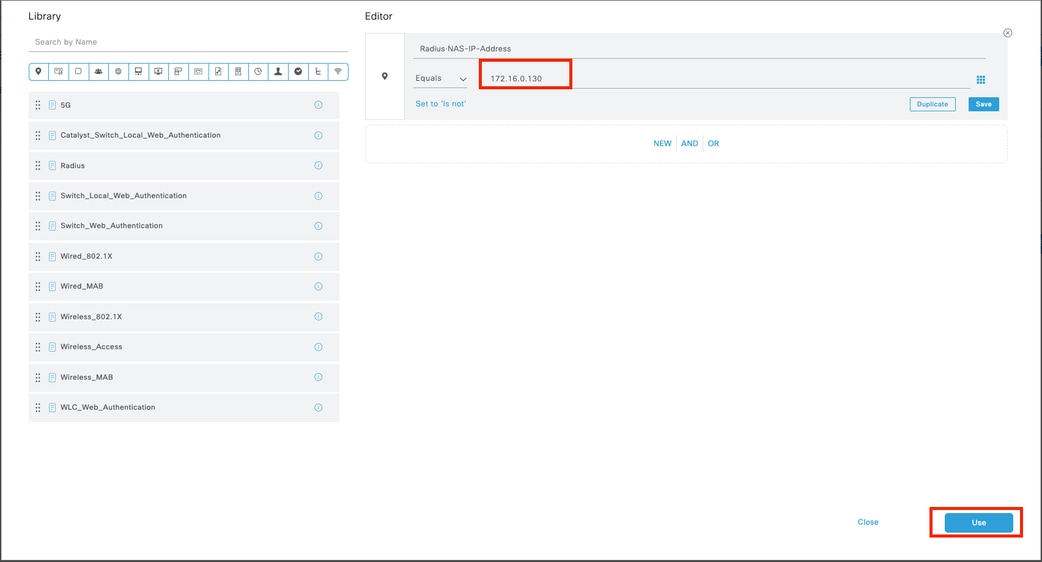
9.3 Once completed, click Save.
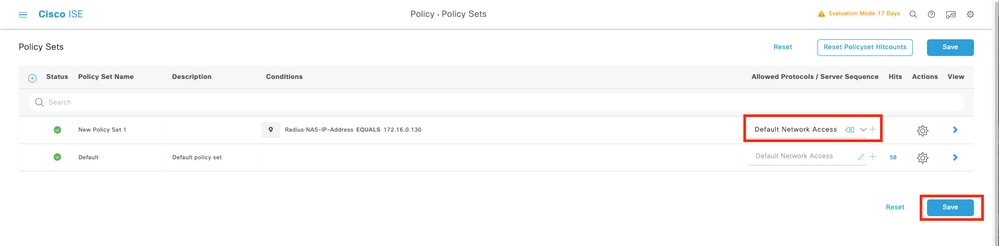

Tip: For this exercise we have allowed the Default Network Access Protocols list. You can create a new list and narrow it down as needed.
Step 10. View the new Policy Set by hitting the >icon placed at the end of the row.

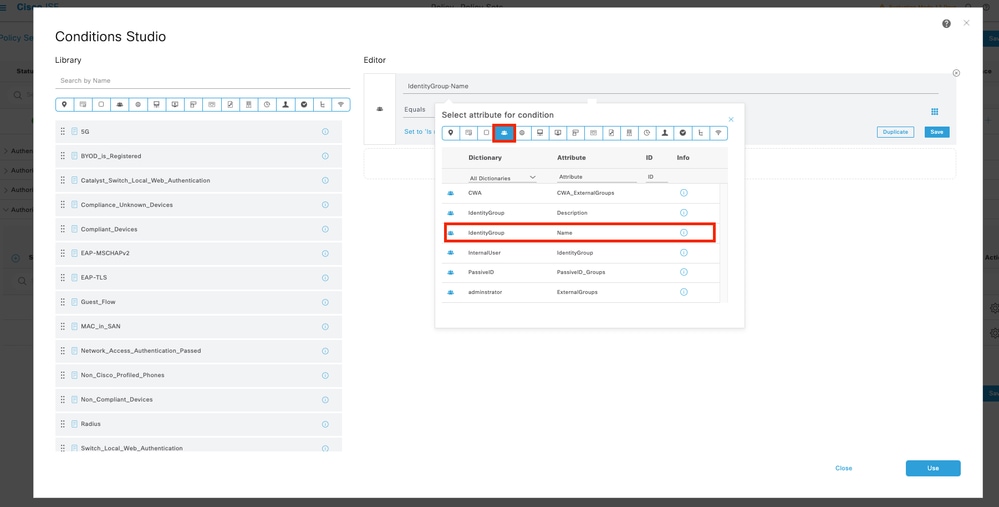
10.1 Expand the Authorization Policy menu and click in (+) to add a new condition.

10.2 Set the conditions to match the DictionaryIdentity Groupwith AttributeName Equals User Identity Groups: FPR-4110-Admins(the group name created in Step 7) and clickUse.
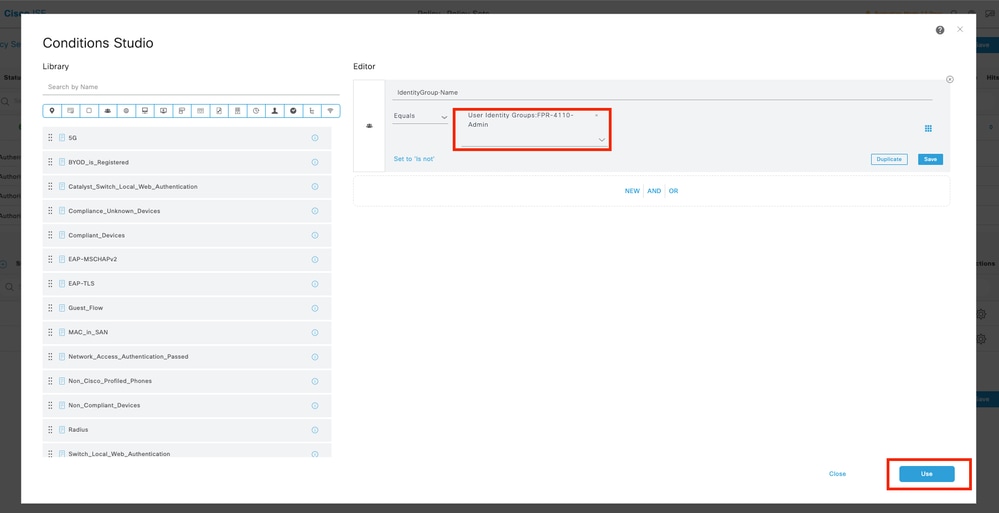
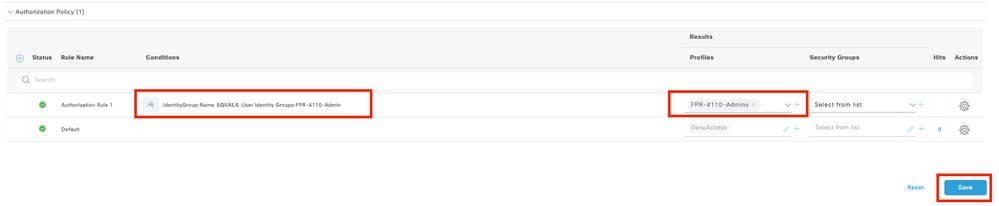
Step 10.3 Validate the new condition is configured in the Authorization policy, then add a User profile under Profiles.
Step 11. Repeat the same process in step 9 for Read-only Users and click Save.
Verify
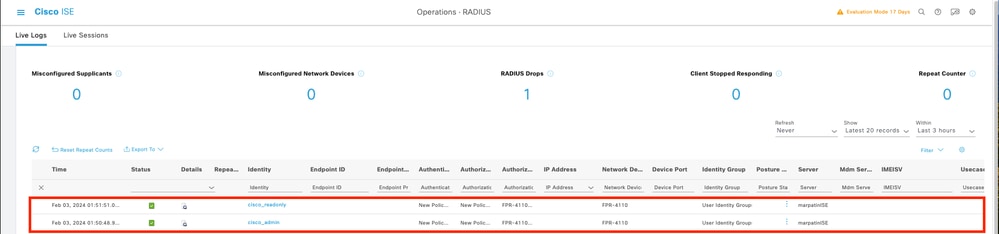
1. Attempt to log into the FCM GUI using the new Radius credentials
2. Navigate to burger icon ≡ > Operations > Radius > Live logs.
3. The information displayed shows if a user logged successfully.
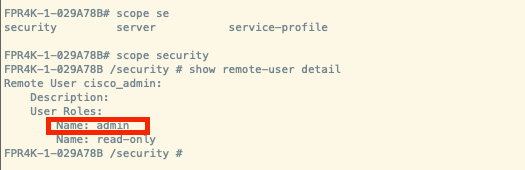
4. Validate Logged users role from Secure Firewall Chassis CLI.
Troubleshoot
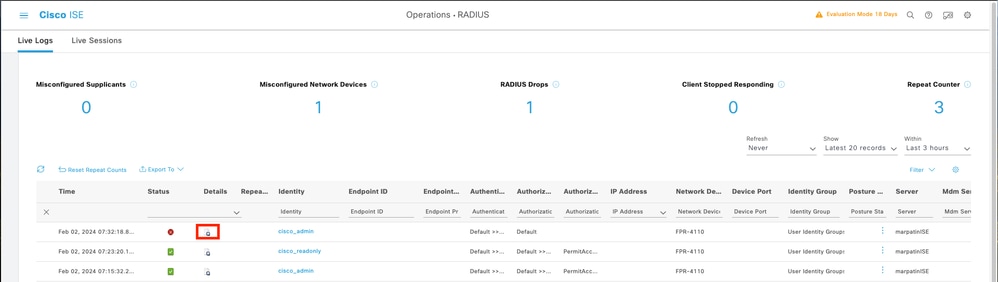
1. Over ISE GUI , Navigate to burger icon ≡ > Operations > Radius > Live logs.
1.1 Validate if the log session request is reaching to the ISE node.
1.2 For failed status review the details of the session.
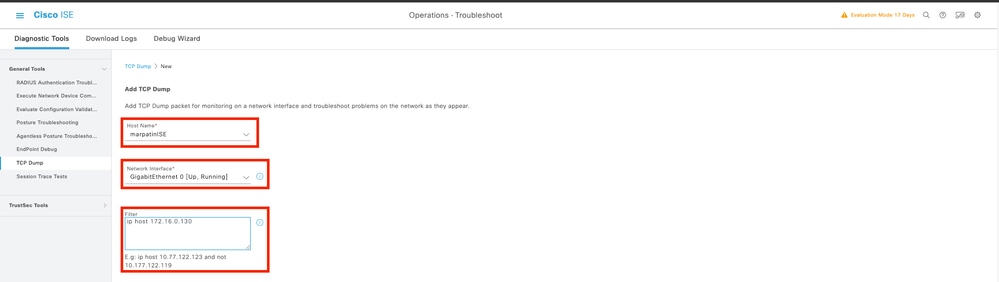
2. For requests not showing in Radius Live logs , review if UDP request is reaching the ISE node through a packet capture.
Navigate to burger icon ≡ > Operations > Troubleshoot > Diagnostic Tools > TCP dump. Add a new capture and download the file to your local machine in order to review if the UDP packets are arriving to the ISE node.
2.1 Fill the requested information, scroll down and click Save.
2.2 Select and Start the capture.

2.3 Attempt to log to the Secure Firewall Chassis while the ISE capture is running
2.4 Stop the TCP Dump in ISE and download the file to a local machine.
2.5 Review traffic output.
Expected output:
Packet No1. Request from the Secure Firewall to the ISE server through Port 1812 (RADIUS)
Packet No2. ISE server reply accepting the inital request.

 Feedback