Introduction
This document describes installing a release key and an option key on Telepresence Content Server (TCS) via the Web Interface.
Contributed by Careem Corbett, Cisco TAC Engineer.
Prerequisites
Requirements
Cisco recommends that you have knowledge of these topics:
Telepresence Content Server (TCS) Installation.
Have successfully installed a TCS Virtual Machine (VM) and have applied a valid IP address that is reachable via the web interface.
Have applied for and received a valid release key and or option key for the TCS serial number.
Have access to the TCS VM with an administrator account by web interface.
Knowledge of Windows Commmand Prompt (CMD) Command Line Interface (CLI).
Note: Installation guides can be found here: http://www.cisco.com/c/en/us/support/conferencing/telepresence-content-server/products-install...
Components Used
The information in this document is based on these software versions:
TCS Version 7.1
TCS Version 7.x and 6.X releases.
Licensing email with release key and or option key.
A web browser, such as Firefox, Internet Explorer or Google Chrome.
Windows Command Prompt (CMD) Command Line Interface (CLI)
The information in this document was created from the devices in a specific lab environment. All of the devices used in this document started with a cleared (default) configuration. If your network is live, make sure that you understand the potential impact of any command.
Configure
This web interface example video supplements this document:
Install Release Key and required Option Keys
Note: You must be logged in as a Local Administrator to install, uninstall, or manage the TCS Virtual Machine (VM). The rest of this guide assumes you have installed the TCS VM up to the point of license key installation.
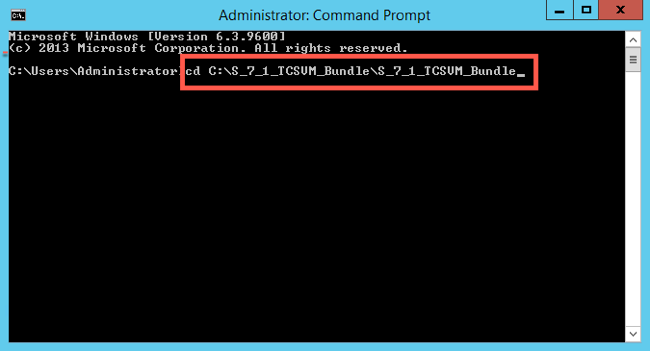
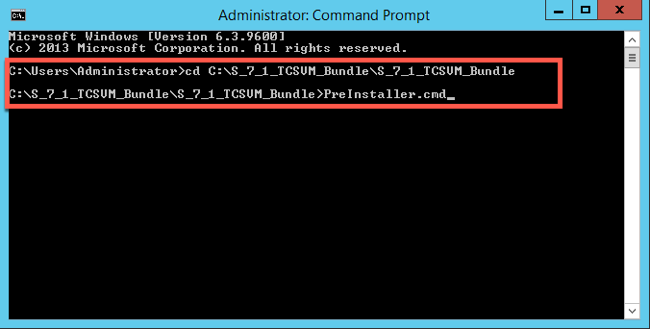
Step 1. Copy the S_7_1_TCSVM_Bundle.zip or S_7_1_TCSBE6K_Bundle.zip file to a folder on your system and extract the files. Launch the command prompt and change the directory to the folder location:
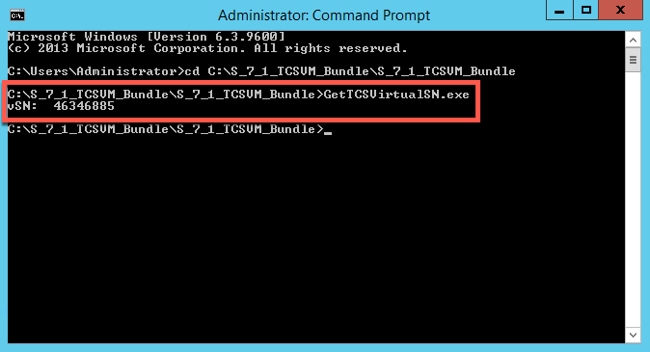
Step 2. Run GetTCSVirtualSN.exe to generate the Virtual Serial Number (VSN) for your TCS VM. Copy the virtual serial number:
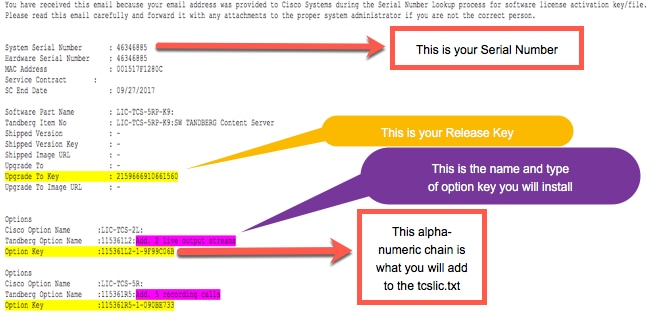
Step 3. After you have installed your Content Server and have your serial number, contact Cisco licensing for the the initial release key and option keys. You can do so be sending an email to licensing@cisco.com. This information is part of the claim certificate that you received after ordering the TCS VM. Contact Cisco licensing team for the assistance with your software base Product Authorization Key (PAK) and option PAK if necessary for the next steps. In the example email, you can see a sample release key and option keys for your TCS:
Note: Examples of PAK are outside the scope of this document.
EXAMPLE EMAIL
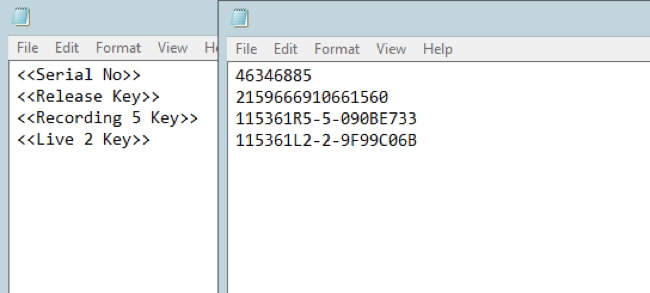
Step 4. In the S_7_1_TCSVM_Bundle.zip or S_7_1_TCSBE6K_Bundle.zipextracted directory, create a TCSLic.txt file by using the licensing information in this format:
<<Virtual Serial No>>
<<Release Key>>
<<Recording 5 Key>>
<<Live 2 Key>>
Note: In the license text file, make sure that there are no extra spaces before or after the license keys.
Step 5. Run the Command Prompt (CMD) as an Administrator. Run the PreInstaller.cmd from the extracted S_7_1_TCSVM_Bundle.zip or S_7_1_TCSBE6K_Bundle.zip directory to configure the Content Server Pre-Installer:
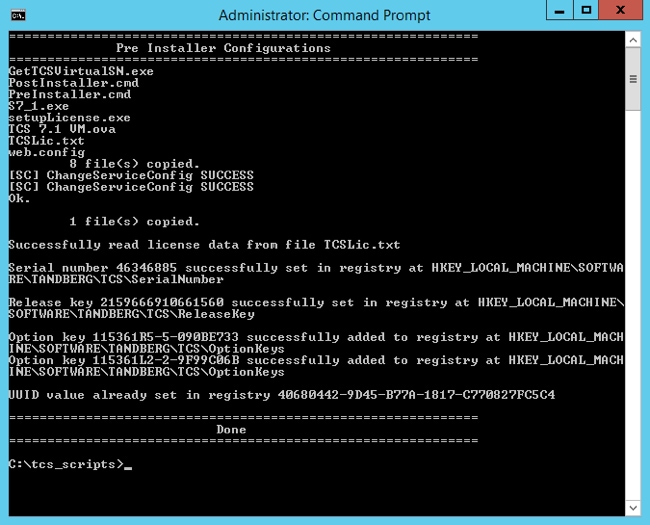
Step 6. Confirm Preinstaller.cmd completed:
Step 7. Run S7_1_VM.exe to install the TCS software on the VM:
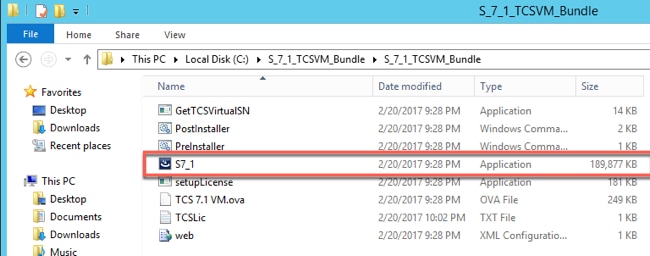
Follow the prompts to complete the TCS installation.
The installer validates the release key and options keys that were installed in the registry after running the PreInstaller.cmd.
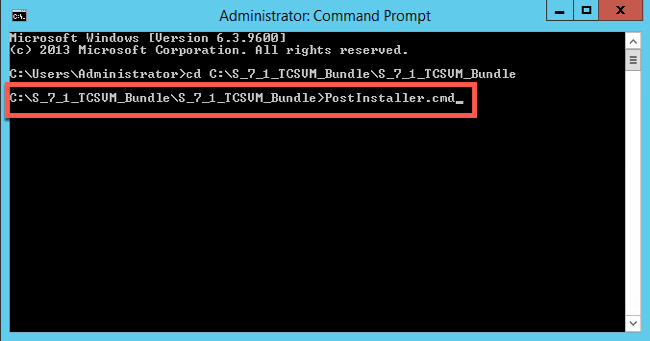
Step 8. Run the PostInstaller.cmd from the VM Scripts folder in the Command Prompt (CMD) to configure the Post-Installer. This reboots the system:
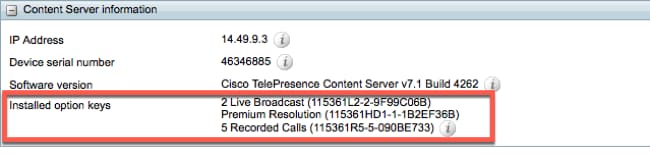
Step 9. Confirm the newly created TCS VM is up and running. Launch the TCS web interface in a web browser and navigate to Management > Content Server Information to verify the Release Key and required Option keys were installed:

Installing additional Option Keys using the Web Interface
Step 1. Log in to the web interface which defaults to the Management tab for TCS:

Step 2. Scroll down to the Software option section:

Step 3. Copy the option key value you received in your license email and enter the value in the Add option key field and click Add option key:

Note: You must restart the Content Engine service for your changes to be applied
Step 4. Repeat step 2 for every additional option key you would like to add to your TCS VM.
Verify
The installed option key(s) will show under Content Server Information on the Management page.
Troubleshoot
Step 1. Verify the key was copied correctly from the licensing email and the license file was created correctly. Any change in the alphanumeric value string may cause an error.
Step 2. Verify the key matches with the correct Telepresence Content Server (TCS) serial number.
Step 3. Assess steps one through two again. If all is correct, add the keys once more. Ensure there are no extra spaces or characters in the value entered and be sure to include any dashes.
If you encounter any errors after following steps one through three above, engage Cisco TAC.
 Feedback