Feedback Feedback
|
Table Of Contents
Cisco Wireless Control System Navigator 1.083.0 Installation Guide
Installing Navigator for Windows
Installing Navigator for Linux
Logging into the Navigator User Interface
Cisco Wireless Control System Navigator 1.083.0 Installation Guide
This chapter describes how to install Cisco Wireless Control System (WCS) Navigator 1.0.83.0. It contains these sections:
•
Installing Navigator for Windows
•
•
Prerequisites
Before installing the WCS Navigator, ensure that you have completed the following:
•
•
Note
•
System Requirements
Cisco WCS Navigator for Windows or Linux requires the following:
–
–
–
–
Note
Supported Operating Systems
The following operating systems are supported:
•
Note
•
Installing Navigator for Windows
This section describes how to install WCS Navigator on a Windows operating system. Before installing WCS Navigator, refer to the "Prerequisites" section and the "System Requirements" section. These sections give an overview of the system requirements and measures that you should take prior to the installation. You must have administrator privileges on Windows and root privileges on Linux. If installing Navigator for Linux, see the "Installing Navigator for Linux" section.
Note
Note
To install Navigator, follow these steps:
Step 1
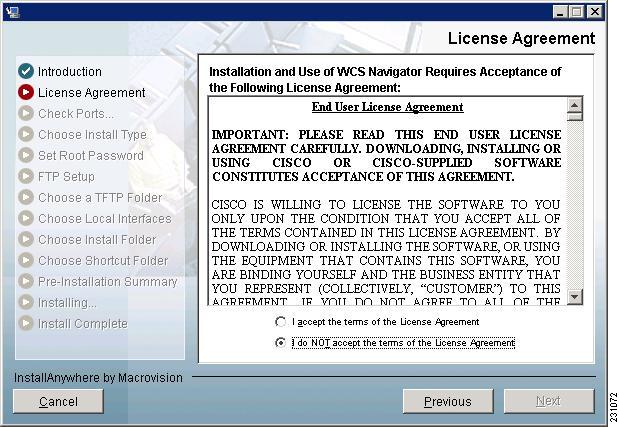
Step 2
Figure 1 License Agreement
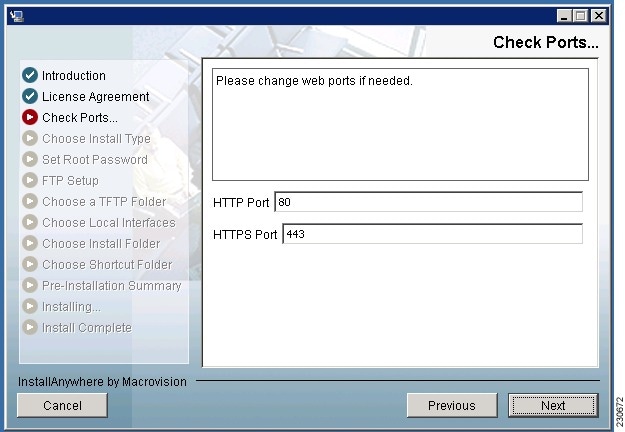
Step 3
Figure 2 Check Ports Window
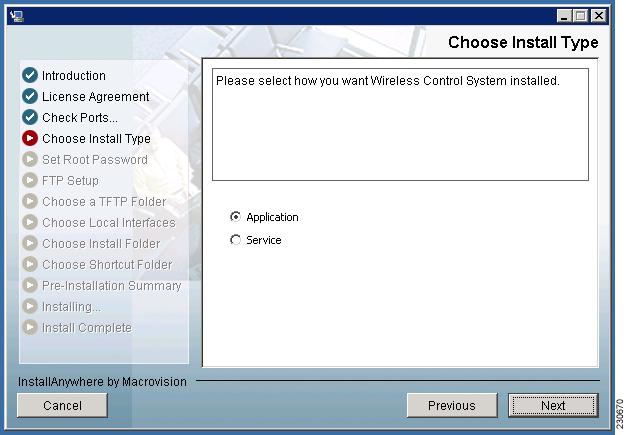
Step 4
Figure 3 Choose Install Type Window
Step 5
•
•
Note
Step 6
•
•
•
•
•
•
Step 7
Step 8
Note
Step 9
Note
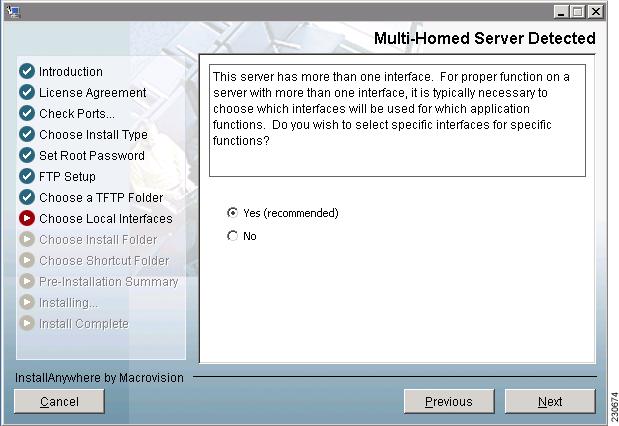
If you are installing WCS Navigator on a multi-homed server (a server having multiple interfaces), the installer automatically detects the presence of multiple interfaces and opens the Multi-Homed Server Detected window (see Figure 4).
Figure 4 Multi-Homed Server Detected Window
Note
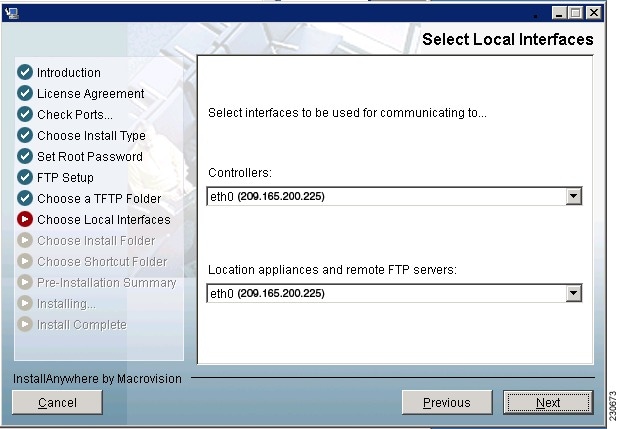
Step 10
Figure 5 Select Local Interfaces Window
Step 11
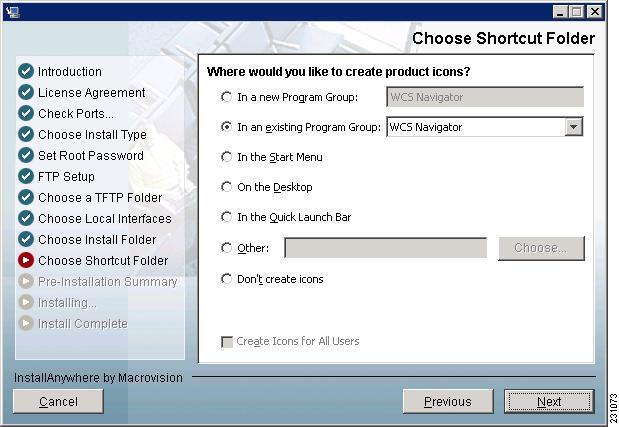
Step 12
Figure 6 Choose Shortcut Folder Window
Step 13
Step 14
Step 15
Note
Installing Navigator for Linux
This section describes how to install WCS Navigator on a Linux operating system.
Step 1
Step 2
Step 3
The install script prepares the install environment, and several windows of the license agreement display. You will then be asked if you accept the terms of the license agreement.
Step 4
Step 5
Step 6
Note
Step 7
•
•
•
•
•
•
Step 8
Step 9
Step 10
Step 11
Note
Step 12
Step 13
Step 14
Step 15
Note
Starting Navigator
This section provides instructions for starting Navigator on either a Windows or Linux server.
Starting Navigator on Windows
Follow these steps to start Navigator when it is installed as a Windows application or Windows service.
Note
Step 1
Step 2
•
•
The Navigator Admin window appears and displays messages indicating that it is starting.
Note
Step 3
Step 4
Starting Navigator on Linux
Follow these steps to start Navigator when it is installed as a Linux application or Linux service.
Note
Note
Step 1
Step 2
•
•
The CLI displays messages indicating that Navigator is starting.
Step 3
Logging into the Navigator User Interface
Follow these steps to log into the Navigator user interface through a web browser.
Step 1
Note
Step 2
Step 3
Step 4
Step 5
You can now add WCS to the Navigator and start using the application.
Note