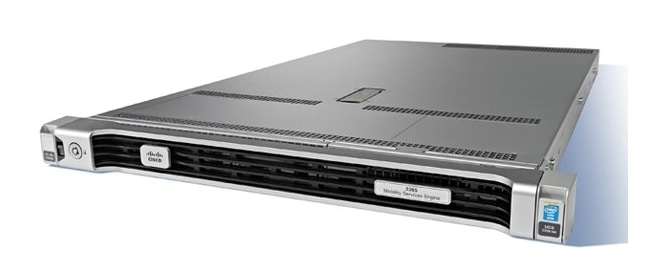
Cisco Mobility Services Engine
| Status |
End of Sale
EOL Details
|
|---|---|
| Series Release Date | 27-MAY-2008 |
| End-of-Sale Date | 29-NOV-2023 |
| End-of-Support Date | 30-NOV-2028 |
|
This product is supported by Cisco, but is no longer sold.
Supported Model: - Cisco CMX 3375 Appliance for Cisco Mobile Experiences |
|
|
Note: Cisco Adaptive Wireless IPS Software (Retired) redirects here.
|
|
- US/Canada 800-553-2447
- Worldwide Support Phone Numbers
- All Tools
 Feedback
 Feedback
-
Top Search Results
Key Information
Customers Also Viewed
Saved Content
-
You can now save documents for easier access and future use. Saved documents for this product will be listed here, or visit the My Saved Content page to view and manage all saved content from across Cisco.com.
Log in to see your Saved Content.
Document Categories
-
Data Sheets and Product Information
- Cisco Mobility Services Engine Ordering and Licensing Guide (up to Release 8.0 software)
Data Sheets
-
English
- End-of-Sale and End-of-Life Announcement for the Cisco CMX 3375 and CMX SW version 10.6.3
- End-of-Sale and End-of-Life Announcement for the Cisco Mobility Services Engine aWIPS
- End-of-Sale and End-of-Life Announcement for the Cisco 3365 Mobility Services Engine
- End-of-Sale and End-of-Life Announcement for the Cisco Mobility Service Engine 8.x (Location and CAS Services) and 7.x SW Release (MSE 8.x and 7.x)
- End-of-Sale and End-of-Life Announcement for the Cisco CMX Connect and CMX Connect with Presence Analytics
- End-of-Sale and End-of-Life Announcement for the Cisco Virtual BLE Beacon Solution
- End-of-Sale and End-of-Life Announcement for the Cisco 3355 Mobility Services Engine
- End-of-Sale and End-of-Life Announcement for the Cisco 3350 Mobility Services Engine
- End-of-Sale and End-of-Life Announcement for the Cisco Mobility Services Engine 3350 Field-Replaceable Hard Disk and Power Supply
- EOL/EOS for the AeroScout Exciters
End-of-Life and End-of-Sale Notices
-
Security Notices
- Multiple Vulnerabilities in OpenSSL Affecting Cisco Products: September 2016
- Cisco Policy Suite Read-Only User Effect Change Vulnerability
- Cisco Policy Suite World-Readable Sensitive Data Vulnerability
- Cisco Policy Suite OSGi Interface Unauthenticated Access Vulnerability
- Cisco Policy Suite Cluster Manager Default Password Vulnerability
- Cisco Policy Suite Policy Builder Unauthenticated Access Vulnerability
- Cisco Policy Suite Policy Builder Database Unauthenticated Access Vulnerability
- Cisco Policy Suite Unauthenticated Information Disclosure Vulnerability
- Cisco Mobility Express 2800 and 3800 Series Wireless LAN Controllers Shell Bypass Vulnerability
- Multiple Vulnerabilities in OpenSSL Affecting Cisco Products: January and February 2017
- Multiple Vulnerabilities in Network Time Protocol Daemon Affecting Cisco Products: November 2016
- Vulnerability in Linux Kernel Affecting Cisco Products: October 2016
- Multiple Vulnerabilities in OpenSSL Affecting Cisco Products: May 2016
- Multiple Vulnerabilities in OpenSSL Affecting Cisco Products: March 2016
- Vulnerability in GNU glibc Affecting Cisco Products: February 2016
Security Advisories, Responses and Notices
-
Release and Compatibility
- Cisco Wireless Solutions Software Compatibility Matrix
- Compatibility Matrix for Legacy Cisco Wireless Solutions
Compatibility Information
-
Deferred Releases
- Release Notes for Cisco Mobility Services Engine, Release 7.6.120.0
- Release Notes for Cisco Mobility Services Engine, Release 7.6.100.0
- Release Notes for Cisco Mobility Services Engine, Release 7.5.102.101
- Release Notes for Cisco Mobility Services Engine, Release 7.4.121.0
- Release Notes for Cisco Mobility Services Engine, Release 7.4.110.0
Release Notes
-
Reference
- Cisco Connected Mobile Experiences (CMX) Command Reference Guide, Release 10.2
- Cisco Connected Mobile Experiences (CMX) Command Reference Guide, Release 10.1
Command References
- Open Source Document for Cisco Connected Mobile Experiences (CMX), Cisco Release 10.3, Version 1.0 (PDF - 4 MB)
- Open Source Used in Cisco Mobility Services Engine, 8.0.110.0 (PDF - 1 MB)
- Open Source Used in Cisco Mobility Services Engine, 8.0.100.0 (PDF - 1 MB)
Licensing Information
-
Install and Upgrade
-
Cisco MSE Virtual Appliance
-
Cisco 3355 Mobility Services Engine
-
Cisco 3350 Mobility Services Engine
-
Cisco 3310 Mobility Services Engine
- Cisco Aironet Directional Hyperlocation Antenna (AIR-ANT25-LOC-02=) Installation Guide
Install and Upgrade Guides
- Transferring and installing patches on CMX 10.6 and above
Install and Upgrade TechNotes
-
-
Configuration
- Configure Console Access to 5520 8540 WLC via CIMC
- Configuration and Deployment Guide for MSE Software Release 8.0 High Availability
- Location based authorization with Mobility Services Engine (MSE) and Identity Services Engine (ISE) ISE 2.0
Configuration Examples and TechNotes
-
10.x Releases
-
8.0 Releases
-
7.6 Releases
-
7.5 Releases
-
7.4 Releases
-
7.3 Releases
Configuration Guides
- Cisco Mobility Services Engine REST API Guide, Release 7.6
- Cisco Connected Mobile Experiences REST API Guide, Release 10.2
- Cisco Mobility Services Engine SOAP API Guide, Release 7.4 (PDF - 3 MB)
- Cisco Mobility Services Engine REST API Guide, Release 8.0
- Cisco Mobility Services Engine REST API Guide, Release 7.5
Programming Guides
-
Troubleshooting
- Troubleshooting NMSP issues on MSE and Converged Access(5760/3850/3650/4500s8e)
Troubleshooting TechNotes
-
Literature
- Monetizing Public Wi-Fi via Business-to-Consumer Relationships (PDF - 3 MB)
White Papers
-
Log in to see available downloads.
-
