Cisco Unified SIP Phone 3905 User Guide for Cisco Unified Communications Manager 8.6
Features of your Cisco Unified SIP Phone 3905

Download this chapter
Download the complete book
Contents
Features of your Cisco Unified SIP Phone 3905
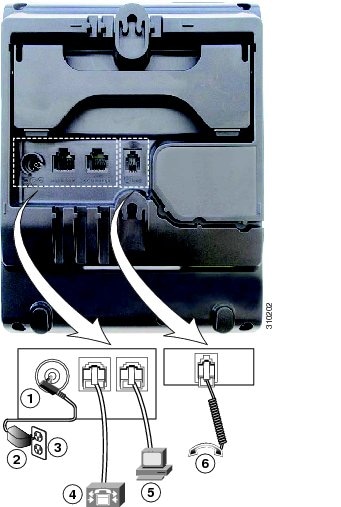
Phone connections
Buttons and hardware
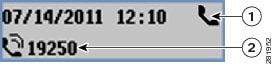
Phone screen
1
Header
Displays date and time. Also displays line information such as voicemail and missed calls. When using the Applications menu, displays phone menu listings.
2
Line details and other phone information
Displays the directory number. During a call, also displays details for the active line. If not on a call, also displays line text label and other information such as placed calls and phone menu listings.
Adjust handset rest
ProcedureYour system administrator may have mounted your phone on a wall. With a wall-mounted phone, you might need to adjust the handset rest to ensure that the receiver does not slip out of the cradle.