Feedback
Table Of Contents
Introduction
This guide provides guidelines for using the Policy Enforcement Point (PEP) and Policy Administration Point (PAP) APIs, as well as instructions for configuring the PEP agent and Java Server Page (JSP) tag libraries. You can make use of old and new APIs as well as new APIs for this purpose.
The PEP APIs provide an interface to query the entitlements from the PDP. A set of classes, methods, and operations are defined in the PEP APIs for the purpose of enforcing entitlements created within the administration console.
In CEPM, the PEP APIs are implemented in two ways:
•
By writing function calls within a protected application using old PEP APIs. These function calls, when invoked, make policy decision requests to the Policy Decision Points (PDPs). Refer to Chapter 2 "PEP API Quick Start Guide" for (old) PEP API implementation.
•
The PAP APIs provide an interface for programmatically leveraging all of the administrative functions available from the administration console. These APIs can be used to create custom administration consoles that manage CEPM users, groups, roles, rules, and policies. Additionally, the PAP APIs can be used to create scripts to facilitate the process of migrating users, roles, and resources into the policy administration console.
The PEP tag libraries can be used as an alternative to the PEP APIs for JSP applications.
Please refer to PAP and PEP Javadocs for full set of
Prerequisites
Before you can use the PEP/PAP APIs or the tag libraries, you must update the PEP configuration file, pep_config.xml, and place it in the classpath of the protected application.
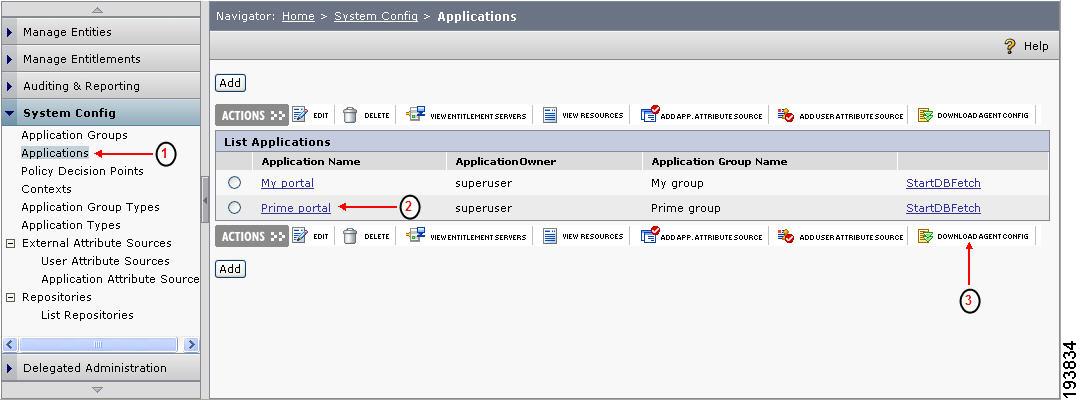
To download the PEP configuration file from the administration console, follow these steps:
Step 1
Step 2
Step 3
Figure 1-1 Applications Page
Step 4
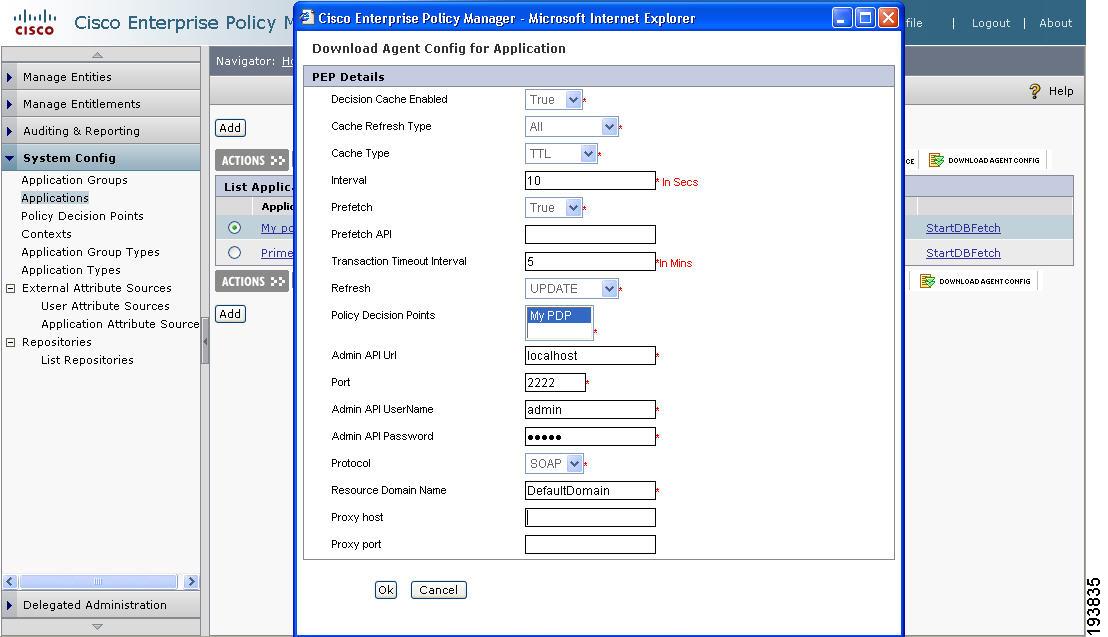
Step 5
Figure 1-2 Download Agent Config
Step 6
Figure 1-3 Save pep_config.xml file
Step 7