Downloads |
 Feedback Feedback
|
Table Of Contents
Integrating CEPM ACEGI Agent with a Web Application
Integrating the ACEGI Agent in a Static Application (Using In-Process PDP)
Configuring ACEGI Agent with a Sample Spring Application
Obtaining Documentation and Submitting a Service Request
CEPM ACEGI Agent Guides
Revised: January 17, 2011, Doc Part No: OL-19562-01Contents
•
Integrating CEPM ACEGI Agent with a Web Application
•
•
•
About This Document
Objective
This document provides guidelines for deployment of the ACEGI agent and it explain using Cisco customized ACEGI authorization solution for applications running in the Spring Framework. It also provides a step-by-step procedure for the integration of ACEGI agent in static applications with in-process Policy Decision Point (PDP) configuration.
Audience
This guide is for administrators who use CEPM and are responsible for resource modelling and entitlement management.
ACEGI Approach
ACEGI Security provides comprehensive security services for Java 2 Platform, Enterprise Edition (J2EE)-based enterprise software applications, particularly applications using the Spring Framework. ACEGI provides a strong security cover to these applications while switching server environments, where the user must reconfigure the security features.
ACEGI stipulates the authentication as well as authorization features of an application. To make the security cover more explicable and stronger, the security configuration is customized in terms of Cisco Enterprise Policy Manager (CEPM) functionalities, which will henceforth attend to the authorization part assuming that ACEGI still meets the authentication feature.
When a user tries to access a Spring-based security implementation, the ACEGI authenticates the user, but CEPM authorizes the user by using customized accessibility features.
For example, in a banking application protected by ACEGI, user Mary has access only to Report6. To make the authorization process more stringent, the user info of Mary is reconfigured using the advanced features of CEPM. For example, a rule-based policy is created for Report6 involving things such as utsertype and user attributes. When Mary tries to access Report6, assuming that the login authentication has already been done by ACEGI, the authorization permission is delivered by CEPM.
Integrating CEPM ACEGI Agent with a Web Application
To integrate the ACEGI agent with a web application, follow these steps:
Step 1
In this document, the directory where this zip file is unzipped is referred to as the ACEGI_HOME directory.
Step 2
Step 3
Step 4
-DCEPM_AGENT_CONFIG=$ACEGI_HOME\config\pep\pep_config.xml-Dlog4j.configuration=$ACEGI_HOME\config\logging\logging.xml -DCEPM_DECISION_CACHE_CONFIG=$ACEGI_HOME\config\jbosscache\jbosscache.xml
Note
Step 5
<filter><filter-name>Acegi Filter Chain Proxy </filter-name><filter-class>org.acegisecurity.util.FilterToBeanProxy</filter-class><init-param><param-name>targetClass</param-name><param-value>org.acegisecurity.util.FilterChainProxy</param-value></init-param></filter><filter-mapping><filter-name>Acegi Filter Chain Proxy</filter-name><url-pattern>/*</url-pattern></filter-mapping>Step 6
<bean id="cepmDecisionManager" class="com.cisco.epm.agent.acegi.CepmDecisionManager"><property name="resourceManager"><bean class="com.cisco.epm.agent.acegi.CepmSecurityResourceManager"/></property></bean>Step 7
a.
<bean id="filterChainProxy" class="org.acegisecurity.util.FilterChainProxy"><property name="filterInvocationDefinitionSource"><value>CONVERT_URL_TO_LOWERCASE_BEFORE_COMPARISON PATTERN_TYPE_APACHE_ANT URL_pattern=filterInvocationInterceptor</value></property></bean><bean id="httpSessionContextIntegrationFilter" class="org.acegisecurity.context.HttpSessionContextIntegrationFilter"/><bean id="filterInvocationInterceptor" class="com.cisco.epm.agent.springsecurityrolevoter.CepmFilterSecurityInterceptor"><property name="authenticationManager"><ref bean="authenticationManager"/></property><property name="accessDecisionManager"><ref local="cepmDecisionManager"/></property><property name="objectDefinitionSource"><value>CONVERT_URL_TO_LOWERCASE_BEFORE_COMPARISON PATTERN_T YPE_APACHE_ANT URL_pattern=role_allowed</value></property></bean><bean id="exceptionTranslationFilter" class="org.acegisecurity.ui.ExceptionTranslationFilter"><property name="authenticationEntryPoint"><ref local="authenticationProcessingFilterEntryPoint"/></property></bean><bean id="authenticationManager" class="org.acegisecurity.providers.ProviderManager"><property name="providers"><list><ref local="anonymousAuthenticationProvider"/></list></property></bean><bean id="anonymousAuthenticationProvider" class="org.acegisecurity.providers.anonymous.AnonymousAuthenticationProvider"><property name="key"><value>test</value></property></bean><bean id="authenticationProcessingFilterEntryPoint" class="org.acegisecurity.ui.webapp.AuthenticationProcessingFilterEntryPoint"><property name="loginFormUrl"><value>/index.jsp</value></property><property name="forceHttps"><value>false</value></property></bean>b.
–
Example:
/* or /log/portfolio.htm
–
Example:
/* or /log/portfolio.htm
–
–
Step 8
a.
<bean id="autoProxyCreator"
class="org.springframework.aop.framework.autoproxy.BeanNameAutoProxyCreator">
<property name="interceptorNames"><list><value>Interceptor_Names</value></list></property><property name="beanNames"><list><value>Bean_Names</value></list></property><property name="proxyTargetClass" value="true"/></bean><bean id="Interceptor_Name" class="com.cisco.epm.agent.springsecurityrolevoter.CepmMethodSecurityInterceptor"><property name="authenticationManager" ref="authenticationManager"/><property name="accessDecisionManager" ref=" cepmDecisionManager"/><property name="objectDefinitionSource"><value>Method=role_allowed</value></property></bean>b.
–
Example:
com.devx.tradingapp.web.PortfolioItemBean.setGainLoss (or)
com.devx.tradingapp.web.PortfolioItemBean.set
–
–
Example:
methodSecurityInterceptor
–
Example:
<bean id="portfolioBean"class="com.devx.tradingapp.web.PortfolioItemBean"></bean>then update 'Bean_Names' to 'portfolioBean'
Step 9
a.
* Statement which will create object of the class which implements 'Authentication'
interface, say 'auth' based on the user information coming from login page like
username,password etc.('CepmAuthentication' provided with agent reqiuires only
username)
* Add the following statements:HttpSession httpSession = ((HttpServletRequest) httpServletRequest).getSession();//Where httpServletRequest is an object of type HttpServletRequestorg.acegisecurity.context.SecurityContext sc=org.acegisecurity.context.SecurityContextHolder.getContext();sc.setAuthentication(auth);// where 'auth' is an object created in above stephttpSession.setAttribute("ACEGI_SECURITY_CONTEXT",sc);b.
–
–
–
–
–
Step 10
When an authenticated user tries to access a secured resource (for example, a Java Server Page), depending on the permissions specified within CEPM, either the requested resource is displayed or an AccessDeniedException is thrown to indicate access is denied.
Note
Integrating the ACEGI Agent in a Static Application (Using In-Process PDP)
If you are using the in-process PDP, the PEP configurations are accommodated in pdp_config.xml file. No pep_config.xml file exists. The process of integrating the ACEGI agent with in-process PDP is similar to the process for integrating the ACEGI agent with a web application, with changes in Steps 1 to 3.
To integrate the ACEGI agent with in-process PDP configurations in the static application running in Spring Framework, follow these steps:
Step 1
In this document, the directory where this zip file is unzipped is referred to as the ACEGI_HOME directory.
Step 2
Note
Step 3
Step 4
For example:
-DCEPM_AGENT_CONFIG=$ACEGI_HOME\config\pep\pep_config.xml-Dlog4j.configuration=$ACEGI_HOME\config\logging\logging.xml -DCEPM_DECISION_CACHE_CONFIG=$ACEGI_HOME\config\jbosscache\jbosscache.xmlTo complete this process, refer Step 5 of "Integrating CEPM ACEGI Agent with a Web Application".
Configuring ACEGI Agent with a Sample Spring Application
Follow the steps below to configure and test the countries Spring application using ACEGI to protect URLs and methods.
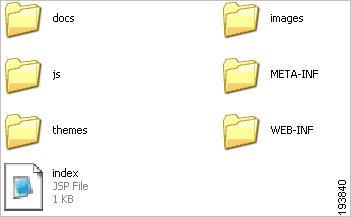
Step 1
Figure 1 Folder structure
Step 2
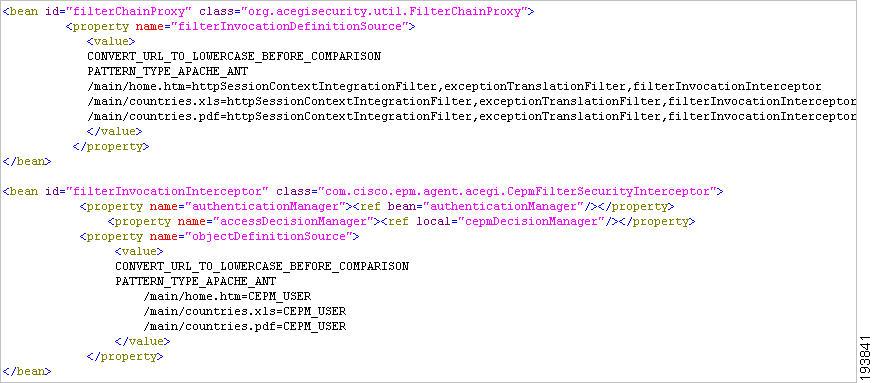
Step 3
Figure 2
applicationContext.xml
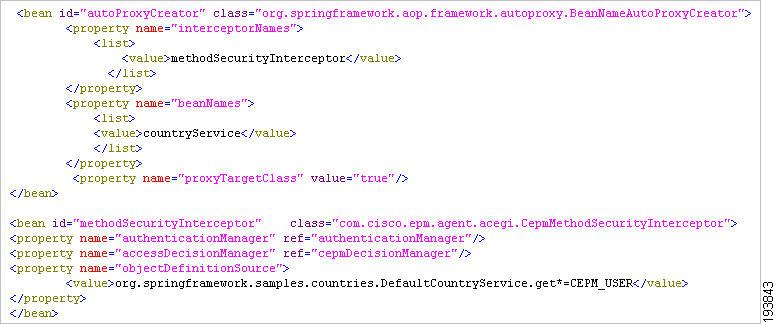
Step 4
Figure 3
Method
Modify applicationContext.xml as follows:
Figure 4 applicationContext.xml
Step 5
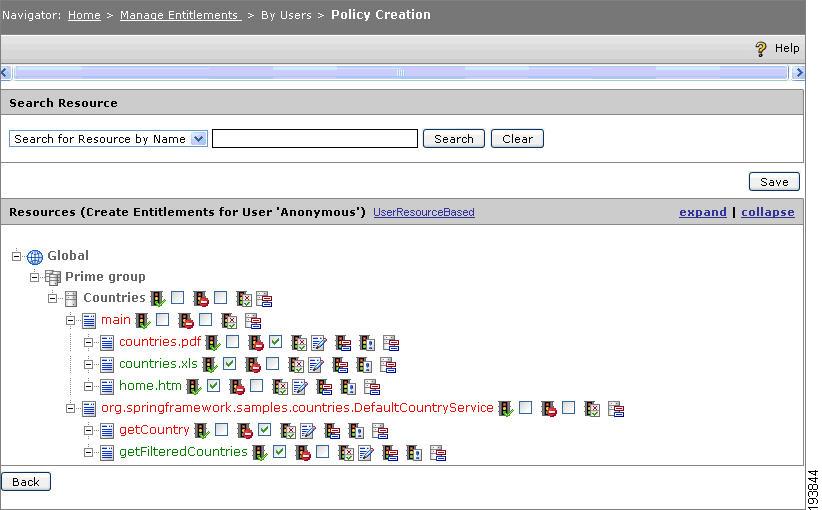
<applicationgroup>Prime group</applicationgroup><application>Countries</application>Step 6
Figure 5 Policy Creation
Step 7
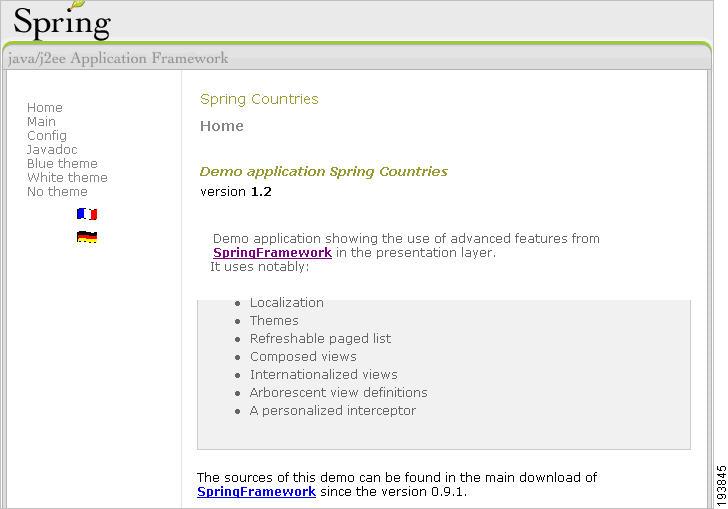
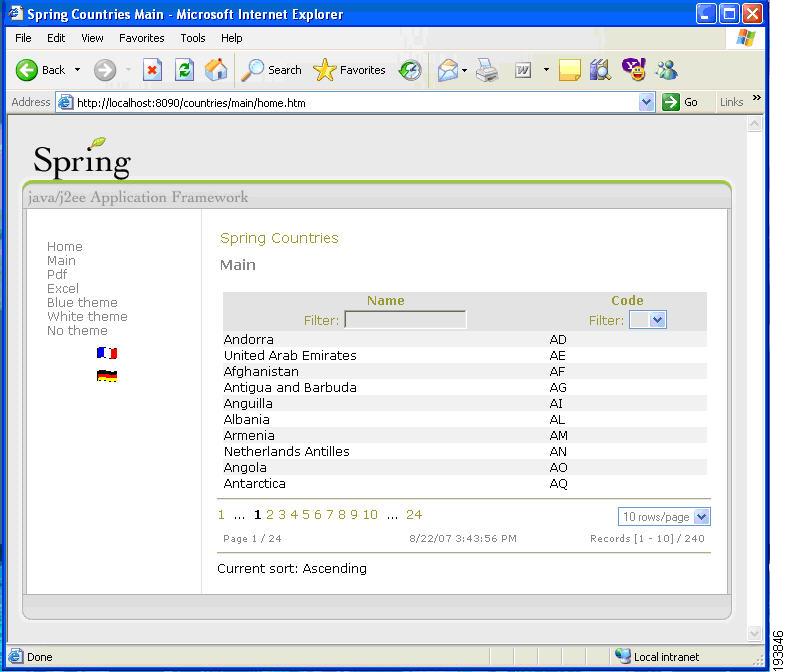
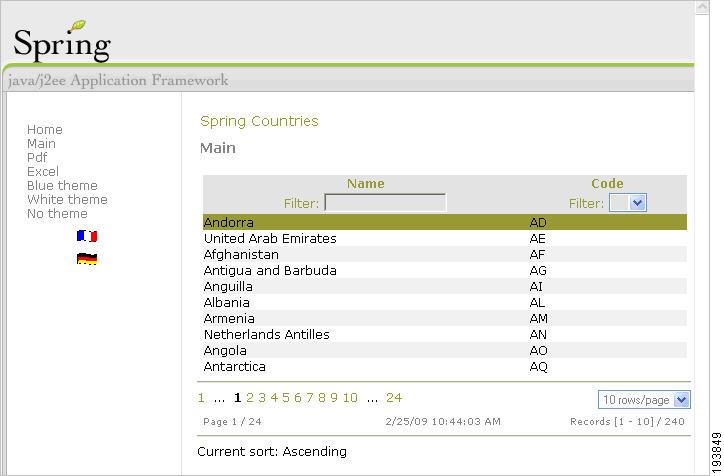
Run the application (for ex: http://host:port/countries).
Figure 6
Spring Framework
Step 8
URL resource .../main/home.htm and Method "getFilteredCountries" will be protected and
•
•
Figure 7 Spring Framework Hom e page
.
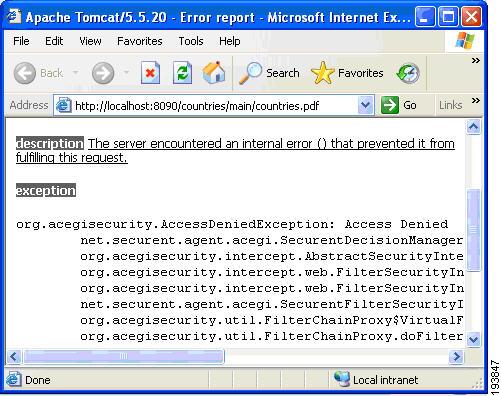
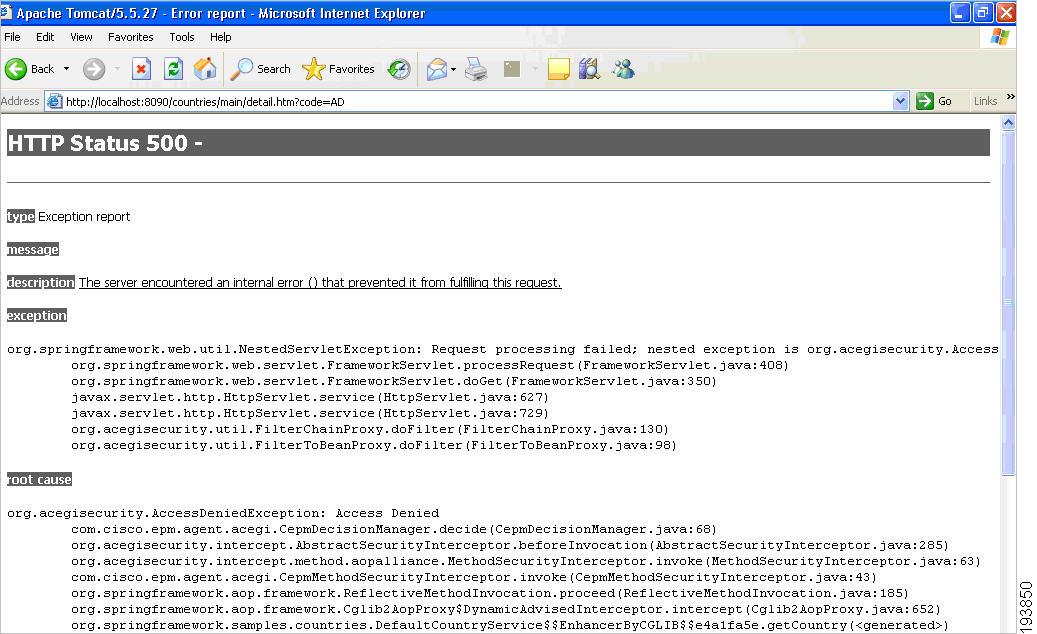
Step 9
URL resource /main/countries.pdf is protected. Decision for User 'Anonymous' for resource 'Prime group:Countries:main:countries.pdf' with action 'any' is:- 'Deny. As the permission is deny, Access Denied Exception will be thrown.
Figure 8 Access Denied Exception
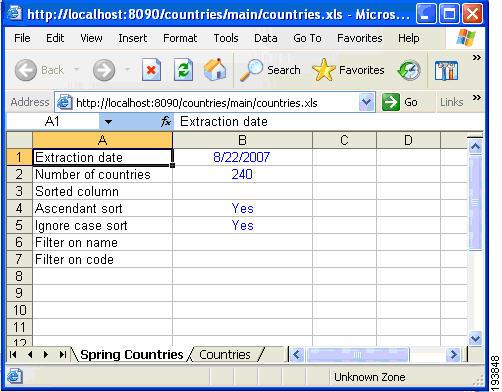
Step 10
URL resource /main/countries.xls is protected. Decision for User 'Anonymous' for resource 'Prime group:Countries:main:countries.xls' with action 'any' is 'Permit'.
Figure 9 Country.xls
Step 11
Figure 10
Protected Country and Method
Decision for User 'Anonymous' for resource 'Prime group:Countries:org.springframework.samples.countries.DefaultCountryService:getCountry' with action 'any' is:- 'Deny'. As the permission is deny, AccessDenied Exception will be thrown.
Figure 11 AccessDenied Exception
Documentation Updates
Table 1 Updates to CEPM ACEGI Agent Guides
July 9, 2009
Minor edits and template/boilerplate updates for publication to Cisco.com
April 3, 2009
Cisco Enterprise Policy Manager (EPM) Release 3.3.0.0
Related Documentation
CEPM_User_Guide_V3.3.0.0.pdf
Obtaining Documentation and Submitting a Service Request
For information on obtaining documentation, submitting a service request, and gathering additional information, see the monthly What's New in Cisco Product Documentation, which also lists all new and revised Cisco technical documentation, at:
http://www.cisco.com/en/US/docs/general/whatsnew/whatsnew.html
Subscribe to the What's New in Cisco Product Documentation as a Really Simple Syndication (RSS) feed and set content to be delivered directly to your desktop using a reader application. The RSS feeds are a free service and Cisco currently supports RSS Version 2.0.
CCDE, CCENT, CCSI, Cisco Eos, Cisco Explorer, Cisco HealthPresence, Cisco IronPort, the Cisco logo, Cisco Nurse Connect, Cisco Pulse, Cisco SensorBase, Cisco StackPower, Cisco StadiumVision, Cisco TelePresence, Cisco TrustSec, Cisco Unified Computing System, Cisco WebEx, DCE, Flip Channels, Flip for Good, Flip Mino, Flipshare (Design), Flip Ultra, Flip Video, Flip Video (Design), Instant Broadband, and Welcome to the Human Network are trademarks; Changing the Way We Work, Live, Play, and Learn, Cisco Capital, Cisco Capital (Design), Cisco:Financed (Stylized), Cisco Store, Flip Gift Card, and One Million Acts of Green are service marks; and Access Registrar, Aironet, AllTouch, AsyncOS, Bringing the Meeting To You, Catalyst, CCDA, CCDP, CCIE, CCIP, CCNA, CCNP, CCSP, CCVP, Cisco, the Cisco Certified Internetwork Expert logo, Cisco IOS, Cisco Lumin, Cisco Nexus, Cisco Press, Cisco Systems, Cisco Systems Capital, the Cisco Systems logo, Cisco Unity, Collaboration Without Limitation, Continuum, EtherFast, EtherSwitch, Event Center, Explorer, Follow Me Browsing, GainMaker, iLYNX, IOS, iPhone, IronPort, the IronPort logo, Laser Link, LightStream, Linksys, MeetingPlace, MeetingPlace Chime Sound, MGX, Networkers, Networking Academy, PCNow, PIX, PowerKEY, PowerPanels, PowerTV, PowerTV (Design), PowerVu, Prisma, ProConnect, ROSA, SenderBase, SMARTnet, Spectrum Expert, StackWise, WebEx, and the WebEx logo are registered trademarks of Cisco and/or its affiliates in the United States and certain other countries.
All other trademarks mentioned in this document or website are the property of their respective owners. The use of the word partner does not imply a partnership relationship between Cisco and any other company. (1002R)
Any Internet Protocol (IP) addresses and phone numbers used in this document are not intended to be actual addresses and phone numbers. Any examples, command display output, network topology diagrams, and other figures included in the document are shown for illustrative purposes only. Any use of actual IP addresses or phone numbers in illustrative content is unintentional and coincidental.
© 2009 Cisco Systems, Inc. All rights reserved.