Authentication Overview
Use the authentication feature, known as web authentication proxy, to authenticate end users on host systems that do not run the IEEE 802.1x supplicant.
 Note |
You can configure web-based authentication on Layer 2 and Layer 3 interfaces. |
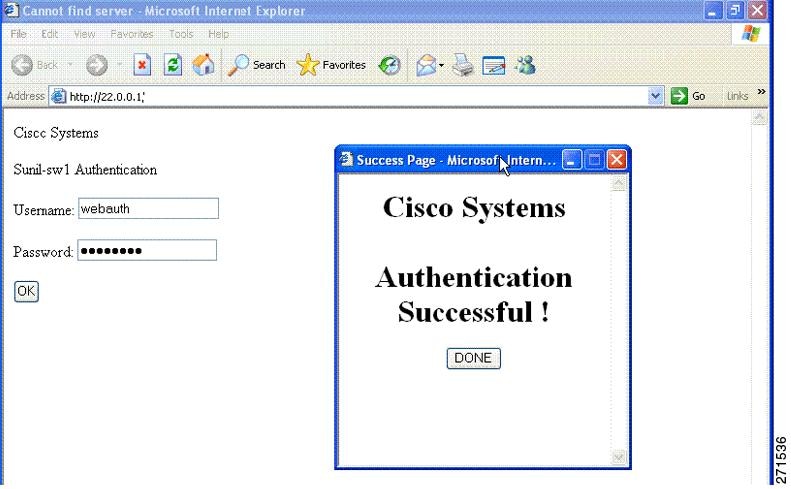
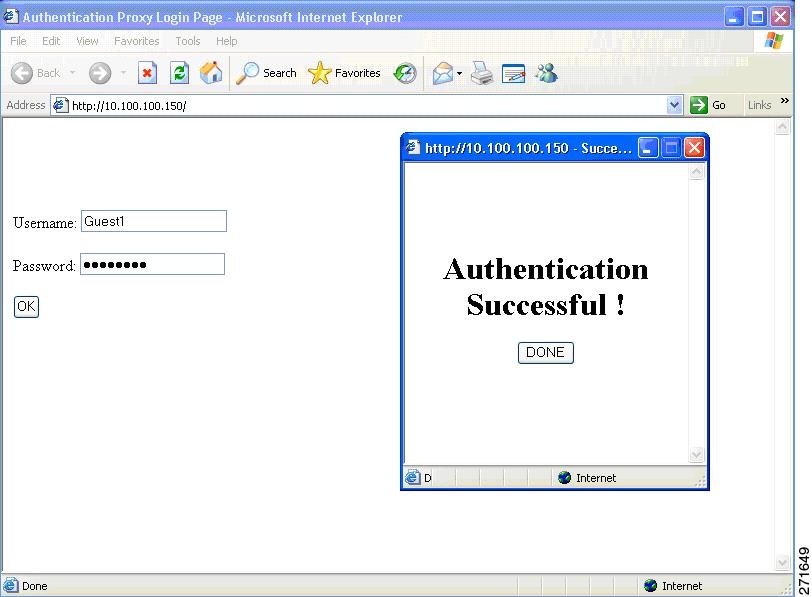
When you initiate an HTTP session, authentication intercepts ingress HTTP packets from the host and sends an HTML login page to the users. The users enter their credentials, which the authentication feature sends to the authentication, authorization, and accounting (AAA) server for authentication.
If authentication succeeds, authentication sends a Login-Successful HTML page to the host and applies the access policies returned by the AAA server.
If authentication fails, authentication forwards a Login-Fail HTML page to the user, prompting the user to retry the login. If the user exceeds the maximum number of attempts, authentication forwards a Login-Expired HTML page to the host, and the user is .
Note |
The traceback that you receive when webauth client tries to do authentication does not have any performance or behavioral impact. It happens rarely when the context for which FFM replied back to EPM for ACL application is already dequeued (possibly due to timer expiry) and the session becomes ‘unauthorized’. |
Based on where the web pages are hosted, the local web authention can be categorozied as follows:
-
Internal—The internal default HTML pages (Login, Success, Fail, and Expire) in the embedded wireless controller are used during the local web authentication.
-
Customized—The customized web pages (Login, Success, Fail, and Expire) are downloaded onto the embedded wireless controller and used during the local web authentication.
-
External—The customized web pages are hosted on the external web server instead of using the in-built or custom web pages.
Based on the various web authentication pages, the types of web authentication are as follows:
-
Webauth—This is a basic web authentication. Herein, the embedded wireless controller presents a policy page with the user name and password. You need to enter the correct credentials to access the network.
-
Consent or web-passthrough—Herein, the controller presents a policy page with the Accept or Deny buttons. You need to click the Accept button to access the network.
-
Webconsent—This is a combination of webauth and consent web authentication types. Herein, the embedded wireless controller presents a policy page with Accept or Deny buttons along with user name or password. You need to enter the correct credentials and click the Accept button to access the network.
Note |
|
Note |
|
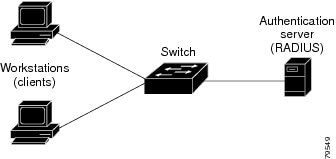
Device Roles
With local web authentication, the devices in the network have these specific roles:
-
Client—The device (workstation) that requests access to the network and the controller and responds to requests from the controller. The workstation must be running an HTML browser with Java Script enabled.
-
Authentication server—Authenticates the client. The authentication server validates the identity of the client and notifies the controller that the client is authorized to access the network and the controller services or that the client is denied.
-
Controller—Controls the physical access to the network based on the authentication status of the client. The controller acts as an intermediary (proxy) between the client and the authentication server, requesting identity information from the client, verifying that information with the authentication server, and relaying a response to the client.
Authentication Process
When you enable local web authentication, these events occur:
-
The user initiates an HTTP session.
-
The HTTP traffic is intercepted, and authorization is initiated. The switch sends the login page to the user. The user enters a username and password, and the switch sends the entries to the authentication server.
-
If the authentication succeeds, the switch downloads and activates the user’s access policy from the authentication server. The login success page is sent to the user.
-
If the authentication fails, the switch sends the login fail page. The user retries the login. If the maximum number of attempts fails, the switch sends the login expired page, and the host is placed in a watch list. After the watch list times out, the user can retry the authentication process.
-
If authentication server is not available, after the web authentication retries, the client moves to the excluded state and the client receives an Authentication Server is Unavailabble page.
-
The switch reauthenticates a client when the host does not respond to an ARP probe on a Layer 2 interface, or when the host does not send any traffic within the idle timeout on a Layer 3 interface.
-
Web authentication sessions can not apply new VLAN as part of the authorization policy, as the client already has been assigned an IP address and you will not be able to change the IP address in the client, in case the VLAN changes.
-
If the terminate action is RADIUS, the feature sends a nonresponsive host (NRH) request to the server. The terminate action is included in the response from the server.
-
If the terminate action is default, the session is dismantled, and the applied policy is removed.
Local Web Authentication Banner
With Web Authentication, you can create a default and customized web-browser banners that appears when you log in to the controller.
The banner appears on both the login page and the authentication-result pop-up pages. The default banner messages are as follows:
-
Authentication Successful
-
Authentication Failed
-
Authentication Expired
The Local Web Authentication Banner can be configured as follows:
-
Use the following global configuration command:
Device(config)# parameter map type webauth global
Device(config-params-parameter-map)# banner ?
file <file-name>
text <Banner text>
title <Banner title>
The default banner Cisco Systems and Switch host-name Authentication appear on the Login Page. Cisco Systems appears on the authentication result pop-up page.
The banner can be customized as follows:
-
Add a message, such as switch, router, or company name to the banner:
-
New-style mode—Use the following global configuration command:
parameter-map type webauth global
banner text <text>
-
-
Add a logo or text file to the banner:
-
New-style mode—Use the following global configuration command:
parameter-map type webauth global
banner file <filepath>
Figure 3. Customized Web Banner 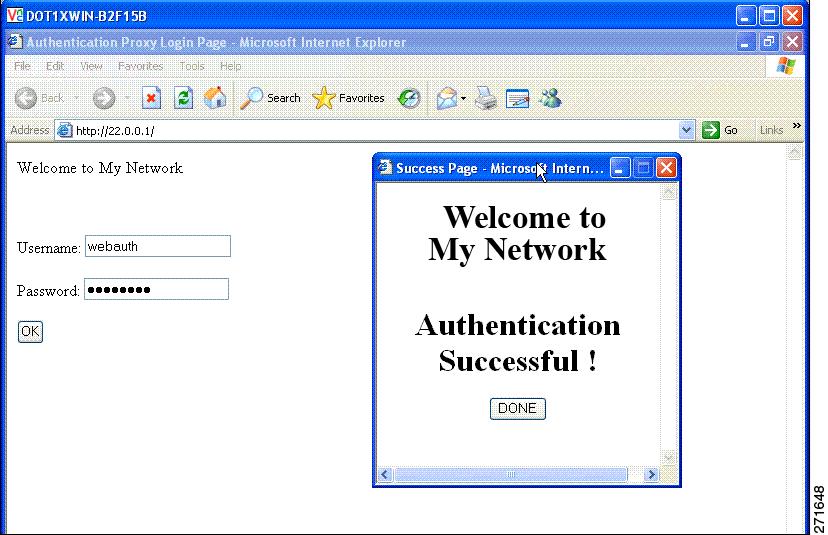
-
If you do not enable a banner, only the username and password dialog boxes appear in the web authentication login screen, and no banner appears when you log into the switch.
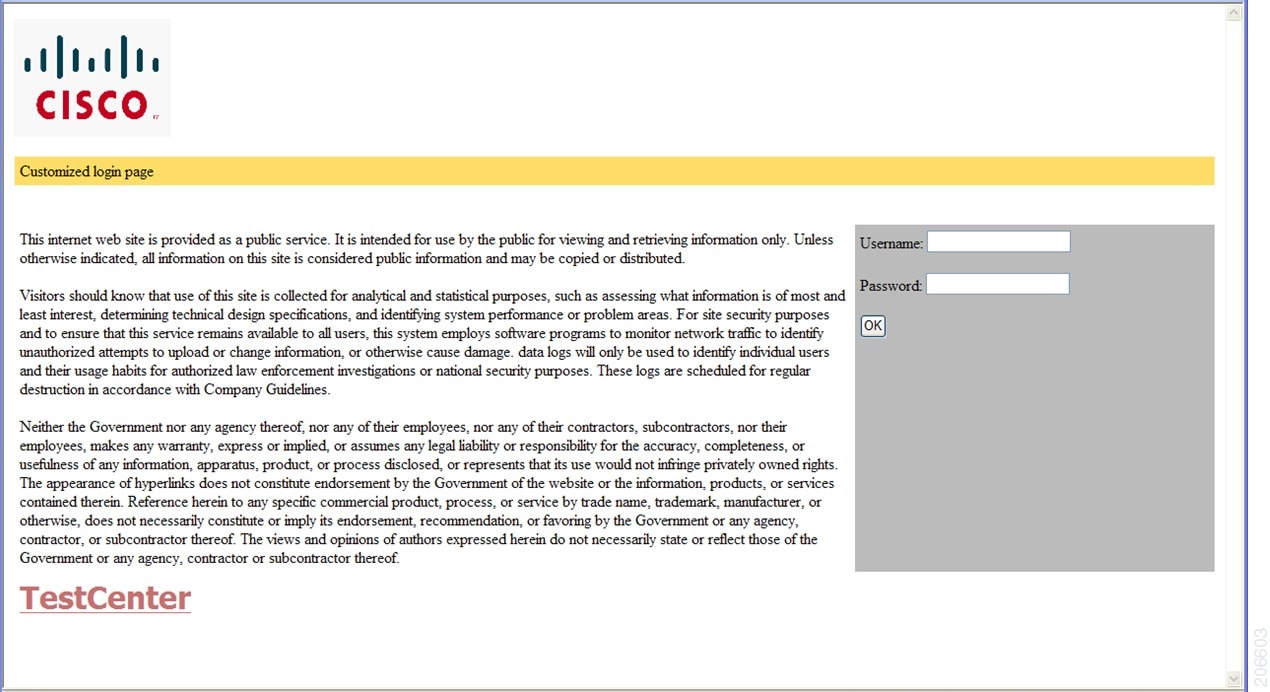
Customized Local Web Authentication
During the local web authentication process, the switch internal HTTP server hosts four HTML pages to deliver to an authenticating client. The server uses these pages to notify you of these four-authentication process states:
-
Login—Your credentials are requested.
-
Success—The login was successful.
-
Fail—The login failed.
-
Expire—The login session has expired because of excessive login failures.
Note |
Virtual IP address is mandatory to configure custom web authentication. |
Guidelines
-
You can substitute your own HTML pages for the default internal HTML pages.
-
You can use a logo or specify text in the login, success, failure, and expire web pages.
-
On the banner page, you can specify text in the login page.
-
The pages are in HTML.
-
You must include an HTML redirect command in the success page to access a specific URL.
-
The URL string must be a valid URL (for example, http://www.cisco.com). An incomplete URL might cause page not found or similar errors on a web browser.
-
If you configure web pages for HTTP authentication, they must include the appropriate HTML commands (for example, to set the page time out, to set a hidden password, or to confirm that the same page is not submitted twice).
-
The CLI command to redirect users to a specific URL is not available when the configured login form is enabled. The administrator should ensure that the redirection is configured in the web page.
-
If the CLI command redirecting users to specific URL after authentication occurs is entered and then the command configuring web pages is entered, the CLI command redirecting users to a specific URL does not take effect.
-
Configured web pages can be copied to the switch boot flash or flash.
-
The login page can be on one flash, and the success and failure pages can be another flash (for example, the flash on the active switch or a member switch).
-
You must configure all four pages.
-
The banner page has no effect if it is configured with the web page.
-
All of the logo files (image, flash, audio, video, and so on) that are stored in the system directory (for example, flash, disk0, or disk) and that must be displayed on the login page must use web_auth_<filename> as the file name.
-
The configured authentication proxy feature supports both HTTP and SSL.
You can substitute your HTML pages for the default internal HTML pages. You can also specify a URL to which users are redirected after authentication occurs, which replaces the internal Success page.
Redirection URL for Successful Login Guidelines
When configuring a redirection URL for successful login, consider these guidelines:
-
If the custom authentication proxy web pages feature is enabled, the redirection URL feature is disabled and is not available in the CLI. You can perform redirection in the custom-login success page.
-
If the redirection URL feature is enabled, a configured auth-proxy-banner is not used
-
To remove the specification of a redirection URL, use the no form of the command.
-
If the redirection URL is required after the web-based authentication client is successfully authenticated, then the URL string must start with a valid URL (for example, http://) followed by the URL information. If only the URL is given without http://, then the redirection URL on successful authentication might cause page not found or similar errors on a web browser.
 Feedback