User Guide for Cisco Digital Media Manager 5.2.x
Bias-Free Language
The documentation set for this product strives to use bias-free language. For the purposes of this documentation set, bias-free is defined as language that does not imply discrimination based on age, disability, gender, racial identity, ethnic identity, sexual orientation, socioeconomic status, and intersectionality. Exceptions may be present in the documentation due to language that is hardcoded in the user interfaces of the product software, language used based on RFP documentation, or language that is used by a referenced third-party product. Learn more about how Cisco is using Inclusive Language.
- Updated:
- June 1, 2011
Chapter: Plan For and Manage Emergencies
Plan for and Manage Emergencies
Revised: May 13, 2015
OL-15762-03


|
|
We prepared this material with specific expectations of you. |


Note This material pertains to multiple releases of Cisco DMS.
Concepts
Overview
When emergencies of any kind affect sites where you deploy digital signage, you can use DMP displays to alert your viewers, warn them about dangers that might affect them, and direct them to safety. Or you can provide other kinds of information to them as you see fit. Until you stop playing emergency messages, they override all events that were scheduled to run automatically.
It is important to remember that emergency message insertions in your schedule will override only the events that are scheduled to run automatically. Furthermore, such insertions will override these events on only the DMPs that the emergency message insertion affected. All other DMPs in your network will abide by their schedule, without disruption.
Emergency conditions might prevent messages from playing on your DMP displays.
Note![]() Consider very carefully which DMM users should have permission to work with your schedule and manage your DMP groups. Although all of the “Play in Future” features are suspended (for affected DMPs only) while an emergency is in progress, none of the “Play Now” features or “DMP Manager” features are suspended. Therefore, it is possible for a careless user or malicious user with sufficient permissions to start another event manually on the DMPs where an emergency message should play.
Consider very carefully which DMM users should have permission to work with your schedule and manage your DMP groups. Although all of the “Play in Future” features are suspended (for affected DMPs only) while an emergency is in progress, none of the “Play Now” features or “DMP Manager” features are suspended. Therefore, it is possible for a careless user or malicious user with sufficient permissions to start another event manually on the DMPs where an emergency message should play.
If policies in your organization require of you that one or more screen zones must show assets that are editable, you can stage the editable assets remotely on one of your external deployment servers instead of staging them locally on your DMPs. Then, the people in your organization who are entrusted to edit these assets can change them — to update the emergency message, for example — in real time.
After an emergency has stopped and normal scheduling has resumed on a DMP group and its children, any playlist or presentation that was scheduled for playback at that time will start from the beginning.
Procedures
- Create Deployment Packages for Emergencies
- Provision Emergency Assets Immediately to DMP Local Storage
- Schedule the Future Staging of Emergency Assets
- Start Playback of an Emergency Message
- Stop Playback of an Emergency Message
Create Deployment Packages for Emergencies
Step 1![]() Define a deployment task for DMS-CD to provisioning emergency assets to DMP local storage.
Define a deployment task for DMS-CD to provisioning emergency assets to DMP local storage.
Alternatively, do the following to define a file transfer task that you can deploy:
a.![]() Choose Digital Media Players > Advanced Tasks, and then click File Transfer to DMP or Server.
Choose Digital Media Players > Advanced Tasks, and then click File Transfer to DMP or Server.
b.![]() To create a new file transfer task, click
To create a new file transfer task, click  Add New Application.
c.![]() After the page is refreshed, do the following to define behaviors for, and save, the file transfer task.
After the page is refreshed, do the following to define behaviors for, and save, the file transfer task.
1. Enter a specific name, such as “Fire” or “Flash Flood,” for the type of emergency. You might want to use a less specific name, such as “Emergencies,” if this task will transfer the assets for multiple presentations or playlists, or if your organization uses one playlist or presentation for emergencies of all kinds.
2. From the DMP Publishing Protocol list, choose FTP or HTTP, and then check the Emergency/Alarm check box.
3. Click Presentations in the Applications list if the assets are part of a saved presentation.
OR
Click Playlists if the assets are part of a saved playlist.
4. After the page is refreshed, click in the Available Applications list the name of the presentation or playlist whose assets should be transferred, and then click  Select Applications.
5. (Optional) To transfer the assets for multiple playlists and presentations, repeat the preceding step.
6. Click Submit to save this task, so that it becomes available for deployments.
Note Even though you created and saved a file transfer task, you have not used it yet. Your DMPs will not have local copies of the emergency assets until after you run this task successfully.
Step 2![]() Provision the emergency assets to your DMPs.
Provision the emergency assets to your DMPs.
Step 3![]() Stop. You have completed this procedure.
Stop. You have completed this procedure.
Provision Emergency Assets Immediately to DMP Local Storage
Use the ‘Run Task’ Feature to Provision Emergency Assets Immediately
Step 1![]() Click the DMP Manager tab.
Click the DMP Manager tab.
Step 2![]() Use check boxes in the table to mark DMPs that should immediately show the emergency message.
Use check boxes in the table to mark DMPs that should immediately show the emergency message.
The Run Task dialog box opens.
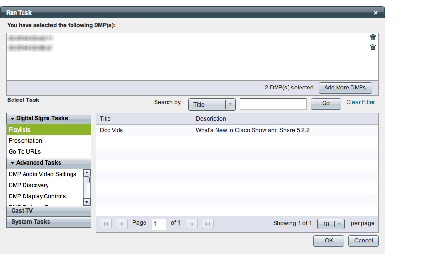
- Use options in the top pane to add DMPs to, or remove them from, your emergency deployment.
- Use options in the Select Tasks pane to filter which advanced tasks the table shows.
- Use pagination controls under the table to control how many advanced tasks you see.
- Use the Search function above the table to locate particular tasks quickly.
Step 4![]() Click to highlight the best system tasks for the type of emergency.
Click to highlight the best system tasks for the type of emergency.
The Run Task dialog box closes and a message tells you that your selected task was deployed.

Step 6![]() Stop. You have completed this procedure.
Stop. You have completed this procedure.
Use the ‘Play Now’ Feature to Provision Emergency Assets Immediately
Step 1![]() Choose Schedules > Play Now.
Choose Schedules > Play Now.
Step 2![]() From the Select an Event Type list, choose System
From the Select an Event Type list, choose System![]() Tasks.
Tasks.
Step 3![]() Click Select System
Click Select System![]() Tasks and wait until the Select Event dialog box opens.
Tasks and wait until the Select Event dialog box opens.
Step 4![]() Click Deployment Package in the Type column if you created a DMS-CD deployment task for this emergency.
Click Deployment Package in the Type column if you created a DMS-CD deployment task for this emergency.
OR
Click File Transfer to DMP or Server in the Type column if you created a file transfer task for this emergency.
Step 5![]() Click the task name in the Application Name column.
Click the task name in the Application Name column.
Step 6![]() Click OK to confirm your selection and close the Select Event dialog box.
Click OK to confirm your selection and close the Select Event dialog box.
Step 7![]() Click the name in the DMP Groups tree of the group whose member DMPs should have local copies of the emergency assets.
Click the name in the DMP Groups tree of the group whose member DMPs should have local copies of the emergency assets.
Step 8![]() Click Submit to issue the command immediately.
Click Submit to issue the command immediately.
Step 9![]() Stop. You have completed this procedure.
Stop. You have completed this procedure.
Schedule the Future Staging of Emergency Assets
Step 1![]() Choose Schedules > Play in Future.
Choose Schedules > Play in Future.
Step 2![]() From the calendar, choose the year, month, and day when the assets should be transferred.
From the calendar, choose the year, month, and day when the assets should be transferred.
The timeline is updated automatically, so that it shows the schedule for that day.
Step 3![]() Choose Advanced Tasks from the Add an Event list, which is located under the timeline.
Choose Advanced Tasks from the Add an Event list, which is located under the timeline.
Step 4![]() Use features of the Schedule Task dialog box to choose the DMPs or the external servers.
Use features of the Schedule Task dialog box to choose the DMPs or the external servers.
a.![]() Click Select Group, and then click the name of the group whose members should have local copies of the emergency assets.
Click Select Group, and then click the name of the group whose members should have local copies of the emergency assets.
b.![]() Click OK to confirm your selection and close the Select DMP Group dialog box.
Click OK to confirm your selection and close the Select DMP Group dialog box.
Step 5![]() Click Select System
Click Select System![]() Tasks and wait until the Select Event dialog box opens.
Tasks and wait until the Select Event dialog box opens.
Step 6![]() Click Deployment Package in the Type column if you created a DMS-CD deployment task for this emergency.
Click Deployment Package in the Type column if you created a DMS-CD deployment task for this emergency.
OR
Click File Transfer to DMP or Server in the Type column if you created a file transfer task for this emergency.
Step 7![]() Click the task name in the Application Name column.
Click the task name in the Application Name column.
Note![]() You cannot use DMS-CD to deploy to an external server. DMS-CD supports deployments to DMPs only.
You cannot use DMS-CD to deploy to an external server. DMS-CD supports deployments to DMPs only.
Step 8![]() Click OK to confirm your selection and close the Select Advanced Tasks dialog box.
Click OK to confirm your selection and close the Select Advanced Tasks dialog box.

Tip You can use the provided controls to adjust the start and stop time for this task. Remember to allow sufficient time for the transfer to complete. The amount of time required can vary according to the cumulative file size of the selected assets, the capacity of your network, any congestion in your network, and possibly other factors. Do not use any of the provided controls for repeating a task.
Step 9![]() Click Save to confirm your selections and close the Schedule Task dialog box.
Click Save to confirm your selections and close the Schedule Task dialog box.
Step 10![]() Click Save All to save your work in the schedule before you try to publish it.
Click Save All to save your work in the schedule before you try to publish it.
Step 11![]() Click Publish All to transmit the deployment according to the schedule that you defined.
Click Publish All to transmit the deployment according to the schedule that you defined.
Step 12![]() Stop. You have completed this procedure.
Stop. You have completed this procedure.
Start Playback of an Emergency Message
- Create and save deployable messages for playback during emergencies.
- Provision assets for the emergency message to DMP local storage or a network server.
Step 1![]() Choose Digital Media Players > Emergencies.
Choose Digital Media Players > Emergencies.
OR
Choose Schedules > Emergencies.
Step 3![]() From the Select Emergency list, choose the playlist or presentation that your DMPs should play during the type of emergency that is now in progress.
From the Select Emergency list, choose the playlist or presentation that your DMPs should play during the type of emergency that is now in progress.
Entries that you see in the Select Emergency list are derived from file transfer tasks that you saved after checking the Emergency/Alarm check box. You cannot add the “ALARM” prefix manually to the name of a (Go to) URL task to make the task appear in the Select Emergency list. Nor can you delete the “ALARM” prefix manually from the name of a (Go to) URL task to exclude the task from the Select Emergency list.
Step 4![]() Expand the Select DMP Group tree, click the entry for the DMP group whose member DMPs should all announce the emergency, and then click Start.
Expand the Select DMP Group tree, click the entry for the DMP group whose member DMPs should all announce the emergency, and then click Start.
When you choose a DMP group that has child groups, the child groups and their member DMPs are also selected automatically.
While this emergency is in-progress, the event-scheduling features at Schedule > Play in Future will be suspended temporarily for whichever group and children you chose. However, your other DMP groups will not be affected. You still can schedule events for those other groups. Later, after you stop this emergency, the event-scheduling features at Schedule > Play in Future will be restored for the group and children that you chose.
Step 5![]() To confirm your selections and start playback immediately of your emergency presentation or emergency playlist, click OK. (Emergency conditions might prevent messages from playing on your DMP displays.) Alternatively, to discard your selections without playing any assets for any emergency, click Cancel.
To confirm your selections and start playback immediately of your emergency presentation or emergency playlist, click OK. (Emergency conditions might prevent messages from playing on your DMP displays.) Alternatively, to discard your selections without playing any assets for any emergency, click Cancel.
A message tells you whether you submitted the emergency successfully. After you dismiss the message, the page is refreshed. If you submitted the emergency, the DMP group that you chose in Step 4 is colored red in the Select DMP Group tree.
Step 6![]() Stop. You have completed this procedure.
Stop. You have completed this procedure.
Tip![]() You can submit an emergency to a DMP group while it is showing a playlist or presentation that describes some other emergency. There is no need to explicitly stop playback of the current emergency message before you start another one.
You can submit an emergency to a DMP group while it is showing a playlist or presentation that describes some other emergency. There is no need to explicitly stop playback of the current emergency message before you start another one.
Stop Playback of an Emergency Message
Step 1![]() Choose Digital Media Players > Emergencies.
Choose Digital Media Players > Emergencies.
OR
Choose Schedules > Emergencies.
Step 3![]() Expand the Select DMP Group tree, click the DMP group that is colored red, and then click Stop.
Expand the Select DMP Group tree, click the DMP group that is colored red, and then click Stop.
If you choose a DMP group that has child groups, the child groups and their member DMPs are also selected automatically.
Step 4![]() To confirm your selections, which will stop playback of your emergency message and restore normal scheduling for the DMP group (and children) that you chose, click OK. Alternatively, to discard your selections without stopping the emergency, click Cancel.
To confirm your selections, which will stop playback of your emergency message and restore normal scheduling for the DMP group (and children) that you chose, click OK. Alternatively, to discard your selections without stopping the emergency, click Cancel.
A message tells you whether you stopped the emergency successfully. After you dismiss the message, the page is refreshed.
If you stopped the emergency, the DMP group that you chose in Step 3 is no longer colored red in the Select DMP Group tree.
Step 5![]() Stop. You have completed this procedure.
Stop. You have completed this procedure.
If you selected a DMP group whose member DMPs were not showing emergency messages, these DMPs will stop and then restart their playback of whatever asset they are scheduled to show.
If separate emergencies were in effect simultaneously across multiple DMP groups and you stopped the emergency for only one group, remember that the event-scheduling features at Schedule > Play in Future still are suspended for all groups where emergencies remain in effect.
 Feedback