- Index
- New and Changed
- Preface
- Overview
- Installing Cisco MDS NX-OS and Fabric Manager
- Fabric Manager Server
- Authentication in Fabric Manager
- Fabric Manager Client
- Device Manager
- Fabric Manager Web Cient
- Performance Manager
- Cisco Traffic Analyzer
- Network Monitoring
- Performance Monitoring
- Software Images
- Management Software FAQs
- Launching Fabric Manager in Cisco SAN-OS Releases Prior to 3.2(1)
- Cisco Fabric Manager Unsupported Feature List
- Interface Nonoperational Reason Codes
- Managing Cisco FabricWare
Cisco Fabric Manager Fundamentals Configuration Guide
Bias-Free Language
The documentation set for this product strives to use bias-free language. For the purposes of this documentation set, bias-free is defined as language that does not imply discrimination based on age, disability, gender, racial identity, ethnic identity, sexual orientation, socioeconomic status, and intersectionality. Exceptions may be present in the documentation due to language that is hardcoded in the user interfaces of the product software, language used based on RFP documentation, or language that is used by a referenced third-party product. Learn more about how Cisco is using Inclusive Language.
- Updated:
- August 22, 2009
Chapter: Fabric Manager Server
Fabric Manager Server
Fabric Manager Server is a platform for advanced MDS monitoring, troubleshooting, and configuration capabilities. No additional software needs to be installed. The server capabilities are an integral part of the Cisco Fabric Manager software.
This chapter contains the following sections:
•![]() Fabric Manager Server Overview
Fabric Manager Server Overview
•![]() Fabric Manager Server Features
Fabric Manager Server Features
•![]() Installing and Configuring Fabric Manager Server
Installing and Configuring Fabric Manager Server
•![]() Managing a Fabric Manager Server Fabric
Managing a Fabric Manager Server Fabric
•![]() Fabric Manager Server Properties File
Fabric Manager Server Properties File
•![]() Modifying Fabric Manager Server
Modifying Fabric Manager Server
Fabric Manager Server Overview
Install Cisco Fabric Manager Server on a computer that you want to provide centralized MDS management services and performance monitoring. SNMP operations are used to efficiently collect fabric information. The Cisco Fabric Manager software, including the server components, requires about 60 MB of hard disk space on your workstation. Cisco Fabric Manager Server runs on Windows 2000, Windows 2003, Windows XP, Solaris 8 and 10, and Red Hat Enterprise Linux AS Release 4.
Each computer configured as a Cisco Fabric Manager Server can monitor multiple Fibre Channel SAN fabrics. Up to 16 clients (by default) can connect to a single Cisco Fabric Manager Server concurrently. The Cisco Fabric Manager Clients can also connect directly to an MDS switch in fabrics that are not monitored by a Cisco Fabric Manager Server, which ensures you can manage any of your MDS devices from a single console.
Fabric Manager Server Features
Cisco Fabric Manager Server has the following features:
•![]() Multiple fabric management— Fabric Manager Server monitors multiple physical fabrics under the same user interface. This facilitates managing redundant fabrics. A licensed Fabric Manager Server maintains up-to-date discovery information on all configured fabrics so device status and interconnections are immediately available when you open the Fabric Manager Client.
Multiple fabric management— Fabric Manager Server monitors multiple physical fabrics under the same user interface. This facilitates managing redundant fabrics. A licensed Fabric Manager Server maintains up-to-date discovery information on all configured fabrics so device status and interconnections are immediately available when you open the Fabric Manager Client.
•![]() Continuous health monitoring—MDS health is monitored continuously, so any events that occurred since the last time you opened the Fabric Manager Client are captured.
Continuous health monitoring—MDS health is monitored continuously, so any events that occurred since the last time you opened the Fabric Manager Client are captured.
•![]() Roaming user profiles—The licensed Fabric Manager Server uses the roaming user profile feature to store your preferences and topology map layouts on the server, so that your user interface will be consistent regardless of what computer you use to manage your storage networks.
Roaming user profiles—The licensed Fabric Manager Server uses the roaming user profile feature to store your preferences and topology map layouts on the server, so that your user interface will be consistent regardless of what computer you use to manage your storage networks.

Note ![]() You must have the same release of Fabric Manager Client and Fabric Manager Server.
You must have the same release of Fabric Manager Client and Fabric Manager Server.
Installing and Configuring Fabric Manager Server
Note ![]() Prior to running Fabric Manage Server, you should create a special Fabric Manager administrative user on each switch in the fabric or on a remote AAA server. Use this user to discover your fabric topology. See the "Best Practices for Discovering a Fabric" section on page 4-3.
Prior to running Fabric Manage Server, you should create a special Fabric Manager administrative user on each switch in the fabric or on a remote AAA server. Use this user to discover your fabric topology. See the "Best Practices for Discovering a Fabric" section on page 4-3.
To install Fabric Manager Server and set the initial configuration, follow these steps:
Step 1 ![]() Install Fabric Manager and Fabric Manager server on your workstation. See the "Installing Fabric Manager Server" section.
Install Fabric Manager and Fabric Manager server on your workstation. See the "Installing Fabric Manager Server" section.
Step 2 ![]() Log in to Fabric Manager. See the "Launching Fabric Manager Client in Cisco SAN-OS Release 3.2(1) and Later" section on page 5-2.
Log in to Fabric Manager. See the "Launching Fabric Manager Client in Cisco SAN-OS Release 3.2(1) and Later" section on page 5-2.
Step 3 ![]() Set Fabric Manager Server to continuously monitor the fabric. See the "Managing a Fabric Manager Server Fabric" section.
Set Fabric Manager Server to continuously monitor the fabric. See the "Managing a Fabric Manager Server Fabric" section.
Step 4 ![]() Repeat Step 2 through Step 3 for each fabric that you want to manage through Fabric Manager Server.
Repeat Step 2 through Step 3 for each fabric that you want to manage through Fabric Manager Server.
Step 5 ![]() Install Fabric Manager Web Server. See the "Verifying Performance Manager Collections" section.
Install Fabric Manager Web Server. See the "Verifying Performance Manager Collections" section.
Step 6 ![]() Verify Performance Manager is collecting data. See the "Verifying Performance Manager Collections" section.
Verify Performance Manager is collecting data. See the "Verifying Performance Manager Collections" section.
Installing Fabric Manager Server
When you install Fabric Manager, the basic version of the Fabric Manager Server (unlicensed) is installed with it. After you click the Fabric Manager icon, a dialog box opens and you can enter the IP address of a computer running the Fabric Manager Server component. If you do not see the Fabric Manager Server IP address text box, click Options to expand the list of configuration options. If the server component is running on your local machine, leave localhost in that field. If you try to run Fabric Manager without specifying a valid server, you are prompted to start the Fabric Manager Server locally.
On a Windows PC, you install the Fabric Manager Server as a service. This service can then be administered using Services in the Administrative Tools. The default setting for the Fabric Manager Server service is that the server is automatically started when the Windows PC is rebooted. You can change this behavior by modifying the properties in Services.
For switches running Cisco MDS 9000 FabricWare, you must install Fabric Manager from the CD-ROM included with your switch, or you can download Fabric Manager from Cisco.com.
To download the software from Cisco.com, go to the following website:
http://cisco.com/cgi-bin/tablebuild.pl/mds-fm
To install Fabric Manager Server on windows, follow these steps:
Step 1 ![]() Click the Install Management Software link.
Click the Install Management Software link.
Step 2 ![]() Choose Management Software > Cisco Fabric Manager.
Choose Management Software > Cisco Fabric Manager.
Step 3 ![]() Click the Installing Fabric Manager link.
Click the Installing Fabric Manager link.
Step 4 ![]() Click the FM Installer link.
Click the FM Installer link.
You see the welcome message in the Cisco Fabric Manager Installer window shown in Figure 3-1
Figure 3-1
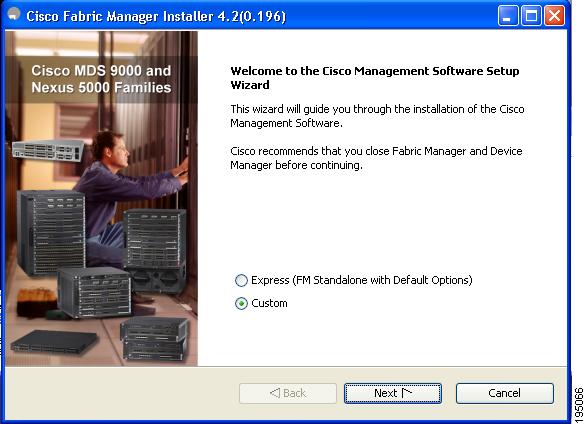
Welcome to the Management Software Setup Wizard
Step 5 ![]() Click the Custom radio button, and then click Next to begin installation.
Click the Custom radio button, and then click Next to begin installation.
Step 6 ![]() Check the I accept the terms of the License Agreement check box, and then click Next.
Check the I accept the terms of the License Agreement check box, and then click Next.
You see the Install Options dialog box shownin Figure 3-2
Figure 3-2 Install Options dialog box
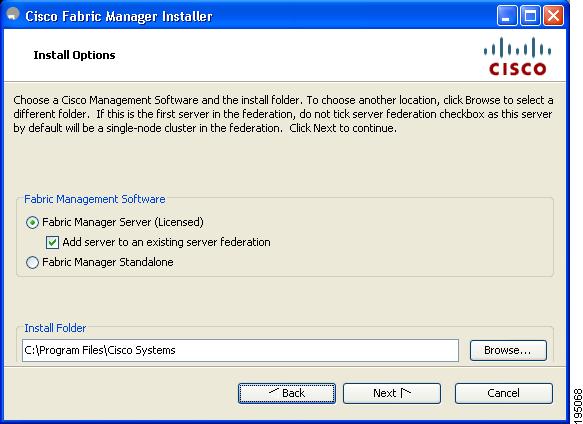
Step 7 ![]() Click the Fabric Manager Server (Licensed) radio button to install the server components for Fabric Manager Server.
Click the Fabric Manager Server (Licensed) radio button to install the server components for Fabric Manager Server.
Step 8 ![]() Click Add server to an existing server federation to add the server to a federation.
Click Add server to an existing server federation to add the server to a federation.
Step 9 ![]() Select an installation folder on your workstation for Fabric Manager. On Windows, the default location is C:\Program Files\Cisco Systems.
Select an installation folder on your workstation for Fabric Manager. On Windows, the default location is C:\Program Files\Cisco Systems.
Step 10 ![]() Click Next.
Click Next.
You see the Database Options dialog box shown in Figure 3-3
Figure 3-3 Database Options dialog box
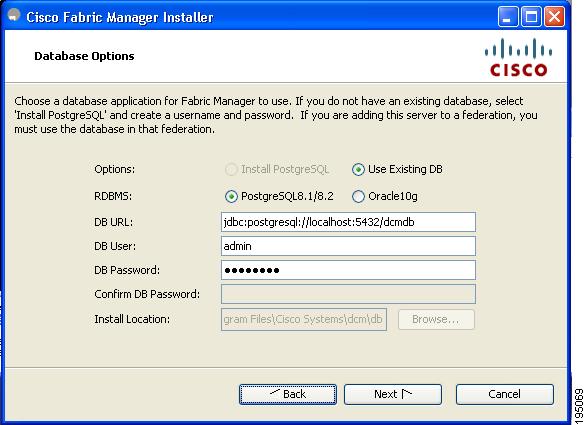
Step 11 ![]() Click the radio button for either Install PostgreSQL or Use existing DB to specify which database you want to use.
Click the radio button for either Install PostgreSQL or Use existing DB to specify which database you want to use.
If you choose Install PostgreSQL, accept the defaults and enter a password. The PostgreSQL database will be installed.
Note ![]() If you choose to install PostgreSQL, you must disable any security software you are running, because PostgreSQL may not install certain folders or users.
If you choose to install PostgreSQL, you must disable any security software you are running, because PostgreSQL may not install certain folders or users.
Note ![]() Before you install PostgreSQL, remove the cygwin/bin from your environment variable path if Cygwin is running on your system.
Before you install PostgreSQL, remove the cygwin/bin from your environment variable path if Cygwin is running on your system.
Step 12 ![]() If you select Use existing DB, click the radio button for either PostgreSQL 8.1/8.2 or Oracle10g.
If you select Use existing DB, click the radio button for either PostgreSQL 8.1/8.2 or Oracle10g.
Step 13 ![]() Click Next in the Database Options dialog box.
Click Next in the Database Options dialog box.
You see the ConfigurationOptions dialog box shown in Figure 3-4
Figure 3-4

Configuration Options dialog box
Step 14 ![]() Click Install to install Fabric Manage Server.
Click Install to install Fabric Manage Server.
Unlicensed Versus Licensed Fabric Manager Server
When you install Fabric Manager, the basic unlicensed version of Fabric Manager Server is installed with it. To get the licensed features, such as Performance Manager, remote client support, and continuously monitored fabrics, you need to buy and install the Fabric Manager Server package.
However, trial versions of these licensed features are available. To enable the trial version of a feature, you run the feature as you would if you had purchased the license. You see a dialog box explaining that this is a demo version of the feature and that it is enabled for a limited time.
If you are evaluating one of these Fabric Manager Server features and want to stop the evaluation period for that feature, you can do that using Device Manager.
Data Migration in Fabric Manager Server
The database migration should be limited to the existing database. Data collision may occur when you merge the data between the several databases.
When you upgrade a non-clustering mode database to clustering mode database for the first time, we pre-fill the cluster sequence table with the values larger than the corresponding ones in sequence table and conforming to the cluster sequence number format for that server ID.
Verifying Performance Manager Collections
Once Performance Manager collections have been running for five or more minutes, you can verify that the collections are gathering data by choosing Performance Manager > Reports in Fabric Manager. You see the first few data points gathered in the graphs and tables.
Managing a Fabric Manager Server Fabric
You can continuously manage a Fabric Manager Server fabric, whether or not a client has that fabric open. A continuously managed fabric is automatically reloaded and managed by Fabric Manager Server whenever the server starts.
Selecting a Fabric to Manage Continuously
To continuously manage a fabric using Fabric Manager, follow these steps:
Step 1 ![]() Choose Server > Admin.
Choose Server > Admin.
You see the Control Panel dialog box with the Fabrics tab open as in Figure 3-5.
Note ![]() The Fabrics tab is only accessible to network administrators.
The Fabrics tab is only accessible to network administrators.
Figure 3-5 Fabrics Tab in Control Panel Dialog Box
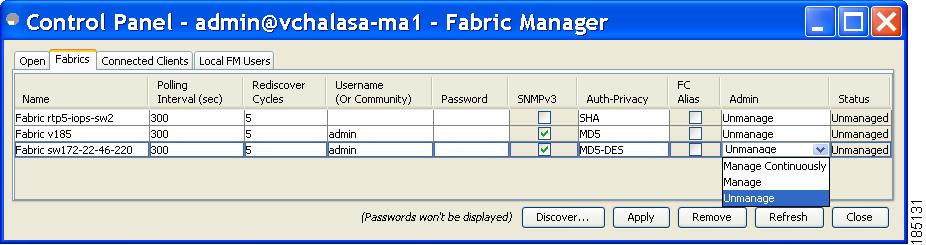
Step 2 ![]() Select one of the following Admin options:
Select one of the following Admin options:
a. ![]() Manage Continuously—The fabric is automatically managed when Fabric Manager Server starts and continues to be managed until this option is changed to Unmanage.
Manage Continuously—The fabric is automatically managed when Fabric Manager Server starts and continues to be managed until this option is changed to Unmanage.
b. ![]() Manage—The fabric is managed by Fabric Manager Server until there are no instances of Fabric Manager viewing the fabric.
Manage—The fabric is managed by Fabric Manager Server until there are no instances of Fabric Manager viewing the fabric.
c. ![]() Unmanage—Fabric Manager Server stops managing this fabric.
Unmanage—Fabric Manager Server stops managing this fabric.
Step 3 ![]() Click Apply.
Click Apply.
Note ![]() If you are collecting data on these fabrics using Performance Manager, you should now configure flows and define the data collections. These procedures are described in Chapter 8, "Performance Manager."
If you are collecting data on these fabrics using Performance Manager, you should now configure flows and define the data collections. These procedures are described in Chapter 8, "Performance Manager."
Fabric Manager Server Properties File
The Fabric Manager Server properties file (MDS 9000\server.properties) contains a list of properties that determine how the Fabric Manager Server will function. You can edit this file with a text editor, or you can set the properties through the Fabric Manager Web Services GUI, under the Admin tab.
Note ![]() As of Cisco NX-OS Release 4.1(1b) and later, you can optionally encrypt the password in the server.properties and the AAA.properties files.
As of Cisco NX-OS Release 4.1(1b) and later, you can optionally encrypt the password in the server.properties and the AAA.properties files.
The server properties file contains these nine general sections:
•![]() GENERAL—Contains the general settings for the server.
GENERAL—Contains the general settings for the server.
•![]() SNMP SPECIFIC—Contains the settings for SNMP requests, responses, and traps.
SNMP SPECIFIC—Contains the settings for SNMP requests, responses, and traps.
•![]() SNMP PROXY SERVER SPECIFIC—Contains the settings for SNMP proxy server configuration and TCP port designation.
SNMP PROXY SERVER SPECIFIC—Contains the settings for SNMP proxy server configuration and TCP port designation.
•![]() GLOBAL FABRIC—Contains the settings for fabrics, such as discovery and loading.
GLOBAL FABRIC—Contains the settings for fabrics, such as discovery and loading.
•![]() CLIENT SESSION—Contains the settings for Fabric Manager Clients that can log into the server.
CLIENT SESSION—Contains the settings for Fabric Manager Clients that can log into the server.
•![]() EVENTS—Contains the settings for syslog messages.
EVENTS—Contains the settings for syslog messages.
•![]() PERFORMANCE CHART—Contains the settings for defining the end time to generate a Performance Manager chart.
PERFORMANCE CHART—Contains the settings for defining the end time to generate a Performance Manager chart.
•![]() EMC CALL HOME—Contains the settings for the forwarding of traps as XML data using e-mail, according to EMC specifications.
EMC CALL HOME—Contains the settings for the forwarding of traps as XML data using e-mail, according to EMC specifications.
•![]() EVENT FORWARD SETUP—Contains the settings for forwarding events logged by Cisco Fabric Manager Server through e-mail.
EVENT FORWARD SETUP—Contains the settings for forwarding events logged by Cisco Fabric Manager Server through e-mail.
The following are new or changed server properties for Fabric Manager Release 3.x:
SNMP Specific
•![]() snmp.preferTCP—If this option is set to true, TCP will be the default protocol for the Fabric Manager Server to communicate with switches. By default, this setting is true. For those switches that do not have have TCP enabled, the Fabric Manager Server uses UDP. The advantage of this setting is the ability to designate one TCP session for each SNMP user on a switch. It also helps to reduce timeouts and increase scalability.
snmp.preferTCP—If this option is set to true, TCP will be the default protocol for the Fabric Manager Server to communicate with switches. By default, this setting is true. For those switches that do not have have TCP enabled, the Fabric Manager Server uses UDP. The advantage of this setting is the ability to designate one TCP session for each SNMP user on a switch. It also helps to reduce timeouts and increase scalability.
Note ![]() If you set this option to false, the same choice must be set in Fabric Manager. The default value of snmp.preferTCP for Fabric Manager is true.
If you set this option to false, the same choice must be set in Fabric Manager. The default value of snmp.preferTCP for Fabric Manager is true.
Performance Chart
•![]() pmchart.currenttime—Specifies the end time to generate a Performance Manager chart. This should only be used for debugging purposes.
pmchart.currenttime—Specifies the end time to generate a Performance Manager chart. This should only be used for debugging purposes.
EMC Call Home
•![]() server.callhome.enable—Enables or disables EMC Call Home. By default, it is disabled.
server.callhome.enable—Enables or disables EMC Call Home. By default, it is disabled.
•![]() server.callhome.location—Specifies the Location parameter.
server.callhome.location—Specifies the Location parameter.
•![]() server.callhome.fromEmail—Specifies the 'From Email' list.
server.callhome.fromEmail—Specifies the 'From Email' list.
•![]() server.callhome.recipientEmail—Specifies the 'recipientEmail' list.
server.callhome.recipientEmail—Specifies the 'recipientEmail' list.
•![]() server.callhome.smtphost—Specifies the SMTP host address for outbound e-mail.
server.callhome.smtphost—Specifies the SMTP host address for outbound e-mail.
•![]() server.callhome.xmlDir—Specifies the path to store the XML message files.
server.callhome.xmlDir—Specifies the path to store the XML message files.
•![]() server.callhome.connectType—Specifies the method to use to remotely connect to the server.
server.callhome.connectType—Specifies the method to use to remotely connect to the server.
•![]() server.callhome.accessType—Specifies the method to use to establish remote communication with the server.
server.callhome.accessType—Specifies the method to use to establish remote communication with the server.
•![]() server.callhome.version—Specifies the version number of the connection type.
server.callhome.version—Specifies the version number of the connection type.
•![]() server.callhome.routerIp—Specifies the public IP address of the RSC router.
server.callhome.routerIp—Specifies the public IP address of the RSC router.
Event Forwarding
•![]() server.forward.event.enable—Enables or disables event forwarding.
server.forward.event.enable—Enables or disables event forwarding.
•![]() server.forward.email.fromAddress—Specifies the 'From Email' list.
server.forward.email.fromAddress—Specifies the 'From Email' list.
•![]() server.forward.email.mailCC—Specifies the 'CC Email' list.
server.forward.email.mailCC—Specifies the 'CC Email' list.
•![]() server.forward.email.mailBCC—Specifies the 'BCC Email' list.
server.forward.email.mailBCC—Specifies the 'BCC Email' list.
•![]() server.forward.email.smtphost—Specifies the SMTP host address for outbound e-mail.
server.forward.email.smtphost—Specifies the SMTP host address for outbound e-mail.
Deactivation
•![]() deactivate.confirm=deactivate—Specific Request for User to type a String for deactivation.
deactivate.confirm=deactivate—Specific Request for User to type a String for deactivation.
For more information on setting the server properties, read the server.properties file or see the "Configuring Fabric Manager Server Preferences" section on page 7-51.
Note ![]() In a federated server environment, you should not change Fabric Manager Server properties by modifying server.properties file. You must modify the server.properties using web client menu Admin > Configure > Preferences.
In a federated server environment, you should not change Fabric Manager Server properties by modifying server.properties file. You must modify the server.properties using web client menu Admin > Configure > Preferences.
Modifying Fabric Manager Server
Fabric Manager Release 2.1(2) or later allows you to modify certain Fabric Manager Server settings without stopping and starting the server.
•![]() Adding or Removing Fabric Manager Server Users
Adding or Removing Fabric Manager Server Users
•![]() Changing the Fabric Manager Server User Name and Password
Changing the Fabric Manager Server User Name and Password
•![]() Changing the Polling Period and Fabric Rediscovery Time
Changing the Polling Period and Fabric Rediscovery Time
•![]() Using Device Aliases or FC Aliases
Using Device Aliases or FC Aliases
Adding or Removing Fabric Manager Server Users
To add a Fabric Manager Server user or to change the password for an existing user using Fabric Manager, follow these steps:
Step 1 ![]() Click the Local FM Users tab in the Control Panel dialog box (see Figure 3-5). You see a list of Fabric Manager users.
Click the Local FM Users tab in the Control Panel dialog box (see Figure 3-5). You see a list of Fabric Manager users.
Note ![]() Only network administrators can manage users.
Only network administrators can manage users.
Step 2 ![]() Click New to add a user or click the user name and click Edit to change the password for an existing user.
Click New to add a user or click the user name and click Edit to change the password for an existing user.
You see the FM User dialog box as shown in Figure 3-6.
Figure 3-6 FM User Dialog Box
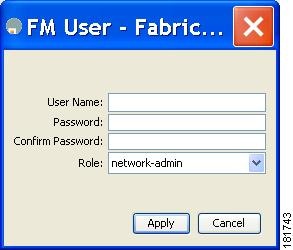
Step 3 ![]() Set the user name and password for the new user and then click Apply.
Set the user name and password for the new user and then click Apply.
To remove a Fabric Manager Server user using Fabric Manager, follow these steps:
Step 1 ![]() Click the Local FM Users tab in the Control Panel dialog box (see Figure 3-5). You see a list of Fabric Manager users.
Click the Local FM Users tab in the Control Panel dialog box (see Figure 3-5). You see a list of Fabric Manager users.
Step 2 ![]() Click the user name you want to delete.
Click the user name you want to delete.
Step 3 ![]() Click Remove to delete the user.
Click Remove to delete the user.
Step 4 ![]() Click Yes to confirm the deletion or No to cancel it.
Click Yes to confirm the deletion or No to cancel it.
Changing the Fabric Manager Server User Name and Password
You can modify the user name or password used to access a fabric from Fabric Manager Client without restarting Fabric Manager Server.
To change the user name or password used by Fabric Manager Server, follow these steps:
Step 1 ![]() Choose Server > Admin.
Choose Server > Admin.
You see the Control Panel dialog box with the Fabrics tab open (see Figure 3-5).
Step 2 ![]() Set the Name or Password for each fabric that you are monitoring with Fabric Manager Server.
Set the Name or Password for each fabric that you are monitoring with Fabric Manager Server.
Step 3 ![]() Click Apply to save these changes.
Click Apply to save these changes.
Changing the Polling Period and Fabric Rediscovery Time
Fabric Manager Server periodically polls the monitored fabrics and periodically rediscovers the full fabric at a default interval of five cycles.You can modify these settings from Fabric Manager Client without restarting Fabric Manager Server.
To change the polling period or full fabric rediscovery setting used by Fabric Manager Server using Fabric Manager, follow these steps:
Step 1 ![]() Choose Server > Admin.
Choose Server > Admin.
You see the Control Panel dialog box with the Fabrics tab open (see Figure 3-5).
Step 2 ![]() For each fabric that you are monitoring with Fabric Manager Server, set the Polling Interval to determine how frequently Fabric Manager Server polls the fabric elements for status and statistics.
For each fabric that you are monitoring with Fabric Manager Server, set the Polling Interval to determine how frequently Fabric Manager Server polls the fabric elements for status and statistics.
Step 3 ![]() For each fabric that you are monitoring with Fabric Manager Server, set the Rediscover Cycles to determine how often Fabric Manager Server rediscovers the full fabric.
For each fabric that you are monitoring with Fabric Manager Server, set the Rediscover Cycles to determine how often Fabric Manager Server rediscovers the full fabric.
Step 4 ![]() Click Apply to save these changes.
Click Apply to save these changes.
Using Device Aliases or FC Aliases
You can change whether Fabric Manager uses FC aliases or global device aliases from Fabric Manager Client without restarting Fabric Manager Server.
To change whether Fabric Manager uses FC aliases or global device aliases using Fabric Manager, follow these steps:
Step 1 ![]() Choose Server > Admin.
Choose Server > Admin.
You see the Control Panel dialog box with the Fabrics tab open (see Figure 3-5).
Step 2 ![]() For each fabric that you are monitoring with Fabric Manager Server, check the Device Alias check box to use global device aliases, or uncheck to use FC aliases.
For each fabric that you are monitoring with Fabric Manager Server, check the Device Alias check box to use global device aliases, or uncheck to use FC aliases.
Step 3 ![]() Click Apply to save these changes.
Click Apply to save these changes.
Server Clustering
Clustering or server federation is a distributed system that includes a collection of intercommunicated servers or computers that is utilized as a single, unified computing resource. With Fabric Manager Server clustering, you can communicate with multiple servers together in order to provide high availability, scalability and easy manageability of data and programs running within the cluster. The core of server cluster includes several functional units such as Fabric Manager server, embedded web servers, database and Fabric Manager Client that accesses the servers.
The Fabric Manager Server in the cluster uses the same database to store and retrieve data. The database is shared among different servers to share common information. A Fabric Manager client or Fabric Manager web client can open fabrics from the Fabric Manager Server using the mapping table. A fabric can be moved from one logical server to another. A logical server also can be moved from one physical machine to another machine.
Note ![]() You cannot upgrade more than one Fabric Manager Server in an existing cluster. If you choose to do so, you may not be able to migrate the Performance Manager statistics and other information on that server.
You cannot upgrade more than one Fabric Manager Server in an existing cluster. If you choose to do so, you may not be able to migrate the Performance Manager statistics and other information on that server.
Note ![]() You may require to synchronize the time on all the Fabric Manager Servers in a federated server environment.
You may require to synchronize the time on all the Fabric Manager Servers in a federated server environment.
Note ![]() Clustering or server federation is a licensed feature. For more information on Fabric Manager Server Licensing, see Cisco MDS 9000 Family NX-OS Licensing Guide.
Clustering or server federation is a licensed feature. For more information on Fabric Manager Server Licensing, see Cisco MDS 9000 Family NX-OS Licensing Guide.
Mapping Fabric ID to Server ID
The IP address of the physical server will be mapped to the server ID during the installation of the Fabric Manager Server whenever the IP address of the physical server is changed, you need to map the IP address to the server ID using the PLMapping script provided with the Fabric Manager Server. Whenever the you open or discover a fabric, the fabric ID will be mapped to the server ID . You can move a fabric to a different server ID using the control panel.
To map a fabric to a different server, follow these steps:
Step 1 ![]() Choose Server > Admin.
Choose Server > Admin.
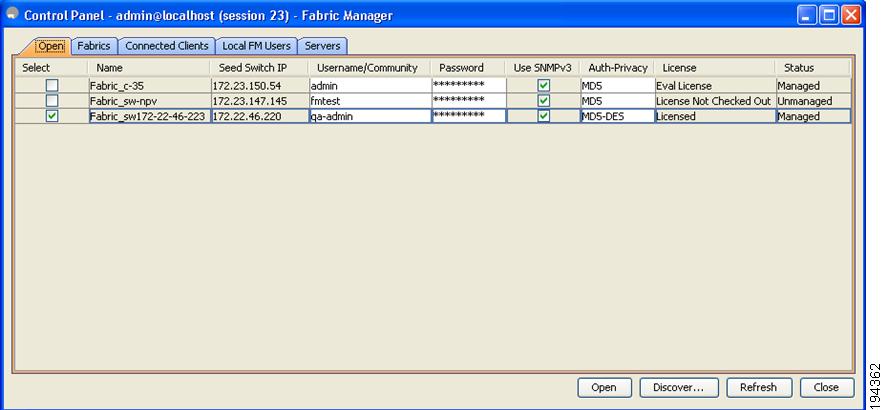
You see the Control Panel as shown in Figure 3-7
Figure 3-7 Control Panel

Step 2 ![]() Select the fabric that you want to move to a different server and then click Move.
Select the fabric that you want to move to a different server and then click Move.
You see the Move Fabric dialog box as shown in Figure 3-8.
Figure 3-8 Move Fabric Dialog Box
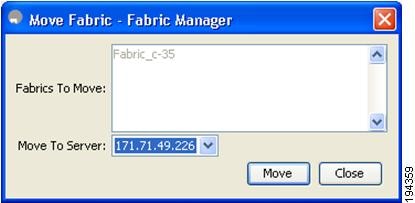
Step 3 ![]() You see the fabrics that you selected in the Fabrics to Move list box. From the Move To Server drop-down list select the server you want to move the fabric to.
You see the fabrics that you selected in the Fabrics to Move list box. From the Move To Server drop-down list select the server you want to move the fabric to.
Step 4 ![]() Click Move.
Click Move.
Opening the Fabric on a Different Server
To open the fabric on a different server follow these steps:
Step 1 ![]() Choose Server > Admin.
Choose Server > Admin.
You see the Control Panel as shown in Figure 3-9.
Figure 3-9
Control Panel
Step 2 ![]() Click Discover.
Click Discover.
You see the Discover New Fabric dialog box as shown in Figure 3-10.
Figure 3-10 Discover new Fabric
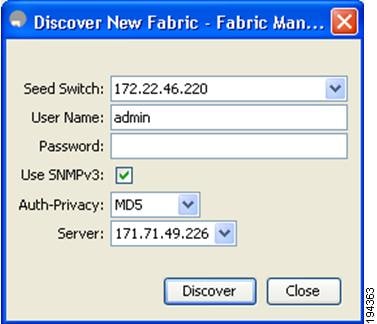
Step 3 ![]() In the Seed Switch list box, enter the IP Address of the seed switch.
In the Seed Switch list box, enter the IP Address of the seed switch.
Step 4 ![]() In the User Name field, enter the user name.
In the User Name field, enter the user name.
Step 5 ![]() In the password field, enter the password.
In the password field, enter the password.
Step 6 ![]() From the Auth-Privacy drop-down list, choose the privacy protocol you want to apply.
From the Auth-Privacy drop-down list, choose the privacy protocol you want to apply.
Step 7 ![]() To open the selected fabric in a different server, select the server ID from the Server drop-down list.
To open the selected fabric in a different server, select the server ID from the Server drop-down list.
Step 8 ![]() Click Discover.
Click Discover.
Note ![]() You may receive an error message when you discover a fabric in a cluster while another Fabric Manager Server is joining the federation. You can discover the fabric on after the installation or upgradation is complete.
You may receive an error message when you discover a fabric in a cluster while another Fabric Manager Server is joining the federation. You can discover the fabric on after the installation or upgradation is complete.
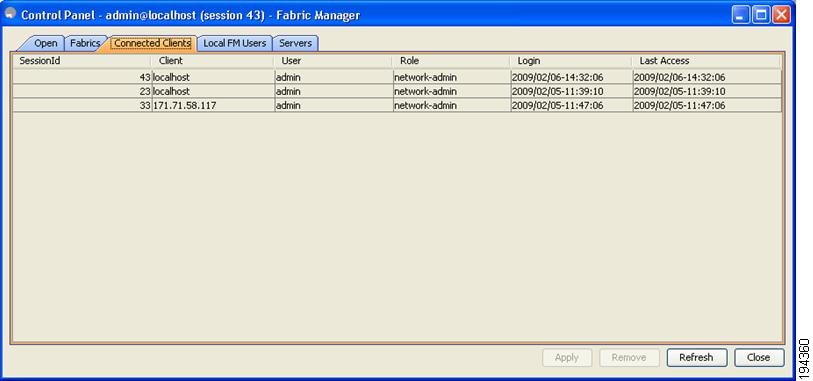
Viewing the Sessions in a Cluster
To view all the sessions in a cluster, follow these steps:
Step 1 ![]() Choose Server > Admin.
Choose Server > Admin.
Step 2 ![]() Click the Connected Clients tab.
Click the Connected Clients tab.
You see the Control Panel as shown inFigure 3-11
Figure 3-11 Connected Clients
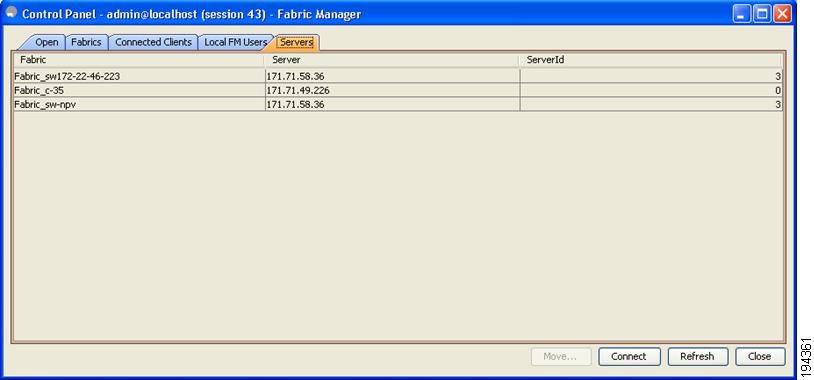
Viewing the Servers in a Cluster
To view all the servers in a cluster follow these steps:
Step 1 ![]() Choose Server > Admin.
Choose Server > Admin.
Step 2 ![]() Click Servers tab.
Click Servers tab.
You see the Control Panel as shown inFigure 3-12
Figure 3-12 Servers
 Feedback