- Index
- New and Changed Information
- Preface
- Fabric Overview
- Configuring and Managing VSANs
- SAN Device Virtualization
- Creating Dynamic VSANs
- Configuring and Managing Zones
- Distributing Device Alias Services
- Configuring FCoE
- Configuring Fibre Channel Routing Services and Protocols
- Dense Wavelength Division Multiplexing
- Managing FLOGI, Name Server, FDMI, and RSCN Databases
- Discovering SCSI Targets
- Configuring FICON
- Advanced Features and Concepts
Cisco Fabric Manager Fabric Configuration Guide
Bias-Free Language
The documentation set for this product strives to use bias-free language. For the purposes of this documentation set, bias-free is defined as language that does not imply discrimination based on age, disability, gender, racial identity, ethnic identity, sexual orientation, socioeconomic status, and intersectionality. Exceptions may be present in the documentation due to language that is hardcoded in the user interfaces of the product software, language used based on RFP documentation, or language that is used by a referenced third-party product. Learn more about how Cisco is using Inclusive Language.
- Updated:
- December 21, 2009
Chapter: Dense Wavelength Division Multiplexing
Configuring Dense Wavelength Division Multiplexing
This chapter includes the following topics:
•![]() Configuring X2 DWDM Transceiver Frequency
Configuring X2 DWDM Transceiver Frequency
About DWDM
Dense Wavelength-Division Multiplexing (DWDM) multiplexes multiple optical carrier signals on a single optical fiber. DWDM uses different wavelengths to carry various signals.
To establish a DWDM link, both ends of an Inter Switch Link (ISL) need to be connected with DWDM SFPs (small form-factor pluggable) at each end of the link. To identify a DWDM link, Fabric Manager discovers the connector type on the Fiber Channel (FC) ports. If the ISL link is associated with the FC ports at each end, then the FC port uses DWDM SFP to connect the links.
Fabric Manager Server discovers FC ports with DWDM SFPs and the ISLs associated with the FC ports. The Fabric Manager Client displays ISL with DWDM attribute on the topology map.

Note ![]() The Fabric Shortest Path First (FSPF) database only displays an ISL link, which is connected with DWDM SFPs at both ends.
The Fabric Shortest Path First (FSPF) database only displays an ISL link, which is connected with DWDM SFPs at both ends.
Viewing DWDM Links
The Fabric Manager Client displays DWDM links with "dash-dash" pattern. The tooltip for the link displays "DWDM" to indicate its link type.
To view the DWDM link, follow these steps:
Step 1 ![]() Select the switch in the Logical Domain region.
Select the switch in the Logical Domain region.
Step 2 ![]() Select ISL in the Physical Attributes region.
Select ISL in the Physical Attributes region.
The Information pane diplays the ISL's information.
Step 3 ![]() Click the Physical tab.
Click the Physical tab.
You see the ISL in the Information pane as shown in Figure 9-1.
Figure 9-1 Fabric Manager with ISL Link
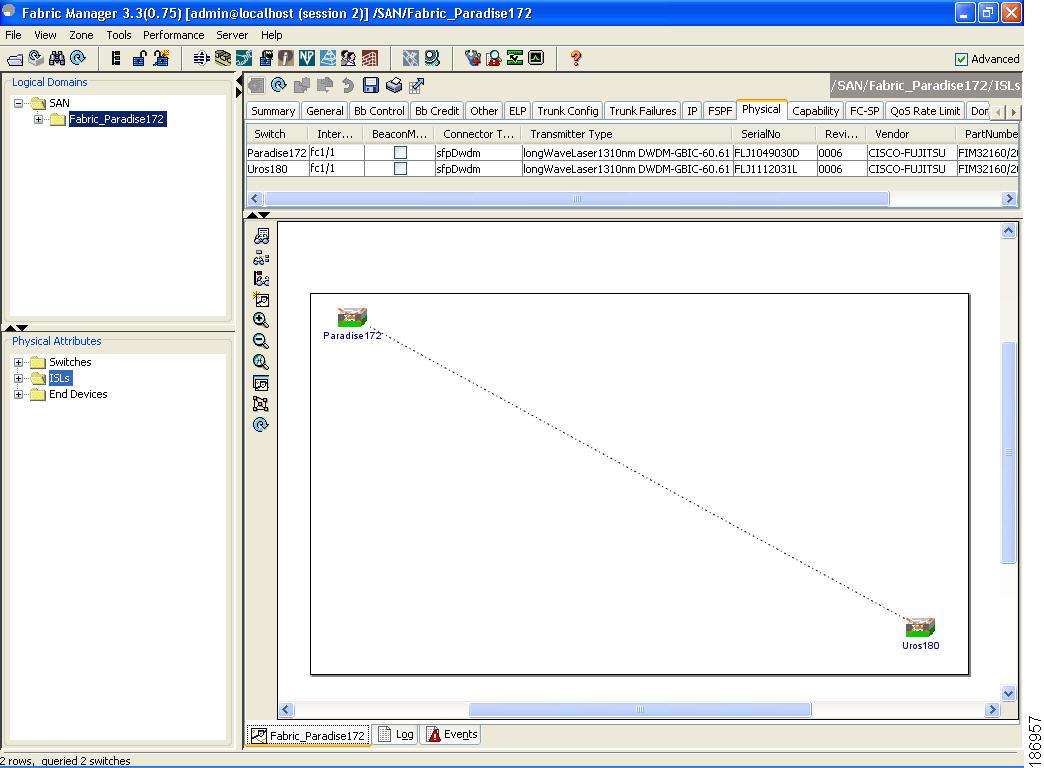
Step 4 ![]() The ISL's Physical table displays the connector type as "sfpDwdm" as shown in Figure 9-2.
The ISL's Physical table displays the connector type as "sfpDwdm" as shown in Figure 9-2.
Figure 9-2 Connector Type Displayed as "sfpDwdm"

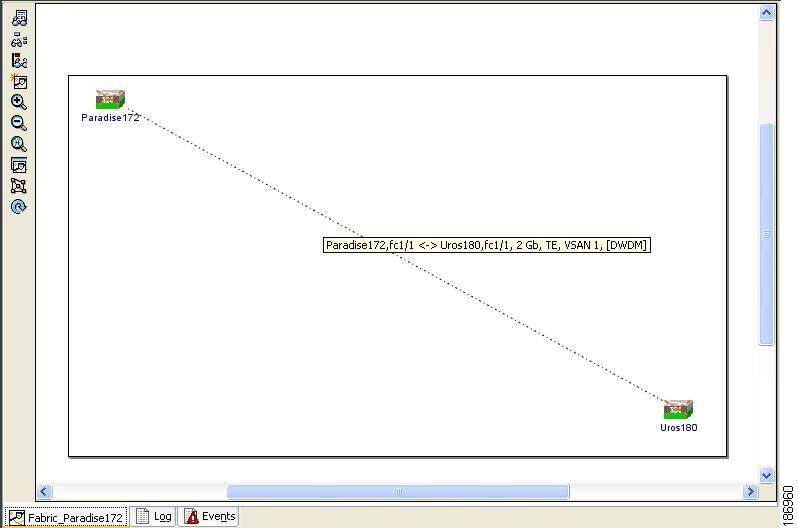
Step 5 ![]() Move the mouse over the link to see the tooltip as DWDM indicating the link type as shown in Figure 9-3.
Move the mouse over the link to see the tooltip as DWDM indicating the link type as shown in Figure 9-3.
Figure 9-3 Tooltip Showing DWDM
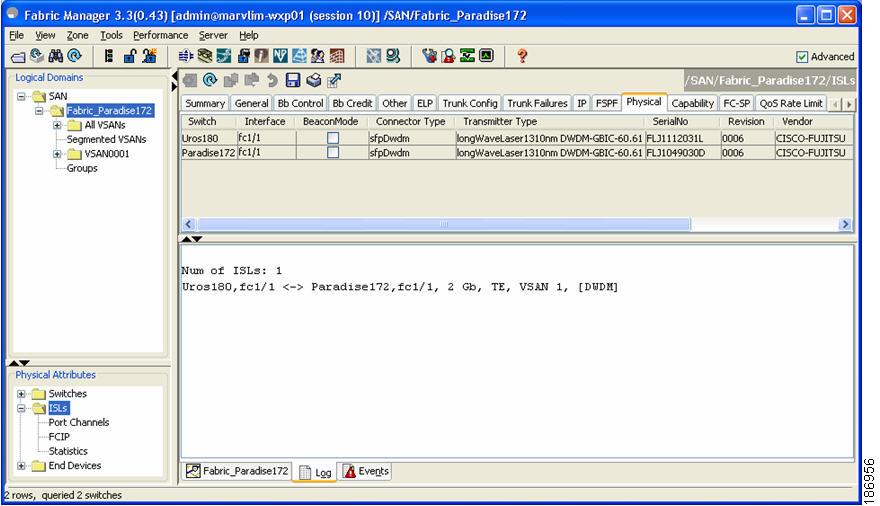
Step 6 ![]() Perform a Dump Discovery of ISL to list all ISLs. DWDM links are listed with "[DWDM]" as shown in Figure 9-4.
Perform a Dump Discovery of ISL to list all ISLs. DWDM links are listed with "[DWDM]" as shown in Figure 9-4.
Figure 9-4 ISL List Displayed in the Information Pane
Configuring X2 DWDM Transceiver Frequency
Note ![]() This feature is not supported in non-UROS modules. In the UROS modules, the 10-Gigabit Ethernet ports must be in down state when you configure the X2 transceiver frequency.
This feature is not supported in non-UROS modules. In the UROS modules, the 10-Gigabit Ethernet ports must be in down state when you configure the X2 transceiver frequency.
To configure the X2 DWDM transceiver frequency using Device Manager, follow these steps:
Step 1 ![]() From Device Manager menu bar, select Physical > Modules .
From Device Manager menu bar, select Physical > Modules .
The module configuration window is displayed (Figure 9-5).
Figure 9-5 X2 DWDM Transceiver Configuration in Device Manager
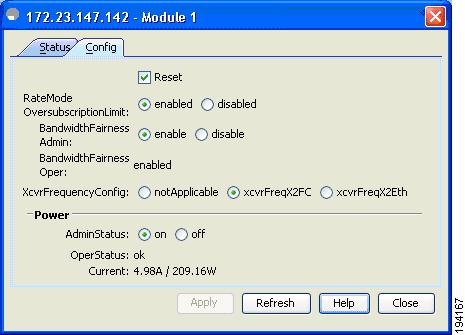
Step 2 ![]() Choose an XcvrFrequencyConfig option button.
Choose an XcvrFrequencyConfig option button.
Step 3 ![]() Click Apply.
Click Apply.
To configure the X2 DWDM transceiver frequency using Fabric Manager, follow these steps:
Step 1 ![]() From the Physical Attributes pane, select Hardware .
From the Physical Attributes pane, select Hardware .
The module configuration window is displayed.
Figure 9-6 X2 DWDM Transciever Configuration in Fabric Manager

Step 2 ![]() Click the Card Module Config tab.
Click the Card Module Config tab.
Step 3 ![]() In the X2 XcvrFrequencyConfig column, choose an option.
In the X2 XcvrFrequencyConfig column, choose an option.
Step 4 ![]() Click Apply.
Click Apply.
 Feedback