Cisco Prime Access Registrar 8.0 Installation Guide
Bias-Free Language
The documentation set for this product strives to use bias-free language. For the purposes of this documentation set, bias-free is defined as language that does not imply discrimination based on age, disability, gender, racial identity, ethnic identity, sexual orientation, socioeconomic status, and intersectionality. Exceptions may be present in the documentation due to language that is hardcoded in the user interfaces of the product software, language used based on RFP documentation, or language that is used by a referenced third-party product. Learn more about how Cisco is using Inclusive Language.
- Updated:
- January 25, 2018
Chapter: Installing Cisco Prime Access Registrar 8.0
Installing Cisco Prime Access Registrar 8.0
This chapter provides information about installing Cisco Prime Access Registrar software. The software is available in DVD-ROM form and can also be downloaded from the Cisco.com website. The installation instructions differ slightly depending on whether you install the software from the Prime Access Registrar DVD-ROM or from downloaded software.

Note![]() Prime Access Registrar can be used with Red Hat Enterprise Linux (RHEL) 6.6/7.0/7.2 and CentOS 6.5 64-bit operating systems using kernel and Glibc.
Prime Access Registrar can be used with Red Hat Enterprise Linux (RHEL) 6.6/7.0/7.2 and CentOS 6.5 64-bit operating systems using kernel and Glibc.
This chapter contains the following sections:
- Installing the Prime Access Registrar 8.0 License File
- Installing Prime Access Registrar 8.0 Software
Note![]() For installing Prime Access Registrar, we have set /opt/CSCOar as the install location. However, you can change the install location as required.
For installing Prime Access Registrar, we have set /opt/CSCOar as the install location. However, you can change the install location as required.
Prime Access Registrar can be run as a non-root user as well. You must ensure that a non-root user account already exists. During installation of Prime Access Registrar, you will be prompted whether to run Prime Access Registrar as a non-root user or not. If you want to run Prime Access Registrar as a non-root user, you must provide the user name and user group of the non-root user. The details are validated and you can proceed with the installation. For more information, see Common Installation Steps.
Installing the Prime Access Registrar 8.0 License File
You must have a license file in a directory on the Prime Access Registrar machine before you attempt to install Prime Access Registrar software. After purchasing Prime Access Registrar, you will receive a license file in an e-mail attachment. Save or copy this license file to a directory on the Prime Access Registrar workstation. If you have not installed the Prime Access Registrar license file before beginning the software installation, the installation process will fail.
You can store the Prime Access Registrar license file in any directory on the Prime Access Registrar machine. During the installation process, you will be asked the location of the license file, and the installation process will copy the license file to the /opt/CSCOar/license directory or to the base installation directory you specify when you install the software if you are not using the default installation location.
The license file might have the name ciscoar.lic, but it can be any filename with the suffix .lic. To install the Prime Access Registrar license file, you can copy and paste the text into a file, or you can simply save the file you receive in e-mail to an accessible directory.
Note![]() Prime Access Registrar can be used with Red Hat Enterprise Linux (RHEL) 6.6/7.0/7.2 and CentOS 6.5 64-bit operating systems using kernel and Glibc.
Prime Access Registrar can be used with Red Hat Enterprise Linux (RHEL) 6.6/7.0/7.2 and CentOS 6.5 64-bit operating systems using kernel and Glibc.
Note![]() Prime Access Registrar 8.0 evaluation license can be generated using your Cisco.com account in the Product License Registration tool at http://www.cisco.com/web/go/license/index.html. The evaluation license is valid only for 90 days.
Prime Access Registrar 8.0 evaluation license can be generated using your Cisco.com account in the Product License Registration tool at http://www.cisco.com/web/go/license/index.html. The evaluation license is valid only for 90 days.
Installing Prime Access Registrar 8.0 Software
This section describes the software installation process when installing Prime Access Registrar software for the first time. This section includes the following subsections:
- Deciding Where to Install
- Installing Downloaded Software
- Installing Cisco Prime Access Registrar Software from DVD-ROM
- Common Installation Steps

Tip![]() s Before you begin to install the software, check your workstation’s /etc/group file and make sure that group adm exists. The software installation will fail if group staff does not exist before you begin.
s Before you begin to install the software, check your workstation’s /etc/group file and make sure that group adm exists. The software installation will fail if group staff does not exist before you begin.
Deciding Where to Install
Before you begin the software installation, you should decide where you want to install the new software. The default installation directory for Cisco Prime Access Registrar software is /opt/CSCOar. You can use the default installation directory, or you can choose to install the Prime Access Registrar software in a different directory.
Installing Downloaded Software
This section describes how to uncompress and extract downloaded Prime Access Registrar software and begin the software installation.
Step 1![]() Log into the Prime Access Registrar workstation as a root user.
Log into the Prime Access Registrar workstation as a root user.
Step 2![]() Change directory to the location where you have stored the uncompressed tar file.
Change directory to the location where you have stored the uncompressed tar file.
Step 3![]() Change the permissions of the CSCOar-8.0.0.0-lnx26-install.sh file to make it executable.
Change the permissions of the CSCOar-8.0.0.0-lnx26-install.sh file to make it executable.
chmod 777 CSCOar-8.0.0.0-lnx26_64-install.sh
Step 4![]() Run set SELinux to permissive mode:
Run set SELinux to permissive mode:
Note![]() The above command will set SELinux to permissive mode temporarily until you reboot the system. To start the system in permissive mode permanently, edit /etc/selinux/config and change SELINUX=enforcing to SELINUX=permissive and reboot the system.
The above command will set SELinux to permissive mode temporarily until you reboot the system. To start the system in permissive mode permanently, edit /etc/selinux/config and change SELINUX=enforcing to SELINUX=permissive and reboot the system.
Step 5![]() Proceed to “Common Installation Steps” section.
Proceed to “Common Installation Steps” section.
Installing Cisco Prime Access Registrar Software from DVD-ROM
The following steps describe how to begin the software installation process when installing software from the Cisco Prime Access Registrar DVD-ROM. If you are installing downloaded software, proceed to “Installing Downloaded Software” section.
Step 1![]() Place the DVD-ROM in the Prime Access Registrar workstation DVD-ROM drive.
Place the DVD-ROM in the Prime Access Registrar workstation DVD-ROM drive.
Step 2![]() Log into the Prime Access Registrar workstation as a root user and find a temporary directory, such as /tmp, to store the Linux installation file.
Log into the Prime Access Registrar workstation as a root user and find a temporary directory, such as /tmp, to store the Linux installation file.
Note![]() The temporary directory requires at least 70 MB of free space.
The temporary directory requires at least 70 MB of free space.
Step 3![]() Change directory to the CD-ROM.
Change directory to the CD-ROM.
cd /cdrom/cdrom0/kit/linux-2.6
Step 4![]() Copy the CSCOar-8.0.0.0-lnx26_64-install.sh file to the temporary directory.
Copy the CSCOar-8.0.0.0-lnx26_64-install.sh file to the temporary directory.
cp CSCOar-8.0.0.0-lnx26_64-install.sh /tmp
Step 5![]() Change the permissions of the CSCOar-8.0.0.0-lnx26-install.sh file to make it executable.
Change the permissions of the CSCOar-8.0.0.0-lnx26-install.sh file to make it executable.
chmod 777 CSCOar-8.0.0.0-lnx26_64-install.sh
Step 6![]() Run set SELinux to permissive mode:
Run set SELinux to permissive mode:
Note![]() The above command will set SELinux to permissive mode temporarily until you reboot the system. To start the system in permissive mode permanently, edit /etc/selinux/config and change SELINUX=enforcing to SELINUX=permissive and reboot the system.
The above command will set SELinux to permissive mode temporarily until you reboot the system. To start the system in permissive mode permanently, edit /etc/selinux/config and change SELINUX=enforcing to SELINUX=permissive and reboot the system.
To continue the installation, proceed to “Common Installation Steps” section.
Common Installation Steps
This section describes how to install the downloaded Prime Access Registrar software for Linux and begin the software installation.
Note![]() The Prime Access Registrar Linux installation automatically installs aregcmd and radclient as setgid programs in group adm.
The Prime Access Registrar Linux installation automatically installs aregcmd and radclient as setgid programs in group adm.
Step 1![]() Log into the Prime Access Registrar workstation as a root user.
Log into the Prime Access Registrar workstation as a root user.
Step 2![]() Change the directory to the location where you have stored the CSCOar-8.0.0.0-lnx26_64-install.sh file.
Change the directory to the location where you have stored the CSCOar-8.0.0.0-lnx26_64-install.sh file.
Step 3![]() Enter the name of the script file to begin the installation:
Enter the name of the script file to begin the installation:
./CSCOar-8.0.0.0-lnx26_64-install.sh
Name : CSCOar Relocations: /opt/CSCOar
Version : 8.0.0.0 Vendor: Cisco Systems, Inc.
Release : 1474031373 Build Date: Fri May 16 06:21:37 2017
Install Date: (not installed) Build Host: nm-rtp-view4
build_tag: [Linux-2.6.18, official]
Copyright (C) 1998-2016 by Cisco Systems, Inc.
This program contains proprietary and confidential information.
All rights reserved except as may be permitted by prior written consent.
Where do you want to install <CSCOar>? [/opt/CSCOar] [?,q]
Step 4![]() Press Enter to accept the default location of /opt/CSCOar, or enter a different directory to be used as the base installation directory.
Press Enter to accept the default location of /opt/CSCOar, or enter a different directory to be used as the base installation directory.
Step 5![]() Specify whether you want to enable Smart Licensing or not. If yes, refer to Smart Licensing in Prime Access Registrar for smart licensing work flow. Proceed with the next step if you want to use the traditional licensing method.
Specify whether you want to enable Smart Licensing or not. If yes, refer to Smart Licensing in Prime Access Registrar for smart licensing work flow. Proceed with the next step if you want to use the traditional licensing method.
Step 6![]() Enter the directory where you have stored the Prime Access Registrar license file.
Enter the directory where you have stored the Prime Access Registrar license file.
The J2RE is required to use the Cisco Prime Access Registrar GUI. If you already have a Java 2 platform installed, enter the directory where it is installed.
Note![]() If you do not provide the JRE path, or if the path is empty or unsupported, the installation process exits. Prime Access Registrar requires either JRE 1.7.x or JRE 1.8.x version.
If you do not provide the JRE path, or if the path is empty or unsupported, the installation process exits. Prime Access Registrar requires either JRE 1.7.x or JRE 1.8.x version.
Note![]() For OCI related services, install Oracle client version 10.2.0.1.0 - 12c for Linux. Oracle Instant Client libraries are not supported by OCI services.
For OCI related services, install Oracle client version 10.2.0.1.0 - 12c for Linux. Oracle Instant Client libraries are not supported by OCI services.
Step 7![]() Enter the location where you have installed Oracle, otherwise press Enter.
Enter the location where you have installed Oracle, otherwise press Enter.
Step 8![]() Specify whether you want to install SIGTRAN_M3UA. If you select the option ‘Y’, SIGTRAN-M3UA process will run.
Specify whether you want to install SIGTRAN_M3UA. If you select the option ‘Y’, SIGTRAN-M3UA process will run.
Note![]() You must install the rpm versions relevant to the RHEL OS versions while installing Prime Access Registrar. For more information, see “Prerequisites.”
You must install the rpm versions relevant to the RHEL OS versions while installing Prime Access Registrar. For more information, see “Prerequisites.”
Step 9![]() Specify whether you want to run Prime Access Registrar as a non-root user.
Specify whether you want to run Prime Access Registrar as a non-root user.
Cisco Prime Access Registrar can be run as non-root user also.
This requires the libcap-2.16-5.5 rpm to be installed. If the kernel version is 2.6.24 or later, libcap is already available Please ensure that you have an existing non-root user created prior to this.
If you require to run Prime Access Registrar as non-root user, and the user does not exist, please choose to exit installation. Once the non-root user is created, you may install Prime Access Registrar.
Step 10![]() When prompted whether to install the example configuration now, enter Y or N to continue.
When prompted whether to install the example configuration now, enter Y or N to continue.
Note![]() You can delete the example configuration at any time by running the command /opt/CSCOar/usrbin/aregcmd -f /opt/CSCOar/examples/cli/delete-example-configuration.rc.
You can delete the example configuration at any time by running the command /opt/CSCOar/usrbin/aregcmd -f /opt/CSCOar/examples/cli/delete-example-configuration.rc.
Note![]() After the installation process, run the command service iptables stop to disable the iptables firewall.
After the installation process, run the command service iptables stop to disable the iptables firewall.
Configuring SNMP
If you choose not to use the SNMP features of Prime Access Registrar, the installation process is completed. To use SNMP features, complete the configuration procedure described in “Configuring SNMP” section in the “Configuring Cisco Prime Access Registrar” chapter of the Cisco Prime Access Registrar 8.0 Administrator Guide.
Smart Licensing in Prime Access Registrar
The licenses purchased in CSSM must be added into Prime Access Register using a set of licensing commands, which are explained in detail below. For detailed information about the Smart Licensing process, see Chapter6, “Smart Licensing”
Prime Access Registrar provides a CLI option to enable smart licensing during the regular installation work flow. If you chose not to proceed with Smart Licensing, you can proceed with the traditional installation work flow.
1.![]() If Smart Licensing is enabled, Prime Access Registrar will start up with PAR-TPS as the default base license.
If Smart Licensing is enabled, Prime Access Registrar will start up with PAR-TPS as the default base license.
2.![]() You can use the following aregcmd to configure Prime Access Registrar in Smart Licensing mode.
You can use the following aregcmd to configure Prime Access Registrar in Smart Licensing mode.
3.![]() To use the licenses that you’ve registered in the CSSM, run the use command. You can perform the following with the use commands:
To use the licenses that you’ve registered in the CSSM, run the use command. You can perform the following with the use commands:
|
|
|
|---|---|
4.![]() For the use option selected above, you can use the enable command to add a required Prime Access Registrar license. The following screen shot shows an example of enable options available for the use tps command.
For the use option selected above, you can use the enable command to add a required Prime Access Registrar license. The following screen shot shows an example of enable options available for the use tps command.
Figure 2-1 Enable Command Options
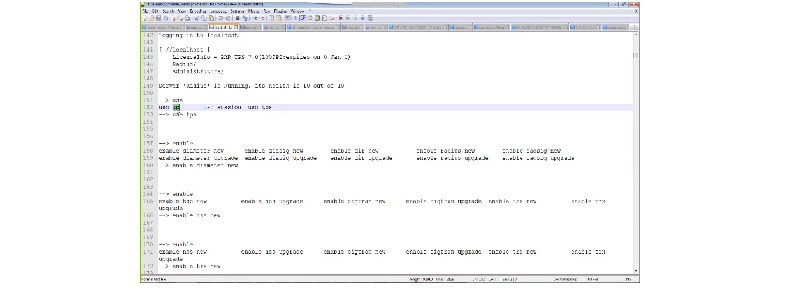
Licenses are available based on the combination of use and enable commands.
5.![]() After you add the required license, you must save and reload the server for the changes to take effect. After executing each of these commands, it’s important that you restart the Prime Access Registrar server for the changes to take effect.
After you add the required license, you must save and reload the server for the changes to take effect. After executing each of these commands, it’s important that you restart the Prime Access Registrar server for the changes to take effect.
6.![]() Use the following command to register the license using a token ID that was generated in the CSSM system:
Use the following command to register the license using a token ID that was generated in the CSSM system:
Note![]() If Smart Licensing is not enabled as part of the installation work flow, Prime Access Registrar allows you to enable it at a later point in time using the CLI option. Use the following command in CLI to do so:
If Smart Licensing is not enabled as part of the installation work flow, Prime Access Registrar allows you to enable it at a later point in time using the CLI option. Use the following command in CLI to do so:
7.![]() After executing this command, it’s important that you restart the Prime Access Registrar server for the changes to take effect.
After executing this command, it’s important that you restart the Prime Access Registrar server for the changes to take effect.
8.![]() If you wish to upgrade Prime Access Registrar from an earlier version:
If you wish to upgrade Prime Access Registrar from an earlier version:
–![]() You must place the traditional license files for that version in the $INSTALLPATH/license folder and these licenses will be automatically upgraded to smart license. You need not configure them.
You must place the traditional license files for that version in the $INSTALLPATH/license folder and these licenses will be automatically upgraded to smart license. You need not configure them.
–![]() You must ensure that only valid licenses are present in the installation path folder.
You must ensure that only valid licenses are present in the installation path folder.
9.![]() After the registration process, the entitlements will be sent to the CSSM and you will get a notification with appropriate status:
After the registration process, the entitlements will be sent to the CSSM and you will get a notification with appropriate status:
–![]() Registered – user registration is complete and entitlements are sent to CSSM
Registered – user registration is complete and entitlements are sent to CSSM
–![]() Authorized – all the entitlements are in compliance with CSSM
Authorized – all the entitlements are in compliance with CSSM
–![]() Out of Compliance – particular user is out of compliance. A log will be generated and an appropriate SNMP trap will also be sent
Out of Compliance – particular user is out of compliance. A log will be generated and an appropriate SNMP trap will also be sent
10.![]() Use the following command to exit the smart licensing mode:
Use the following command to exit the smart licensing mode:
 Feedback