- Overview
- Configuring Cisco Prime Access Registrar
- Customizing Your Configuration
- Setting Prime Access Registrar Configurable Option
- Configuring and Monitoring the RADIUS Server
- Configuring Local Authentication and Authorization
- Using Extension Points
- Testing the RADIUS Server
- Using Trusted ID Authorization with SESM
- Using the REX Accounting Script
Cisco Prime Access Registrar 8.0 Administrator Guide
Bias-Free Language
The documentation set for this product strives to use bias-free language. For the purposes of this documentation set, bias-free is defined as language that does not imply discrimination based on age, disability, gender, racial identity, ethnic identity, sexual orientation, socioeconomic status, and intersectionality. Exceptions may be present in the documentation due to language that is hardcoded in the user interfaces of the product software, language used based on RFP documentation, or language that is used by a referenced third-party product. Learn more about how Cisco is using Inclusive Language.
- Updated:
- January 25, 2018
Chapter: Using Trusted ID Authorization with SESM
Using Trusted ID Authorization with SESM
Cisco Prime Access Registrar (Prime Access Registrar) can be used in a Service Selection Gateway (SSG) - Cisco Subscriber Edge Services Manager (SESM) deployment to enable the Trusted Identity (Trusted ID) Authorization feature. This chapter describes how to use Prime Access Registrar with SESM, and how to configure Prime Access Registrar to use the Trusted ID feature.
The Trusted ID feature provides transparent login capabilities for users based on a trusted ID instead of the user's name, enabling end users of an SSG to maintain an always-on connection without the need to authenticate on each connect. Using SSG's Transparent Auto-Login (TAL) feature, a TAL access-request packet contains a Trusted ID, such as a MAC address, that identifies the user without the user's real username and password.The SESM Profile Management Guide provides detailed information about Trusted ID authorization in SESM.
If Prime Access Registrar knows the user associated with the Trusted ID, Prime Access Registrar uses the Trusted ID to authenticate and authorize the user. If the authentication and authorization succeeds, Prime Access Registrar returns the user’s username in the Access-Accept so the SSG can include the user’s identity in subsequent Accounting-Requests.
If Prime Access Registrar does not know the user associated with the Trusted ID, Prime Access Registrar returns an Access-Reject. The Access-Reject causes the SSG to redirect the user to a SESM web portal login page. When the user explicitly authenticates, Prime Access Registrar captures the Trusted ID and maps it to a user association so subsequent attempts to authenticate with the Trusted ID succeed.
Trusted ID Operational Overview
This section describes the following operations of the Trusted ID Authentication feature:
Configuration Overview
The Trusted ID features require two objects in Prime Access Registrar, a UserService, a SessionManager, and a ResourceManager. The UserService references another service called to perform the authentication and authorization (AA). The SessionManager references a SessionManager that contains a reference to a session-cache Resource Manager. These objects are imported into the Prime Access Registrar server configuration when you run the TrustedIdInstall.bin program. Configuration Imported by TrustedIdInstall Program lists the configuration imported into the Prime Access Registrar server by the TrustedIdInstall.bin program.
The Resource Manager is configured with the QueryKey property set to a RADIUS attribute that contains the Trusted ID such as the Calling-Station ID. The Query Key should be set to an attribute present in all appropriate AA requests that uniquely identifies the user such as Calling-Station ID. The Query Key can be set to only one RADIUS attribute.
The Resource Manager is also configured to cache the attributes required to identify the user, username, and the user’s credentials, password or CHAP-Password and CHAP-Challenge. The attributes User-Name, User-Password, NAS-Identifier, NAS-Port, or NAS-Port-Type are not appropriate choices for Query Key because they do not uniquely identify users.
The RollingEncryptionKeyChangePeriod specifies the length of time a given EncryptionKey will be used before a new one is created. When the session-cache ResourceManager caches User-Password attributes, Prime Access Registrar encrypts the User-Password so it is not stored in memory or persisted on disk in clear text. Prime Access Registrar uses up to 255 encryption keys, using a new one after each RollingEncryptionKeyChangePeriod expires. If RollingEncryptionKeyChangePeriod is set to 2 days , Prime Access Registrar will create and begin using a new EncryptionKey every two days. The oldest key will be retired, and Prime Access Registrar will re-encrypt any User-Passwords that used the old key with the new key. This way, if the RollingEncryptionKeyChangePeriod is set to 1 day , no key will be older than 255 days.
The encryption keys are indirectly connected to Trusted ID. Since User-Passwords might be stored for a long time in memory and on disk, Prime Access Registrar uses the RollingEncryptionKey to encrypt the User-Passwords. The RollingEncryptionKey makes it more difficult for someone to crack or decode the User-Passwords because the key used changes frequently. If someone were to break one key, that would only give them the ability to decrypt those User-Passwords that had been encrypted with that key. All others, including those yet to be encrypted after the key change period expires would not be vulnerable.
Request Processing
When the Trusted ID service processes Access-Requests, it queries the session-cache Resource Manager for a cache entry associated with the Trusted ID. If found, the Resource Manager returns the cached attributes. The Trusted ID service replaces the request’s existing attributes with the cached attributes.
After the Resource Manager is queried (and the request's existing attributes are replaced with the cached attributes if the cache entry exists), the Trusted ID’s UserService authenticates and authorizes the request. The UserService is always called whether the cache entry exists or not. The only attributes cached in the Resource Manager are the ones listed in AttributesToBeCached. The user profile is usually not cached and is retrieved each time by the UserService.
Whether the request succeeds or not, the request is passed on to the service referenced by the UserService property. When that service completes authentication and authorization, control returns to the Trusted ID service. The session-cache might be updated if AA is successful.
Session Cache Life Cycle
Session cache management comprises adding and deleting Trusted ID to user mapping to and from the cache and is initiated from the Trusted ID service. The mapping is one-to-one mapping. For each Trusted ID, there can be only one cache entry, and conversely for each cache entry, there can be only one Trusted ID.
If a user is not presently in the session cache (the query failed), the AA done by the UserService succeeded and the internal attribute (Implicit-Auth-Enabled) was returned with a value of true , Prime Access Registrar adds the user to the cache. Since the AA succeeded, Prime Access Registrar assumes this is an explicit authentication by the user and the attributes required by the session-cache are present in the Access-Request.
If the user is already in the session cache (the query succeeded) and the AA done by the UserService failed, the internal attributes Implicit-Auth-Enabled was not returned, or was returned with a value other than true, Prime Access Registrar removes the user from the session cache.
If the user has enabled implicit authentication (and if that results in Implicit-Auth-Enabled being returned as true ), after the first Explicit Auth (from the login page), the user will be in the cache and will always be implicitly authenticated and authorized. In this case, you can get them out of the cache three ways:
- Have the user disable implicit authentication, then reconnect
- Have the system administrator release the session using aregcmd commands
- Use the SessionTimeout property in the Session Manager
If the user’s account becomes orphaned (the user no longer exists), the cache entry will persist until it is removed using aregcmd .
If you have disabled implicit authentication, you are forced to authenticate each time and the cache is not updated. If you subsequently enable implicit authentication, you must explicitly authenticate one more time to create the user’s cache entry. After creating the user’s cache entry, they will not need to explicitly authenticate again (with this instance of Prime Access Registrar) as long as implicit authentication is enabled.
Configuration Restrictions
The Session Manager referenced by the TrustedID Service should not be used for general session management. The Trusted ID Session Manager should be a separate Session Manager used only for the Trusted ID session cache. The data in the session-cache must persist longer than the length of the session. If the Trusted ID Session Manager was used for general session management, the cache would be updated for the general session, overwriting the cache entry for the special session created for the Trusted ID service. When the general session ended it would delete that data and subsequent queries for implicit authentication would fail.
Software Requirements
The Trusted ID feature requires the following software to be installed:
- Cisco Subscriber Edge Services Manager (SESM) 3.3(1)
- Cisco Subscriber Policy Engine (SPE) 2.1.12
- Cisco Prime Access Registrar
In addition to the software listed above, you must run TrustedIdInstall.rpm , a Java application that runs on the Linux platform.

Note The disk space required to run the TrustedIdInstall program is about 1.3 MB.
The TrustedIdInstall program verifies the software prerequisites, installs the required jar files, and extends the configuration for Prime Access Registrar. The TrustedIdInstall program is only available on Cisco.com under the Prime Access Registrar download area at the following URL:
http://www.cisco.com/cgi-bin/tablebuild.pl/access-registrar-encrypted
This section contains the following topics:
Installing Cisco Prime Access Registrar
See the Cisco Prime Access Registrar 8.0 Installation Guide . for detailed information about how to install Prime Access Registrar software.
Note You must specify a Java Runtime Environment (JRE) when you install Prime Access Registrar software.
Running the TrustedIdInstall Program
Cisco provides a Java-based program called TrustedIdInstall that installs required jar files, the configuration for Subscriber Policy Engine (SPE), and Prime Access Registrar. The TrustedIdInstall program can be run as an InstallShield wizard using the graphical user interface (GUI) or from the command line.
Note Before running the TrustedIDInstall program, ensure that the SPE 2.1.12 software has been installed with SESM 3.3(1) (in SPE mode).
Using the TrustedIdInstall.bin GUI
You must run the TrustedIdInstall program on the workstation where Prime Access Registrar is installed with a Java Runtime Environment (JRE) up to and including 1.4.2 in the path.
Installing the TrustedIdInstall
Step 1 Log in as a user with root privileges.
Step 2 Enter the following from the Prime Access Registrar server’s command line:
The following message appears after you enter the command line above:
Figure 9-1 shows the welcome window of the Trusted ID Azn AR SESM Integration 1.0 Installer.
Figure 9-1 Trusted ID Azn AR SESM Integration 1.0 Installer Welcome
Step 3 Click Next to continue.
The InstallIdInstall.rpm wizard displays the Prerequisites window.
Step 4 Check to ensure that Cisco SESM 3.3(1) is installed and available on the network, then click Next .
The InstallIdInstall.rpm wizard checks for Prime Access Registrar 5.1 software. You will need the SESM 3.3(1) configuration parameters later in this procedure.
Step 5 Select the vendor name of the LDAP data store you are using for SPE, then click Next .
The InstallIdInstall.rpm wizard displays the Password Encryption Panel. This panel prompts you for a master password (entered twice to ensure accuracy) and a Password Encryption Algorithm which can be None, SHA, or SHA-1.
Note If you plan to use EAP-MD5 authentication, choose None. See Configuring EAP-MD5 Authentication for information about configuring EAP-MD5 authentication.
Step 6 Enter the password in field provided, and select the password encryption type, then click Next .
Step 7 If in Step 5 you selected iPlanet as the Data Store Type, continue with Step 8 . If you chose any other Data Store Type, proceed to Step 9 .
The iPlanet Data Store Type requires that you set the value for the naming variable in ACNSchema.xml and DESSSchema.xml , either for Uid or Cn as shown in Figure 9-2. You can set the naming variable to either Uid or Cn.
Figure 9-2 Selecting iPlanet Naming Variable
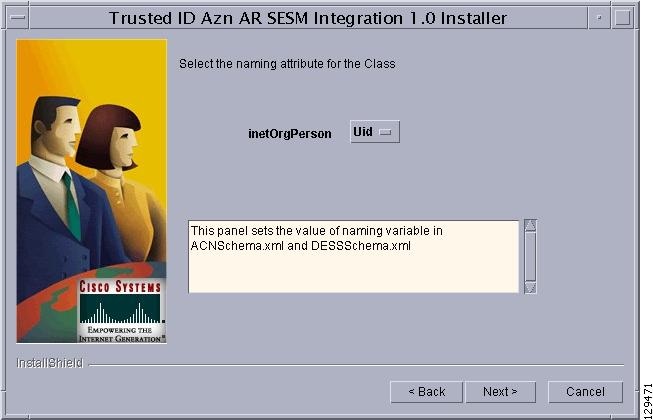
Step 8 Select either Uid or Cn as the inetOrgPerson naming variable, then click Next .
The InstallIdInstall.rpm wizard displays the Service Type Selection panel.
Step 9 Accept the default Trusted ID Service Enable True or click to select False, then click Next .
The TrustedIdInstall program displays a panel that indicates the following:
- Location where the Trusted ID Authorization SESM Integration files will be stored (/cisco-ar)
- Features to be stored (Admin Tool)
- Amount of space required (about 1.3 MB)
The InstallIdInstall.rpm wizard displays the Directory Information panel, requesting information about the directory server required to extend the schema.
Step 10 Provide the requested Directory Server information as shown in Figure 9-3.
Figure 9-3 Directory Server Information
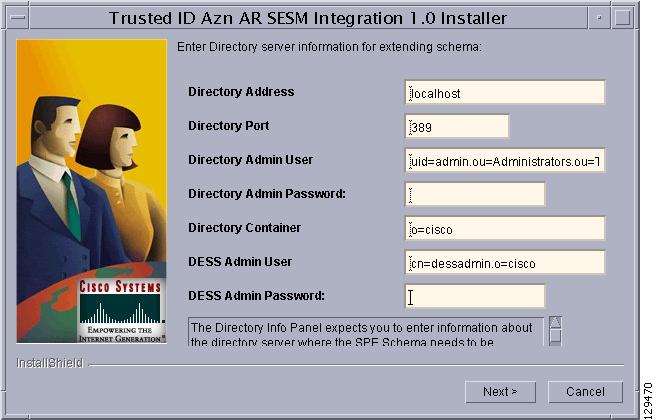
Contact the directory administrator if you are unsure about the information required.
a. Enter a Directory Address .
The Directory Address field requires the directory server IP address or DNS hostname.
b. Enter a Directory Port number.
Provide the TCP/IP port on which your directory server listens. (This is usually port 389.)
c. Enter a Directory Admin User .
Provide the User ID of the directory server administrator with permissions to extend the schema in the form:
cn=admin
d. Enter a Directory Admin Password .
Provide the password for the directory administrator user.
e. Enter a Directory Container .
Provide the container in which the default RBAC objects should be created in the form:
ou=sesm,o=cisco
Provide the User ID of the DESS administrator in the form:
uid=admin,ou=sesm,o=cisco
g. Enter a DESS Admin Password .
Provide the password for the DESS administrator.
Step 11 Click Next to continue.
The InstallIdInstall.rpm wizard begins the installation and displays a progress bar. When the installation completes, the wizard displays any warnings or errors it might have detected. Both boxes being empty indications a successful install.
Step 12 Click Next to continue.
A final window indicates a successful installation of the Trusted ID Authorization AR SESM Integration software.
Using the TrustedIdInstall Command Line
You can run the TrustedIdInstall program using the command line option on a workstation where Prime Access Registrar is installed with a JRE up to and including 1.4.2 in the path. The command line interface requires the same information as the GUI method.
Note You must be a root user to run the TrustedIdInstall program
Installing the TrustedIdInstall using Command Line
To install TrustedIdInstall using command line:
Step 1 To run the TrustedIdInstall program using the command line interface, enter the following from the Prime Access Registrar server’s command line:
The line above provides a way for you to enter your selection. You can press Enter to go to the next panel. Enter 3 to cancel the installation, or enter 4 to redisplay the current panel.
Step 2 Press Enter to go to the next panel.
This panel lists prerequisites required for successful installation. Before continuing to the next panel, ensure that SESM 3.3(1) is installed and available or the network. The program checks for Prime Access Registrar 3.5.3 (or later).
Step 3 After insuring that SESM 3.3(1) is installed and available on the network, press Enter .
This panel requests the data store type selection and indicates the Novell Directory Server is the default selection.
Step 4 Press Enter to select the Novell Directory Server.
You can press 2 to select iPlanet, 3 to select Data Communications Directory, 4 to select IBM Directory Server, or 6 to select Open LDAP.
This panel requests a master password for SPE.
Step 5 Enter a password to be used as the master password for SPE and press Enter .
You are asked to re-enter the master password. The following panel requests an encryption algorithm and generates a secret key using the master password and selected algorithm.
This panel indicates the default installation type as None. Enter “2” and press Enter to select SHA, or enter “3” and press Enter to select SSHA.
Note If you plan to use EAP-MD5 authentication, choose None. See Configuring EAP-MD5 Authentication for information about configuring EAP-MD5 authentication.
Step 6 If in Step 4 you selected iPlanet as the Data Store Type, continue with Step 7 . If you chose any other Data Store Type, proceed to Step 8 .
The iPlanet Data Store Type requires that you set the value for the naming variable in ACNSchema.xml and DESSSchema.xml , either for Uid or Cn as shown above.
Step 7 Press Enter to use the naming variable to Uid, or press 2 to select Cn.
The Service Type Selection panel asks if you want to enable the Trusted ID service. Enter 2 to choose to not enable the Trusted ID service.
Step 8 Press Enter to enable the Trusted ID service.
This panel indicates the location where the TrustedIdInstall program will write data and the amount of storage required.
Step 9 Press Enter to begin writing data.
Step 10 Press Enter to use the current system as the directory server, or enter another directory server name or IP address.
Step 11 Press Enter to use the default port, 389, or enter a different port number.
Note Contact your directory server administrator if you are not sure about which port to use or other information required in the following steps.
Step 12 Enter the User ID of the directory server administrator with the necessary permissions to extend the schema.
Step 13 Enter the password for the user provided in the previous step.
Step 14 Press Enter to use the default container, or enter a different container and press Enter .
Step 15 Press Enter to use the default DESS user, or enter a different user ID and press Enter .
Step 16 Enter the DESS user password, then press Enter .
At this point, the software installation is ready to begin.
Step 17 Press Enter to begin the software installation and extend the schema.
As the installation proceeds, status messages will be displayed.
When the installation completes successfully, the following message displays:
Step 18 Press Enter to end the program.
Configuring Cisco Prime Access Registrar for Trusted Identity with SESM
Use the command line interface aregcmd to configure Prime Access Registrar to use Trusted ID authorization in SSG-SESM deployments.
This section contains the following topics:
Configuring the RADIUS Ports
By default, Prime Access Registrar listens on ports 1812 and 1813 for any type of RADIUS request. It might be necessary to change the port assignments in the case of a resource collision. For example, if the RADIUS Directory Enabled Service Selection (DESS) Proxy (RDP) component of SPE is using ports 1812 and 1813, a port assignment change would be required.
The following command sequence causes Prime Access Registrar to listen on the explicitly defined ports, 1812 and 1813, for all types of RADIUS requests.
After changing the port assignments, Prime Access Registrar no longer listens on the default ports. It might be necessary to add ports 1812 and 1813 if you are also using Prime Access Registrar for other AAA functionality.
Note By default, Prime Access Registrar listens on ports 1812 and 1813 for the Linux platform.
Configuring NAS Clients
Change directory to /Radius/Clients , then add and configure the NAS clients required by SESM deployments:
Configuration Imported by TrustedIdInstall Program
The following is a listing of the configuration imported into the Prime Access Registrar server when you run the TrustedIdInstall program:
Configuring EAP-MD5 Authentication
EAP-MD5 authentication is an optional authentication configuration. The following configuration changes are required to support EAP-MD5 authentication:
- Creating the CheckEap.tcl Script
- Adding the CheckEap.tcl Script
- Using the CheckEap.tcl Script
- Adding the EAP-MD5 Authentication Service
- Adding an LDAP Remote Server
- Adding an LDAP Service
- Saving the Configuration and Reloading the Server
- Cisco SSG VSAs in Cisco Prime Access Registrar Dictionary
Note If you configure Prime Access Registrar to use EAP-MD5 authentication with the Trusted ID feature, you will not be able to use the Transparent Auto Login feature.
Creating the CheckEap.tcl Script
The CheckEap.tcl script must be created and stored in the file called /cisco-ar/scripts/radius/tcl/CheckEap.tcl . Use a text editor and copy the following lines into the CheckEap.tcl file:
Adding the CheckEap.tcl Script
To add the CheckEap.tcl script:
Step 1 Start aregcmd , then change directory to /Radius/Scripts and add the CheckEap script.
Step 2 Change directory to EapCheck .
Step 3 Set the Language property to TCL.
Step 4 Set the filename property to CheckEap.tcl.
Step 5 Set the EntryPoint property to CheckEap.
Note The following sections also require you to use aregcmd, the command line interface.
Using the CheckEap.tcl Script
This section describes how to configure Prime Access Registrar to use the CheckEap script by setting the /Radius/IncomingScript property to CheckEap.
Adding the EAP-MD5 Authentication Service
To add and configure the EAP-MD5 service:
Step 1 Change directory to /Radius/Services and add an EAP-MD5 service.
Step 2 Change directory to the EAP-MD5 service and set the Type and UserService properties as shown below:
Step 3 Change directory to the EAP-MD5 service.
Step 4 Set the service Type property to eap-md5 and the UserService property to LDAP.
The following example shows the configuration of the EAP-MD5 service:
Adding an LDAP Remote Server
Prime Access Registrar adds a new type of service and remote server called ldap-accounting that enables inserting accounting records into LDAP. You can write accounting records into LDAP by referring this service in /Radius/DefaultAccountingService or in the Accounting-Service environment variable.
Adding and Configuring an LDAP Remote Server
To add and configure an LDAP remote server:
Step 1 Change directory to /Radius/RemoteServers and add a RemoteServer object.
Step 2 Change directory to the LDAP RemoteServer.
Step 3 Set the RemoteServer protocol property to ldap.
The following example shows the default configuration of an LDAP remote server:
Step 4 Set the HostName property to the SPE/DESS directory IP address or hostname.
Step 5 Set the BindName property to the SPE/DESS administrator name.
Step 6 Set the BindPassword property to the SPE/DESS administrator password.
Step 7 Set the SearchPath property to the SPE/DESS directory container.
Step 8 Set the UserPasswordAttribute property type to clearpassword.
Adding an LDAP Service
You must configure a service of type ldap-accounting under /Radius/Services using the ldap accounting feature.
Adding and Configuring an LDAP Service
To add and configure an LDAP service:
Step 1 Change directory to /Radius/Service and add LDAP.
Step 2 Change directory to LDAP and set the type property to ldap.
The following shows the default configuration for an LDAP service:
Step 3 Change directory to RemoteServers and associate the LDAP RemoteServer with the LDAP service.
Saving the Configuration and Reloading the Server
Use the save command to save the configuration, then reload the Prime Access Registrar server.
Cisco SSG VSAs in Cisco Prime Access Registrar Dictionary
The following vendor-specific attributes (VSAs) are defined by default in the attribute dictionary after installing Prime Access Registrar software:
 Feedback