- Introduction
- Getting Started
- Managing Automation Packs
- Performing advanced console tasks
- Authoring Processes
- Authoring Categories
- Advanced Authoring
- Monitoring Operations
- Performing Basic Console Tasks
- Performing Administrative Actions
- Working with Events and Triggers
- Using Adapters
- Using SAP Adapters
- Using the PowerShell Snap-in CLI
- Managing High Availability and Resiliency
Cisco Process Orchestrator User Guide 3.4
Bias-Free Language
The documentation set for this product strives to use bias-free language. For the purposes of this documentation set, bias-free is defined as language that does not imply discrimination based on age, disability, gender, racial identity, ethnic identity, sexual orientation, socioeconomic status, and intersectionality. Exceptions may be present in the documentation due to language that is hardcoded in the user interfaces of the product software, language used based on RFP documentation, or language that is used by a referenced third-party product. Learn more about how Cisco is using Inclusive Language.
- Updated:
- May 26, 2016
Chapter: Performing Basic Console Tasks
- Launching the Web Console
- Performing Web Console Actions
- Refreshing the View
- Viewing and Modifying Object Properties
- Configuring the Navigation Pane
- Customizing the Fonts and Colors
- Matching a Regular Expression
- Changing the Process Display Icon
- Configuring the Display Refresh Rate
- Configuring Columns
- Searching for an Object
- Modifying the Console Time Zones
- Enabling and Disabling an Object
- Deleting an Object
- Connecting to a Server
- Specifying Server Credentials
- Displaying Recent Servers
- Assigning Credentials to Processes and Activities
- Modifying the Condition Branches
- Assigning a Category
- Suspending Server Automation
- Viewing the Properties of an Object
- Viewing Activity Instance Properties
- Viewing Environment Properties
- Viewing Runtime Usage Properties
- Viewing the Used By Properties of an Object
- Viewing the History of an Object
- Creating an Alert Task
- Creating an Approval Request Task
- Creating a Change Request Task
- Creating a Guided Operation Task
- Creating an Incident Task
- Creating an Input Request Task
- Creating a Review Task
- Adding a Related Task
- Adding an Option to the Input Request Select Question
- Assigning a Category to a Task
- Assigning a Duplicate Alert
- Creating a Check Box Question
- Creating a Hidden Text Question
- Creating a Select Question
- Creating a Text Question
- Manually Changing the Status
- Modifying the Assignment Properties for a Task
- Specifying Parameters for a Task
- Resolving a Task
- Viewing Task History
- Reversing Process Changes
- Deleting a Calendar
- Removing Dates from a Calendar List
- Applying a Value to a Target-Specific Target Property
- Viewing Ta rget Proper ties
- Inserting Reference Variables
Performing Basic Console Tasks
The Process Orchestrator Web Console provides a simplified web-based view to allow end users to interact with automation. The web console does not allow users to define processes but does allow them to start processes, monitor processes they started, or interact with human steps in processes called tasks (such as approvals). This interface is purposefully simplified to minimize the learning curve of the occasional user.

Note![]() The Web Console is typically not used when Process Orchestrator is used in conjunction with Cisco Prime Service Catalog. In these cases, end-user interaction occurs through the catalog rather than Process Orchestrator interfaces. The Web Console is typically only used in cases when Process Orchestrator is used independently.
The Web Console is typically not used when Process Orchestrator is used in conjunction with Cisco Prime Service Catalog. In these cases, end-user interaction occurs through the catalog rather than Process Orchestrator interfaces. The Web Console is typically only used in cases when Process Orchestrator is used independently.
Figure 9-1 Cisco Process Orchestrator Web Console
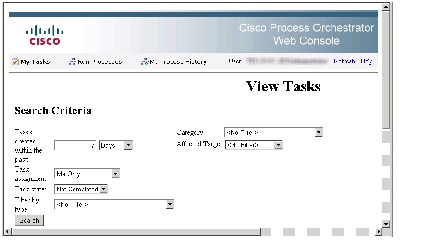
For the Web Console to work properly, Internet Information Services must be installed on the computer on which the Web Console is installed. For information about installing and configuring IIS, refer to the Cisco Process Orchestrator Installation Guide.
You cannot create or modify processes on the Web Console. To modify a process, you must have the appropriate security rights and must access the Process Orchestrator console. If you think you should have access to the expert Process Orchestrator console, contact your manager to authorize your access.
Use the following sections for instructions on navigating and performing actions in the Web Console:
Launching the Web Console
To use the Process Orchestrator Web Console, you must log in using your Windows credentials. If you have Windows integrated authentication configured, then logging in might not be required.
Performing Web Console Actions
The following sections describe some of the typical actions you can perform using the Web Console.
Refreshing the Display
The Refresh option updates the information on the current web page.
To refresh the current view, use one of the following methods:
The display refreshes with the latest information generated from the Process Orchestrator server.
Viewing the My Tasks Page
Use the My Tasks page to navigate and manage Process Orchestrator tasks in the Web Console.
To make sure the default search criteria is available after the initial search on the Process Orchestrator Web Console, enable the cookies in your browser.
Step 1![]() Launch the Web Console and click My Tasks.
Launch the Web Console and click My Tasks.
Step 2![]() Enter the search criteria, then click Search. Tasks can be filtered to display:
Enter the search criteria, then click Search. Tasks can be filtered to display:
Note![]() Press Alt E to highlight the Tasks created within the past option.
Press Alt E to highlight the Tasks created within the past option.
- Tasks assigned to the currently logged in user or user group
- Tasks filtered according to the state of the task
- Tasks filtered according to the type of task
- The affected target (for example, the default SMTP server, automation service, or Process Orchestrator server) that the alert or incident describes
- Tasks filtered according to the category assigned to the task
The <No Filter> option allows the page to display all tasks regardless of the assigned state.
Step 3![]() To view the task details, highlight the appropriate task, then click View Details.
To view the task details, highlight the appropriate task, then click View Details.
Resolving Tasks in the Web Console
Step 1![]() Launch the Web Console, click My Tasks, then enter the search criteria to filter the display.
Launch the Web Console, click My Tasks, then enter the search criteria to filter the display.
Step 2![]() Highlight the appropriate task, then click View Details or press Alt V.
Highlight the appropriate task, then click View Details or press Alt V.
Step 3![]() From the Status drop-down list, choose the appropriate status for the task resolution.
From the Status drop-down list, choose the appropriate status for the task resolution.
Step 4![]() In the Add Notes text box, if available, enter any notes related to the task resolution or status update.
In the Add Notes text box, if available, enter any notes related to the task resolution or status update.
Step 5![]() Click Submit to resolve the task.
Click Submit to resolve the task.
Taking Ownership of a Task
These steps are used when deciding to take ownership of a task that is unassigned or assigned to an entire group of which the current logged in user is also included.
Step 1![]() Launch the Web Console, click My Tasks, then enter the search criteria to filter the display.
Launch the Web Console, click My Tasks, then enter the search criteria to filter the display.
Step 2![]() Highlight the appropriate task, then click View Details.
Highlight the appropriate task, then click View Details.
Step 3![]() In the Add Note text box, add notes to the task, as necessary.
In the Add Note text box, add notes to the task, as necessary.
Step 4![]() Check the Take sole ownership of this task check box, then click Submit.
Check the Take sole ownership of this task check box, then click Submit.
Starting Processes in the Web Console
The Run Processes page displays the processes that the user has access to run, are enabled, and have the Started by User trigger.
Step 1![]() Launch the Web Console and click Run Processes, then enter the search criteria to filter the display.
Launch the Web Console and click Run Processes, then enter the search criteria to filter the display.
To filter the display by category, choose the appropriate category and click Search.
Step 2![]() On the appropriate process, click Start.
On the appropriate process, click Start.
Step 3![]() If process has input variables, under Start the process with the following parameters, verify or modify the values:
If process has input variables, under Start the process with the following parameters, verify or modify the values:
Step 4![]() If the process has multiple start points and you want to start a process from a specific point, check the Start from start point check box, then select the appropriate starting point. The first activity after the specified starting point will run first.
If the process has multiple start points and you want to start a process from a specific point, check the Start from start point check box, then select the appropriate starting point. The first activity after the specified starting point will run first.
Step 5![]() Under This process will execute against [Target Name]. Would you like to override?, choose one of the following options:
Under This process will execute against [Target Name]. Would you like to override?, choose one of the following options:
- Yes—To specify a target or target group different from the defined process target
- No—To continue with the process execution
Step 6![]() Click Start to start the process; click Observe to review the process execution details.
Click Start to start the process; click Observe to review the process execution details.
Overriding the Process Target
With the appropriate rights, you can override the target of any manually-started process before process execution begins. To override the current process target, see Starting Processes in the Web Console, Step 5.
Note![]() Targets cannot be modified from the Web Console.
Targets cannot be modified from the Web Console.
Viewing My Process History
The My Process History page displays the processes that you have run in Process Orchestrator. You can filter the display of the processes you have launched and the details of the processes.
Step 1![]() Launch the Web Console, click My Process History, then enter the search criteria to filter the display. You can filter by:
Launch the Web Console, click My Process History, then enter the search criteria to filter the display. You can filter by:
- Processes that were started in a specified time period.
- Process state—Display all processes in all states (same as <No Filter>), only the processes that have succeeded, or only the process that have failed.
- Category—Filter by the category associated with the processes in the list. The <No Filter> option displays all processes regardless of the assigned category.
Step 2![]() Click Search to modify the process list display.
Click Search to modify the process list display.
Step 3![]() On the appropriate process, click View Details. The Process Details page displays the summary information for the process.
On the appropriate process, click View Details. The Process Details page displays the summary information for the process.
Viewing an Automation Summary
An automation summary is a collection of data summarizing the objects included in the process and the data retrieved by the processing of the objects. On the web console, an automation summary can be launched from the following locations:
- Task detail page—Displays the task details of the task
- Process history page—Displays the details of the process activity
Step 1![]() Launch the Web Console.
Launch the Web Console.
Step 2![]() Use one of the following methods:
Use one of the following methods:
The Automation Summary page displays the following information.
The topics in the following sections describe some of the more typical actions you can perform from the Process Orchestrator console:
- Refreshing the View
- Viewing and Modifying Object Properties
- Configuring the Navigation Pane
- Customizing the Fonts and Colors
- Changing the Process Display Icon
- Configuring the Display Refresh Rate
- Configuring Columns
- Searching for an Object
- Modifying the Console Time Zones
- Enabling and Disabling an Object
- Deleting an Object
- Connecting to a Server
- Specifying Server Credentials
- Assigning Credentials to Processes and Activities
- Displaying Recent Servers
- Suspending Server Automation
- Viewing the Properties of an Object
- Viewing Activity Instance Properties
- Viewing Runtime Usage Properties
- Viewing the Used By Properties of an Object
- Viewing the History of an Object
- Creating an Alert Task
- Creating an Approval Request Task
- Creating a Change Request Task
- Creating a Guided Operation Task
- Creating an Incident Task
- Creating an Input Request Task
- Creating a Review Task
- Adding a Related Task
- Adding an Option to the Input Request Select Question
- Assigning a Category to a Task
- Assigning a Duplicate Alert
- Creating a Check Box Question
- Creating a Hidden Text Question
- Creating a Select Question
- Creating a Text Question
Refreshing the View
The Refresh option updates the information on the current view.
To refresh the current view, choose View > Refresh, or click F5.
Viewing and Modifying Object Properties
Step 1![]() Click Definitions > [Object], highlight the appropriate object, right-click and choose Properties.
Click Definitions > [Object], highlight the appropriate object, right-click and choose Properties.
Step 2![]() On the [Object] Properties property sheet, click the tabs to view and update the various properties for that object.
On the [Object] Properties property sheet, click the tabs to view and update the various properties for that object.
Step 3![]() Click OK to close the dialog.
Click OK to close the dialog.
Configuring the Navigation Pane
The Navigation pane includes views that you use to perform specific functions in the product. You can customize the views that display in the Navigation pane and the order in which they display.
Step 1![]() In the bottom right corner of the Navigation pane, click the >> icon.
In the bottom right corner of the Navigation pane, click the >> icon.
Step 2![]() Select the option for the appropriate action to be performed:
Select the option for the appropriate action to be performed:
Customizing the Fonts and Colors
The default formatting for the Console display can be updated through the Customize dialog box. The available items to update depend on the category selected.
Step 1![]() Choose Tools > Customize.
Choose Tools > Customize.
Step 2![]() From the Category drop-down list in the Customize dialog box (see Using the Actions Menu), select any of the following items, as necessary:
From the Category drop-down list in the Customize dialog box (see Using the Actions Menu), select any of the following items, as necessary:
Step 3![]() Under Display items, select the item to be modified. The available items to update depend on the category selected.
Under Display items, select the item to be modified. The available items to update depend on the category selected.
Step 4![]() Modify the following items as necessary, then click OK.
Modify the following items as necessary, then click OK.
Matching a Regular Expression
The Match dialog box provides the ability to easily check the specified string text against a specified regular expression.
Step 1![]() In the Process Editor, choose Tools > Regex Matcher.
In the Process Editor, choose Tools > Regex Matcher.
Step 2![]() In the Match dialog box, specify the following information to the regular expression:.
In the Match dialog box, specify the following information to the regular expression:.
Changing the Process Display Icon
The following steps provide instructions on how to change the icon for the process that displays in the Process Views.
Step 1![]() On the Process Properties pane, click the Options tab.
On the Process Properties pane, click the Options tab.
Step 2![]() Under Display, check the Use custom icon check box and click Select Icon.
Under Display, check the Use custom icon check box and click Select Icon.
Step 3![]() In the Select Images dialog box, the currently selected icons display to the right of the of the fields. To the right of both Image fields ( Small or Large), click “... ” to change the icon, then click OK.
In the Select Images dialog box, the currently selected icons display to the right of the of the fields. To the right of both Image fields ( Small or Large), click “... ” to change the icon, then click OK.
Step 4![]() In the Select Image dialog box, use one of the following options:
In the Select Image dialog box, use one of the following options:
–![]() To the right of the Image path field, click “... ” to insert the file path to the appropriate icon.
To the right of the Image path field, click “... ” to insert the file path to the appropriate icon.
–![]() In the Display Name field, enter the name of the icon and click OK.
In the Display Name field, enter the name of the icon and click OK.
Configuring the Display Refresh Rate
Use the Refresh tab to specify the refresh rate for the Activity and Process Views.
Note![]() Use the scroll buttons to the right of the text fields to change the numeric display one second at a time.
Use the scroll buttons to the right of the text fields to change the numeric display one second at a time.
Step 1![]() Choose Tools > Options, then click the Refresh tab.
Choose Tools > Options, then click the Refresh tab.
Step 2![]() Under Refresh, select the appropriate process and activity instance refresh rate (see Using the Actions Menu), then click OK.
Under Refresh, select the appropriate process and activity instance refresh rate (see Using the Actions Menu), then click OK.
Configuring Columns
The Choose Columns dialog box determines which columns display for a selected navigation item and the order in which the columns display. The available column headings vary depending on the selected item.
Step 1![]() In the Navigation pane, select the appropriate item.
In the Navigation pane, select the appropriate item.
Step 2![]() In the Results pane, right-click and choose Choose Columns.
In the Results pane, right-click and choose Choose Columns.
Step 3![]() Under Columns, use one of the following options to select the appropriate column heading to display:
Under Columns, use one of the following options to select the appropriate column heading to display:
Step 4![]() Choose any of the following options:
Choose any of the following options:
a.![]() To remove a column heading from the display, use one of the following options:
To remove a column heading from the display, use one of the following options:
–![]() Highlight the column heading and click Hide.
Highlight the column heading and click Hide.
b.![]() To change the order in which a column appears in the results pane, select the column heading and click Move Up or Move Down.
To change the order in which a column appears in the results pane, select the column heading and click Move Up or Move Down.
c.![]() To determine the width of a column, select the column heading and specify a value in the Width of selected column field.
To determine the width of a column, select the column heading and specify a value in the Width of selected column field.
d.![]() To reset the column settings to the default, click Reset.
To reset the column settings to the default, click Reset.
Step 5![]() Click OK to save the settings and close the dialog box.
Click OK to save the settings and close the dialog box.
Searching for an Object
The Find dialog box locates an item with specific text in the current view.
Step 2![]() In the Find what text field, enter specific terms for the search query.
In the Find what text field, enter specific terms for the search query.
Step 3![]() Check the following check boxes, as necessary:
Check the following check boxes, as necessary:
Step 4![]() Click one of the following buttons to begin the search:
Click one of the following buttons to begin the search:
Modifying the Console Time Zones
Use the Date & Times tab to specify the time zone that will be used to display date and time values throughout the application.
Step 1![]() Choose Tools > Options, then click the Date & Times tab.
Choose Tools > Options, then click the Date & Times tab.
Step 2![]() Under Show dates and times using, choose one of the following options to specify the time zone to be used, then click OK.
Under Show dates and times using, choose one of the following options to specify the time zone to be used, then click OK.
Enabling and Disabling an Object
Most objects are enabled by default. If an object is manually disabled, it must be enabled before it is available. The disabled object is not removed from the list of objects in the Definitions > [Objects] Results pane.
Step 1![]() Choose Definitions > [Objects].
Choose Definitions > [Objects].
Step 2![]() Highlight the object, then in the Results pane, right-click and choose one of the following:
Highlight the object, then in the Results pane, right-click and choose one of the following:
Step 3![]() If necessary, click the Refresh
If necessary, click the Refresh  tool to update the view.
Deleting an Object
Note![]() If the object definition is shipped as a part of product or you do not have the appropriate rights, the Delete option will be disabled.
If the object definition is shipped as a part of product or you do not have the appropriate rights, the Delete option will be disabled.
Use the Definitions > [Object] view to delete an object.
Before deleting an object, access the object’s properties and click the Used By tab to view where this object is being referenced. This ensures that deleting the object does not affect any processes or activities.
Connecting to a Server
Use this option when you want to connect to a different server used for process monitoring.
Step 1![]() Choose File> Connect to Server.
Choose File> Connect to Server.
Step 2![]() Choose a previously connected server from the Server drop-down list or enter the server’s name, then click OK.
Choose a previously connected server from the Server drop-down list or enter the server’s name, then click OK.
If the server is properly connected, the Cisco Process Orchestrator License Check dialog box displays. If the server does not properly connect, the Connect to Server dialog box displays.
Specifying Server Credentials
The Specify Credentials check box on the Select Server dialog box displays the login pane used for entering the information to authenticate the server connection.
Step 1![]() Choose File > Connect to Server.
Choose File > Connect to Server.
Step 2![]() In the Select Server dialog box, enter the server URL into the Server field or choose the server from the list.
In the Select Server dialog box, enter the server URL into the Server field or choose the server from the list.
Step 3![]() Check the Specify Credentials check box.
Check the Specify Credentials check box.
Step 4![]() Enter the user name required to access the server, the domain where the server resides, and the user password. Then click OK.
Enter the user name required to access the server, the domain where the server resides, and the user password. Then click OK.
Displaying Recent Servers
The Recent Servers option displays all the servers recently accessed during the current session.
Step 1![]() Choose File > Recent Servers.
Choose File > Recent Servers.
Step 2![]() To adjust the number of recent servers displayed:
To adjust the number of recent servers displayed:
a.![]() Choose Tools > Options > General > Most recently used servers.
Choose Tools > Options > General > Most recently used servers.
b.![]() Enter the number of servers to display on the Recent Servers list on the File menu, then click OK.
Enter the number of servers to display on the Recent Servers list on the File menu, then click OK.
Assigning Credentials to Processes and Activities
Step 1![]() Choose Definitions > Processes, right-click and choose Edit, or right-click Processes in the navigation pane and choose New Process.
Choose Definitions > Processes, right-click and choose Edit, or right-click Processes in the navigation pane and choose New Process.
Step 2![]() On the Process Editor properties, click the Credentials tab.
On the Process Editor properties, click the Credentials tab.
Step 3![]() Check the check box for the appropriate runtime user types to be included with the process.
Check the check box for the appropriate runtime user types to be included with the process.
Step 4![]() Click Select All to select all the available runtime users. Click the Unselect All to clear the selected runtime users availability for the process.
Click Select All to select all the available runtime users. Click the Unselect All to clear the selected runtime users availability for the process.
Step 5![]() In the Default runtime user section, select the appropriate runtime user that the process will run on by default.
In the Default runtime user section, select the appropriate runtime user that the process will run on by default.
Modifying the Condition Branches
Use the Result Handlers tab to modify the list of condition branches on the process. You can add condition branches, specify the order of the condition branches, or remove condition branches from the process.
Assigning a Category
Step 1![]() Choose Definitions > Processes, right-click and choose Edit, or right-click Processes in the navigation pane and choose New Process.
Choose Definitions > Processes, right-click and choose Edit, or right-click Processes in the navigation pane and choose New Process.
Step 2![]() On the Process Editor properties, click the Category tab.
On the Process Editor properties, click the Category tab.
Step 3![]() Click Add to launch the Select Categories dialog box and select the category to which the process is to be assigned.
Click Add to launch the Select Categories dialog box and select the category to which the process is to be assigned.
Suspending Server Automation
Use the Suspend Automation check box to suspend the execution of processes on the server. The enabled check box suspends any new process from being created and the server will no longer create instances of activities or processes.
Step 1![]() Choose File > Environment Properties.
Choose File > Environment Properties.
Step 2![]() In the Environment Properties dialog box, check the Suspend automation check box.
In the Environment Properties dialog box, check the Suspend automation check box.
Viewing the Properties of an Object
To view information about an object, highlight the object, right-click and choose Properties.
Properties are organized by tabs. For example, the General tab can include information such as the object name of the object and type, its status, a brief description, and whether the object is enabled or disabled. The properties that are displayed depend on the object type.
Viewing Activity Instance Properties
Step 1![]() Select any of the activity views to display the process and activity instances in the Results pane (for example, Operations > Activity Views > View Triggered).
Select any of the activity views to display the process and activity instances in the Results pane (for example, Operations > Activity Views > View Triggered).
Step 2![]() In the Results pane, expand the appropriate instance to display the related activities.
In the Results pane, expand the appropriate instance to display the related activities.
Step 3![]() Highlight the appropriate activity, and use one of the following methods:
Highlight the appropriate activity, and use one of the following methods:
- Double-click the appropriate activity instance.
- Right-click and choose Observe.
- From the Details pane, click any hyperlink (see Details Pane).
Step 4![]() To view activity instance properties, in the Results pane, expand the appropriate instance to display the related activities.
To view activity instance properties, in the Results pane, expand the appropriate instance to display the related activities.
Viewing Environment Properties
The Environment Properties option provides a view of the properties for the entire high availability Process Orchestrator environment.
To view the environment properties, choose File > Environment Properties.
Viewing Runtime Usage Properties
The Runtime Usage tab shows the list of running processes that is currently using that specific queue resource.
|
|
|
Displays how many seconds the queue resource has been in allocated state for the process. |
Viewing the Used By Properties of an Object
Use the Used By tab to display the objects that directly reference the selected object in their configuration. Because the Used By tab displays objects in a tree view, you can also display the objects that directly reference the top level objects for the selected object.
The objects at the top level are the objects that reference the selected object directly, but you can expand the listed objects and see their referenced objects. For example, if object A is used by objects X and Y and object X is used by object Q, then on the property pages of object A, you will see X and Y listed. If you expand the (+) o bject X, then object Q will display.
Step 1![]() Click Definitions > [Object], highlight the appropriate object, right-click and choose Properties.
Click Definitions > [Object], highlight the appropriate object, right-click and choose Properties.
Step 2![]() On the [Object] Properties property sheet, click the Used By tab to view the objects that use that object.
On the [Object] Properties property sheet, click the Used By tab to view the objects that use that object.
Step 3![]() Click OK to close the dialog.
Click OK to close the dialog.
Viewing the History of an Object
Use the History tab to view a history of changes that have been made to an object. This is a display-only tab that does not require any user interaction.
Step 1![]() Click the History tab to view the changes made to the object.
Click the History tab to view the changes made to the object.
The following information about the history of the object is displayed:
|
|
|
|---|---|
Step 2![]() To view the audit history for a specific action, highlight the appropriate time, right-click and choose Properties.
To view the audit history for a specific action, highlight the appropriate time, right-click and choose Properties.
Step 3![]() Click OK to close the property sheet.
Click OK to close the property sheet.
Creating an Alert Task
Use the Alert task to create an alert regarding any potential problems. An alert reflects potential problems that a user might want to investigate and possibly diagnose the problem.
Step 1![]() Choose Operations > Task Views > New > IT Record > Alert.
Choose Operations > Task Views > New > IT Record > Alert.
Step 2![]() Click the General tab and enter the required information.
Click the General tab and enter the required information.
Step 3![]() Click the Alert tab to enter the following criteria for the alert:
Click the Alert tab to enter the following criteria for the alert:
–![]() High—Interruption to critical business processes.
High—Interruption to critical business processes.
–![]() Normal—Interruption to the work of individual employees.
Normal—Interruption to the work of individual employees.
–![]() Low—Hindrance to the work of individual employees, continuation of work possible by means of a circumvented solution.
Low—Hindrance to the work of individual employees, continuation of work possible by means of a circumvented solution.
Step 4![]() Click the Affects tab to specify the elements that trigger the selected target:
Click the Affects tab to specify the elements that trigger the selected target:
–![]() Activity target—Select the activity containing the target that will be used. Only task activities will display in the list.
Activity target—Select the activity containing the target that will be used. Only task activities will display in the list.
–![]() Specific target—Specify the affected target that will be used.
Specific target—Specify the affected target that will be used.
To view the properties for the selected target, click the Properties  tool. To create a new target, click New > [Target].
–![]() Specific target group—Specify the affected target group that will be used.
Specific target group—Specify the affected target group that will be used.
To view the properties for the selected target group, click the Properties  tool. To create a new target group, click New > [Target Group].
From the Choose a target using this algorithm drop-down list, specify which target will be chosen from the eligible target group members.
Choose all targets that satisfy the specified criteria—Executes the process on all targets defined by the criteria specified in the Target Selection dialog box.
Choose any target that satisfies the specified criteria—Executes the process on any targets defined by the criteria specified in the Target Selection dialog box.
Choose the target with the specified name—Executes the process on the member of the group specified in the Name to match text field.
Select SAP target with the specified System ID—SAP System runs target against the SAP System database connection
–![]() Choose the target with the specified name—Runs the process on the member of the group whose name is specified in Name to match.
Choose the target with the specified name—Runs the process on the member of the group whose name is specified in Name to match.
- This applies to the following configuration item—Specify the configuration item to be used in the activity
- Name—Name of the configuration item (IT component) to which the alert pertains. For example, the name of a database server that failed or the name of a specific job that failed.
- Type—Enter the appropriate configuration item type or select the type of ITIL configuration item (IT component) from the list which the alert describes. For example, the type of the specific application element that failed (Application Server, Database, Host, or User).
- This is a CMDB reference—Indicate that the true source of the CI is in the CMDB, so the configuration item properties reference a CMDB entry.
- Object key—ID for the specific record in the CMDB that contains the configuration item
- Object source—Name for the specific record in the CMDB that contains the target configuration item
- Affected services—IT Service affected by the alert or incident
- Affected organizations—Organizations that consume the IT service affected by the alert or incident
Step 5![]() Click the Assignment tab to manage the general task properties for the alert.
Click the Assignment tab to manage the general task properties for the alert.
–![]() Add—Click Add to launch the Select Identity dialog box to add a user name to the list.
Add—Click Add to launch the Select Identity dialog box to add a user name to the list.
Type the name of the assignee or to search for the assignee, click Browse to launch the Select User or Group dialog box to select the name of the person.
–![]() Remove—Select the user name and click this button to remove the user from list.
Remove—Select the user name and click this button to remove the user from list.
- Priority—Indicates the priority of the task
- Due date—Check the check box and select appropriate date the task should be completed from the drop-down calendar.
- Expiration date—Select the appropriate date the alert should expire from the drop-down calendar.
Step 6![]() Click the Notification tab to specify the recipients to be notified when the task rule is executed.
Click the Notification tab to specify the recipients to be notified when the task rule is executed.
Step 7![]() Click the Parameters tab to define parameters for a specific task.
Click the Parameters tab to define parameters for a specific task.
Step 8![]() Click the Notes tab to enter any notes related to the task.
Click the Notes tab to enter any notes related to the task.
Click Add to launch the Add Note Dialog Box to add a specific set of notes to the task.
Step 9![]() Click the Categories tab to assign an alert to a category or modify an existing assigned category for the task.
Click the Categories tab to assign an alert to a category or modify an existing assigned category for the task.
Step 10![]() Click the Related tab to assign or modify an existing related task. The fields displayed depend on the task selected.
Click the Related tab to assign or modify an existing related task. The fields displayed depend on the task selected.
Step 11![]() Click the External tab to specify the external incident information to support the synchronization between Cisco Process Orchestrator and the system that the customer is using.
Click the External tab to specify the external incident information to support the synchronization between Cisco Process Orchestrator and the system that the customer is using.
Step 12![]() Enter the information in the remaining tabs as necessary, then click OK to complete the task definition.
Enter the information in the remaining tabs as necessary, then click OK to complete the task definition.
Creating an Approval Request Task
Use the Approval Request task to specify the user or group required to approve a task including the message associated for the approver.
Step 1![]() Choose Operations > Task Views > New > User Interaction > Approval Request.
Choose Operations > Task Views > New > User Interaction > Approval Request.
Step 2![]() Click the General tab and enter the required information.
Click the General tab and enter the required information.
Step 3![]() Click the Approval tab and enter the following criteria:
Click the Approval tab and enter the following criteria:
Step 4![]() Enter the information in the remaining tabs as necessary, then click OK to complete the task definition.
Enter the information in the remaining tabs as necessary, then click OK to complete the task definition.
Creating a Change Request Task
Use the Change Request task to request a modification to the configuration of an object or system. Change requests are used to request system enhancements, report problems with a system, or report changes from one system which affects another system.
Step 1![]() Choose Operations > Task Views > New > IT Record > Change Request.
Choose Operations > Task Views > New > IT Record > Change Request.
Step 2![]() Click the General tab and enter the required information.
Click the General tab and enter the required information.
Step 3![]() Click the Change Request tab to enter the following criteria for the task:
Click the Change Request tab to enter the following criteria for the task:
- Change request identifier—Cisco Process Orchestrator generated ID number for the change request task
- Change request class—Numeric value indicating the class of the change request
- Reason for change—Describes the business justification for the request
- Change timing—Enter the deadline date or time for the change
- Severity—Severity of the change request (High, Normal, Low)
- Automation Summary—Enter the file path for the related automation summary that was performed on the change request.
Step 4![]() Enter the information in the remaining tabs as necessary, then click OK to complete the task definition.
Enter the information in the remaining tabs as necessary, then click OK to complete the task definition.
Creating a Guided Operation Task
Use the Guided Operations activity to detail the steps a user makes when handling an assigned task.
Step 1![]() Choose Operations > Task Views > New > User Interaction > Guided Operation.
Choose Operations > Task Views > New > User Interaction > Guided Operation.
Step 2![]() Click the General tab and enter the required information.
Click the General tab and enter the required information.
Step 3![]() Click the Guided Operation tab and enter the step-by-step process for handling the task.
Click the Guided Operation tab and enter the step-by-step process for handling the task.
- Alert—Alerts reflect potential problems that a user may want to investigate and possibly diagnose the problem
- Approval Request—Specifies the message and choices for the assignee who is approving the task
- Guided Operation—Details the steps a user takes to complete an assigned task
- Incident—Task requires an operator to take action in order to resolve an issue
- Input Request—Task requires input from an individual or group
- Review—Task assigns a document for review
Step 4![]() Enter the information in the remaining tabs as necessary, then click OK to complete the task definition.
Enter the information in the remaining tabs as necessary, then click OK to complete the task definition.
Creating an Incident Task
Use the Incident task to create a create a task that requires an operator to take action in order to resolve an issue.
Click the hyperlink to display field descriptions for the appropriate tab. Click the hyperlink again to remove the displayed field descriptions.
Step 1![]() Choose Operations > Task Views > New > IT Record > Incident.
Choose Operations > Task Views > New > IT Record > Incident.
Step 2![]() Click the General tab and enter the required information.
Click the General tab and enter the required information.
Step 3![]() Click the Incident tab to enter the criteria for the incident.
Click the Incident tab to enter the criteria for the incident.
- Incident Identifier—ID of the incident
- Reporting user—User name of the individual who reported the incident and contact information of the user who called IT to report the problem
- Reporting user details—Contact information of the individual who reported the incident
- Severity—Severity of the incident (High, Normal, Low)
- Automation Summary—Enter the file path for the related automation summary that was performed on the alert
Step 4![]() Click the Affects tab to specify the elements that trigger the selected target:
Click the Affects tab to specify the elements that trigger the selected target:
–![]() Activity target—Select the activity containing the target that will be used. Only task activities will display in the list.
Activity target—Select the activity containing the target that will be used. Only task activities will display in the list.
–![]() Specific target—Specify the affected target that will be used.
Specific target—Specify the affected target that will be used.
To view the properties for the selected target, click the Properties  tool. To create a new target, click New > [Target].
–![]() Specific target group—Specify the affected target group that will be used.
Specific target group—Specify the affected target group that will be used.
To view the properties for the selected target group, click the Properties  tool. To create a new target group, click New > [Target Group].
From the Choose a target using this algorithm drop-down list, specify which target will be chosen from the eligible target group members.
–![]() Choose the target with the specified name—Runs the process on the member of the group whose name is specified in Name to match.
Choose the target with the specified name—Runs the process on the member of the group whose name is specified in Name to match.
- This applies to the following configuration item—Specify the configuration item to be used in the activity
- Name—Name of the configuration item (IT component) to which the alert pertains. For example, the name of a database server that failed or the name of a specific job that failed.
- Type—Enter the appropriate configuration item type or select the type of ITIL configuration item (IT component) from the list which the alert describes. For example, the type of the specific application element that failed (Application Server, Database, Host, or User).
- This is a CMDB reference—Indicate that the true source of the CI is in the CMDB, so the configuration item properties reference a CMDB entry.
- Object key—ID for the specific record in the CMDB that contains the configuration item
- Object source—Name for the specific record in the CMDB that contains the target configuration item
- Affected services—IT Service affected by the alert or incident
- Affected organizations—Organizations that consume the IT service affected by the alert or incident
Step 5![]() Click the Related tab to assign or modify alerts that originated the incident.
Click the Related tab to assign or modify alerts that originated the incident.
Step 6![]() Enter the information in the remaining tabs as necessary, then click OK to complete the task definition.
Enter the information in the remaining tabs as necessary, then click OK to complete the task definition.
Creating an Input Request Task
Use the Input Request task to create a set of questions requiring a user or group response in order to gather a large set of information.
Step 1![]() Choose Operations > Task Views > New > User Interaction > Input Request.
Choose Operations > Task Views > New > User Interaction > Input Request.
Step 2![]() Click the General tab and enter the required information.
Click the General tab and enter the required information.
Step 3![]() Click the Questions tab and enter the following criteria for the input request:
Click the Questions tab and enter the following criteria for the input request:
–![]() Question—Input request question
Question—Input request question
–![]() Type—Type of question (text, select, check box)
Type—Type of question (text, select, check box)
–![]() Default Value—Default answer for the question
Default Value—Default answer for the question
–![]() Text—Launches the Text Question Properties dialog box to allow the user to define a text question.
Text—Launches the Text Question Properties dialog box to allow the user to define a text question.
–![]() Hidden value text—Launches the New Hidden Text Properties dialog box to allow the user to define a question requiring an encrypted value as a response.
Hidden value text—Launches the New Hidden Text Properties dialog box to allow the user to define a question requiring an encrypted value as a response.
–![]() Check box—Launches the Check box Question Properties dialog box to allow the user to define a question utilizing a check box.
Check box—Launches the Check box Question Properties dialog box to allow the user to define a question utilizing a check box.
–![]() Select—Launches the Select Question Properties dialog box to allow the user to define a text question.
Select—Launches the Select Question Properties dialog box to allow the user to define a text question.
Step 4![]() Enter the information in the remaining tabs as necessary, then click OK to complete the task definition.
Enter the information in the remaining tabs as necessary, then click OK to complete the task definition.
Creating a Review Task
Use the Review task to submit a document for review as well as provide a message for the reviewer.
Step 1![]() Choose Operations > Task Views > New > User Interaction > Review.
Choose Operations > Task Views > New > User Interaction > Review.
Step 2![]() Click the General tab and enter the required information.
Click the General tab and enter the required information.
Step 3![]() Click the Review tab to enter the following criteria for the review request:
Click the Review tab to enter the following criteria for the review request:
C:/Documents and Settings/user name/My Documents/
Step 4![]() Enter the information in the remaining tabs as necessary, then click OK to complete the task definition.
Enter the information in the remaining tabs as necessary, then click OK to complete the task definition.
Adding a Related Task
Related tasks could be duplicates of one another or the resolution of the task is dependent on the solution of the existing task.
Step 1![]() Choose Operations > Tasks Views, highlight the appropriate task, right-click and choose Properties.
Choose Operations > Tasks Views, highlight the appropriate task, right-click and choose Properties.
Step 2![]() Click the Related tab to modify the list of tasks related to the opened task.
Click the Related tab to modify the list of tasks related to the opened task.
Step 3![]() Click Add to launch the Select Task dialog box.
Click Add to launch the Select Task dialog box.
Step 4![]() Use one of the methods to choose a category:
Use one of the methods to choose a category:
Step 5![]() Click OK to close the dialog box.
Click OK to close the dialog box.
Note![]() On the Related tab, you can click Remove to remove the task from the list. This action does not delete the task from the system.
On the Related tab, you can click Remove to remove the task from the list. This action does not delete the task from the system.
Adding an Option to the Input Request Select Question
Use the following steps to create options for the Select question. Repeat the steps for each additional option.
Step 1![]() On the New Select Properties dialog box, click New.
On the New Select Properties dialog box, click New.
Step 2![]() Enter the label name and value for the selection, then click OK.
Enter the label name and value for the selection, then click OK.
The new selection displays on the New Select Properties dialog box under the Selections area.
Assigning a Category to a Task
Step 1![]() Choose Operations > Tasks Views, highlight the appropriate task, right-click and choose Properties.
Choose Operations > Tasks Views, highlight the appropriate task, right-click and choose Properties.
Step 2![]() Click the Categories tab to modify the list of categories assigned to the task.
Click the Categories tab to modify the list of categories assigned to the task.
Step 3![]() Click Add to launch the Select Categories dialog box.
Click Add to launch the Select Categories dialog box.
Step 4![]() Use one of the methods to choose a category, then click OK.
Use one of the methods to choose a category, then click OK.
Note![]() On the Related tab, you can click Remove to remove the category from the list. This action does not delete the category from the system.
On the Related tab, you can click Remove to remove the category from the list. This action does not delete the category from the system.
Assigning a Duplicate Alert
This task can be auto-populated if the duplicate task criteria defined in the Create Alert activity has been met.
Step 1![]() Choose Operations > Tasks Views, highlight the appropriate task, right-click and choose Properties.
Choose Operations > Tasks Views, highlight the appropriate task, right-click and choose Properties.
Step 2![]() Click the Related tab to indicate the task is a duplicate of another task.
Click the Related tab to indicate the task is a duplicate of another task.
Step 3![]() Click Browse to launch the Select Tasks dialog box.
Click Browse to launch the Select Tasks dialog box.
Step 4![]() Use one of the following to choose a duplicate task, then click OK.
Use one of the following to choose a duplicate task, then click OK.
Note![]() On the Related tab, you can click Remove to remove the selected task from the field. This action does not delete the task from the system.
On the Related tab, you can click Remove to remove the selected task from the field. This action does not delete the task from the system.
Creating a Check Box Question
Use a Check Box question in an Input Request task to check a specific selection to a defined question. For example, create this task type to allow assignees to respond with an answer such as True/False or Yes/No to the question.
Step 1![]() Choose the Input Request > Questions tab, click New > Check Box.
Choose the Input Request > Questions tab, click New > Check Box.
Step 2![]() Enter the following information to create or modify questions that contain a check box:
Enter the following information to create or modify questions that contain a check box:
Step 3![]() Click OK to create the new question.
Click OK to create the new question.
The new question displays on Input Request > Questions tab under the Questions presented on the input request area.
Creating a Hidden Text Question
Use the Hidden Text Properties dialog to create or modify Hidden text questions for an input request. An example of an encrypted value includes values such as passwords.
An encrypted value will be available from the Insert Variable Reference dialog and can be used in providing a response to the Hidden text question. The encrypted value is only to be used when the question type is a Hidden text question.
Step 1![]() Choose Input Request > Questions, then click New > Hidden Text.
Choose Input Request > Questions, then click New > Hidden Text.
Step 2![]() Enter the following information for the question:
Enter the following information for the question:
Step 3![]() Click OK to create the new question.
Click OK to create the new question.
Creating a Select Question
A Select question in an Input Request task allows the user to choose a single option from a list of answers to a defined question.
Step 1![]() Choose Input Request > Questions, then click New > Select.
Choose Input Request > Questions, then click New > Select.
Step 2![]() Enter the following information to create or modify questions that contain a check box:
Enter the following information to create or modify questions that contain a check box:
–![]() Label—Input request question
Label—Input request question
–![]() Value—Default answer for the question
Value—Default answer for the question
–![]() New—Use this option to launch the Select Choice dialog box to create a selection for the input request question. For additional information, see Adding an Option to the Input Request Select Question.
New—Use this option to launch the Select Choice dialog box to create a selection for the input request question. For additional information, see Adding an Option to the Input Request Select Question.
Step 3![]() Click OK to create the new question.
Click OK to create the new question.
The new question displays on Input Request > Questions tab under the Questions presented on the input request section.
Creating a Text Question
A Text question in an Input Request task allows the user to enter a text or numeric value to the question.
Step 1![]() Choose Input Request > Questions, then click New > Text.
Choose Input Request > Questions, then click New > Text.
Step 2![]() Enter the following information for the text question:
Enter the following information for the text question:
Step 3![]() Click OK to create the new question.
Click OK to create the new question.
The new question displays on Input Request > Questions tab under the Questions presented on the input request area.
Manually Changing the Status
Step 1![]() Choose Operations > Tasks Views, then highlight the appropriate task, right-click and choose Properties.
Choose Operations > Tasks Views, then highlight the appropriate task, right-click and choose Properties.
Step 2![]() Click the General tab and enter the following information, then click OK.
Click the General tab and enter the following information, then click OK.
Modifying the Assignment Properties for a Task
Use the following steps to change the assignee or other assignment properties for the task. This includes taking ownership of the task, if necessary.
Step 1![]() Choose Operations > Tasks Views, highlight the appropriate task, right-click and choose Properties.
Choose Operations > Tasks Views, highlight the appropriate task, right-click and choose Properties.
Step 2![]() Click the Assignment tab to modify the assignment properties for the task.
Click the Assignment tab to modify the assignment properties for the task.
Step 3![]() Under Assigned to, change the list owners for the task.
Under Assigned to, change the list owners for the task.
Step 4![]() Modify the task priority, the date the task should be completed, and the expiration date, then click OK.
Modify the task priority, the date the task should be completed, and the expiration date, then click OK.
Specifying Parameters for a Task
A single task can include up to 10 parameters.
Step 1![]() Choose Operations > Tasks Views, highlight the appropriate task, right-click and choose Properties.
Choose Operations > Tasks Views, highlight the appropriate task, right-click and choose Properties.
Step 2![]() Click the Parameters tab, then click Add.
Click the Parameters tab, then click Add.
Step 3![]() Enter the appropriate information for the task, then click OK.
Enter the appropriate information for the task, then click OK.
Resolving a Task
Only users with administrative rights can update tasks from the Operations > Task view in Cisco Process Orchestrator.
Step 1![]() Choose Operations > Tasks Views, highlight the appropriate task, right-click and choose one of the following:
Choose Operations > Tasks Views, highlight the appropriate task, right-click and choose one of the following:
Step 2![]() From the Status drop-down list, choose the appropriate status for the task resolution, then click Submit.
From the Status drop-down list, choose the appropriate status for the task resolution, then click Submit.
Viewing Task History
Use the History tab to view a history of changes that have been made to the task.
Step 1![]() Choose Operations > Task, highlight the appropriate task, right-click and choose Properties.
Choose Operations > Task, highlight the appropriate task, right-click and choose Properties.
Step 2![]() Click the History tab to view the changes made to the task.
Click the History tab to view the changes made to the task.
Step 3![]() To view the audit history for a specific action, highlight the appropriate item, right-click and choose Properties to display the Audit Properties dialog box.
To view the audit history for a specific action, highlight the appropriate item, right-click and choose Properties to display the Audit Properties dialog box.
Step 4![]() Click OK to close the dialog box.
Click OK to close the dialog box.
Reversing Process Changes
This item is used when changes have been made to the process definition, but are no longer necessary. This option deletes all changes made since you last saved the process. If you have saved the process and have not made any additional changes, then no action will be taken.
To reverse process changes, choose File > Revert.
The process reverts back to the last saved version of the process. All activities, components, and other changes are removed from the process definition.
Deleting a Calendar
Choose Definitions > Calendars to delete calendars that are no longer used. Before deleting a calendar, access the properties, then select the Used By tab to view where objects are being used by the calendar. The calendar deletion process fails if the calendar is used by another object.
If the calendar definition is a core product or the user does not have the appropriate rights, the Delete option will be disabled.
Removing Dates from a Calendar List
Step 1![]() Choose Definitions > Calendars, highlight the appropriate calendar, right-click, and choose Properties.
Choose Definitions > Calendars, highlight the appropriate calendar, right-click, and choose Properties.
To remove a calendar from either list, highlight the appropriate calendar and click Remove.
Certain features of the property pages may display as display-only if the calendar definition is shipped as part of an automation pack or the user does not have the appropriate rights.
Step 2![]() Click the Dates tab, highlight the appropriate date, and drag it onto the calendar displayed to the right.
Click the Dates tab, highlight the appropriate date, and drag it onto the calendar displayed to the right.
Step 3![]() Click the Preview tab to review the schedule, then click OK.
Click the Preview tab to review the schedule, then click OK.
Applying a Value to a Target-Specific Target Property
Use the Target Values tab to specify a target property value for a specific target. This values overrides the default target property value.
Step 1![]() Choose Definitions > Target Properties, highlight the appropriate target property, right-click and choose Properties.
Choose Definitions > Target Properties, highlight the appropriate target property, right-click and choose Properties.
Step 2![]() Click the Target Values tab to specify a target property value for a specific target.
Click the Target Values tab to specify a target property value for a specific target.
Step 3![]() Click New to launch the Target Properties dialog box.
Click New to launch the Target Properties dialog box.
Step 4![]() To add a specific target to the target property, click Add to launch the Select Targets dialog box.
To add a specific target to the target property, click Add to launch the Select Targets dialog box.
Step 5![]() On the Select Targets dialog box, select the targets to be added to the target property.
On the Select Targets dialog box, select the targets to be added to the target property.
Step 6![]() Use the Value field to modify the value assigned to the targets assigned to the target property. The fields displayed depend on the type of extended target property.
Use the Value field to modify the value assigned to the targets assigned to the target property. The fields displayed depend on the type of extended target property.
Step 7![]() Click OK to close the dialog box.
Click OK to close the dialog box.
Viewing Target Properties
Use the Definitions—Target Properties view to access the properties of the target property.
Step 1![]() Choose Definitions > Target Properties, highlight the appropriate target property, right-click and choose Properties.
Choose Definitions > Target Properties, highlight the appropriate target property, right-click and choose Properties.
Step 2![]() Click the General tab to view information such as Target name, owner, data type, and description.
Click the General tab to view information such as Target name, owner, data type, and description.
Step 3![]() Click the Group tab to view information about the primary property group name, secondary property group name, and the grouping index.
Click the Group tab to view information about the primary property group name, secondary property group name, and the grouping index.
Step 4![]() Click the Target Types tab to view the information about the Target types that are chosen.
Click the Target Types tab to view the information about the Target types that are chosen.
Inserting Reference Variables
The Reference  icon displayed next to a text field indicates that the field can be populated by referencing a defined variable or the property of another activity or process. Use the Insert Variable Reference dialog box to select a defined variable or reference an object to populate a field. The OK button does not activate until a valid property or variable is selected.
Depending on the object type, some of these variables might not be available.
 Feedback