- Preface
- Product Overview
- Graphical User Interface
- Device and Subdevice Manager
- Users Account Manager
- Configuration and Image Update Jobs Manager
- Groups
- Namespace Manager
- Query Manager
- Data Manager
- Directory Manager
- Parameters Manager
- Templates
- Security Manager
- Log Manager
- Service Manager
- Bulk Data Manager
- Email Manager
- Image Service
- Upgrade or Downgrade Cisco IOS Image
- Backup and Restore
- PIX Firewall Device Support
- ASA Firewall Device Support
- IMGW Device Module Development Kit
- Troubleshooting
- Software Licenses and Acknowledgements
- Index
Cisco Configuration Engine Administration Guide 3.5.4
Bias-Free Language
The documentation set for this product strives to use bias-free language. For the purposes of this documentation set, bias-free is defined as language that does not imply discrimination based on age, disability, gender, racial identity, ethnic identity, sexual orientation, socioeconomic status, and intersectionality. Exceptions may be present in the documentation due to language that is hardcoded in the user interfaces of the product software, language used based on RFP documentation, or language that is used by a referenced third-party product. Learn more about how Cisco is using Inclusive Language.
- Updated:
- April 10, 2014
Chapter: Directory Manager
Directory Manager

Note Directory Manager can be accessed only when operating in Internal Directory mode.
To access Directory management tasks, log into the system (see “Logging In” section). Then, from the Home page, click the Tools tab. The Tools page appears.
Editing Schema
Step 1![]() From the Directory Manager page, click
Edit Schema
.
From the Directory Manager page, click
Edit Schema
.
The schema editor appears (see Figure 10-1).
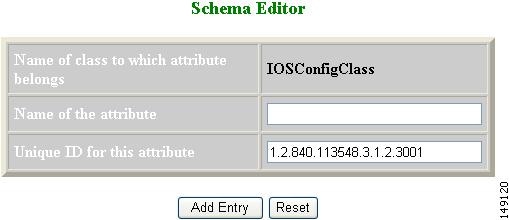
Step 2![]() Enter the name of the new attribute.
Enter the name of the new attribute.
Table 10-1 shows valid values for these fields.
Step 3![]() Accept or modify the
Unique ID
for this attribute.
Accept or modify the
Unique ID
for this attribute.
Step 4![]() To clear your entries, click
Reset
.
To clear your entries, click
Reset
.
Step 5![]() To add this attribute to the schema, click
Add Entry
.
To add this attribute to the schema, click
Add Entry
.
Importing Schema
You can import a schema accessible from your computer. However, the file must be in XML format and conform to the definitions specified in the document type definition (DTD) file shown here:
For example, a valid schema would look like:
Step 1![]() From the Directory Manager page, click
Import Schema
.
From the Directory Manager page, click
Import Schema
.
The import schema dialog box appears (see Figure 10-2).
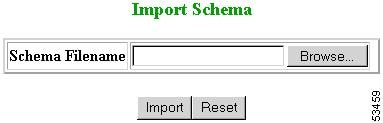
Step 2![]() Enter the filename of the schema you want to import in the
Schema Filename
field.
Enter the filename of the schema you want to import in the
Schema Filename
field.
Table 10-2 shows valid values for these fields.
Use the browse function to locate the file, if needed.
Step 3![]() To clear your entries, click
Reset
.
To clear your entries, click
Reset
.
Step 4![]() To import the file, click
Import
.
To import the file, click
Import
.
 Feedback