Manage user access
In CWM, you can manage user access via NxF which adds a layer of security and works as a Single Authentication Agent, thus sharing local, LDAP, and SAML users.
NxF functionality in CWM
NxF functionality is available for admin users from the Settings tab in the CWM UI. To access NxF functionality in CWM:
Procedure
|
Step 1 |
In CWM, go to the outermost navigation menu on the left. |
|
Step 2 |
Click the Settings icon. 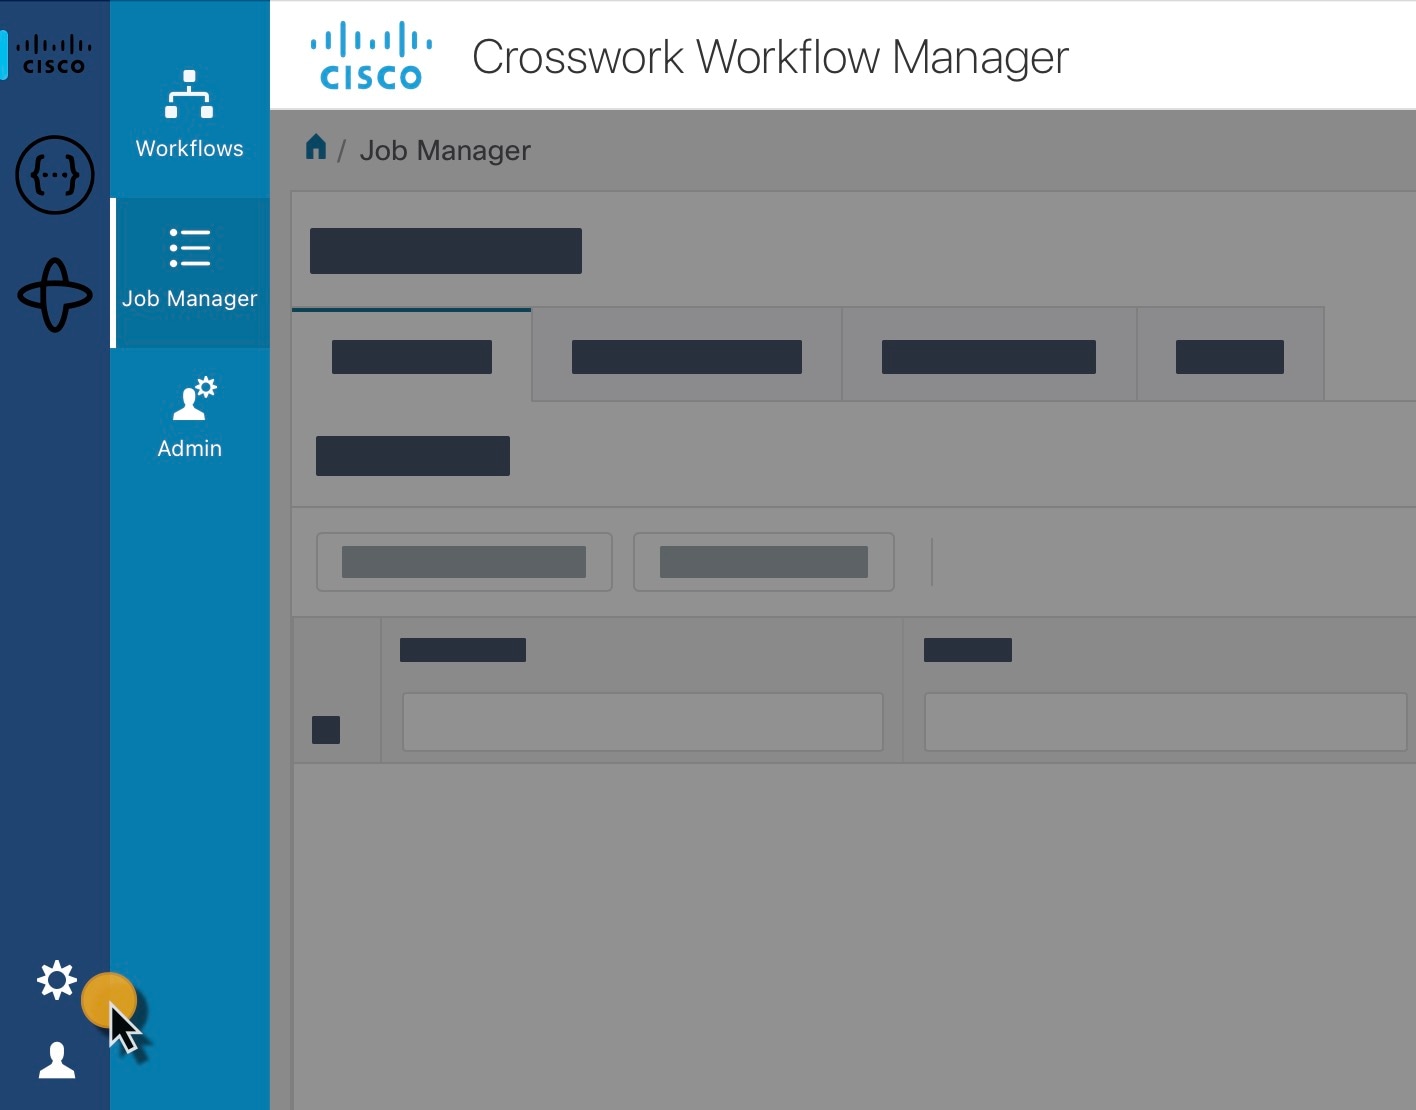
|
|
Step 3 |
In the expanded drawer, you can find the following: 
|
Add local user
Procedure
|
Step 1 |
In CWM, go to the outermost navigation menu on the left. |
|
Step 2 |
Navigate to CWM (Cisco icon) -> Local Users tab. |
|
Step 3 |
Click Add... |
|
Step 4 |
In the Add User panel, fill in the mandatory fields (marked with an asterisk): Username (used to log in to the CWM), Password,
Confirm Password and Access Permissions (enter 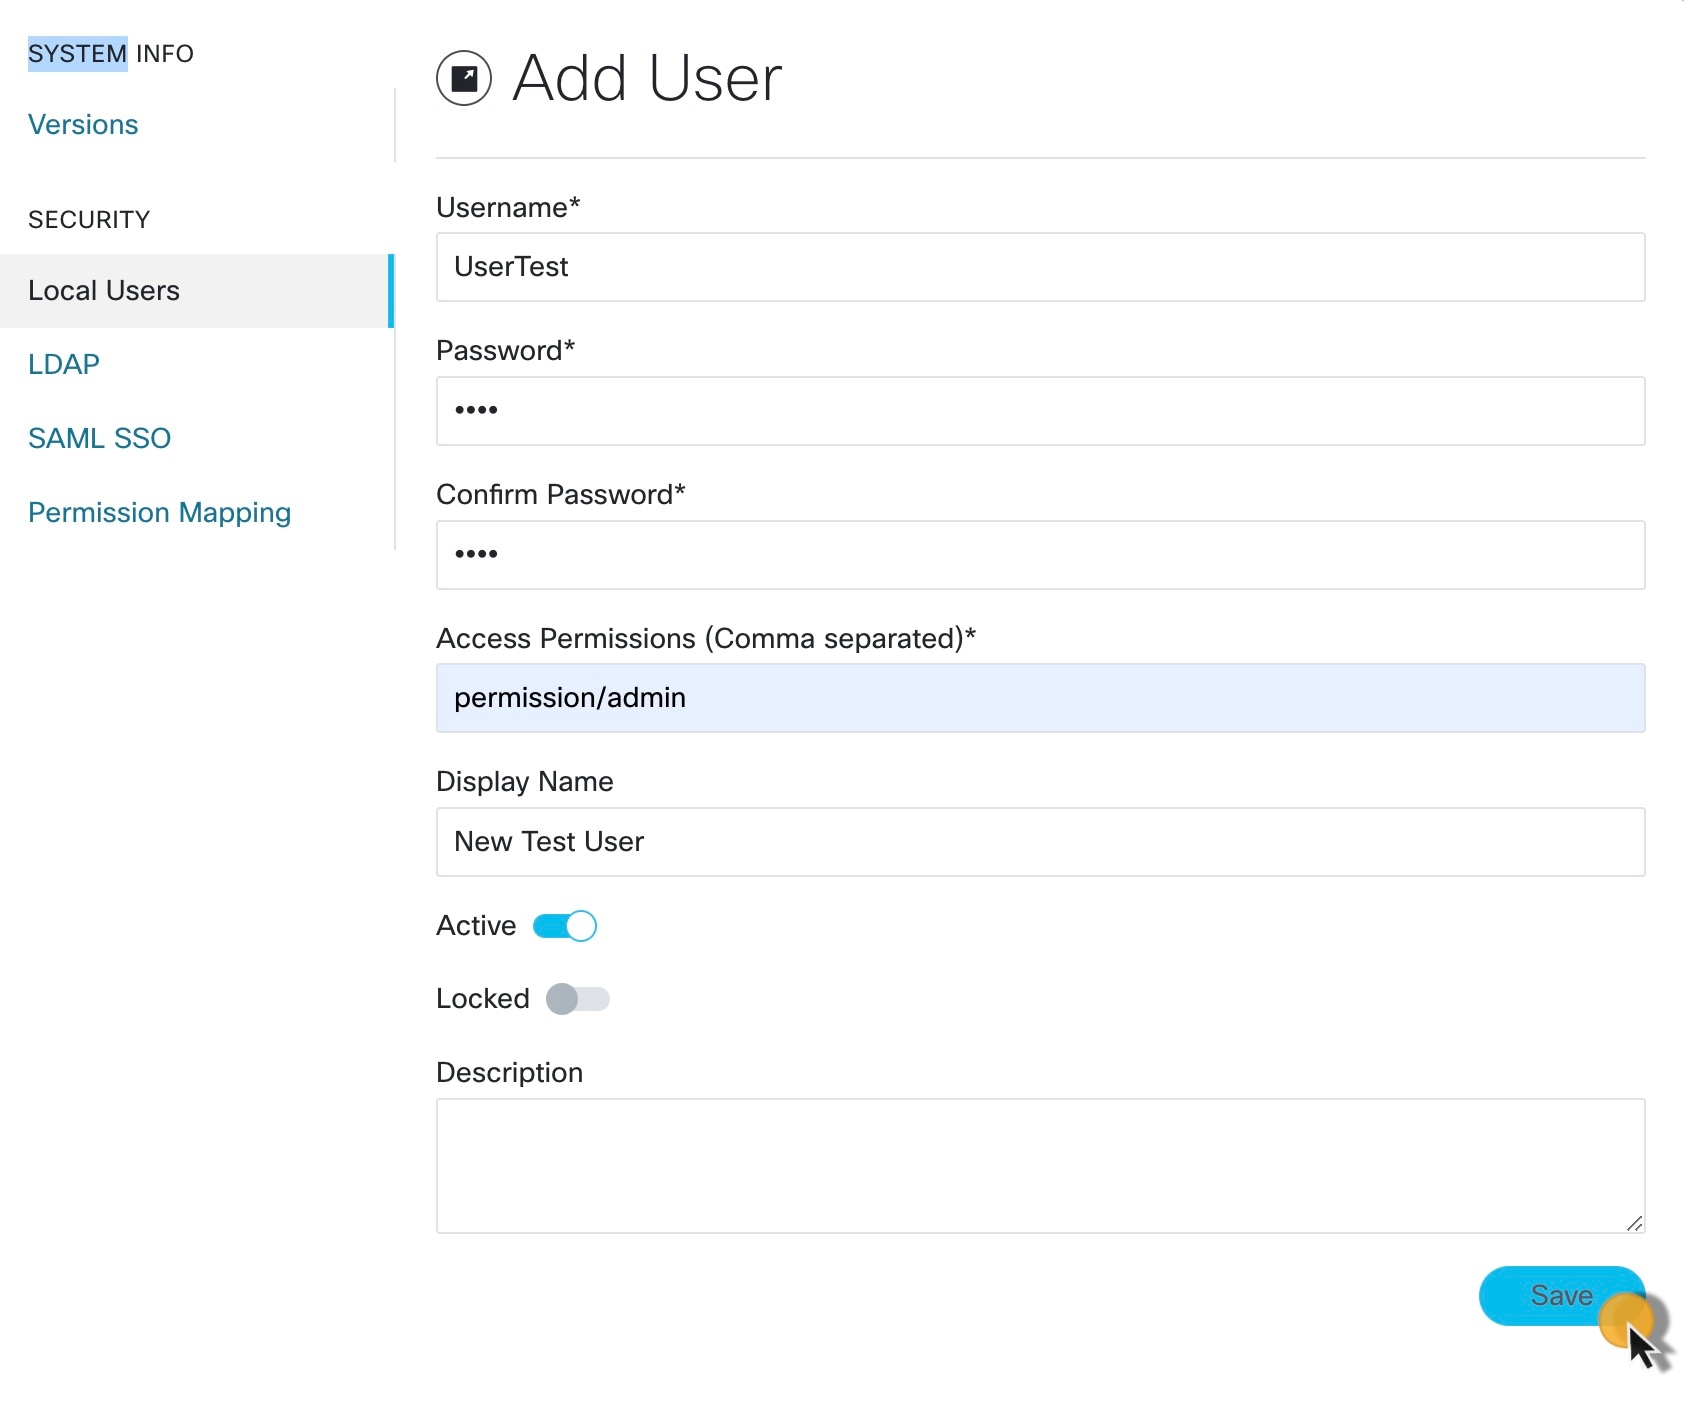
|
|
Step 5 |
Use radio buttons to set the user status. You can make both radio buttons disabled or enabled at the same time.
|
|
Step 6 |
Click Save. |
Set up authentication via LDAP
Besides supporting local users, CWM allows adding LDAP users through integration with LDAP (Lightweight Directory Access Protocol) servers.
Procedure
|
Step 1 |
In CWM, go to the outermost navigation menu on the left. |
|
Step 2 |
Navigate to CWM (Cisco icon) -> LDAP tab. |
|
Step 3 |
Click the Enabled radio button. |
|
Step 4 |
Fill in the mandatory fields (marked with an asterisk): LDAP Server Address, Bind DN, Bind Credentials and Search Filter. Search Base and Root CAs are optional. 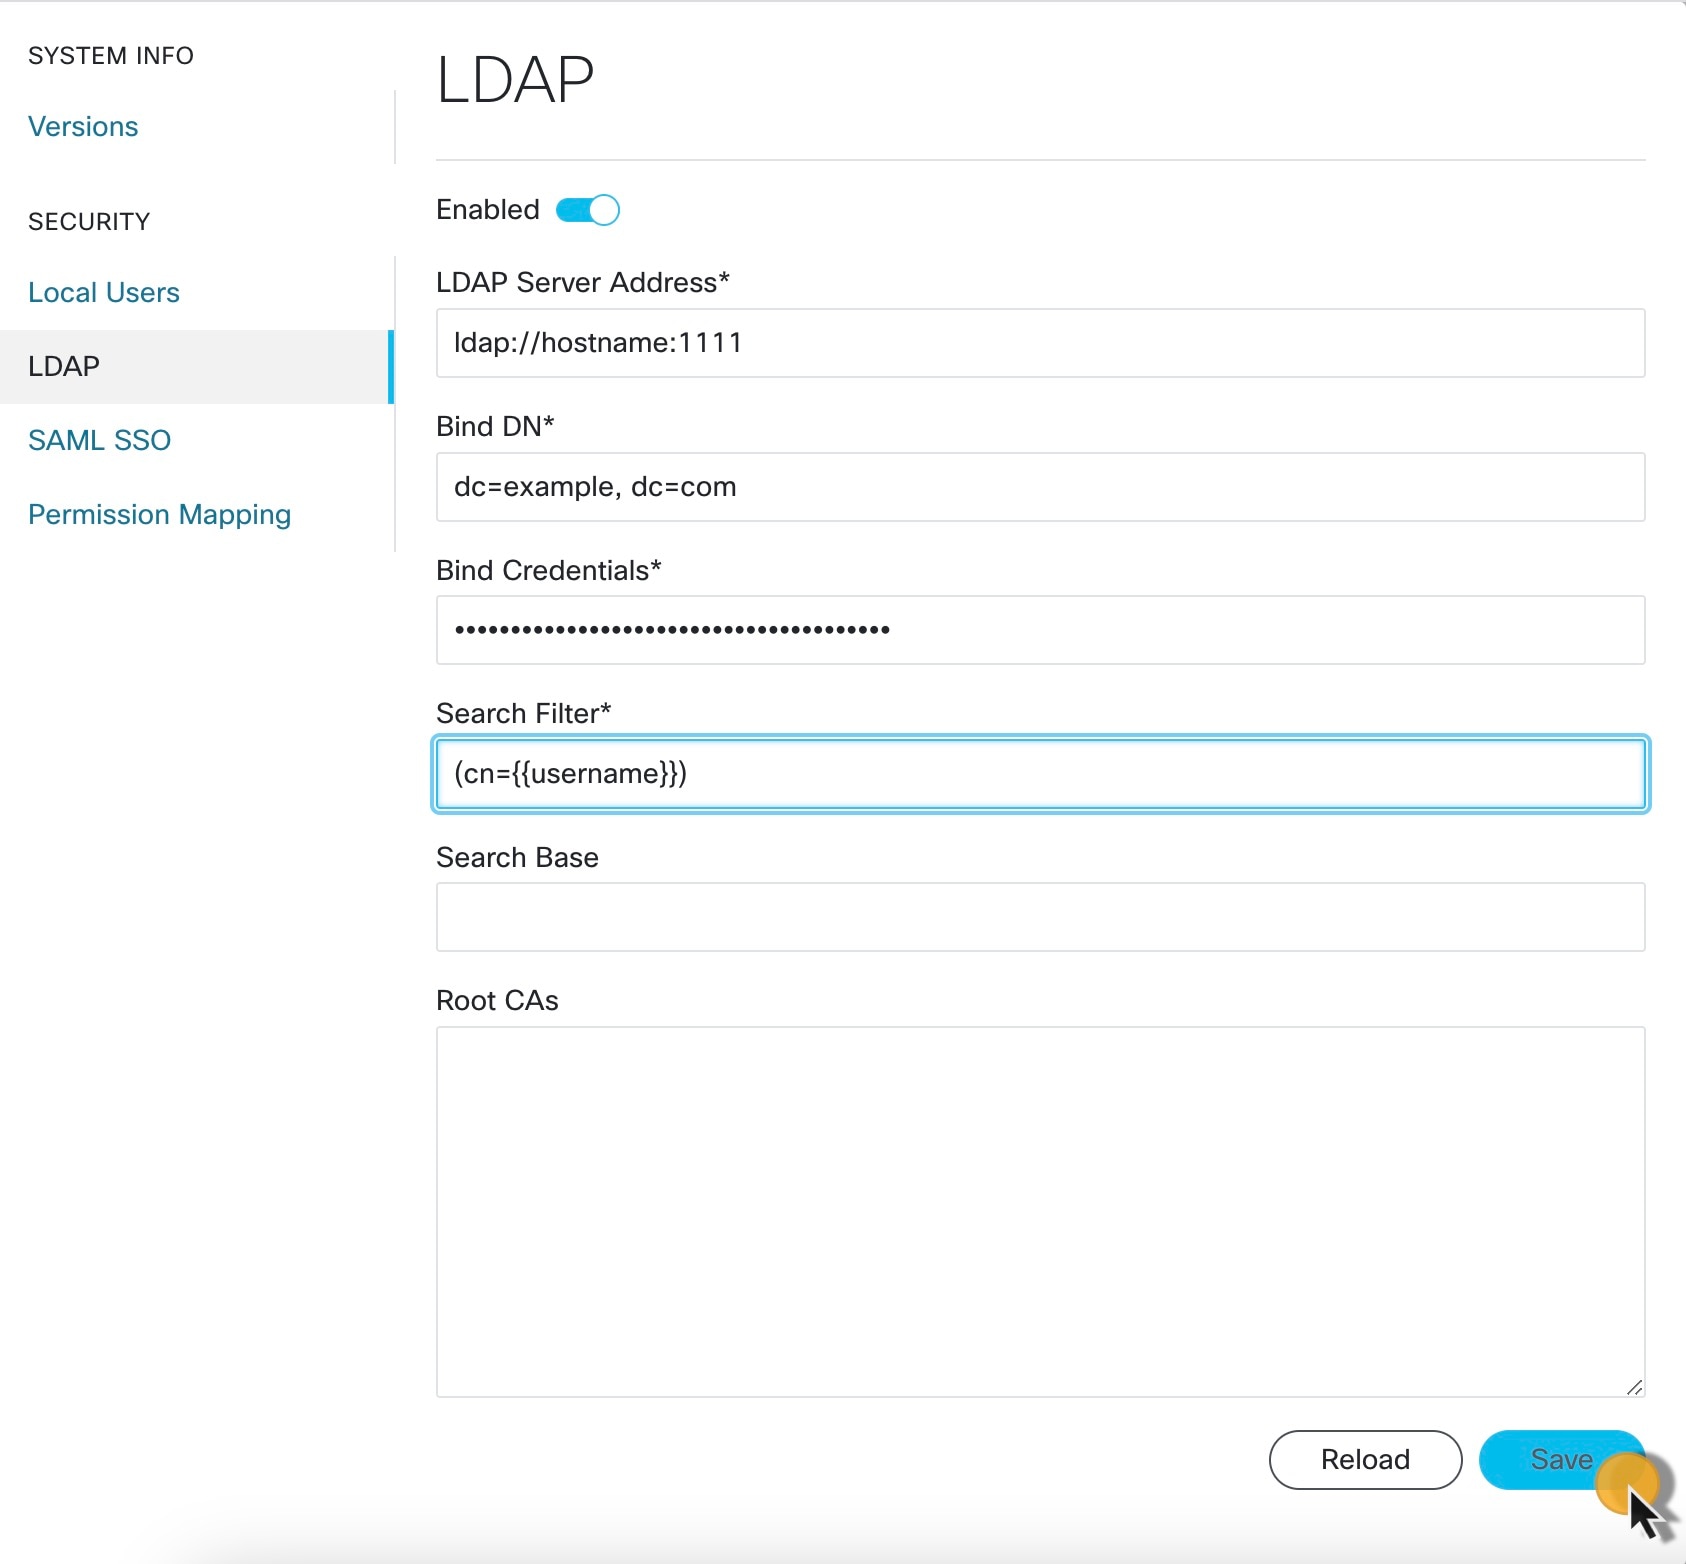
|
|
Step 5 |
Click Save. |
Set up authentication via SAML SSO
CWM offers SAML SSO feature that supports both LDAP and non-LDAP users to gain single sign-on access based on the protocol SAML (Security Assertion Markup Language). You can enable SAML SSO for CWM along with LDAP or without it.
Procedure
|
Step 1 |
In CWM, go to the outermost navigation menu on the left. |
|
Step 2 |
Navigate to CWM (Cisco icon) -> SAML SSO tab. |
|
Step 3 |
Click the Enabled radio button. |
|
Step 4 |
Fill in the mandatory fields: Login URL, Entity ID, Base URL, Signing Certificate and Groups Attribute Name. 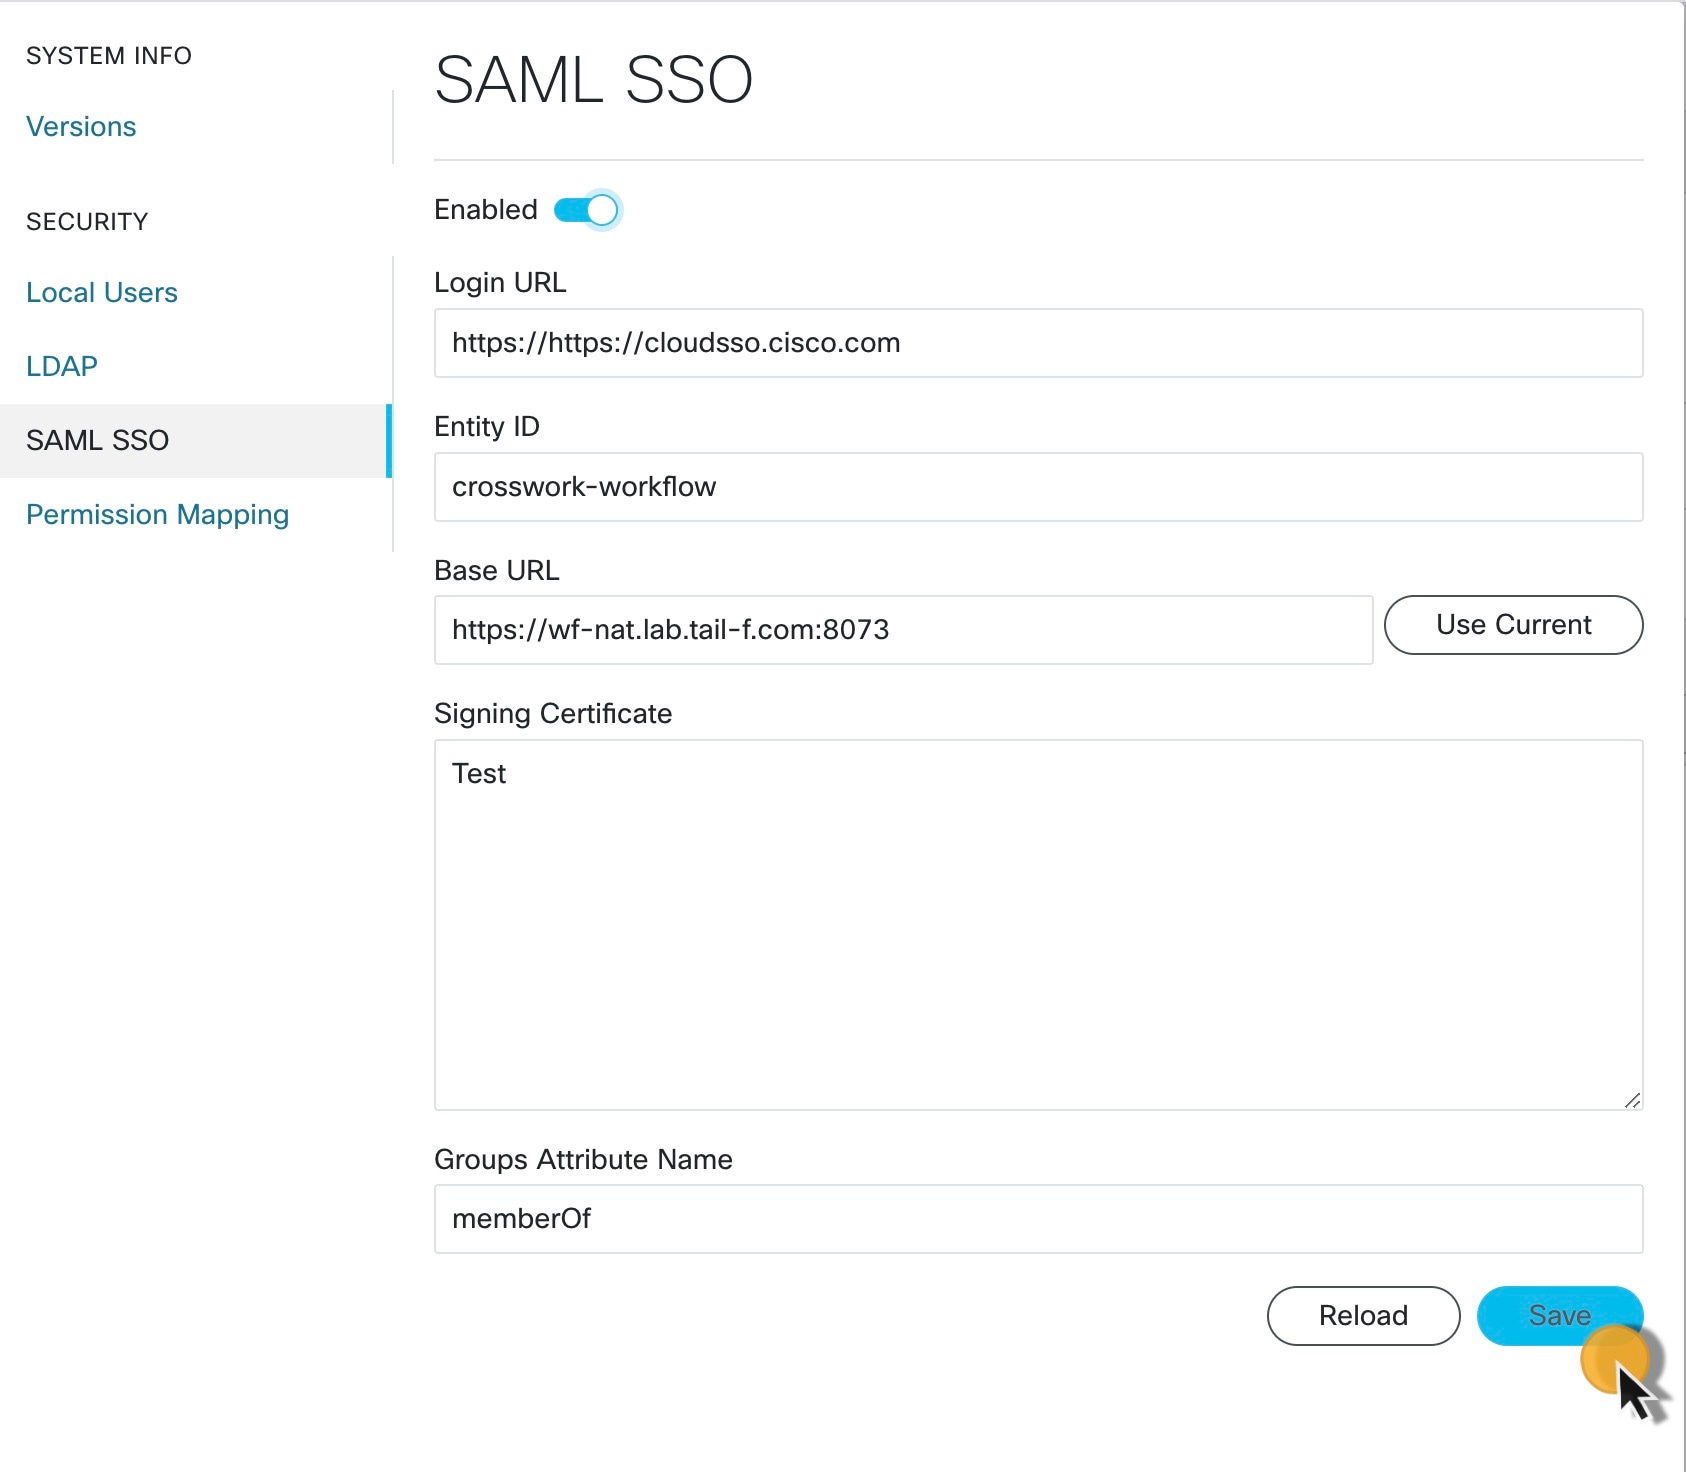
|
|
Step 5 |
Click Save. |
Set up permission mapping
You can give specific permissions to a group of users via Cisco Policy Management Tool (PMT).
Procedure
|
Step 1 |
In CWM, go to the outermost navigation menu on the left. |
|
Step 2 |
Navigate to CWM (Cisco icon) -> Permission Mapping tab. |
|
Step 3 |
Click Add.... |
|
Step 4 |
In the Add Permission Mapping panel, choose one Mapping Type from the dropdown menu: SAML User, SAML Group, LDAP User, or LDAP Group. 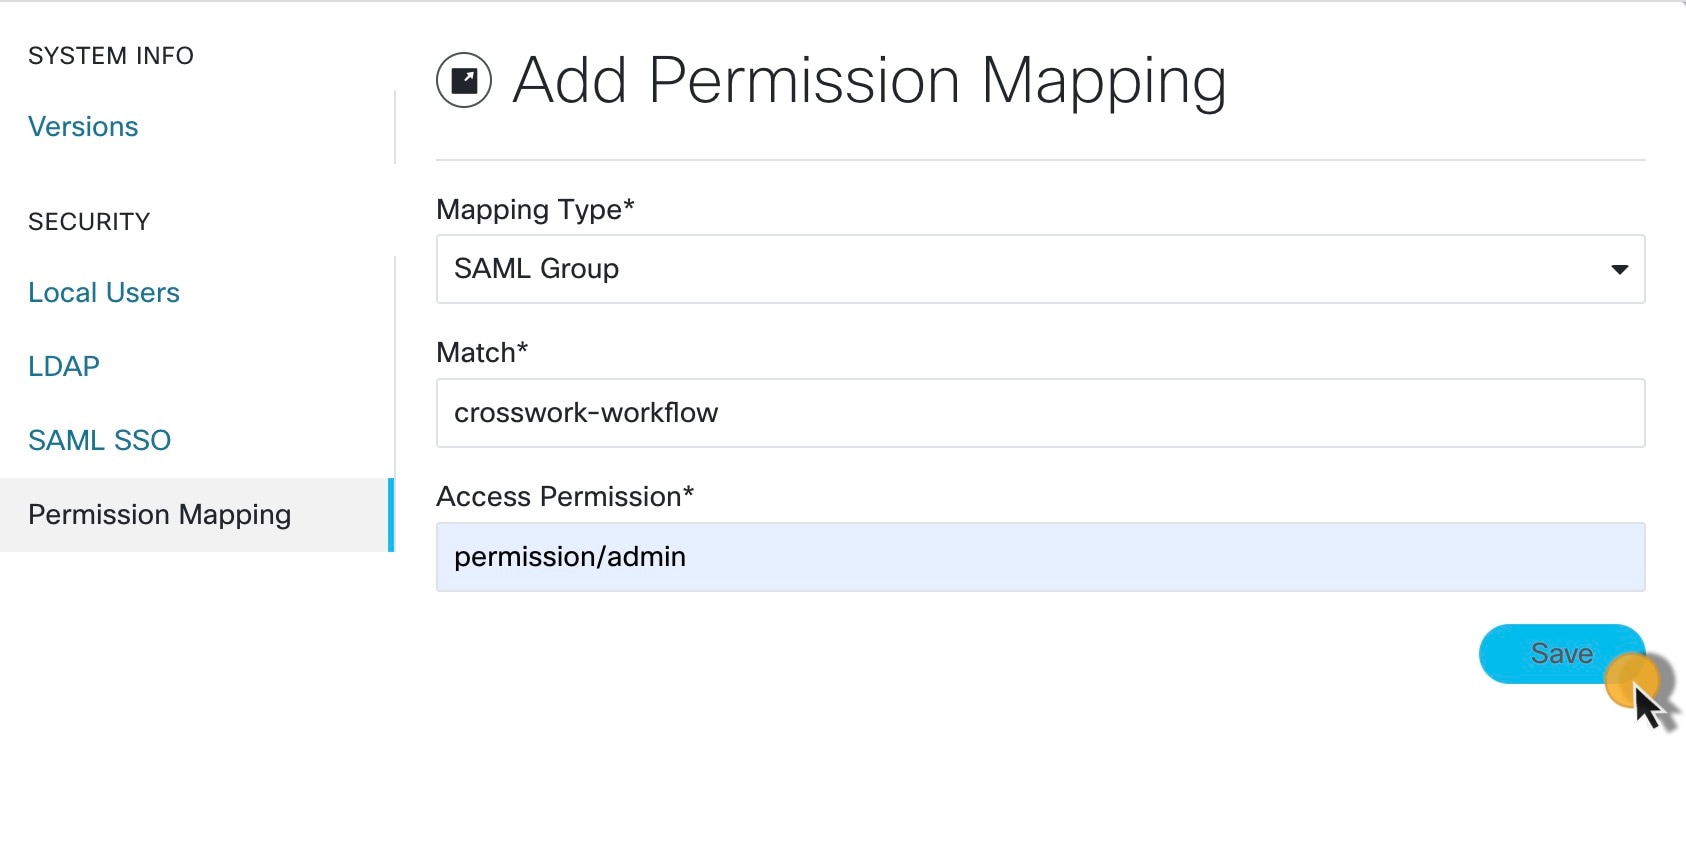
|
|
Step 5 |
Fill in the Match field with the entry from the Cisco Policy Management Tool. You can find the match in PMT UI -> OAuth Clients tab -> Client ID Column. |
|
Step 6 |
Enter appropriate permission (for example |
|
Step 7 |
Click Save. |
 Feedback