Release 4.0: Cisco StadiumVision Director Server Administration Guide
Bias-Free Language
The documentation set for this product strives to use bias-free language. For the purposes of this documentation set, bias-free is defined as language that does not imply discrimination based on age, disability, gender, racial identity, ethnic identity, sexual orientation, socioeconomic status, and intersectionality. Exceptions may be present in the documentation due to language that is hardcoded in the user interfaces of the product software, language used based on RFP documentation, or language that is used by a referenced third-party product. Learn more about how Cisco is using Inclusive Language.
- Updated:
- May 2, 2015
Chapter: Configuring the Cisco StadiumVision Director Remote Servers
- Contents
- Prerequisites for Configuring Cisco StadiumVision Director Remote Servers
- Information About Configuring Cisco StadiumVision Director Remote Servers
- How to Configure Cisco StadiumVision Director Remote Servers
- What To Do Next
Configuring Cisco StadiumVision Director Remote Servers
First Published: March 20, 2015
In Cisco StadiumVision Director Release 3.1 and later releases, a centralized server site can be deployed with multiple remote sites in a multi-venue architecture. This document is intended for Cisco StadiumVision Director administrators and describes how to configure the initial setup of Cisco StadiumVision Director Remote server network connectivity and communication with the Cisco StadiumVision Director server.
Contents
Prerequisites for Configuring Cisco StadiumVision Director Remote Servers
Before you configure Cisco StadiumVision Director remote servers, be sure that the following requirements are met:
- The Cisco StadiumVision Director Remote server hardware and software is installed. For more information, see the Cisco StadiumVision Director Remote Installation and Upgrade Guide.
- The Cisco StadiumVision Director Server is installed and you know the IP address.
- You understand the use of the global credential for Management Dashboard monitoring, and you have determined a common password for use by all remote servers, or unique passwords for each venue. The JMX password must be a minimum length of 6 characters.
- You know the time zones where the remote servers are installed and the NTP source address (if used).
- You have either physical console access or an SSH client such as PuTTY to log into both the Cisco StadiumVision Director and Cisco StadiumVision Director Remote servers.
- You know the installer account credentials on the Cisco StadiumVision Director and Cisco StadiumVision Director Remote servers.
- You understand how to use the Text Utility Interface (TUI). For more information, see the Cisco StadiumVision Director Server Text Utility Interface. For simplicity in these tasks, the instruction to “select” a particular menu item implies that you type the character that corresponds to the menu option and press Enter.
Information About Configuring Cisco StadiumVision Director Remote Servers
This section includes the following topics:
Management Dashboard Monitoring and the Global Credential
The centralized Cisco StadiumVision Director server is configured by default to use a global account for communication with all Cisco StadiumVision Director Remote servers to support monitoring of venues from the Management Dashboard. Using the default configuration, you can specify a common password to be used by all Cisco StadiumVision Director Remote servers.
You can change the default configuration and specify a unique password for each remote server. To do this, you must modify the global credential on the Cisco StadiumVision Director server, and then configure a password in the Venues interface from the Control Panel on the Cisco StadiumVision Director server.
Whether you are using a common or unique password, the remote server must be configured to use the same password that is configured on the Cisco StadiumVision Director server for that venue.

Note![]() The global credential is not a user password for the remote server.
The global credential is not a user password for the remote server.
Main Menu Applications
The Cisco StadiumVision Director Remote server supports the following applications from its Main Menu using the admin user credential:
The System State Report feature enables easy capture and export of system state data for Cisco StadiumVision servers. This information can be sent to a remote support engineer to help troubleshoot any issues that occur with the system. For more information, see the System State Reports.
Allows you to install ISO files for fresh installs or upgrades after the first installation of Cisco StadiumVision Director Remote software.
Note![]() Installation of language packs and custom fonts are not supported for Cisco StadiumVision Director Remote Release 3.2.
Installation of language packs and custom fonts are not supported for Cisco StadiumVision Director Remote Release 3.2.
The Main Menu is accessible with HTTP or HTTPS access using a web browser and specifying the IP address of the remote server.
To use these applications, the admin user password must be configured from the TUI System Accounts menu after Cisco StadiumVision Director Remote is installed.
How to Configure Cisco StadiumVision Director Remote Servers
This section includes the following tasks:
- Configuring Connectivity to the Cisco StadiumVision Director Server (required)
- Configuring the Admin Password (required)
- Configuring the Date and Time Options on the Remote Server (required)
Configuring Connectivity to the Cisco StadiumVision Director Server
Configuring the Cisco StadiumVision Director Server IP Address on the Remote Server
To configure the Cisco StadiumVision Director Server IP address on the remote server, complete the following steps:
Step 1![]() From the TUI Network Settings menu, select the Setup StadiumVision Director Address option.
From the TUI Network Settings menu, select the Setup StadiumVision Director Address option.
Step 2![]() At the prompt, type the IP address (or host name) of the Cisco StadiumVision Director server and press Enter.
At the prompt, type the IP address (or host name) of the Cisco StadiumVision Director server and press Enter.

Tip To exit without configuring the IP address, do not type anything and simply press Enter to cancel.
Step 3![]() Press any key to return to the Network Settings menu.
Press any key to return to the Network Settings menu.
Step 4![]() Return to the Main Menu.
Return to the Main Menu.
Step 5![]() Restart the Cisco StadiumVision Director Remote services by going to StadiumVision Remote Server Administration > Restart StadiumVision Remote Software.
Restart the Cisco StadiumVision Director Remote services by going to StadiumVision Remote Server Administration > Restart StadiumVision Remote Software.
Configuring the Global Credential on the Cisco StadiumVision Director Server
The global credential configuration on the Cisco StadiumVision Director Server determines how JMX account passwords are configured to support Management Dashboard monitoring of remote venues.
Note![]() The global credential is not a user account for the remote server.
The global credential is not a user account for the remote server.
You can configure a common or unique password:
- Configuring a Common Password on the Cisco StadiumVision Director Server for all Remote Servers
- Configuring a Unique Password on the Cisco StadiumVision Director Server for Each Remote Server
Note![]() Be sure to note the password that you configure on the Cisco StadiumVision Director server to be sure that you configure the same one on the applicable remote servers.
Be sure to note the password that you configure on the Cisco StadiumVision Director server to be sure that you configure the same one on the applicable remote servers.
Configuring a Common Password on the Cisco StadiumVision Director Server for all Remote Servers
To configure a common password on the Cisco StadiumVision Director server for all remote servers, complete the following steps:
Step 1![]() Log into the Cisco StadiumVision Director server as an administrator.
Log into the Cisco StadiumVision Director server as an administrator.
Step 2![]() Go to the Management Dashboard.
Go to the Management Dashboard.
Step 3![]() Click SV Director Configuration > System
Click SV Director Configuration > System![]() Configuration > StadiumVision Remote.
Configuration > StadiumVision Remote.
Step 4![]() Confirm that the Use Global JMX credentials? property is set to Yes. This is the default.
Confirm that the Use Global JMX credentials? property is set to Yes. This is the default.
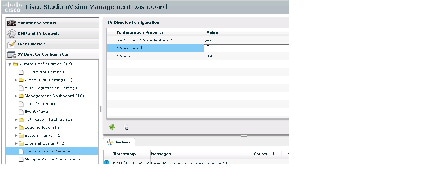
Step 5![]() In the JMX Password property value box, type the password (minimum of 6 characters) that you want to use for all remote servers (Figure 1).
In the JMX Password property value box, type the password (minimum of 6 characters) that you want to use for all remote servers (Figure 1).
Note![]() This password will be auto-populated when you add new venues in the Control Panel.
This password will be auto-populated when you add new venues in the Control Panel.
Figure 1 Global JMX Account Password on the Cisco StadiumVision Director Server
Step 6![]() Click the disk icon to save the configuration (Figure 2).
Click the disk icon to save the configuration (Figure 2).

Configuring a Unique Password on the Cisco StadiumVision Director Server for Each Remote Server
To configure a unique password on the Cisco StadiumVision Director Server for each remote server, complete the following steps:
Step 1![]() Log into the Cisco StadiumVision Director server as an administrator.
Log into the Cisco StadiumVision Director server as an administrator.
Step 2![]() Go to the Management Dashboard.
Go to the Management Dashboard.
Step 3![]() Click SV Director Configuration > System
Click SV Director Configuration > System![]() Configuration > StadiumVision Remote.
Configuration > StadiumVision Remote.
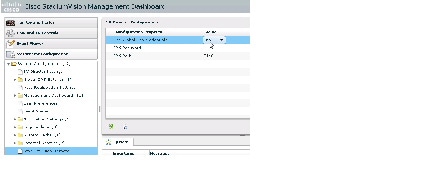
Step 4![]() In the Use Global JMX credentials? property, click the arrow and select No in the drop-down box (Figure 3).
In the Use Global JMX credentials? property, click the arrow and select No in the drop-down box (Figure 3).
Figure 3 Disable the Global Credential on the Cisco StadiumVision Director Server
Step 5![]() Click the Refresh Property Values icon.
Click the Refresh Property Values icon.
Step 6![]() Exit the Management Dashboard.
Exit the Management Dashboard.
Step 7![]() Go to Control Panel > Setup > Venues.
Go to Control Panel > Setup > Venues.
Note![]() To complete this configuration on the Cisco StadiumVision Director server, you must enable the system to support multiple venues and configure them in the Control Panel. For more information on venue configuration, see the Configuring Cisco StadiumVision Director for Multiple Venue Support.
To complete this configuration on the Cisco StadiumVision Director server, you must enable the system to support multiple venues and configure them in the Control Panel. For more information on venue configuration, see the Configuring Cisco StadiumVision Director for Multiple Venue Support.
Step 8![]() Add a new venue (or select an existing name from the Venue list) and specify the required Name, Time zone, and remote server IP address.
Add a new venue (or select an existing name from the Venue list) and specify the required Name, Time zone, and remote server IP address.
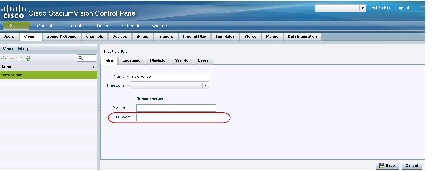
Step 9![]() In the remote server Password box, type the unique password (minimum of 6 characters) for this venue (Figure 4).
In the remote server Password box, type the unique password (minimum of 6 characters) for this venue (Figure 4).
Tip Although you can always configure this option, it is only used when the “Use JMX Global credentials property?” is set to No in the Management Dashboard.
Figure 4 Remote Server Password Configuration
Setting the JMX Account Password on the Cisco StadiumVision Director Remote Server
To set up the capability for monitoring of the Cisco StadiumVision Director Remote server by the central Cisco StadiumVision Director server, the JMX account password on the remote server must be configured to match the configuration on the Cisco StadiumVision Director server.
To change the JMX account password on the Cisco StadiumVision Director Remote server, complete the following steps:
Step 1![]() Log into the TUI as installer on the remote server using a directly-connected console or SSH client.
Log into the TUI as installer on the remote server using a directly-connected console or SSH client.
The TUI Main Menu is displayed.
Step 2![]() From the Main Menu, go to System
From the Main Menu, go to System![]() Accounts > Change JMX password.
Accounts > Change JMX password.
Tip To navigate through the TUI menus you must type the character that corresponds to the menu area where you want to go (a, b, c, and so on) and press Enter.
To return to other menus, you must back out of the hierarchy of menus using one of the indicated keys to return you to prior menus.
Step 3![]() At the new password prompt, type the password that you configured on the Cisco StadiumVision Director server for this venue and press Enter.
At the new password prompt, type the password that you configured on the Cisco StadiumVision Director server for this venue and press Enter.
Note![]() To cancel the password configuration, do not enter any characters when prompted and simply press Enter.
To cancel the password configuration, do not enter any characters when prompted and simply press Enter.
Step 4![]() At the confirm new password prompt, re-type the same password and press Enter.
At the confirm new password prompt, re-type the same password and press Enter.
Tip If the passwords do not match, you will be prompted to retry by typing Y, or N to cancel.
Step 5![]() Press any key to return to the System Accounts menu.
Press any key to return to the System Accounts menu.
Tip If you have not yet configured the Admin user password, consider doing that now from the System Accounts menu before restarting the Cisco StadiumVision Remote software. The Admin user account must be configured to enable access to the Main Menu applications.
Step 6![]() Return to the Main Menu.
Return to the Main Menu.
Step 7![]() Restart the Cisco StadiumVision Director Remote services by going to StadiumVision Remote Server Administration > Restart StadiumVision Remote Software.
Restart the Cisco StadiumVision Director Remote services by going to StadiumVision Remote Server Administration > Restart StadiumVision Remote Software.
Configuring the Admin Password
The admin system account password must be configured after you install Cisco StadiumVision Director Remote Release 3.2 for the first time. This credential is needed to authenticate access to the System State Report and Software Manager applications from the Main Menu.
To configure the admin password, complete the following steps:
Step 1![]() Log into the TUI as installer on the remote server using a directly-connected console or SSH client.
Log into the TUI as installer on the remote server using a directly-connected console or SSH client.
The TUI Main Menu is displayed.
Step 2![]() From the Main Menu, go to System
From the Main Menu, go to System![]() Accounts > Change admin password.
Accounts > Change admin password.
Tip To navigate through the TUI menus you must type the character that corresponds to the menu area where you want to go (a, b, c, and so on) and press Enter.
To return to other menus, you must back out of the hierarchy of menus using one of the indicated keys to return you to prior menus.
Step 3![]() At the new password prompt, type a password and press Enter.
At the new password prompt, type a password and press Enter.
Note![]() To cancel the password configuration, do not enter any characters when prompted and simply press Enter.
To cancel the password configuration, do not enter any characters when prompted and simply press Enter.
Step 4![]() At the confirm new password prompt, re-type the same password and press Enter.
At the confirm new password prompt, re-type the same password and press Enter.
Tip If the passwords do not match, you will be prompted to retry by typing Y, or N to cancel.
Step 5![]() Press any key to return to the System Accounts menu.
Press any key to return to the System Accounts menu.
Step 6![]() Return to the Main Menu.
Return to the Main Menu.
Configuring the Date and Time Options on the Remote Server
When you install or upgrade the Cisco StadiumVision Director Remote servers, you need to configure the system date and time. This can be done in the TUI to either reference an NTP server (recommended), or manually set the date and time. You also need to configure the time zone.
For detailed information about how to configure the date and time options, see the “Configuring the System Date and Time Using NTP on Cisco StadiumVision Servers” section of the “Configuring the Cisco StadiumVision Director Server System Settings” module.
What To Do Next
After you have configured your Cisco StadiumVision Director remote servers, see the Configuring Cisco StadiumVision Director for Multiple Venue Support for information about how to set up Cisco StadiumVision Director for operation in multiple venues.
 Feedback