Configuring NAT and Static NAT on the RV160 and RV260
Available Languages
Objective
Introduction
In a network, each device is assigned its own internal IP address. They often follow a 10.x.x.x, 172.16.x.x – 172.31.x.x, or 192.168.x.x pattern. These addresses are only visible inside a network, between devices, and are considered private. There are millions of locations that might have the same pool of internal IP addresses as your business. It doesn’t matter, they are only used within their own private network so there is no conflict.
Only Wide Area Network (WAN) addresses can talk to each other across the internet. Each WAN address has to be unique. In order for devices inside a network to be able to send and receive information over the internet, you must have a router at the edge of your network that can conduct Network Address Translation (NAT).
A router receives a WAN address through an Internet Service Provider (ISP). The router comes with NAT capability that takes traffic leaving the network, translates the private address to the public WAN address, and sends it out across the internet. It does the reverse when receiving traffic.
This was set up because there are not enough permanent IPv4 addresses available for all of the devices in the world. The benefit of NAT is that it provides additional security by effectively hiding the entire internal network behind that one unique public IP address.
Internal IP addresses often stay the same, but if unplugged for a while, configured a certain way, or reset to factory default, it may not. You can configure the internal IP address to stay the same by configuring static Dynamic Host Configuration Protocol (DHCP) on the RV160 and RV260.
Public IP addresses are not guaranteed to stay the same either, unless you pay to have a static public IP address through your ISP. Many companies pay for this service so their employees and customers have a more reliable connection to their servers (web, mail, VPN, etc.).
Static NAT maps a one-to-one translation of the private IP addresses to the public IP addresses. It creates a fixed translation of private addresses to the public addresses. This means that you would need an equal amount of public addresses as private addresses. This is useful when a device needs to be accessible from outside the network.
To learn how to configure Policy NAT on the RV160 and RV260, click here.
Applicable Devices
· RV160
· RV260
Software Version
· 1.0.0.13
Table of Contents
1. Configuring Network Address Translation (NAT)
3. Conclusion
Configuring Network Address Translation (NAT)
Step 1. Log in to the web-based utility of your router. The default username and password is cisco/cisco.

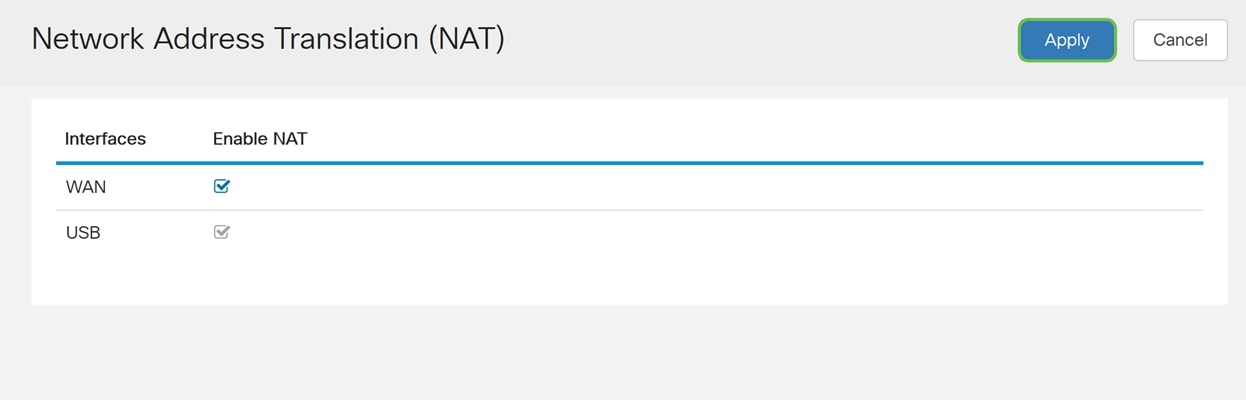
Step 2. Navigate to Firewall > Network Address Translation.

Step 3. In the NAT table, check Enable NAT to enable the NAT for those interfaces. NAT is enabled by default.

Step 4. Click Apply to save your settings.
Configuring Static NAT
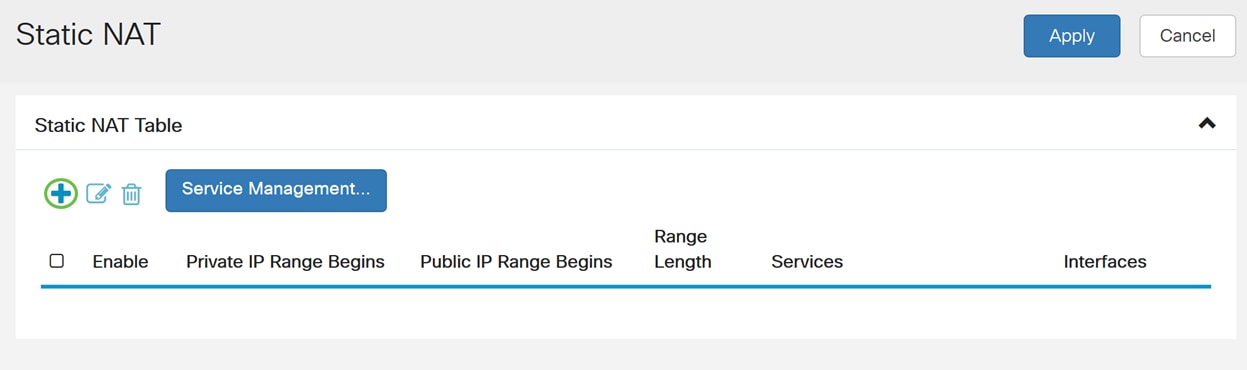
Step 1. Navigate to Firewall > Static NAT. The Static NAT page opens.

Step 2. In the Static NAT Table, click the Plus icon to add a static NAT.
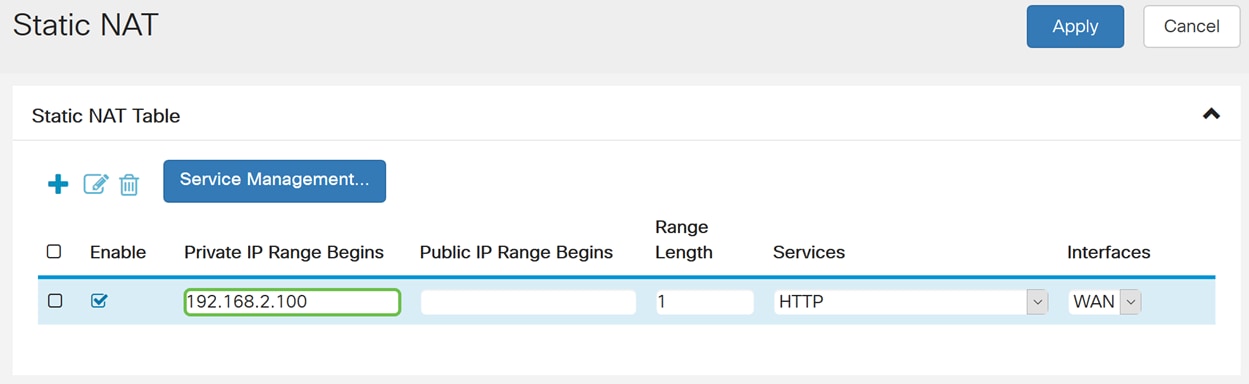
Step 3. Check the Enable check box to enable the static NAT. This is enabled by default.

Step 4. Enter the starting internal IP address range that you will map to the public WAN. In this example, we will only pick one private IP address to be mapped to a single public IP address. 192.168.2.100 is entered in the Private IP Range Begins field.
Note: You can enter in the starting IP address range of a Virtual Local Area Network (VLAN) to map an entire VLAN to a single public IP address or a VLAN to a range of public IP addresses.
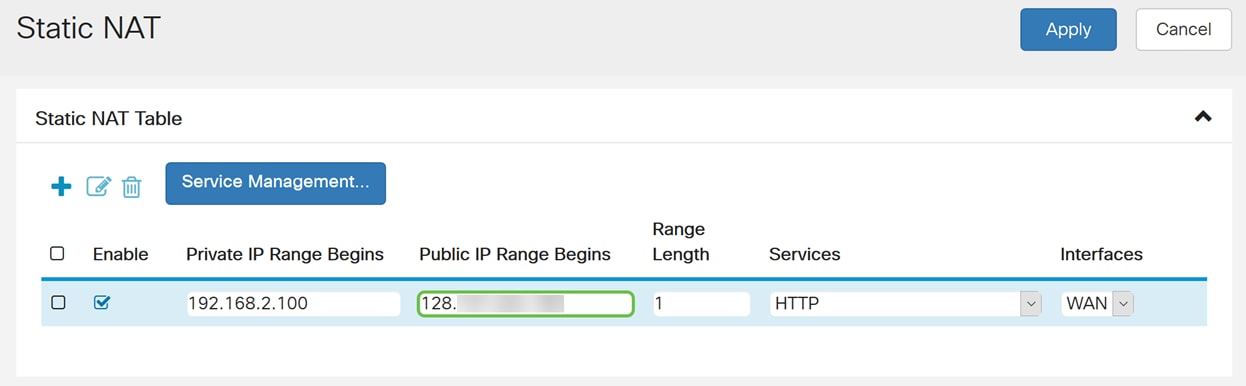
Step 5. Enter the starting IP address of the WAN IP address range provided by your ISP. You can map a VLAN to a single or a range of addresses that was provided by the ISP. In this example, we will be entering a single public IP address that the private IP address will map to.
Note: Do not include the WAN IP address of the router in this range.
Step 6. In the Range Length field, enter the number of IP addresses in the range. The range length must not exceed the number of valid IP addresses. To map a single address, enter 1. The range is from 1-30.

Step 7. Select the type of service from the drop-down list to apply for the static NAT. In this example, we will be using the default value of HTTP.

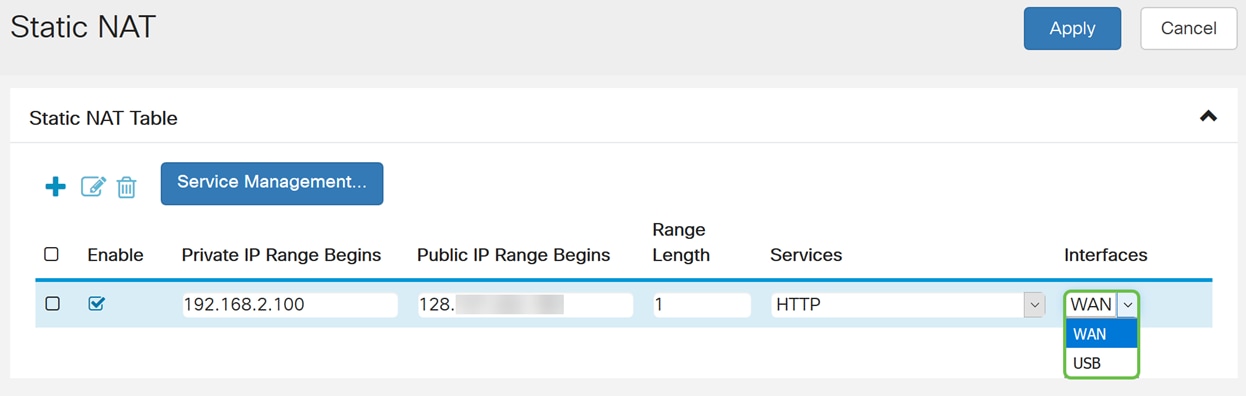
Step 8. Select the interface that you want to use from the drop-down list. We will be choosing WAN as our interface.
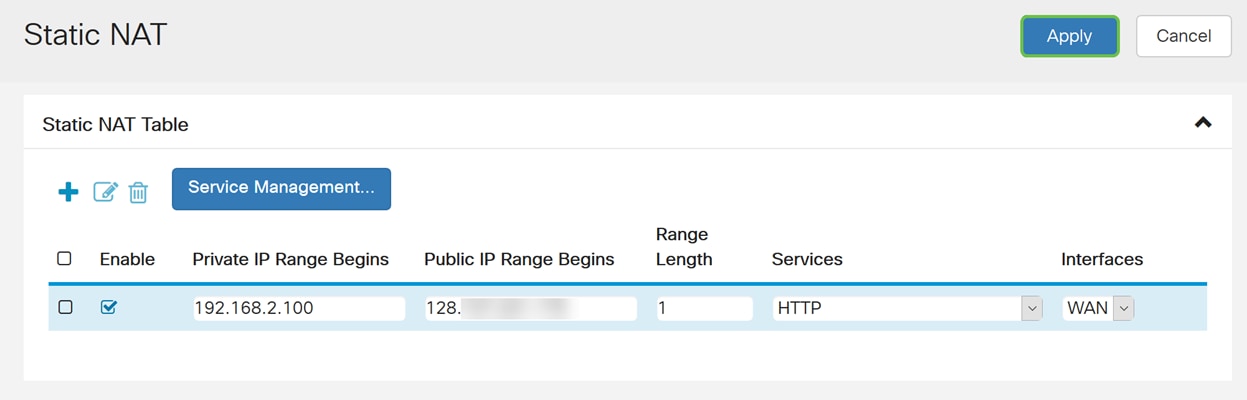
Step 9. Click Apply.
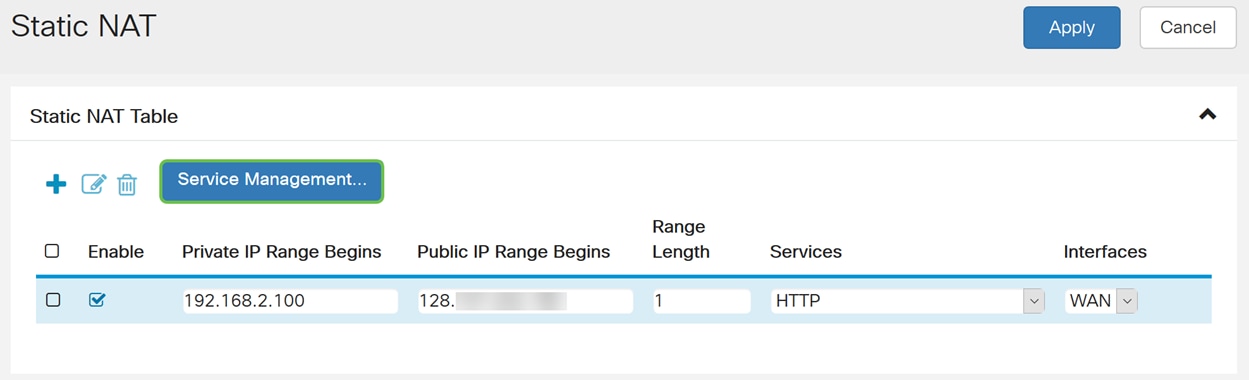
Step 10. (Optional) If you want to configure or add a new service, click the Service Management... button.
Step 11. (Optional) The Service Management page opens. In the Service Table, click the Plus icon to add a new service or select a row and click the Pad and Pen to configure the existing service. The following fields are:
· Application Name – Name of the service of application
· Protocol – Select the Layer 4 protocol that the service uses from the drop-down list.
· Port Start/ICMP Type/ IP Protocol – Enter the port numbers reserved for this service. The range is from 1-65535.
· Port End – Last number of the port, reserved for this service. The range is from 1-65535.

Step 12 (Optional) Click Apply to make your changes.

Conclusion
You should have now successfully configured NAT and Static NAT on the RV160 and RV260.
 Feedback